Sign In
Upload
Manuals
Brands
FOR-A Manuals
Switch
HVS-391OU
FOR-A HVS-391OU Manuals
Manuals and User Guides for FOR-A HVS-391OU. We have
1
FOR-A HVS-391OU manual available for free PDF download: Operation Manual
FOR-A HVS-391OU Operation Manual (326 pages)
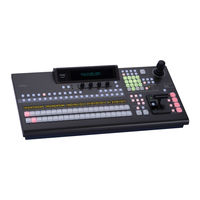
Digital Video Switcher/Operation Unit
Brand:
FOR-A
| Category:
Switch
| Size: 11 MB
Table of Contents
Table of Contents
7
About this Manual
6
1 Prior to Starting
15
Welcome
15
Features
15
2 Panel Descriptions
16
Hvs-390Hs
16
Control Panel
18
Option Slots
20
Connector 1-6
21
EDITOR Connector
21
Interfaces
21
GPI in Connector
22
GPI/TALLY out Connector
23
GPI/TALLY out Connector (HVS-391OU)
24
TALLY out Connector (HVS-30TALR)
25
3 Connection
27
Basic Configuration
27
Optional Configuration
28
How to Connect between MU and ou Units
29
Power on
30
System Signal Format Selection at Initial Use
31
4 Menu Operations
32
How to Access Menus
32
Menu Access Buttons
32
Other Menu Access Buttons
33
USER Button (Menu Shortcut)
33
How to Set Values
34
Displaying Parameters
34
Changing Settings or Values Using F1 to F4
35
Changing Settings or Values Using the Numeric Keypad
36
Changing Settings or Values Using the Joystick
37
Copying / Swapping Settings
39
Operation Example: Copying Settings from KEY2 to KEY4
39
How to Return Settings to Default
40
Returning Menus to Default
40
Returning Parameters to Default
40
How to Back up Settings
40
5 Video Sources
41
How to Assign User Names to Sources
41
How to Assign Sources to Bus Buttons
42
How to Display Signal Names on the Bus Section
43
How to Select an M/E (HVS-39EXTME)
43
Resize Function
44
INPUT STILL (Freezing Input Video)
45
Changing the Side Panel Image
46
Xpt Delay
46
Frame Synchronizer
47
Bus Matte
47
Setting the Matte Color
47
Setting the Gradient Matte
48
Setting up Additional Inputs
49
6 Video Outputs
51
Selecting Video for SDI OUTPUT1 and 2
51
How to Select aux Signals
51
Selecting Video from Menu Selection
52
Selecting Video Via Bus Buttons
52
AUX Video Switching with Effects
53
Preview Set up
54
Preview Bus Monitoring
54
Setting up Preview Images
54
Clean Set up
55
HDMI Output
55
Selecting the HDMI Output Video
55
HD Multiviewer Video Output in SD Mode
56
Setting up and Outputting KEY out
57
Setting up Additional Outputs
58
Aux Link
60
Creating aux Output Link Groups
60
Creating Signal Link Groups
61
Enabling aux LINK
61
7 Bus Operation
63
Selecting Video Sources
63
Selecting Video Sources on M/E
63
Selecting Video Sources for aux Outputs
64
Button Switching Mode in the M/E Bus
64
Setting-Up and Using the SHIFT Function
64
To Assign the SHIFT Function to a Bus Button
65
Using the SHIFT Function
65
8 Transitions
66
Transition Block Description
67
Quick Reference for Available Transitions
68
Black Transitions
68
Background Transitions
69
KEY Transitions
70
Simultaneous BKGD and Key Transitions
72
Pattern (WIPE/DVE) Transitions
73
Direct Pattern Function
74
How to Select Patterns
74
Selecting Patterns in the Menu
74
Key IN/OUT Effects
77
Setting the KEY on AIR Button Function (USER Transition)
78
Setting the KEY AUTO Button Function
79
Advanced Settings for Transitions
80
Fader Limit
80
Endpoint Processing for DVE Transitions
81
Transition Rate
81
Background Layer of DVE Images (Effect Background)
82
9 Modifying Patterns
83
Preset Pattern Groups
83
Modified Patterns
83
Pattern Modify Example 1 (Pattern 20)
84
Pattern Modify Example 2 (Pattern 117)
85
How to Reset the WIPE Menu
86
WIPE Menu
87
No. 100-137
88
No. 140-147, 150-157, 161 and 162
89
No. 170-181
90
10 Key
91
Luminance Key
92
Full Key
93
Bus Key
93
Key Link
94
Key Insert Matt
94
Key Insert aux
95
Adjusting the Key Signal
96
Chroma Key
97
Creating a Chroma Key
97
Chroma Key Adjustments
98
Advanced Example 1 (Using KEY INSERT AUX)
100
Advanced Example 2 (Images with a Specified Color Left)
100
Inverting Key and Background
101
Key Masks
101
Mask and Invert
101
Key Edge
103
Changing KEY Layer Order
104
Where KEY3 and KEY4 Appear
104
11 DVE Effects on Keys
105
How to Enable 2D Dves
105
Changing Position
105
Changing Sizes or Aspect Ratios
106
Fade
107
Rotation
107
Setting Example
108
Crop
109
Sub Effect
110
Mono Color
110
Defocus
110
Paint Color
110
Freeze, Strobe, Nega, Mosaic
111
Borders
112
Still Store
113
Displaying Still Images
113
Saving Stills
113
Backing-Up Stills
114
Backing-Up Still and Clip Data (HVS-39MB)
115
Setting Automatic Backup to on
115
Automatic Loading at Startup
116
Deleting Backup Data
116
Loading Backup Data
116
13 Managing Clips
117
Clip Recording
117
Recording Video
117
Recording Video and Key Signals Simultaneously
118
Playing Clips
119
Ex. 1: Playback on PGM Bus
119
Ex. 2: Playback on KEY1
119
Clearing Clip Data
120
14 Cg Wipe
121
CG WIPE Operation Example 1
122
CG WIPE Operation Example 2
123
Saving CG WIPE Settings
125
CG WIPE Menu Quick Reference
125
15 Multiviewer
127
Assigning the Multiviewer to an aux Bus
127
Selecting the Split-Screen Type
128
Selecting Video for each Split Area
128
Setting up each Split Area
129
Titles
129
Audio Level Meter
130
Frame Border
130
Safety Area
130
On-Air Tally
131
16 Event Memory
132
Storing Events
132
Recalling Events
134
DIRECT Mode
134
Using the RECALL Button
135
Transitions Using Event Recall
136
Overwrite Protection
137
Deleting Events
137
Setting the User Default Menu When Storing an Event
138
Loading an Event at Start-Up
138
17 Sequence Operation
140
Sequence Operation Examples
141
Creating New Sequences
141
Playing Back Sequences
142
Quick Recall (Direct Mode)
143
Playing Back Sequences Using Advanced Settings
144
Editing Sequences: Adding or Inserting Steps
146
Editing Sequences: Copying and Deleting Steps
148
Editing Sequences: Setting Interpolation and Duration
149
Sequence Menu and Keypad Mode
150
SEQUENCE Mode
150
SEQ EDIT Mode
151
Backing up Sequence Data
153
Sequence Memory Operation Examples
153
Setting Overwrite Protection on Sequence Memory 2
153
18 Macros
154
Recording Macros
154
Executing Macros
155
Operation Example 1
155
Operation Example 2
156
Macro Memory Operation
157
Naming Macros
157
Overwrite Protection
157
Deleting Macros
158
Macro Execution Buttons
159
Assigning Macros to Bus Buttons
159
Changing the KEY/AUX Bus Buttons to Macro Buttons
159
Macro Attach and Macro Detach
160
19 File Operations
161
USB Flash Memory
161
Supported Files
161
Saving Data to USB Flash Memory
162
Loading Data from USB Flash Memory
163
To Download Image Files
163
To Load Setting Data
163
Moving between USB Flash Memory Directories
164
Deleting Files in USB Flash Memory
165
Renaming Files in USB Flash Memory
165
20 Color Correction
166
Assigning a Bus or Signal to a Color Corrector
166
Adjusting Colors
167
Clip Adjustment
170
21 System Setup Settings
172
Selecting System Signal Format
172
Crosspoint Switch Timing
172
Selecting Reference Signal
173
To Set Reference Input
173
To Set Reference Output
173
Adjusting Video Signal Levels
174
Proc Amp
174
Video Level Clip
174
Safety Area Markers
175
Ancillary Data
176
M/E Outputs
176
AUX and Optional Outputs
177
Setting Date and Time
177
Setting Time Using SNTP (Time) Server
177
Buzzer, Brightness and Screen Saver
179
22 USER Button
180
USER Button Operation
180
USER Button Settings
180
Triggering User Buttons
184
23 Reboot and Initialize
186
Rebooting System
186
System Initialization
186
24 GPI IN/OUT and Tally Outputs
187
GPI Control
187
Gpi in
187
Gpi out
188
Ou Gpi/O
188
Tally Output
193
Tally Color Settings
193
Tally Output Settings (GPI/TALLY OUT)
193
Tally Output Settings (HVS-30TALR)
195
Sending Tally Signals to Tally Units
196
25 VTR / VDCP Control
197
Assigning a VTR or VDCP Channel to an RS-422 Port
197
Selecting a VTR or VDCP Channel
198
Selecting the VDCP Type
198
Playback and Recording
199
Assigning Functions to User Buttons
199
VDCP Operation
200
Creating Playlists
200
Changing CLIP ID and Deleting Clips
202
Jumping to an in or out Point or a Specified Position
202
Copying and Clearing Playlists
203
Creating New Clips (Recording Using VDCP)
203
26 Connecting to FOR-A MFR Series Router
205
Assigning Router Channel to RS-422 Port
206
Assigning Router Control Function
206
Setting MFR Link
206
Router Control
207
Crosspoint Switches Using the Menu
207
Crosspoint Switches with Bus Buttons (Setup)
207
Crosspoint Switches Using the Bus Buttons
208
Displaying Destination / Source Settings
208
Saving and Loading Crosspoints
209
Simultaneous Switching Using Take
210
Linking Titles by Sending TSL Messages
211
TSL Tally
211
27 Connecting to Routers
212
Router Control
212
Linking Titles and Tallies in the System Via TSL Protocol
212
Linking Titles in the System by Receiving TSL Messages
213
TSL Tally by Sending TSL Messages
213
28 Audio Mixer Control
214
Connecting Audio Mixers
214
Audio-Follow-Video Setting
214
29 Editor Control (Option)
216
Editor Control Settings
216
Connection Settings with Editor (EDITOR Port Setting)
217
30 Network Settings
218
Arcnet
218
Ethernet
220
Image Data Transfer
221
Setup before Connection
221
Sending / Receiving Still Images
223
Sending Images to Clip Memory
224
31 Status Information
225
Checking Alarm Status
225
Verifying Versions
225
Installed Options
226
32 Upgrading an Operational Version
227
Upgrade Precedure
227
Upgrading HVS-390HS
228
Loading Setting Data
228
Bitmap Images for Control Panel Bus Buttons
229
33 Connecting Control and Remote Panels
231
Connecting Remote Panels (HVS-30RU)
231
Connecting Control Panels
232
M/E Mode
233
P/P Setup
234
P/P Control
234
34 Setup Setting for HVS-30RU
236
Assigning Sources to PGM/PST Bus Buttons
236
Setting USER Buttons
237
35 Specifications and Dimensions
238
Specifications
238
External Dimensions
241
Hvs-390Hs
241
Hvs-391Ou
242
Appendix 1. Supported Files
243
Appendix 2. Transition Pattern List
244
Dve Type
245
Appendix 3. HVS-390HS Web-Based Control
247
Appendix 3
248
1 System Setup
250
System Requirements
250
Computer Network Settings
250
Connecting to the HVS-390HS
250
2 Home
251
3 Macro
252
4 Event
253
5 Sequence
254
Sequence - File
254
Sequence - Edit
255
6 Setup
257
Setup - System
257
Setup - Input
258
Setup - Output
260
Setup - Panel
262
Setup - Gpi/Tly
263
Setup - Function
264
7 Still
265
Capture, Record and Play Still Images
265
Backup
267
Backing Up/Loading Still Images
267
Backing Up/Loading Stills and Clips (HVS-39MB)
268
8 Matt
270
9 Ext if
271
Ext if - Editor
271
Ext if - Tsl Tly
271
Vtr/Vdcp
272
VTR Control
272
VDCP Control
273
Ext I/F - Router
275
Ext I/F - Router - Xpt
276
Ext I/F - Audio Mixer
278
10 Key
279
11 Wipe Pattern
280
WIPE PATTERN - Wipe/1Ch Dve/2Chdve/Other
280
Wipe Pattern - Direct
280
12 Wipe Modify
281
13 Trans
282
14 Bus Trans
283
15 User Button
284
Web Control
284
16 Copy Swap
285
17 Status
286
18 Pop-Up Menu Operation
287
Menu Shortcuts
287
Executing User Buttons
288
Setting Parameters to Default
288
19 Backing up Settings
289
Appendix 4
292
1 Upon Receipt
294
Unpacking
294
About this Appendix
294
2 Panel Descriptions
294
3 Connection
296
Power on
296
System Signal Format Selection at the Initial Use
298
4 Menu Operations
299
How to Access Menus
299
Menu Access Buttons
299
Other Menu Access Buttons
300
How to Set Values
301
Changing Settings or Values by Using the Numeric Keypad
301
Changing Settings or Values by Using the Joystick
302
5 Bus Operation
303
Selecting Video Sources
303
Selecting M/E1 or M/E2
303
6 Transition Operations
305
Transition Block Description
305
Available Transitions
306
Black Transitions
306
Background Transitions
307
How to Select Patterns
308
Checking and Selecting Patterns
308
Direct Pattern Function
308
Setting the on AIR Button Function (USER Transition)
311
Setting the AUTO Button Function
312
Pattern Modify Example1 (Pattern 20)
314
8 Event Memory
315
Event Operation
315
9 User Buttons
316
USER Button Operation
316
USER Button Setting
316
10 Arcnet
317
11 Status Information
318
Checking Alarm Status
318
Hvs-30Ou
318
Unit Specifications
319
Advertisement
Advertisement
Related Products
FOR-A HVS-390HS
FOR-A HVS-392OU
FOR-A HVS-392ROU
FOR-A HVS-392WOU
FOR-A HVS-300RPS
FOR-A HVS-30OU
FOR-A HVS-3800HS
FOR-A HVS-3800S
FOR-A HVS-350HS
FOR-A HVS-35OU
FOR-A Categories
Switch
Remote Control
Computer Hardware
Amplifier
Media Converter
More FOR-A Manuals
Login
Sign In
OR
Sign in with Facebook
Sign in with Google
Upload manual
Upload from disk
Upload from URL