Sign In
Upload
Manuals
Brands
Fireye Manuals
Controller
NEXUS NX6100 series
Fireye NEXUS NX6100 series Manuals
Manuals and User Guides for Fireye NEXUS NX6100 series. We have
4
Fireye NEXUS NX6100 series manuals available for free PDF download: Manual, Operator's Manual
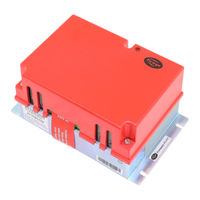
Fireye NEXUS NX6100 series Manual (222 pages)
INTEGRATED BURNER CONTROLLER
Brand:
Fireye
| Category:
Controller
| Size: 3.72 MB
Table of Contents
Table of Contents
3
1 Technical Specification
11
General
11
Servo Motor Control - IMPORTANT: See Section 3.2
11
Digital Outputs (NX6100 and Optional Daughter Board - P/N - NXDBVSD)
12
Alarm Output (NX6100)
13
Digital Inputs
13
Pressure/Temperature Input
14
Auxiliary Analog Inputs
14
Gas Pressure Input
14
Flame Sensing Devices
15
1.10 Communications Interface
15
1.11 Fireye NX1020-1,-2 Gas Pressure Sensor
15
1.12 Fireye NX1030-1,-2 and NX1034-1,-2 Steam Pressure Sensors
16
1.13 Fireye NX1040-1 and NX1044-1 Boiler Temperature Sensors
16
1.14 Fireye NXC04, NXC12, NXC20, NXC40 Servo Motors
17
Fireye NXO2INT Oxygen Probe Interface Unit (Optional)
17
Fireye NXIATS Ambient Air Temperature Sensor (Optional)
18
Fireye NXDBVSD Variable Speed Drive (VSD) Daughter Board (Optional)
18
1.18 Approvals
18
1.19 Parts List with Description
19
2 Installation
21
Mechanical Mounting Details for the NX6100
22
Mechanical Mounting Details for the Display Module
22
Mounting Details for Optional Oxygen Probe Interface Unit
23
Mounting Arrangements for Temperature, Gas Pressure and Steam Pressure Sensors
24
Boiler Temperature Sensors
24
Gas Pressure Sensors
24
Steam Pressure Sensors
25
Oxygen Probe Description
26
Installation of Oxygen Probe
27
Mounting the Oxygen Probe
27
Option Link Selection (NX6100)
28
General
28
Line Supply Voltage (LK1 - 4) (NX6100)
30
SENS in and SENS SUPP (Boiler Temp/Pressure Sensor) (NX6100)
30
Remote Setpoint (Nx6100)
31
RS485 Serial Communications Termination Resistor (NX6100)
31
Isolated (Modbus) RS485 Serial Communications Termination Resistor (Daughter Board)
31
Wiring
31
General
31
Grounding Cable Screens
35
GROUND (EARTH) Connection
36
Ground (Earth) Connection (Display Unit)
36
Ground (Earth) Connection (Oxygen Probe Interface)
36
Ground (Earth) Connection (Servo Motors and Sensors)
36
Terminal Designation
37
LIVE and NEUTRAL Supply (NX6100)
42
Burner Fan Output (NX6100)
42
Ignition, Main Valves, Pilot Valve, Vent and Pump (NX6100)
42
Auxiliary Relay Outputs (Display)
43
Burner Select Input (NX6100)
43
Fuel and Profile Select Inputs (Optional) (NX6100)
44
Low Voltage Digital Inputs 1 to 7 (NX6100)
45
Low Voltage Air Flow Input (NX6100)
45
Servo Motor and Display Connection (NX6100)
45
2.7.17 Pressure Sensor Screen Termination
47
Pressure/Temperature Sensor Input (NX6100)
47
Gas Pressure Sensor Input (NX6100)
48
2.7.20 UV Flame Scanner
48
2.7.21 Photocell/ I.R. Flame Scanner
48
Remote Setpoint (Analog Input 5) (NX6100)
49
Analog Input 1 to 3 (NX6100)
49
RS485 Interface (NX6100)
50
2.7.25 Variable Speed Drive Selection
51
2.7.26 Variable Speed Drive Daughter Board P/N NXDBVSD
52
2.7.27 LIVE and NEUTRAL Supply External Interface - P/N NXO2INT
53
Oxygen Probe Connection (Optional Oxygen Probe Interface Unit)
53
Inlet Temperature Sensor (Optional)
55
Final Checks
56
3 Servo-Motor Selection and Calibration
57
Servo-Motor Selection
57
Motor Requirements
57
IMPORTANT: Servo-Motor Direction Warning
58
Locking the Servo-Motor to the Valve Shaft
59
Feedback Potentiometer
59
Adjusting Microswitch Positions
60
Servomotor Replacement
61
4 Description of Operation
62
OLED (Organic LED) Display & Keypad Option
62
Start-Up Sequence
63
Gas Safety Valve Proving Sequence (VPS)
68
Closedd
69
Modulation
69
Normal/Remote Mode
69
Local Mode. (LOC 1, LOC 2)
69
5 Commissioning the Control
70
General
70
Commissioning Data
71
Option Parameters
71
Setpoints
71
The Commissioning Process
71
Navigation
71
Description of Touchscreen Operation
73
The Touchscreen
73
Touchscreen Power on
73
The Operation Mode Line and Status Messages
73
Touchscreen Overview Display
75
Touchscreen Lockout Reset (Alarm Mute) Function
76
Touchscreen LED Indication
76
Touchscreen Fuel/Profile Select
77
Touchscreen 'Control' Screen
78
Touchscreen 'Menu' Button
78
5.4.10 Touchscreen 'Burner Settings' Button
79
5.4.11 Touchscreen 'Fault/Event Log' Button
80
5.4.12 Touchscreen 'Screen Configuration' Button
80
5.4.13 Cleaning the Touchscreen
81
5.4.14 Touchscreen Commission Mode
82
Using Option Set Mode
84
Option Parameter List
84
Option 00.1 - Site Passcode (0 - 999) DEFAULT VALUE Is 154. LV3
84
Option 00.2 - Serial Communications Control Address (0 - 15) LV3
84
Option 00.3 - Reset Hours Run (0 - 1) LV3
85
Option 00.4 - User Program Select (0 / 1) LV1
85
Option 00.6 - Reserved
85
Option 00.7 - MODBUS Device Address (1 - 99) LV3
85
Option 00.8 - MODBUS Communications Speed (0 - 3) LV3
86
Option 01.0 - Power up Option (0 - 30) LV3
86
Option 01.1 - Keyboard Auto/Manual Enable (0 - 1) LV3 [Engineer's Key 33]
86
Option 01.2 - Mute/Reset Input Enable (0 - 2) LV3
86
Option 01.3 - External Profile Select Enable (0 - 2) LV3
87
Option 01.4 - Gas Valve Proof of Closure Select (1 - 13) LV3
87
Option 01.5 - Oil Valve Proof of Closure Select (0 - 13) LV3
88
Option 01.6 - Second Airflow Switch Enable (0 - 3) LV3
88
Option 01.7 - Safety Time Configuration Set (0 - 1)
89
Option 01.8 - Reserved
89
Option 02.X - Drive Name LV3
90
Option 03.X - Drive Serial Number LV3
91
Option 04.X - Drive Usage Information LV3
91
Option 05.X - Drive Options LV3
92
Options 06.1-06.4 - Profile Naming LV3
92
Option 07.0 - Fan on Early Time (0 to 120 Seconds) LV3
93
Option 07.1 - Air Proving Time (T1) (5 to 120 Seconds) LV3
93
Option 07.2 - Pre-Purge Time (T2) (5 to 300 Seconds) LV3
93
Option 07.3 - Pre-Ignition Time (T3) (0 to 10 Seconds) LV3
93
Option 07.4 - Pilot Ignition Time (T4) (1 to 10 Seconds) LV3
94
Option 07.5 - Pilot Hold Time (T5) (1 to 30 Seconds) LV3
94
Option 07.6 - Main Ignition Time (T6) (1 to 10 Seconds) LV3
94
Option 07.7 - Ignition Hold Time (T7) (1 to 30 Seconds) LV3
95
Option 07.8 - Low Fire Hold Time (T8) (0 to 999 Seconds) LV3
95
Option 07.9 - Post Purge Time (T9) (0 to 999 Seconds) LV3
95
Option 08.0 - Ignition Spark Output Check (0 - 1) LV3
96
Option 08.1 - Flame Failure Response Time (T9) (0-3 Seconds) LV3
96
Option 08.2 - Extend False Flame Response Time (T9) LV3
96
Option 09.0 - Inverter Control Accuracy (0 / 1) LV3
97
Option 09.1 - Inverter Error Tolerance (0 / 1) LV3
97
Option 09.2 - Inverter Closed Loop Gain (15 - 125%) LV3
97
Option 09.3 - Inverter Stop Time (0 - 100 Seconds) LV3
98
Option 09.4 - Inverter Acceleration Time (0-100 Seconds) (60 Seconds Max
98
Recommended) LV3
98
Option 09.6 - VSD2 Speed Encoder Scaler (255 - 999) LV3
98
Option 09.7 - Reserved
99
Option 09.8 - Reserved
99
Option 10.1 - Gas Pressure Sensor Span (Mbar, Bar, Inches of Water, PSI) LV3
100
Option 10.2 - Gas Pressure Nominal (Mbar, Bar, Inches of Water, PSI) LV3
100
Option 10.3 - Gas Pressure Low Limit (Mbar, Bar, Inches of Water, PSI) LV3
100
Option 10.5 - Test Volume (0.0 - 99.9 Liters or 0 to 999 Cubic Inches) LV3
100
Option 10.6 - Maximum Permissible Leakage Rate
100
Option 10.7 - Vent Valve Select (0 - 2) LV3
100
Option 10.8 - Valve Proving Selection (0 - 360) LV3
100
Option 12.0 - Flame Detection Device I.R. or Direct Coupled (0 - 2) LV3
101
Option 12.1 - Pilot Flame Threshold Photocell or I.R. (1 -100) LV3
102
Option 12.2 - Main Flame Threshold Photocell or I.R. (0 - 100) LV3
102
Option 13.0 - Flame Detection Device U.V. or Self-Check (Shuttered) U
102
Option 13.1 - Pilot Flame Threshold U.V. or Shuttered U.V. (0 - 100) LV3
103
Option 13.2 - Main Flame Threshold U.V. or Shuttered U.V. (0 - 100) LV3
103
Option 14.0 - Primary Fault Relay (0 - 8) LV3
103
Option 14.1 - Limit Relay (0 - 8) LV3
103
Option 14.2 - Oxygen and Flue Temperature Limit Relay (0 - 8) LV3
104
Option 14.3 - Permanent Gas Pilot Select (0 - 1) LV3
105
Option 14.4 - Pilot With/Without Main Valve Select (0 - 1) LV3
105
Option 14.5 - Direct Ignition on Oil (0 - 1) LV3
105
Option 14.6 - Spark Termination (0-3) LV3
105
Option 14.7 - aux / Oil Pump Relay Function. (0 - 6) LV3
106
Option 14.8 - Extended Oil Pilot (0-15 Seconds) LV3
106
Option 15.0 - Modulation Sensor Input Type (0 - 3) LV3
106
Option 15.1 - Modulation Input Decimal Places (0 to 2)
107
Option 15.2 - Modulation Input Zero Value (-999 to +999 / -99.9 to +99.9 / -9.99 to +9.99) LV3
107
Option 15.3 - Modulation Input Span Value (-999 to +999 / -99.9 to +99.9 / -9.99 to +9.99) LV3
108
Option 15.4 - Setpoint Display Units (0 - 3) LV3
108
Option 15.5 - Boiler High Safety Limit (0 - 999 / 0.0 - 99.9 / 0.00 - 9.99) LV3
108
Option 15.6 - Modulation Time (0 - 120 Seconds) LV3
108
Option 15.7 - Bumpless Transfer (0 or 1) LV3
108
Option 15.9 - Reserved
109
Option 16.2 - Allow Profile Swap (0 to 16) LV3
110
Option 16.3 - High Voltage Input 12 Alarm / Lockout Function (0 - 360) LV3
110
Option 16.4 - High Voltage Input 13 Alarm / Lockout Function (0 - 360) LV3
110
Option 16.5 - High Voltage Input 12 Fail-Safe Alarm / Lockout Display Messages (0 - 999) LV3
110
Option 16.6 - High Voltage Input 13 Fail-Safe Alarm / Lockout Display Messages (0 - 999) LV3
110
Option 17.0 - Relay Output Function LV3
111
16.6. Lv3
116
Option 20.0 - Set-Point Select Input (0 - 35) LV3
117
Option 20.1 - Boiler Shutdown Input (0 - 35). LV3
119
Option 20.2 - Low Fire Hold Input (0 - 35). LV3
119
Option 20.3 - Oxygen Trim Disable Input (0 - 35). LV3
119
Option 20.4 - Ignition Wait Input (0 - 35). LV3
119
Option 20.5 - Purge Hold Input (0 - 35). LV3
119
Option 20.6 - Purge Time Start Input (0 - 35). LV3
120
Option 20.7 - Analog Input 5 Function (0 - 2). LV3
120
Option 20.8 - Digital Input - Lead Boiler Select (0 - 35) LV3
120
Option 21.0 - Set-Point 1 Enable (0 - 1) LV1
121
Option 21.1 - Set-Point 1 Control Value (0 - 999 / 00.0 - 99.9 / 0.00 - 9.99) LV1
121
Option 21.2 - Set-Point 1 Proportional Band (0 - 999 / 00.0 - 99.9 / 0.00 - 9.99) LV1
121
Option 21.4 - Set-Point 1 Derivative Time (0 - 999 Seconds) LV1
121
Option 21.5 - Setpoint 1 Control Limit Type (0 - 2) LV3
121
Lv1
121
Option 21.8 - Remote Setpoint 1 Zero (4Ma) Value (0 - 999 / 00.0 - 99.9 / 0.00 - 9.99) LV1
122
Option 21.9 - Remote Setpoint 1 Span (20Ma) Value (0 - 999 / 00.0 - 99.9 / 0.00 - 9.99) LV1
122
Option 22.0 - PID (Set-Point) 2 Enable (0 - 1) LV1
122
Option 22.1 - Set-Point 2 Control Value (0 - 999 / 00.0 - 99.9 / 0.00 - 9.99) LV1
122
Option 22.3 - Set-Point 2 Integral Term (0 - 999 Seconds) LV1
122
Option 22.4 - Set-Point 2 Derivative Term (0 - 100) LV1
123
Option 22.5 - Setpoint 2 Control Limit Type (0 - 2) LV3
123
Option 22.6 - Setpoint 2 Low Limit Control Value (0 - 999 / 00.0 - 99.9 / 0.00 - 9.99) LV1
123
Option 22.7 - Setpoint 2 High Limit Control Value (0 - 999 / 00.0 - 99.9 / 0.00 - 9.99) LV1
123
Option 22.8 - Maximum Modulation Rate
123
Option 22.9 - Reserved
123
Option 23.0 - Warming Enable (0 or 1) LV1
124
Option 23.1 - Warming Limit (0 - 999 / 00.0 - 99.9 / 0.00 - 9.99) LV1
124
Option 23.2 - Warming Time (0 to 999 Minutes) LV1
124
Options 24.X - Sequencing
124
Option 24.0 Sequence Slaves (Number of Boilers) (0-3) LV1
126
Option 24.1 -24.3 Priority Number(S) LV1
126
Option 24.4 - Lead off Time LV1
126
Option 24.5 - Lead (Master) Boiler Select Method LV1
126
Option 24.6 - Lag (Slave) on Rate (0-100%) LV1
127
Option 24.7 - Lag (Slave) on Delay (0-999 Minutes) LV1
127
Option 24.8 - Lag (Slave) off Rate (0-100%) LV3
127
Option 24.9 - Lag (Slave) off Delay (0-999 Minutes) LV3
127
Option 25.0 - Banking Based on Temperature / Water Temperature Standby for Steam Boiler LV3
127
Option 25.1 - Water Temperature Zero Value LV3
128
Option 25.2 - Water Temperature Span Value LV3
128
Option 25.3 - Water Temperature Cut-In LV1
128
Option 25.4 - Water Temperature Cut-Out LV1
128
Option 25.5 - Temperature Based Warming Limit LV1
128
Option 25.6 - Lag Wait Time LV1
128
Option 28.0 - Analog Input 1 Decimals (0-2) LV3
128
Option 28.1 - Analog Input 1 Zero (0-999) LV3
128
Option 28.2 - Analog Input 1 Span (0-999) LV3
128
Option 28.3 - Analog Input 2 Decimals (0-2) LV3
129
Option 28.4 - Analog Input 2 Zero (0-999) LV3
129
Option 28.7 - Analog Input 3 Zero (0-999) LV3
129
Option 28.8 - Analog Input 3 Span (0-999) LV3
129
Option 29.0 - 4-20Ma Output 1 Function if Not VSD LV3
129
Option 29.1 - Output1 Zero Value (4Ma Output) LV3
130
Option 29.2 - Output1 Span Value (20Ma Output) LV3
130
Option 29.3 - 4-20Ma Output 2 Function if Not VSD LV3
130
Option 29.4 - Output2 Zero Value (4Ma Output) LV3
130
Option 29.5 - Output2 Span Value (20Ma Output) LV3
130
Option 29.6 - 4-20Ma Output 3 Function if Not VSD LV3
130
Option 29.7 - Output3 Zero Value (4Ma Output) LV3
130
Option 29.8 - Output3 Span Value (20Ma Output) LV3
131
Option 30.0 - Oxygen Probe Interface Serial Number LV3
133
Option 30.1 - Oxygen Probe Calibration Offset Value (0 - 999) LV3
133
Option 30.2 - Oxygen Probe Calibration Gain Value (0 - 999) LV3
133
Option 30.4 - Flue and Inlet Sensor Temperature Units (0 - 1) LV3
134
Option 30.5 - Oxygen Input Function (0/1) LV3
134
Option 30.6 - Oxygen Probe Calibrate Enable (0 - 2) LV3
134
Option 30.7 - Boiler Transport Delay (5 - 60 Seconds) LV3
135
Option 30.8 - Reset Oxygen Trim Profile (0/1) LV3
135
Option 30.9 - Automatic Trim Commissioning (0 / 1) LV3
135
Options 31.1 to 31.4 - Trim Type for Profiles 1 to 4 (0 to 2) LV3
137
Option 32.0 - Trim Limit Default (0/1) LV3
138
Options 33.1 to 33.4 - Trim Integral Gain (Default 10%) LV3
138
Option 34.0 - Trim Proportional Gain (0/1) LV3
139
Options 34.1 to 34.4 - Trim Proportional Gain (0.0 - 99.9%) LV3
139
Option 34.5 - Calculating and Entering the Flow Values Manually LV3
139
Option 35.0 - Inlet Temperature Sensor Serial Number LV3
142
Options 35.5 to 35.8-Calorific Values of Fuels/Profiles 1 to 4 Respectively (0.0 - 99.9) LV3
142
Option 35.9 - Boiler Radiated Heat Loss (0.0 - 9.9%) LV3
143
Option 36.0 - Flue Temperature Alarm Select (0/1) LV3
143
Options 36.1 to 36.4 - Flue Temperature Low Alarm Values (0 - 999) LV3
143
Option 38.0 - Oxygen Alarm Select (0 - 2) LV3
144
Options 38.1 to 38.4 - Oxygen Low Alarm Values at Low Fire (0.0 - 99.9%) LV3
144
Options 39.1 to 39.4 - Oxygen Low Alarm Values at High Fire (0.0 - 99.9%) LV3
144
Options 40.1 to 40.4 - Oxygen High Alarm Values at Low Fire (0.0 - 99.9%) LV3
144
Options 41.1 to 41.4 - Oxygen High Alarm Values at High Fire (0.0 - 99.9%) LV3
144
Option 42.0 - Second Oxygen Probe Interface Serial Number LV3
145
Option 42.1 - Second Oxygen Probe Calibration Offset Value (0 - 999) LV3
145
Option 42.2 - Second Oxygen Probe Calibration Gain Value (0 - 999) LV3
145
Option 42.3 - Second Oxygen Probe Calibrate Enable (0 - 2) LV3
146
Option 42.4 - Max Oxygen Variation (0 - 9.9 %) LV3
146
Option 42.5 - Max Flue Temp Variation (0 to 999 ºC) LV3
146
Option 42.7 - Air Pressure Input (0-3) LV3
147
Option 42.9 - Air Pressure Error (0-25%) LV3
147
Option 43.0 - Enable Water Level / Expansion Unit - Set to 3 or 4
147
Only ! Lv3
147
Option 43.1 - Unit Address of Water Level / Expansion Unit - Set to 10. LV3
147
Option 44.0 - Set Real Time Clock (0/1) LV1
147
Option 44.1 - Set Year (00 - 99) LV1
148
Option 44.2 - Set Month (1 - 12) LV1
148
Option 44.3 - Set Day of Month (1 - 31) LV1
148
Option 44.4 - Set Day of Week (1 - 7) LV1
148
Option 44.6 - Set Minutes (0 - 59) LV1
148
Option 44.7 - Set Seconds (0 - 59) LV1
148
Option 44.9 - Reset Fault Log (0 - 1) LV3
148
Option 45.0 - Erase / Restore Enable (0 - 1) LV3
149
Option 45.1 - Erase Command (0 - 5) LV3
149
Option 45.2 - Restore Command (0 - 999) LV3
150
Commission Ratio Mode
151
Description
151
Using Commission Ratio Mode
152
Leaving Commission Ratio Mode
153
Adjust Ratio Mode
153
Description
153
Entering Adjust Ratio Mode
154
Using Adjust Ratio Mode
154
Leaving Adjust Ratio Mode
155
Interrogating the Software Issue
155
6 Faults and Fault Finding
156
The Fault Display
156
What to Do When a Fault Occurs
156
Non-Volatile Lockout
157
Fault Subsets
157
Fault Listing
157
The Engineer's Key
168
System Event/Fault History
168
Engineer's Key Parameter List
169
Troubleshooting
181
Display / General
181
Startup
183
Commissioning
183
Gas Valve Proving
184
Modulation
184
Inverters
185
Oxygen Measurement and Trim
186
7 Inverter (Variable Speed) Drives
187
System Configuration
187
Description of Control Method
188
Setting up the Inverter for Use with the NX6100 Series
188
Setting up the NX6100 Series for Use with a Inverter Drive
189
8 The Oxygen Trim Option
190
Oxygen Pro Probe Description
190
Installation of Oxygen Probe
190
Mounting the Oxygen Probe
191
9 Appendix
193
Calibrating and Servicing the Oxygen Probe
193
Probe Calibration
193
Oxygen Probe Filter Testing
194
Removing the Oxygen Probe from the Flue
194
Filter Replacement
195
Probe Mounted Flue Thermocouple Replacement
195
Troubleshooting Inverter Problems
197
PID Tutorial
198
Combustion Profile Setup Guideline
199
Fireye NX6100 Efficiency Calculations
200
Typical Wiring Diagrams
202
Fireye EP and YP Series Programmer Equivalents
203
10 Function Block Programming Details
204
Introduction to Fireye's Abacus Programming Software
204
Introduction
204
The Schematic Toolbar
208
Place Function Blocks
209
Moving and Editing the Link Lines
209
11 Canbus Servomotors - Drawings & Templates
211
11.1 NXC04 4Nm (3 Ft/Lb) Servo
211
11.2 NXC12 10Nm (9 Ft/Lb) Servo
211
11.3 NXC20 20Nm (15 Ft/Lb) Servo
212
11.4 NXC40 40Nm (30 Ft/Lb) Servos
213
11.5 NX6110 12 Key Display
214
NXTSD104 10.4" Touchscreen Display
215
NXO2INT Oxygen Interface
216
12 Circuit Board Connections
217
12.1 Variable Speed Drive (VSD) Daughter Board P/N NXDBVSD
217
Oxygen Probe Connection (Optional Oxygen Probe Interface Unit)
218
12.3 Inlet Air Temperature Sensor
219
NX6100 Terminal Details
221
Advertisement
Fireye NEXUS NX6100 series Operator's Manual (62 pages)
10.4” COLOR TOUCHSCREEN
Brand:
Fireye
| Category:
Touchscreen
| Size: 0.93 MB
Table of Contents
Table of Contents
1
Introduction
4
General
4
Password
4
Description of Touchscreen Operation
5
The Touchscreen
5
Touchscreen Power on
5
The Operation Mode Line and Status Messages
6
Touchscreen Overview Display
8
Touchscreen Lockout Reset (Alarm Mute) Function
8
Touchscreen Led Indication
9
Touchscreen Fuel/Profile Select
9
Touchscreen 'Control' Screen
10
Touchscreen 'Menu' Button
11
Touchscreen 'Burner Settings ' Button
11
Touchscreen 'Fault/Event Log' Button
12
Touchscreen 'Screen Configuration' Button
13
Cleaning the Touchscreen
13
Touchscreen Commission Mode
15
Setpoint, Cut In/Cut out and Modulation Option Parameters
16
Option 21.0 - Set-Point 1 Enable (0 - 1) LV1
17
Option 21.1 - Set-Point 1 Control Value (0 - 999 / 00.0 - 99.9 / 0.00 - 9.99) LV1
17
Option 21.2 - Set-Point 1 Proportional Band (0 - 999 / 00.0 - 99.9 / 0.00 - 9.99) LV1
17
Option 21.3 - Set-Point 1 Integral Time (0 - 999 Seconds) LV1
17
Option 21.4 - Set-Point 1 Derivative Time (0 - 999 Seconds) LV1
18
Option 21.5 - Setpoint 1 Control Limit Type (0 - 2) Lv3
18
Option 21.6 - Setpoint 1 Low Limit Control Value (Cut In) (0 - 999 / 00.0 - 99.9 / 0.00 - 9.99) LV1
19
Option 21.7 - Setpoint 1 High Limit Control Value (Cut Out) (0 - 999 / 00.0 - 99.9 / 0.00 - 9.99) LV1
19
Option 21.8 - Remote Setpoint 1 Zero (4Ma) Value (0 - 999 / 00.0 - 99.9 / 0.00 - 9.99) LV1
20
Option 21.9 - Remote Setpoint 1 Span (20Ma) Value (0 - 999 / 00.0 - 99.9 / 0.00 - 9.99) LV1
20
Option 22.0 - PID (Set-Point) 2 Enable (0 - 1) LV1
20
Option 22.1 - Set-Point 2 Control Value (0 - 999 / 00.0 - 99.9 / 0.00 - 9.99) LV1
20
Option 22.2 - Set-Point 2 Proportional Band (0 - 999 / 00.0 - 99.9 / 0.00 - 9.99) LV1
20
Option 22.3 - Set-Point 2 Integral Term (0 - 999 Seconds) LV1
20
Option 22.4 - Set-Point 2 Derivative Term (0 - 100) LV1
21
Option 22.5 - Setpoint 2 Control Limit Type (0 - 2) Lv3
21
Option 22.6 - Setpoint 2 Low Limit Control Value (0 - 999 / 00.0 - 99.9 / 0.00 - 9.99) Lv1
21
Option 22.7 - Setpoint 2 High Limit Control Value (0 - 999 / 00.0 - 99.9 / 0.00 - 9.99) Lv1
21
Option 22.8 - Remote Setpoint 2 Zero (4Ma) Value (0 - 999 / 00.0 - 99.9 / 0.00 - 9.99) LV1
21
Option 22.9 - Remote Setpoint 2 Span (20Ma) Value (0 - 999 / 00.0 - 99.9 / 0.00 - 9.99) LV1
22
Option 23.0 - Warming Enable (0 or 1) Lv1
22
Option 23.1 - Warming Limit (0 - 999 / 00.0 - 99.9 / 0.00 - 9.99) Lv1
22
Option 23.2 - Warming Time (0 to 999 Minutes) LV1
22
Manual Modulation and Low Fire Hold
22
Auto/Man Key Lv1
22
Low Fire Hold Lv1
23
Options 24.X - Sequencing
23
Option 24.0 Sequence Slaves (Number of Boilers) (0-3) LV1
24
Option 24.1 -24.3 Priority Number(S) LV1
25
Option 24.4 - Reserved
25
Option 24.5 - Lead (Master) Boiler Select Method LV1
25
Option 24.6 - Lag (Slave) on Rate (0-100%) LV1
26
Option 24.7 - Lag (Slave) on Delay (0-999 Minutes) LV1
26
Option 24.8 - Lag (Slave) off Rate (0-100%) LV3
26
Option 24.9 - Lag (Slave) off Delay (0-999 Minutes) LV3
26
Option 25.0 - Banking Based on Temperature Lv3
26
Option 25.1 - Water Temperature Zero Value Lv3
27
Option 25.2 - Water Temperature Span Value Lv3
27
Option 25.3 - Water Temperature Cut-In LV1
27
Option 25.4 - Water Temperature Cut-Out LV1
27
Resetting the Control
27
Start-Up Sequence
28
Faults and Fault Finding
30
The Fault Display
30
What to Do When a Fault Occurs
30
Non-Volatile Lockout
31
Fault Subsets
31
Fault Listing
31
The Engineer's Tab
41
System Event/Fault History
41
Engineer's Key Parameter List
41
Troubleshooting
52
Display / General
52
Startup
53
Commissioning
53
As Valve Proving
54
Modulation
54
Inverters
55
Oxygen Measurement and Trim
56
Pid Tutorial
57
Combustion Profile Setup Guideline
58
Fireye Nx6100 Efficiency Calculations
59
Typical Wiring Diagrams
61
Fireye NEXUS NX6100 series Manual (66 pages)
MODBUS RTU/TCPIP, and BACNET/IP COMMUNICATIONS
Brand:
Fireye
| Category:
Controller
| Size: 0.73 MB
Table of Contents
Table of Contents
3
1 Introduction
4
Compatibility and Conventions
4
Overview
4
2 Wiring and Hardware Configuration
5
MODBUS Cables
5
Screen Termination
5
RS485 Serial Communications Termination Resistor
6
3 Controller Configuration
7
Overview
7
Entering the Parameters
7
General
7
Entering Commission Ratio Mode
8
Exiting from Commission Mode
8
Option Parameter List
8
4 MODBUS RTU Data Sets
10
Overview
10
MODBUS System Reset and Timeout
11
Coils (0XXX(X)) - WRITE to Registers (MODBUS Function Code 5)
11
Input Registers (3XXX(X)) - READ from (MODBUS Function Code 4)
12
Holding Registers (4XXX(X)) - WRITE to (MODBUS Function Code 6)
15
5 Modbus TCPIP Data Sets
16
Overview
16
Coils (READ / WRITE) Registers (Modbus Function Codes 1 & 5)
17
Input (READ ONLY) Registers (Modbus Function Code 4)
19
Holding (READ from / WRITE TO) Registers (Modbus Function Codes 3 & 6)
30
Read Discrete Inputs (Function Code 2)
43
6 BACNET/IP Interface
45
Overview
45
Implementation Details
45
Description of Objects
47
Bacnet Protocol Conformance Statement
51
7 Specification
52
Modbus RTU
52
Modbus TCPIP
52
8 Appendix - Communications
53
E110 Flame Monitor
53
YB110 Burnerlogix
59
Advertisement
Fireye NEXUS NX6100 series Manual (27 pages)
Type2 Oxygen probe system for Nexus
Brand:
Fireye
| Category:
Industrial Equipment
| Size: 0.46 MB
Advertisement
Related Products
Fireye NEXUS NX6220
Fireye NEXUS NX6330
Fireye NXM2G-2
Fireye NXC20EX
Fireye NXC40EX
Fireye NEXUS NX3000
Fireye NEXUS NX3100
Fireye NEXUS NX4000
Fireye NEXUS NX4100
Fireye NEXUS NX5100
Fireye Categories
Controller
Control Unit
Scanner
Industrial Equipment
Control Systems
More Fireye Manuals
Login
Sign In
OR
Sign in with Facebook
Sign in with Google
Upload manual
Upload from disk
Upload from URL