Sign In
Upload
Manuals
Brands
Exabyte Manuals
Storage
LTO-2
Exabyte LTO-2 Tape Drive Manuals
Manuals and User Guides for Exabyte LTO-2 Tape Drive. We have
2
Exabyte LTO-2 Tape Drive manuals available for free PDF download: Product Manual
Exabyte LTO-2 Product Manual (94 pages)
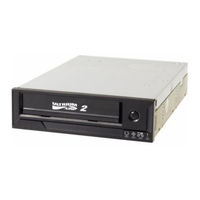
Magnum tape drive
Brand:
Exabyte
| Category:
Storage
| Size: 0 MB
Table of Contents
Table of Contents
5
How to Use this Manual
13
1 Magnum Tape Drive (LTO-2) Features
15
Components
16
Front Panel Components
16
Magnum Tape Drive (LTO-2) Features
16
Figure 1-1 Front-Panel Components
16
Back Panel Components
17
Cartridge Compatibility
17
Figure 1-2 Back-Panel Components
17
Speed Matching and Channel Calibration
18
SCSI Bus Speed
18
Sleep Mode
19
2 Installing the Tape Drive
21
Before You Begin
21
Unpack the Tape Drive
22
Install the Tape Drive
22
Figure 2-1 Back-Panel Components
22
Position the Tape Drive
23
Set the SCSI ID
23
Connect Power
24
Run the Fast Read/Write Test (Diagnostic Function Code F)
24
Connect the Tape Drive to the SCSI Bus
25
Figure 2-2 Tape Drive Is Last or Only Device on the SCSI Bus
27
Figure 2-3 Another Peripheral Is the Last Device on SCSI Bus
27
Configure the Tape Drive to the Server
28
Install Device Drivers
28
3 Operating the Tape Drive
29
Using the Front Panel Controls and Indicators
29
Using the Power Switch
29
Figure 3-1 Front-Panel Components
29
Using the Unload Button
30
Monitoring the Status LED
30
Operating the Tape Drive
30
Table 3-1 Meaning of Status LED Activity
30
Monitoring the Single-Character Display
31
Loading a Cartridge
31
Unloading a Cartridge
32
Figure 3-2 Inserting a Cartridge into the Tape Drive
32
Cleaning the Tape Drive Head
33
Exabyte Magnum Tape Drive (Lto-2)
33
Determining When to Clean the Tape Drive
33
Using a Cleaning Cartridge
33
Resetting the Tape Drive
33
Using the Tape Backup Software
34
4 Using Data Cartridges
35
Description
35
Figure 4-1 LTO Ultrium 200 GB Data Cartridge Components
35
Specifications
36
Cartridge Compatibility
36
Table 4-1 Tape Drive Cartridge and Format Compatibility
36
Data Capacities
37
Environmental and Shipping Specifications for Data Cartridges
37
Table 4-2 Data Capacities in Gigabytes (GB)
37
Table 4-3 Environment for Operating, Storing, and Shipping the LTO Ultrium
37
Setting the Write-Protect Switch
38
Handling Data Cartridges
38
Provide Training
38
Figure 4-2 Setting the Write-Protect Switch
38
Provide Proper Acclimation and Environmental Conditions
39
Perform a Thorough Inspection
39
Handle the Cartridge Carefully
40
Cartridge Storage Guidelines
40
Ensure Proper Packaging for Shipment
41
Repositioning or Reattaching a Leader Pin
41
Repositioning a Leader Pin
42
Figure 4-3 Leader Pin in the Incorrect and Correct Positions
42
Reattaching a Leader Pin
43
Figure 4-4 Placing a Dislodged Leader Pin into the Correct Position
43
Figure 4-5 Rewinding the Tape into the Cartridge
43
Figure 4-6 Leader Pin Reattachment Kit
44
Figure 4-7 Attaching the Leader Pin Tool to the Cartridge
45
Figure 4-8 Winding the Tape out of the Cartridge
46
Figure 4-9 Removing the C-Clip from the Leader Pin
46
Figure 4-10 Attaching the Leader Pin to the Tape
47
Disposing of Tape Cartridges
48
5 Troubleshooting and Diagnostics
49
Table 5-1 Troubleshooting Tips for the Tape Drive
49
Descriptions and Corrective Actions for Errors and Messages
51
Methods of Receiving Errors and Messages
51
Table 5-2 Methods of Receiving Errors and Messages for the Tape Drive
51
Table 5-3 Tape Drive Codes for Error Conditions and Informational Messages
52
Problems and Solutions
53
Resolving Problems Reported by the Server
55
Resolving Media-Related Problems
57
Supported Tapealert Flags
58
Table 5-4 Tapealert Flags Supported by the Tape Drive
58
Using the Tape Drive Diagnostic and Maintenance Functions
61
Setting the Tape Drive to Maintenance Mode
61
Exiting Maintenance Mode
62
Function Code 1 - Run SCSI Drive Diagnostics
62
Function Code 2 - Update Drive Firmware from FMR Tape
63
Function Code 3 - Create FMR Tape
64
Function Code 4 - Force a Drive Dump
65
Function Code 8 - Convert FMR Tape to Scratch Tape
66
Function Code 9 - Display Error Code Log
67
Function Code a - Clear Error Code Log
67
Function Codec - Insert Cartridge into Drive
68
Function Codee - Test Cartridge & Media
68
Function Code F - Fast Read/Write Test
69
Function Code H - Test Head
70
Function Code L - Reserved for Future Use
71
Using Sense Data
72
6 Servicing the Tape Drive
73
Returning the Tape Drive for Service
73
Upgrading Firmware
74
Updating Firmware over the SCSI Bus
74
Updating the Firmware with an FMR Data Cartridge
74
Obtaining a Drive Dump
75
7 Specifications
77
Data Transfer Rates
77
Size and Weight
77
Table 7-1 Maximum Data Transfer Rates in Megabytes Per Second
77
Table 7-2 Size and Weight
77
Power Specifications
78
Environmental Conditions for the Tape Drive
78
Safety and Regulatory Compliance
78
Table 7-3 Power Specifications
78
Table 7-4 Temperature and Humidity Specifications for the Tape Drive
78
Glossary
79
Index
90
Advertisement
Exabyte LTO-2 Product Manual (78 pages)
MAGNUM HALF HEIGHT TAPE DRIVE
Brand:
Exabyte
| Category:
Storage
| Size: 1 MB
Table of Contents
Table of Contents
5
How to Use this Manual
13
Tape Drive Introduction
15
Introduction
15
Features and Benefits
16
Tape Drive Installation
17
Before You Begin
17
Unpack the Tape Drive
17
Solution Contents
18
Tape Backup Software Installation
18
Software Device Driver Installation
18
Mechanical Installation
19
Figure 2-1 Allowed Mounting Orientations
19
Figure 2-2 Mounting Specifications
19
Mounting Screw Requirements
20
SCSI Bus Interface
20
Figure 2-3 Mounting Screw Details
20
SCSI Controller Board Installation
21
SCSI Configuration
21
SCSI ID Selection-Internal Tape Drive
22
Figure 2-4 Internal Tape Drive Connectors
22
Figure 2-5 SCSI ID Jumper Settings
22
SCSI ID Selection-External Tabletop Tape Drive
23
SCSI Bus Termination
23
Termination in General
23
Internal Tape Drive Requirements
23
Figure 2-6 External Tape Drive Connectors
23
Figure 2-7 SCSI Cable
23
External Tape Drive Requirements
24
Internal Tape Drive Installation
24
Figure 2-8 External Tape Drive Termination
24
Figure 2-9 Installing the Internal Tape Drive
25
Figure 2-10 Internal Tape Drive Cable Connections
25
External Tape Drive Installation
26
Figure 2-11 External Tape Drive Back Panel
26
Tape Drive Operation Verification
27
Tape Drive Operation
27
Tape Drive Operation
29
Front LED Indicators
29
Figure 3-1 Front Panel Leds
29
Table 3-1 Front LED Indicator Activity
29
Data Cartridge Operation
30
Write Protecting the Cartridge
30
Figure 3-2 Write Protect Switch
30
Loading a Data Cartridge into the Tape Drive
31
Ejecting a Data Cartridge from the Tape Drive
31
Figure 3-3 Cartridge Insertion
31
Cleaning the Tape Drive
32
Recommended Cleaning Interval
32
Figure 3-4 Eject Button
32
Cleaning Procedure
33
Figure 3-5 Activity and Cleaning Leds
33
Handling and Storing LTO Cartridges
34
Handling LTO Cartridges
34
Storing LTO Cartridges
34
Storage Condition
34
Software Installation
35
Windows 2000/2003/XP
35
Windows Tape Driver
35
Windows Tape Driver Installation
35
Windows Embedded Backup Application
36
SCO Open Server
36
Host Adapter
36
SCO Open Server System Commands
37
SCO Open Server Backup Manager
37
SCO Unixware
38
Host Adapter
38
Installation
38
SCO Unixware System Command
38
Sun Solaris
39
Tape Drive Installation
39
Sun System Command
39
Ibm Aix
40
Tape Drive Installation
40
IBM AIX System Command
40
IBM AIX Storage Manager
41
Hp/Ux
41
Tape Drive Installation
41
HP/UX System Command
41
Linux
42
SCSI Host Adapter
42
Tape Drive Installation
42
Linux System Command
43
Tape Drive Utilities
43
Flashit - Firmware Upgrade Utility
43
Tdkit - Tool for Testing and Downloading Firmware
44
Troubleshooting
45
Hardware Checking
45
Software Checking
45
Verifying Recent Changes
46
Standalone Diagnostics
46
Starting the Test
46
Test Sequence
47
Failure Indication
48
Media Management Reporting
48
Cleaning Is Required
48
Figure 5-1 Backup Exec Reporting that the Tape Drive Needs Cleaning
48
Degraded Media
49
Figure 5-2 Arcserve Reporting that the Tape Drive Needs Cleaning
49
Figure 5-3 Backup Exec Reporting that the Media Is Degraded
49
Figure 5-4 Arcserve Reporting that the Media Is Degraded
49
Problem Situations
50
Dead on Arrival
50
Tape Drive Fails with Sporadic Errors
50
Damaged Front Bezel
51
Tape Drive Not Detected by the Operating System (OS)
51
Will Not Insert or Hold Media or Media Not Recognized
51
Noisy Tape Drive
52
Cartridge Is Stuck Inside the Tape Drive
52
Fault LED Flashes Amber and the Activity LED Is "Off
53
Fault LED Flashes Amber and the Activity LED Flashes
53
Cleaning LED Is Illuminated
53
Incorrect Data Compression
54
Slow Performance
54
Intermittent Failures
55
Tape Removal Procedure
55
Specifications
57
Tape Drive Capacity and Performance
57
Media Specifications and Compatibility
57
Mechanical Dimensions
57
Table A-1 Tape Drive Capacity and Performance
57
Table A-2 Media Specifications and Compatibility
57
Power Requirements
58
Heat Dissipation
58
Data Compression
58
Definition
58
Types of Compression
58
Table A-3 Power Requirements
58
Power Cord Specifications
59
Safety and Regulatory Compliance
59
Table A-4 Power Cord Specifications
59
Figure B-1 Front Panel Leds
61
Tape Drive Leds
61
Table B-1 Front LED Behavior During Normal Operation
61
Advertisement
Related Products
Exabyte LTO-3
Exabyte LTO Series
Exabyte 007-3086-001
Exabyte 215
Exabyte 221L
Exabyte 221L-FC
Exabyte 230D Library
Exabyte 430
Exabyte 8505XL
Exabyte Categories
Storage
Test Equipment
Computer Hardware
Accessories
Robotics
More Exabyte Manuals
Login
Sign In
OR
Sign in with Facebook
Sign in with Google
Upload manual
Upload from disk
Upload from URL