Sign In
Upload
Manuals
Brands
Eventide Manuals
Recording Equipment
VR320
Eventide VR320 Manuals
Manuals and User Guides for Eventide VR320. We have
1
Eventide VR320 manual available for free PDF download: Operator's Manual
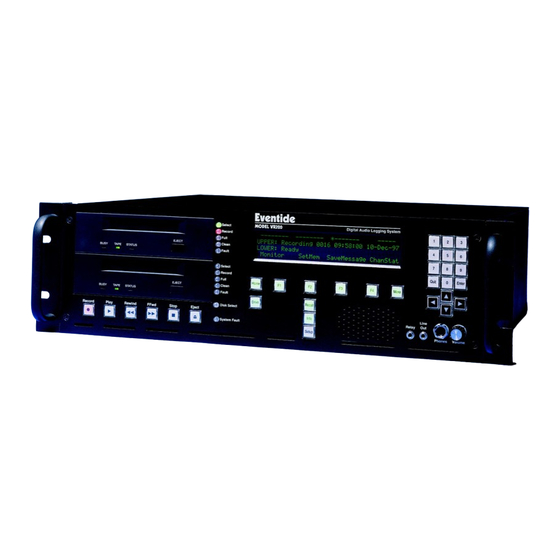
Eventide VR320 Operator's Manual (205 pages)
AUDIO LOGGING RECORDER
Brand:
Eventide
| Category:
Recording Equipment
| Size: 3 MB
Table of Contents
Table of Contents
4
Chapter Page
6
List of Illustrations
10
Introduction
14
Section I. GENERAL INFORMATION
14
Configurations
14
Section II. EQUIPMENT DESCRIPTION and DATA
16
Purpose and Features
16
1-3.1 Purpose
16
Equipment Data
16
1-4.1 Weight and Dimensions
16
1-4.2 Power Requirement
17
Accessories and Options
17
Preparation for Use and Installation
18
Section I. FAMILIARIZATION
18
General
18
Initial Setup
18
2-2.1 Telephone Board Connection (Phoenix Connector)
18
2-2.2 Auto Board (Amphenol Connector)
18
2-2.3 Additional Hardware
18
Initial Turn-On
20
2-3.2 Self Test
20
2-3.3 Front Panel Controls
20
2-3.4 Clearing the Hard Drive (Clear Disk)
20
2-3.5 Setting the System Clock
22
2-3.7 Media Loading and Formatting
26
2-3.8 Recording to the Drives
29
Section II. INSTALLATION
32
Introduction
32
Planning
32
System Connection
33
Power Connection
33
Input Options
35
2-8.1 Connecting the Telephone Channel Inputs
35
2-8.4 Audio Board Front End Options
37
2-8.5 Rear Panel Serial Port Connectors
37
Section III. FRONT PANEL CONTROLS and INDICATORS
39
Home Screen
39
Drives
40
Soft Keys and Function Keys
42
Keypad, Front Panel Ports, Speaker, and Volume Control
43
Software Configuration
45
Section I. SETUP
45
Description
45
Menu Operation and Timeout
45
Setting the Clock
45
Section II. GLOBAL SYSTEM CONFIGURATION
47
System
47
Sampling
47
Security
49
Media Usage
54
Playback Adjustments
56
Display Ascii Character Adjustment
57
Status Report Print out
59
Time Track
63
Line out Volume
65
Language
66
Copy Configuration
68
Serial I/O Port Parameters
68
Set ID
70
C3Ecc Error Connection
71
Relay
72
Label Titling
75
Disk Control
75
Record Verify
78
Automatic Formatting
79
Automatic Recording Configuration
81
Trigger
84
Section III. SYSTEM INFORMATION
86
Info Function Key
86
System Information
86
Media Information
87
Disk Information
89
Label
90
Section IV. BOARD/CHANNEL CONFIGURATION
91
Board/Channel Configuration
91
RECORD ENABLE (Recenable)
92
VOX (Voice Activated)
94
3-32.1 Setting the VOX Hold Time
94
3-32.2 Setting the VOX Level
96
Audio Gain
98
Beep
99
Off Hook
101
Automatic Gain Control (Agc)
103
Section V. DESCRIPTORS
105
Functional Description
105
Copy Descriptors
107
Theory of Operation
110
Section I. PHILOSOPHY of OPERATION
110
General
110
Compromises in Logging Recorders
110
ANALOG Vs. DIGITAL RECORDING
110
Audio Quality Considerations and Tradeoffs
111
Frequency Response
111
Sampling Rate in the Vr320
112
Dynamic Range, Snr, and Thd+N
112
Wow and Flutter
113
Crosstalk
113
Degradation
113
Tape Usage
114
Section II. the VR320 CHANNEL HOUR CAPACITY
115
The "Channel Hour
115
Hard Disk Drive
117
Section III. VR320 THEORY of OPERATION
118
Main Components
118
General Operation
118
Conclusion
120
Operation
121
Section I. PREPARATION for OPERATION
121
General
121
Media Formatting
121
Dat Drive Cleaning
123
Section II. TRANSPORT CONTROLS and INDICATORS
126
Transport Controls
126
Transport Controls Reaction Time
129
Section III. SIGNAL MONITORING, LEVEL INDICATOR, and CHANNEL STATUS
130
Monitor
130
Level Indicator
136
Channel Status During Record
137
Section IV. RECORD OPERATION
138
Record
138
5-9.1 Begin Recording from the "Disk Select" Position
138
5-9.2 Begin Recording from the Drive "Select" Position
139
Section V. DETAILED DESCRIPTION of RECORD OPERATION
144
Operation During Record
144
Media Counter and Drive Switchover
144
Automatic Media Formatting
145
Other Operations During Record
145
Recording Drive Selected
146
5-13.2 Operations Available During Record with the
148
5-13.3 Operations Available During Record with the Internal
148
Routine Record Operation
149
Suspend Recording on a Drive
150
Resume Recording on a Drive
151
Description of Search and Playback Operation
152
5-17.1 Display Status Indicators While Playing from a Drive
152
5-17.2 Display Status Indicators While Playing from the
153
Search and Play Functions
153
Simultaneous Play and Record, and Resume
156
Important Note about Write-Protection
157
Auxiliary Operations: Copy and Make Index
157
5-21.1 Copy
157
5-21.2 Make Index
160
Play Back from the Hard Disk
162
Search for a Particular Time, Date and Channel
163
Play Back from the Dat or Magneto Optical Disk Drive
165
Instant Recall
168
Set Memory Location
169
Section VI. KEY RECORD OPERATION FUNCTIONAL DESCRIPTIONS
173
Appendix A Clock Accuracy, Adjustment and Time Code Input
174
Functional Description
174
Clock Frequency Adjustment Procedure
175
Lithium Battery Voltage Check
175
Time Code Input
175
Configuration and Data Format
176
Vr320 Clock Example
177
Status Printer Indication
178
APPENDIX B 4Mm TAPE ISSUES
179
Availability and Selection
179
Tape Types Available
179
Selecting Your Tape
179
The Tape Counter and Tape Capacity
180
Data Care and Storage
180
Storage Temperature and Humidity
180
Accidental Erasure
180
Deliberate Erasure
181
Functional Description
182
Ups Precautions
183
Appendix D Software Update Procedure
184
Appendix E the Optional Label Printer
185
Description
185
User-Defined Title
186
Appendix Fthe Status Printer
189
Printer Requirements
189
Configuring the Vr320 to Output Desired System Status Reports
190
F-2.1 Detailed Activity Printouts
190
F-2.2 Activity Summaries
190
F-2.3 Summary When Media Is Ejected
191
F-2.4 Summary on Demand
191
Appendix Heventide Digital Logging Products: Year 2000 Considerations
199
Index
200
Warranty
205
Advertisement
Advertisement
Related Products
Eventide VR240
Eventide VR204HF
Eventide VR204HF-PB
Eventide 141242
Eventide 1745M
Eventide BD 955
Eventide BD500
Eventide DIR911
Eventide DIR911t
Eventide DSP7000
Eventide Categories
Recording Equipment
Music Pedal
Music Equipment
Computer Hardware
Control Systems
More Eventide Manuals
Login
Sign In
OR
Sign in with Facebook
Sign in with Google
Upload manual
Upload from disk
Upload from URL