Sign In
Upload
Manuals
Brands
Dot Hill Systems Manuals
Enclosure
AssuredSAN 4844
Dot Hill Systems AssuredSAN 4844 Manuals
Manuals and User Guides for Dot Hill Systems AssuredSAN 4844. We have
2
Dot Hill Systems AssuredSAN 4844 manuals available for free PDF download: Setup Manual
Dot Hill Systems AssuredSAN 4844 Setup Manual (145 pages)
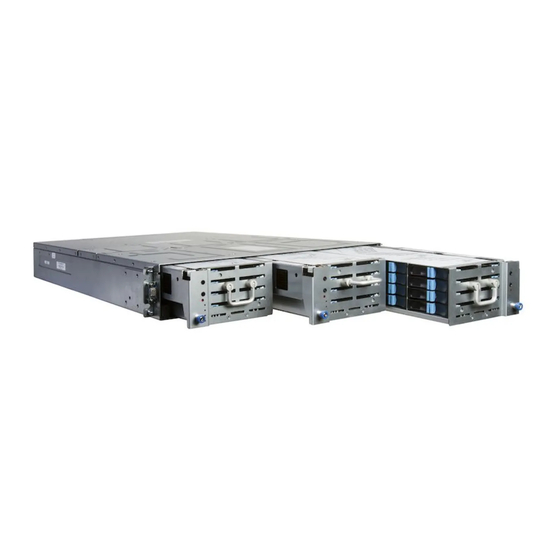
AssuredSAN 4004 Series
Brand:
Dot Hill Systems
| Category:
Data storage
| Size: 7 MB
Table of Contents
Table of Contents
3
About this Guide
10
Overview
10
Assuredsan 4004 Series Enclosure User Interfaces
10
CNC Ports Used for Host Connection
11
HD Mini-SAS Ports Used for Host Connection
11
Intended Audience
11
Prerequisites
11
Related Documentation
12
Document Conventions and Symbols
12
Related Documents
12
Components
14
Front Panel Components
14
24-Drive Enclosure Front Panel Components
14
12-Drive Enclosure Front Panel Components
15
48-Drive Enclosure Front Panel Components
16
2U48 Enclosure Bezel Removed
16
2U48 Enclosure Drawers
16
2U48 Enclosure: Front Panel with Bezel Removed
16
2U48 Enclosure: Drawer Front and Side Views with Disk Slot Numbering
16
2U48 Enclosure: Sample Drawer Population
17
56-Drive Enclosure Front Panel Components
18
4U56 Enclosure Bezel Installed
18
4U56 Enclosure: Front Panel with Bezel Installed
18
4U56 Enclosure Bezel Removed
19
4U56 Enclosure Drawers
19
4U56 Enclosure: Front Panel with Bezel Removed
19
4U56 Enclosure: Drawer Front and Side Views with Disk Slot Numbering
19
Disk Drives Used in 4004 Series Enclosures
20
Controller Enclosure - Rear Panel Layout
20
2U48/2U24/2U12 Controller Enclosures
20
4U56 Controller Enclosures
22
4824/4834/4844/4854 CNC Controller Module - Rear Panel Components
23
4524/4534/4544/4554 SAS Controller Module - Rear Panel Components
24
Supported Drive Enclosures
24
J6G48/J6G24/J6G12 Drive Enclosure Rear Panel Components
24
Drive Enclosure Rear Panel View (2U Form Factor)
24
J6G56 Drive Enclosure Rear Panel Components
25
Component Installation and Replacement
25
Drive Enclosure Rear Panel View (4U Form Factor)
25
Cache
26
Compactflash
26
Compactflash Memory Card
26
Supercapacitor Pack
27
Installing the Enclosures
28
Installation Checklist
28
Populating Drawers
29
Populating Drawers in 2U48 Enclosures
29
Opening and Closing a 2U16 Drawer
29
Opening a 2U16 Drawer: Loosen the Drawer Stop Screw
29
Opening a 2U16 Drawer: Revolve the Handle
29
Aligning an AMS or Disk Module for Installation into a 2U16 Drawer
30
Opening and Closing a 2U16 Drawer: Pull or Push Drawer Along Slide
30
Installing an AMS into a 2U16 Drawer
31
Installing a Disk Module into a 2U16 Drawer
32
Populating Drawers in 4U56 Enclosures
33
Opening and Closing a 4U28 Drawer
33
Opening a 4U28 Drawer: Loosen Screws and Move the Drawer Toggle
33
Aligning a Disk Module for Installation into a 4U28 Drawer
34
Opening a 4U28 Drawer: Revolve the Handle
34
Installing a Disk Module into a 4U28 Drawer
35
Removing a Disk Module from a 4U28 Drawer
36
FDE Considerations
37
Network Equipment-Building System (NEBS) Level 3 Compliance
38
Generic Requirements (Grs)
38
Exceptions to Grs
38
Product Documentation Requirements
38
Connecting the Controller Enclosure and Drive Enclosures
38
Connecting the 4004 Series Controller to the 2U12 Drive Enclosure
39
Connecting the 4004 Series Controller to the 2U24 Drive Enclosure
39
Summary of Drive Enclosures Supported by Controller Enclosures
39
Connecting the 4004 Series Controller to the 2U48 Drive Enclosure
40
Connecting the 4004 Series Controller to the 4U56 Drive Enclosure
40
Connecting the 4004 Series Controller to Mixed Model Drive Enclosures
40
Cable Requirements for Storage Enclosures
40
Summary of Drive Enclosure Cabling Illustrations
41
Cabling Connections between a 2U Controller Enclosure and One 2U Drive Enclosure
42
Cabling Connections between a 2U Controller Enclosure and One 4U Drive Enclosure
42
Cabling Connections between a 4U Controller Enclosure and a 4U Drive Enclosure
42
Cabling Connections between a 4U Controller Enclosure and a 2U Drive Enclosure
42
Cabling Diagrams for Maximum Configuration (2U12 or 2U24)
45
Reverse Cabling between a Dual-Controller 2U Enclosure and Mixed Drive Enclosures
46
Straight-Through Cabling between a Dual-Controller 2U Enclosure and Mixed Drive Enclosures
46
Reverse-Cabling between a Dual-Controller 4U Enclosure and Three 4U Drive Enclosures
47
Straight-Through Cabling between a Dual-Controller 4U Enclosure and Three 4U Drive Enclosures
47
Reverse-Cabling between a Dual-Controller 4U Enclosure and Three 2U Drive Enclosures
48
Straight-Through Cabling between a Dual-Controller 4U Enclosure and Three 2U Drive Enclosure
48
Reverse-Cabling between a Dual-Controller 4U Enclosure and 2U12 or 2U24 Drive Enclosures
49
Straight-Through Cabling between a 4U Enclosure and 2U12 or 2U24 Drive Enclosures
50
Reverse-Cabling between a Dual-Controller 4U Enclosure and Mixed-Model Drive Enclosures
50
Testing Enclosure Connections
51
Powering On/Powering off
51
Straight-Through Cabling between a 4U Enclosure and Mixed-Model Drive Enclosures
51
Power Supplies
52
Ac Psu (2U)
52
DC and AC Psus Equipped with a Power Switch (2U)
53
DC Power Cable Featuring D-Shell and Lug Connectors (2U)
54
Ac Psu (4U)
55
DC Psu (4U)
55
DC Power Cable Featuring 2-Circuit Header and Lug Connectors (4U)
56
Connecting Hosts
57
Host System Requirements
57
Cabling Considerations
57
Connecting the Enclosure to Hosts
57
CNC Technology
57
Fibre Channel Protocol
58
10Gbe Iscsi Protocol
58
Gb Iscsi Protocol
59
HD Mini-SAS Technology
59
12 Gb HD Mini-SAS Ports
59
Connecting Direct Attach Configurations
59
Fibre Channel Host Connection
60
10Gbe Iscsi Host Connection
60
Gb Iscsi Host Connection
60
HD Mini-SAS Host Connection
60
Single-Controller Configurations
61
Dual-Controller Configurations
61
Connecting Hosts: Direct Attach-One Server/One Hba/Single Path
61
Connecting Hosts: Direct Attach-One Server/One Hba/Dual Path (2U)
62
Connecting Hosts: Direct Attach-One Server/One Hba/Dual Path (4U CNC)
62
Connecting Hosts: Direct Attach-One Server/One Hba/Dual Path (4U HD Mini-SAS)
62
Connecting Hosts: Direct Attach-Two Servers/One HBA Per Server/Dual Path (2U)
63
Connecting Hosts: Direct Attach-Two Servers/One HBA Per Server/Dual Path (4U CNC)
63
Connecting Hosts: Direct Attach-Two Servers/One HBA Per Server/Dual Path (4U HD Mini-SAS)
63
Connecting Hosts: Direct Attach-Four Servers/One HBA Per Server/Dual Path (2U)
64
Connecting Hosts: Direct Attach-Four Servers/One HBA Per Server/Dual Path (4U CNC)
64
Connecting Switch Attach Configurations
65
Dual-Controller Configuration
65
Connecting Hosts: Direct Attach-Four Servers/One HBA Per Server/Dual Path (4U HD Mini-SAS)
65
Connecting Hosts: Switch Attach-Two Servers/Two Switches (2U CNC)
65
Connecting Hosts: Switch Attach-Two Servers/Two Switches (4U CNC)
66
Connecting Hosts: Switch Attach-Four Servers/Multiple Switches/San Fabric (2U CNC)
66
Connecting Hosts: Switch Attach-Four Servers/Multiple Switches/San Fabric (4U CNC)
67
Connecting a Management Host on the Network
68
Connecting Two Storage Systems to Replicate Volumes
68
Cabling for Replication
69
CNC Ports and Replication
70
Single-Controller Configuration
70
Dual-Controller Configuration
70
Connecting Two Storage Systems for Replication: One Server/Two Switches/One Location
70
Connecting Two Storage Systems for Replication: Multiple Servers/One Switch/One Location
71
Connecting Two Storage Systems for Replication: Multiple Servers/Switches/One Location
72
Connecting Two Storage Systems for Replication: Multiple Servers/Switches/Two Locations
73
Connecting Two Storage Systems for Replication: Multiple Servers/San Fabric/Two Locations
74
Updating Firmware
75
Obtaining IP Values
75
Setting Network Port IP Addresses Using DHCP
75
Setting Network Port IP Addresses Using the CLI Port and Cable
75
Terminal Emulator Display Settings
77
Terminal Emulator Connection Settings
77
Change the CNC Port Mode
78
Set CNC Port Mode to Iscsi
78
Set CNC Port Mode to FC and Iscsi
79
Configure the System
79
Basic Operation
80
Accessing the SMC or Raidar
80
Configuring and Provisioning the Storage System
80
Troubleshooting
81
USB CLI Port Connection
81
Fault Isolation Methodology
81
Basic Steps
81
Options Available for Performing Basic Steps
81
Use the SMC or Raidar
82
Use the CLI
82
Monitor Event Notification
82
View the Enclosure Leds
82
Performing Basic Steps
82
Gather Fault Information
82
Determine Where the Fault Is Occurring
82
Review the Event Logs
83
Isolate the Fault
83
If the Enclosure Does Not Initialize
83
Correcting Enclosure Ids
83
Stopping I/O
84
Diagnostic Steps
84
Is the Enclosure Front Panel Fault/Service Required LED Amber
85
Is the Controller Back Panel FRU OK LED off
85
Is the Controller Back Panel Fault/Service Required LED Amber
85
Diagnostics LED Status: Front Panel "Fault/Service Required
85
Diagnostics LED Status: Rear Panel "FRU OK
85
Diagnostics LED Status: Rear Panel "Fault/Service Required
85
Is the Drawer Panel Fault/Service Required LED Amber
86
Are Disk Drive Module Leds off
86
Is the 2U12/2U24/4U56 Disk Drive Module Fault LED Amber
86
Diagnostics LED Status: Drawer Panel "Fault/Service Required
86
Diagnostics LED Status: Disk Drives (2U12/2U24/2U48/4U56 Modules)
86
Diagnostics LED Status: Disk Drive Fault Status (2U12/2U24/4U56 Modules)
86
Is the 2U48 Disk Drive Module LED Blinking Blue (4Hz Blink Rate)
87
Is a Connected Host Port Host Link Status LED off
87
Is a Connected Port Expansion Port Status LED off
87
Diagnostics LED Status: Disk Drive Fault Status (2U48 Modules)
87
Diagnostics LED Status: Rear Panel "Host Link Status
87
Diagnostics LED Status: Rear Panel "Expansion Port Status
87
Is a Connected Port's Network Port Link Status LED off
88
Is the Fan Control Module Fault/Service Required LED Amber
88
Is the Power Supply Input Power Source LED off
88
Is the Voltage/Fan Fault/Service Required LED Amber
88
Diagnostics LED Status: Rear Panel "Network Port Link Status
88
Diagnostics LED Status: Rear Panel Fan Control Module "Fault/Service Required" (4U56)
88
Diagnostics LED Status: Rear Panel Power Supply "Input Power Source
88
Diagnostics LED Status: Rear Panel Power Supply "Voltage/Fan Fault/Service Required
88
Controller Failure in a Single-Controller Configuration
89
If the Controller Has Failed or Does Not Start, Is the Cache Status LED On/Blinking
89
Transporting Cache
89
Isolating a Host-Side Connection Fault
89
Diagnostics LED Status: Rear Panel "Cache Status
89
Host-Side Connection Troubleshooting Featuring CNC Ports
90
Host-Side Connection Troubleshooting Featuring SAS Host Ports
91
Isolating a Controller Module Expansion Port Connection Fault
91
Isolating Replication Faults
92
Cabling for Replication
92
Replication Setup and Verification
93
Diagnostic Steps for Replication Setup
94
Virtual Replication Using the SMC
94
Diagnostics for Replication Setup: Using the Replication Feature (V3)
94
Diagnostics for Replication Setup: Viewing Information about Remote Links (V3)
95
Diagnostics for Replication Setup: Creating a Replication Set (V3)
95
Diagnostics for Replication Setup: Replicating a Volume (V3)
95
Diagnostics for Replication Setup: Checking for a Successful Replication (V3)
96
Linear Replication Using Raidar
97
Diagnostics for Replication Setup: Using the Replication Feature (V2)
97
Diagnostics for Replication Setup: Viewing Information about Remote Links (V2)
97
Diagnostics for Replication Setup: Creating a Replication Set (V2)
98
Diagnostics for Replication Setup: Viewing a Replication Image (V2)
99
Diagnostics for Replication Setup: Viewing a Remote System (V2)
99
Resolving Voltage and Temperature Warnings
100
Sensor Locations
100
Power Supply Sensors
100
Cooling Fan Sensors
100
Power Supply Sensor Descriptions
100
Temperature Sensors
101
Cooling Fan Sensor Descriptions
101
Controller Module Temperature Sensor Descriptions
101
Power Supply Module Voltage Sensors
102
ALED Descriptions
103
Front Panel Leds
103
Enclosure Bezels
103
Front Panel Enclosure Bezel: 24-Drive Enclosure (2U24)
103
Front Panel Enclosure Bezel: 12-Drive and 48-Drive Enclosures (2U12/2U48)
103
Front Panel Enclosure Bezel: 56-Drive Enclosure (4U56)
103
Enclosure Bezel Attachment and Removal
104
Enclosure Bezel Attachment
104
Enclosure Bezel Removal
104
Partial Assembly Showing Bezel Alignment with 2U24 Chassis
104
Partial Assembly Showing Bezel Alignment with 2U12 Chassis
105
Partial Assembly Showing Bezel Alignment with 2U48 Chassis
105
Drawer Detail Showing Handle Rotation and Drawer Travel (2U48)
106
Partial Assembly Showing Bezel Alignment with 4U56 Chassis
106
Drawer Detail Showing Handle Rotation and Drawer Travel (4U56)
107
24-Drive Enclosure Front Panel Leds
108
12-Drive Enclosure Front Panel Leds
109
Disk Drive Leds (2U12/2U24)
110
Leds: Disk Drive Modules (2U24/2U12)
110
Leds: Disk Groups in 2U24 (SFF) and 2U12 (LFF) Enclosures
111
48-Drive Enclosure Front Panel Leds
112
Leds Visible with Enclosure Bezel Installed
112
Leds Visible with Enclosure Bezel Removed
113
Disk Drive LED (2U48)
114
Leds: Disk Drive Modules (2U48)
114
Leds: Disk Groups in 2U48 Enclosures
115
56-Drive Enclosure Front Panel Leds
116
Leds Visible with Enclosure Bezel Installed
116
Leds Visible with Enclosure Bezel Removed
117
Disk Drive Leds (4U56)
118
Leds: Disk Drive Modules (4U56)
118
Leds: Disk Groups in LFF Enclosures
119
Controller Enclosure - Rear Panel Layout
120
2U48/2U24/2U12 Controller Enclosures
120
4U56 Controller Enclosures
121
4824/4834/4844/4854 CNC Controller Module - Rear Panel Leds
122
Leds: 4824/4834/4844/4854 CNC Controller Module (FC and 10Gbe Sfps)
122
Leds: 4824/4834/4844/4854 CNC Controller Module (1 Gb RJ-45 Sfps)
123
4524/4534/4544/4554 SAS Controller Module-Rear Panel Leds
124
Cache Status LED Details
125
Power Supply Leds for Supported Psus
125
Leds: Power Supply Units - Rear Panel (2U12/2U24)
125
Leds: Power Supply Units - Rear Panel (2U48)
126
Leds: Power Supply Units - Rear Panel (4U56)
126
Fan Control Module Leds
127
Optional Drive Enclosures for Storage Expansion
127
J6G48/J6G24/J6G12 Drive Enclosure Rear Panel Leds
128
J6G56 Drive Enclosure Rear Panel Leds
129
B Specifications and Requirements
130
Safety Requirements
130
Site Requirements and Guidelines
130
Site Wiring and AC Power Requirements
130
Power Requirements - AC Input
130
Site Wiring and DC Power Requirements
131
Weight and Placement Guidelines
131
Electrical Guidelines
131
Power Requirements - DC Input
131
Ventilation Requirements
132
Cabling Requirements
132
Management Host Requirements
132
Physical Requirements
133
Environmental Requirements
135
Electrical Requirements
136
Site Wiring and Power Requirements
136
Power Cable Requirements
136
C Electrostatic Discharge
137
Preventing Electrostatic Discharge
137
Grounding Methods to Prevent Electrostatic Discharge
137
DUSB Device Connection
138
Rear Panel USB Ports
138
USB CLI Port
138
Emulated Serial Port
138
USB Device Connection - CLI Port
138
Supported Host Applications
139
Command-Line Interface
139
Device Driver/Special Operation Mode
139
Microsoft Windows
139
Obtaining the Software Download
139
Linux
140
Setting Parameters for the Device Driver
140
Using the CLI Port and Cable-Known Issues on Windows
140
Problem
140
Workaround
140
ESFP Option for CNC Ports
141
Locate the SFP Transceivers
141
Install an SFP Transceiver
141
Verify Component Operation
141
Index
142
Advertisement
Dot Hill Systems AssuredSAN 4844 Setup Manual (100 pages)
Brand:
Dot Hill Systems
| Category:
Enclosure
| Size: 3 MB
Table of Contents
Table of Contents
3
About this Guide
11
Overview
11
CNC Ports Used for Host Connection
11
HD Mini-SAS Ports Used for Host Connection
12
Intended Audience
12
Prerequisites
12
Related Documentation
12
Related Documents
12
Document Conventions and Symbols
13
Document Conventions
13
Components
15
Front Panel Components
15
48-Drive Enclosure Front Panel Components
15
Enclosure Bezel Installed
15
2U48 Enclosure: Front Panel with Bezel Installed
15
Enclosure Bezel Removed
16
Enclosure Drawers
16
2U48 Enclosure: Front Panel with Bezel Removed
16
Disk Drives Used in Ultra48 Series Enclosures
17
Controller Enclosure - Rear Panel Layout
18
4844 Controller Module - Rear Panel Components
19
4544 Controller Module - Rear Panel Components
20
4144 Drive Enclosure Rear Panel Components
20
Component Installation and Replacement
20
Cache
21
Compactflash
21
Supercapacitor Pack
22
Compactflash Card
22
Installing the Enclosures
23
Installation Checklist
23
Populating Drawers
24
Opening and Closing a Drawer
24
Opening a Drawer: Loosen the Drawer Stop Screw
24
Opening a Drawer: Revolve the Handle
24
Aligning an AMS or Disk Module for Installation into a Drawer
25
Opening and Closing a Drawer: Pull or Push Drawer Along Slide
25
Installing an AMS
26
Installing a Disk Module
26
FDE Considerations
27
Connecting the Controller Enclosure and Drive Enclosures
28
Cable Requirements for Storage Enclosures
29
Connecting the Ultra48 Series Controller to the 4144 Drive Enclosure
29
Summary of Drive Enclosure Cabling Illustrations
29
Cabling Connections between a Controller Enclosure and One Drive Enclosure
30
Testing Enclosure Connections
31
Powering On/Powering off
31
AC Psus
31
Connect Power Cord to AC Power Supply
32
Power Cycle
32
AC Power Cord
32
Connecting Hosts
33
Host System Requirements
33
Cabling Considerations
33
Connecting the Enclosure to Hosts
33
CNC Technology
33
10Gbe Iscsi Protocol
34
Fibre Channel Protocol
34
Gb Iscsi Protocol
35
HD Mini-SAS Technology
35
12 Gb Mini-SAS Ports
35
Connecting Direct Attach Configurations
35
10Gbe Iscsi Host Connection
35
Fibre Channel Host Connection
35
Dual-Controller Configurations
36
Gb Iscsi Host Connection
36
HD Mini-SAS Host Connection
36
Connecting Hosts: Direct Attach-One Server/One Hba/Dual Path
37
Connecting Hosts: Direct Attach-Two Servers/One HBA Per Server/Dual Path
37
Connecting Hosts: Direct Attach-Four Servers/One HBA Per Server/Dual Path
37
Connecting Switch Attach Configurations
38
Dual-Controller Configuration
38
Connecting Hosts: Switch Attach-Two Servers/Two Switches
38
Connecting Hosts: Switch Attach-Four Servers/Multiple Switches/San Fabric
39
Connecting a Management Host on the Network
40
Connecting Two Storage Systems to Replicate Volumes
40
Cabling for Replication
41
CNC Ports and Replication
41
Dual-Controller Configuration
42
Connecting Two Storage Systems for Assuredremote: Multiple Servers/One Switch/One Location
42
Connecting Two Storage Systems for Assuredremote: Multiple Servers/Switches/One Location
42
Connecting Two Storage Systems for Assuredremote: Multiple Servers/Switches/Two Locations
43
Connecting Two Storage Systems for Assuredremote: Multiple Servers/San Fabric/Two Locations
44
Updating Firmware
45
Obtaining IP Values
45
Setting Network Port IP Addresses Using DHCP
45
Setting Network Port IP Addresses Using the CLI Port and Cable
45
Terminal Emulator Connection Settings
46
Terminal Emulator Display Settings
46
Connecting a USB Cable to the CLI Port
46
Change the CNC Port Mode
48
Configure the System
48
Set CNC Port Mode to FC and Iscsi
48
Set CNC Port Mode to Iscsi
48
Basic Operation
51
Accessing Raidar
51
Configuring and Provisioning the Storage System
51
Troubleshooting
53
USB CLI Port Connection
53
Fault Isolation Methodology
53
Basic Steps
53
Options Available for Performing Basic Steps
53
Use Raidar
53
Monitor Event Notification
54
Use the CLI
54
View the Enclosure Leds
54
Performing Basic Steps
54
Determine Where the Fault Is Occurring
54
Gather Fault Information
54
Review the Event Logs
54
Isolate the Fault
55
If the Enclosure Does Not Initialize
55
Correcting Enclosure Ids
55
Stopping I/O
55
Diagnostic Steps
56
Is the Enclosure Front Panel Fault/Service Required LED Amber
56
Diagnostics LED Status: Front Panel "Fault/Service Required
56
Is the Controller Back Panel FRU OK LED off
57
Is the Controller Back Panel Fault/Service Required LED Amber
57
Is the Drawer Panel Fault/Service Required LED Amber
57
Diagnostics LED Status: Rear Panel "FRU OK
57
Diagnostics LED Status: Rear Panel "Fault/Service Required
57
Diagnostics LED Status: Drawer Panel "Fault/Service Required
57
Is the Disk Drive Module LED off
58
Is the Disk Drive Module LED Blinking Blue (4Hz Blink Rate)
58
Is a Connected Host Port Host Link Status LED off
58
Diagnostics LED Status: Disk LED off
58
Diagnostics LED Status: Disk Drive Module Fault Status
58
Diagnostics LED Status: Rear Panel "Host Link Status
58
Is a Connected Port Expansion Port Status LED off
59
Is a Connected Port's Network Port Link Status LED off
59
Is the Power Supply Input Power Source LED off
59
Is the Voltage/Fan Fault/Service Required LED Amber
59
Diagnostics LED Status: Rear Panel "Expansion Port Status
59
Diagnostics LED Status: Rear Panel "Network Port Link Status
59
Diagnostics LED Status: Rear Panel Power Supply "Input Power Source
59
Diagnostics LED Status: Rear Panel Power Supply "Voltage/Fan Fault/Service Required
59
Controller Failure in a Single-Controller Configuration
60
If the Controller Has Failed or Does Not Start, Is the Cache Status LED On/Blinking
60
Transporting Cache Via Professional Services
60
Diagnostics LED Status: Rear Panel "Cache Status
60
Isolating a Host-Side Connection Fault
61
Host-Side Connection Troubleshooting Featuring CNC Ports
61
Host-Side Connection Troubleshooting Featuring SAS Host Ports
62
Isolating a Controller Module Expansion Port Connection Fault
63
Isolating Assuredremote Replication Faults
64
Cabling for Replication
64
Replication Setup and Verification
64
Diagnostic Steps for Replication Setup
64
Can You Successfully Use the Assuredremote Feature
64
Diagnostics for Replication Setup: Using Assuredremote Feature
64
Can You Create a Replication Set
65
Can You View Information about Remote Links
65
Diagnostics for Replication Setup: Creating a Replication Set
65
Diagnostics for Replication Setup: Viewing Information about Remote Links
65
Can You Replicate a Volume
66
Diagnostics for Replication Setup: Replicating a Volume
66
Can You View a Replication Image
67
Can You View Remote Systems
67
Resolving Voltage and Temperature Warnings
67
Diagnostics for Replication Setup: Viewing a Remote System
67
Diagnostics for Replication Setup: Viewing a Replication Image
67
Cooling Fan Sensor Descriptions
68
Cooling Fan Sensors
68
Power Supply Sensor Descriptions
68
Power Supply Sensors
68
Sensor Locations
68
Temperature Sensors
68
Controller Module Temperature Sensor Descriptions
69
Power Supply Module Voltage Sensors
69
ALED Descriptions
71
Front Panel Leds
71
Enclosure Bezel
71
Enclosure Bezel Attachment and Removal
71
Enclosure Bezel Attachment
71
Enclosure Bezel Removal
71
Partial Assembly Showing Bezel Alignment with 2U48 Chassis
72
48-Drive Enclosure Front Panel Leds
73
Leds Visible with Enclosure Bezel Installed
73
Leds Visible with Enclosure Bezel Removed
74
Disk Drive LED
75
Controller Enclosure - Rear Panel Layout
77
Ultra48 Series Controller Enclosure: Rear Panel
77
4844 CNC Controller Module - Rear Panel Leds
78
Leds: 4844 CNC Controller Module (FC and 10Gbe Sfps)
78
Leds: 4844 CNC Controller Module (1 Gb RJ-45 Sfps)
79
4544 SAS Controller Module-Rear Panel Leds
80
Power Supply Leds
81
4144 Drive Enclosure Rear Panel Leds
82
B Environmental Requirements and Specifications
83
Safety Requirements
83
Site Requirements and Guidelines
83
Site Wiring and AC Power Requirements
83
Weight and Placement Guidelines
84
Electrical Guidelines
84
Ventilation Requirements
84
Cabling Requirements
84
Management Host Requirements
84
Physical Requirements
85
Rackmount Enclosure Dimensions
86
Environmental Requirements
87
Electrical Requirements
88
Power Cable Requirements
88
Site Wiring and Power Requirements
88
C Electrostatic Discharge
89
Preventing Electrostatic Discharge
89
Grounding Methods to Prevent Electrostatic Discharge
89
DUSB Device Connection
91
Rear Panel USB Ports
91
USB CLI Port
91
Emulated Serial Port
91
USB Device Connection - CLI Port
91
Supported Host Applications
92
Command-Line Interface
92
Device Driver/Special Operation Mode
92
Microsoft Windows
92
Obtaining the Software Download
92
Linux
93
Setting Parameters for the Device Driver
93
Using the CLI Port and Cable-Known Issues on Windows
93
Problem
93
Workaround
93
ESFP Option for CNC Ports
95
Locate the SFP Transceivers
95
Install an SFP Transceiver
95
Verify Component Operation
95
Index
97
Advertisement
Related Products
Dot Hill Systems 4824
Dot Hill Systems 4834
Dot Hill Systems 4854
Dot Hill Systems 4534
Dot Hill Systems 4524
Dot Hill Systems AssuredSAN 4544
Dot Hill Systems 4554
Dot Hill Systems AssuredSAN 3004 Series
Dot Hill Systems AssuredSAN Ultra48 Series
Dot Hill Systems AssuredSAN 4000 Series
Dot Hill Systems Categories
Storage
Enclosure
Disk array system
Data storage
More Dot Hill Systems Manuals
Login
Sign In
OR
Sign in with Facebook
Sign in with Google
Upload manual
Upload from disk
Upload from URL