Sign In
Upload
Manuals
Brands
Dionex Manuals
Laboratory Equipment
As
Dionex As Manuals
Manuals and User Guides for Dionex As. We have
1
Dionex As manual available for free PDF download: Operator's Manual
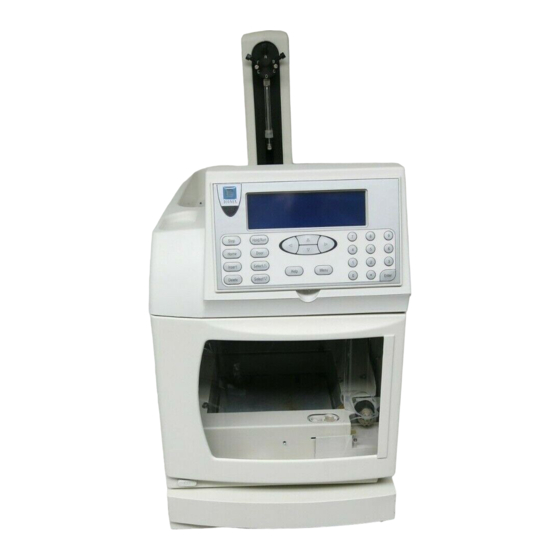
Dionex As Operator's Manual (356 pages)
Brand:
Dionex
| Category:
Laboratory Equipment
| Size: 11 MB
Table of Contents
Table of Contents
3
1 Introduction
13
Overview
13
About this Manual
15
Safety Messages and Notes
16
Safety and Regulatory Information
18
Safety Labels
18
2 Description
19
Overview of Features
19
Front Panel Features
21
Keypad Button Functions
22
Display Screens
24
Autosampler Compartment
26
Syringe and Reservoir Organizer
27
Sampling Needle Arm
29
Sampling Needle Assembly
30
Flush, Waste, and Inject Ports
31
Sample Vials and Well Plates
31
Injection Valve Options
33
Sample Temperature Control Option
34
Simultaneous Injection Option
35
Sequential Injection Option
35
Concentrator Injection Option
36
Rear Panel Features
37
USB Receptacle
37
Ttl/Relay Connectors
38
Fuse Holder and Power Receptacle
38
Autosampler Control
39
Local Control
39
Computer Control (Locked Remote Mode)
42
System Wellness and Predictive Performance
43
Theory of Operation
45
Understanding the Wait Operation
45
Overlapping Sample Preparation
46
Running Samples Without Overlap
47
Operating the as as the System Master
47
Wait Operation)
47
Understanding the Cycle Time
48
Operating Events During a Schedule
49
Understanding the Status Display During a Run
52
Operating Events During Flushing and Priming
53
Sample and Prep Syringe Fluid Schematics
54
3 • Operation and Maintenance
57
Getting Ready to Run
57
Turn on the Power
57
Fill the Vials or Wells and Load the Sample Tray
58
Selecting Computer or Front Panel (Local) Control
63
Connecting to Chromeleon or Chromeleon Xpress
64
Chromeleon Xpress
66
Running a Sequence of Injections in Chromeleon or
66
Default Operating Parameters
67
Specifying Sample Positions
68
Vial Tray Sample Positions
68
Well Plate Tray Sample Positions
69
Specifying Injection Volumes
70
Sample Injection Types
72
Overview
72
Determining the Injection Type
74
Determining the Sample Loop Injection Type
75
Guidelines for Sample Volumes Used, Loop Sizes, and Injection Volumes
78
Normal, Full-Loop Injections
82
Normal, Large-Loop Injections
84
Normal, Partial-Loop Injections
85
Normal, Partial-Loop, Limited-Sample Injections
88
Simultaneous Injections
90
Concentrate Injections
94
Sequential Injections
98
Sequential Concentrate Injections
102
Selecting Syringe Speed Settings
104
Selecting Syringe Speeds on the Control Panel
105
Entering Syringe Speeds in the Program
106
Syringe Speed and Tubing Size Guidelines
109
Opening the Autosampler Door During Operation
112
Routine Maintenance
114
Daily
114
Annually
115
Manually Flushing the Inject Port
115
Periodically
115
System Shutdown
116
4 Troubleshooting
117
Error Messages
117
Liquid Leaks
136
Leaking Syringe or Syringe Valve Port
136
Leaking Drain Line Connection
137
Leaking Inject Port
137
Leaking Fitting
137
Broken Liquid Line
137
Condensation on Well Plate Covers
138
5 Service
139
Replacement Tubing and Fittings
139
Syringe and Reservoir Connections
139
Assemblies, Tubing, and Fittings
140
Resetting the Usage Counters
141
Resetting a Usage Counter on the as Wellness Panel
142
Resetting a Usage Counter on the Usage Log Screen
143
Replacing the Sample or Prep Syringe
144
Removing the Existing Syringe
145
Filling the New Syringe and Removing Bubbles
146
Connecting the New Syringe and Flushing
146
Initializing the Syringe
147
Resetting the Syringe Usage Counter
148
Replacing the Sampling Needle Assembly
148
Removing the Old Sampling Needle Assembly
150
Installing the New Sampling Needle Assembly
154
Resetting the Sampling Needle Assembly Usage Counter
157
Removing the Drip Tray
157
Installing the Drip Tray
158
Replacing the Needle Seal Assembly
160
Aligning the Sampling Needle in the Inject Port
163
Calibrating the Inject Port Volume
167
Replacing the Leak Sensor
173
Calibrating the Leak Sensor
174
Removing the Sample or Prep Syringe Valve
176
Replacing the Sample Syringe Valve
177
Replacing the Prep Syringe Valve
179
Replacing a Sample or Prep Syringe Pump Assembly
181
Rebuilding the Injection or Diverter Valve
182
Replacing the Well Plate Tray Thermal Pads
184
Changing the Main Power Fuses
185
A • Specifications
187
Autosampler
187
Electrical
187
Environmental/Physical
187
A.1 Autosampler
187
Valves (Optional)
188
Injection
188
A.1.3 Valves (Optional)
188
Sample Temperature Control (Optional)
189
B • Installation
191
Facility Requirements
191
B.1 Facility Requirements
191
Unpacking
192
B.2 Unpacking
192
Autosampler Installation
198
Before You Begin
198
Installation Checklist
198
B.3 Autosampler Installation
198
Connecting the Syringes and Drain Line
199
Connecting a Single Injection Valve
203
Connecting Two Injection Valves
205
Injections)
205
Connecting a Diverter Valve (for Sequential Injections)
209
Connecting a Second as to a Dual ICS-3000 System
212
Connecting the as to Chromeleon or Chromeleon
215
Xpress (Optional)
215
Connecting the Power Cord
218
Turning on the Power
219
Selecting Module Setup Options
220
Configuring the as in Chromeleon or Chromeleon Xpress
224
Priming the Liquid Lines
226
Removing Bubbles from the Syringe
230
Injection Valve Plumbing
231
Setting up Chromeleon or Chromeleon Xpress for Simultaneous Injections
232
Assigning Unique Names to Devices
232
Creating Sequences, Programs, and Quantification Methods
236
C • Display Screens
239
Menu of Screens
240
C.1 Menu of Screens
240
Main Status Screen
241
Detail Status Screen
244
Method Menu
248
C.4 Method Menu
248
Sample Prep Screen
249
Method Setup Screen
254
Timed Events Screen
255
Schedule Screen
257
C.5 Schedule Screen
257
Module Setup Menu
259
Installed Options Screen
259
Front Panel Screen
260
Plumbing Configuration Screen
261
Time/Date Screen
263
System Parameters Screen
264
Inject Port Alignment Screen
267
Door Interlock Bypass Screen
268
Flush/Prime Screen
269
Time Function in Screen
271
Diagnostic Menu
272
Power-Up Screen
272
C.9 Diagnostic Menu
272
Diagnostic Tests Screen
273
XYZ Test Screen
274
Temperature Statistics Screen
275
Liquid Control Screen
276
Logs Menu
279
C.9.6 Logs Menu
279
Leak Sensor Calibration and Status Screen
282
Keyboard Test Screen
283
Code Versions Screen
284
Time Function out Screen
284
D • Front Panel Control
285
Accessing as Screens
285
Entering or Changing Values
285
D.1 Accessing as Screens
285
Running a Schedule of Injections from the Front Panel
286
Selecting and Starting the Schedule
287
Placing a Running Schedule on Hold
288
Stopping a Running Schedule
288
Running under Direct Control from the Front Panel
289
Creating Methods from the as Front Panel
291
Creating a Method
291
Saving a Method
292
D.5.2 Saving a Method
292
Defining Sample Prep Steps
293
Selecting Method Setup Parameters
303
Defining Timed Events Steps
306
Editing a Method
309
Deleting a Method
309
Copying a Method
309
D.5.6 Editing a Method
309
Example Method for Dilution
310
Creating Schedules from the as Front Panel
310
Creating a New Schedule
311
Saving a Schedule
312
Selecting an Action if a Scheduled Vial Is Missing
312
D.6.2 Saving a Schedule
312
Defining Schedule Lines
313
Editing a Schedule
315
Deleting a Schedule
315
Copying a Schedule
315
D.6.5 Editing a Schedule
315
Selecting Syringe Speeds for Front Panel Operation
316
Aligning the Sampling Needle from the as Front Panel
318
Calibrating the Inject Port Volume from the as Front Panel
323
E • TTL and Relay Control
329
TTL and Relay Connections
329
Connecting a TTL or Relay
330
Selecting TTL Input Control Types
331
Controlling TTL and Relay Outputs
333
Example Ttl/Relay Connections
334
F • Reordering Information
335
Advertisement
Advertisement
Related Products
Dionex IONPAC AG9-SC GUARD COLUMN
Dionex IONPAC AS9-SC ANALYTICAL COLUMN
Dionex AS-HV
dionex ASE 150
Dionex ASE 100
Dionex AS-DV
Dionex AutoTrace SPE
Dionex 043185
Dionex 043186
Dionex 062983
Dionex Categories
Laboratory Equipment
Measuring Instruments
Analytical Instruments
Security Sensors
Water Pump
More Dionex Manuals
Login
Sign In
OR
Sign in with Facebook
Sign in with Google
Upload manual
Upload from disk
Upload from URL