Sign In
Upload
Manuals
Brands
Digital Equipment Manuals
Server
AlphaServer 2100
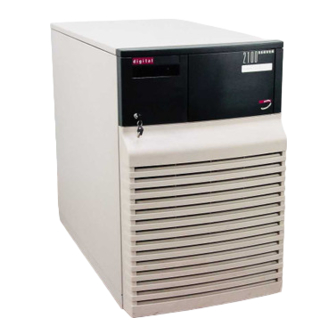
Digital Equipment AlphaServer 2100 Manuals
Manuals and User Guides for Digital Equipment AlphaServer 2100. We have
2
Digital Equipment AlphaServer 2100 manuals available for free PDF download: Owner's Manual, Manual
Digital Equipment AlphaServer 2100 Owner's Manual (182 pages)
Brand:
Digital Equipment
| Category:
Server
| Size: 3 MB
Table of Contents
Table of Contents
4
In this Chapter
5
System Features
17
Overview
17
Characteristics
18
Architecture
18
System Characteristics
18
System Architecture
19
Environmental and Power Requirements
20
In this Section
20
System Dimensions
20
Environmental Specifications
20
Power Requirements
20
System Dimensions and Service Area
20
Power Requirements
22
Power Cords
23
Power Cord Order Numbers
23
Moving the System
24
System Leveler Feet
25
System Keys
26
Turning the System on
27
Overview
27
Checking System Settings
28
Powered-Down System Settings
29
Powering up the System
30
Displaying Power-Up Information
32
Checking Power-Up Display
33
Preboot Tasks
37
Booting the Operating System for the First Time
39
Powering down the System
41
Before You Begin
41
Turning off the System
42
Turning off DC Power
43
Extended Power-Down (AC Power)
43
Invoking Console Mode
44
Console Subsystem
44
Console Terminal
44
Console Mode
44
Remote Access
45
Connecting to Networks
46
Ethernet
46
Ethernet Network Connections
47
Connecting Peripherals
48
Serial/Parallel Connections
48
Connecting Serial and Parallel Devices
49
Terminal Connections
50
Terminal Connections
51
Operating Storage Devices
52
Overview
52
For Additional Information
52
Before You Operate Mass Storage Devices
52
Identifying Mass Storage Compartments
52
Storage Compartments
53
Operating a Compact Disc Drive
54
Caddyless Drive
54
Caddyless CD-ROM Drive
55
Disc Caddy)
56
CD-ROM Drive with Caddy
57
Inserting and Removing a CD-ROM Caddy
59
Operating a DAT Tape Drive
60
Inserting a Tape
60
Inserting and Removing a Tape: DAT
61
Operating a Diskette Drive
62
Diskette Drive Description
62
Inserting a Diskette
62
Removing a Diskette
62
Diskette Drive and Diskette
63
Operating a QIC Drive
64
QIC Drive Description
64
Inserting a QIC Tape
64
Removing a QIC Tape
64
QIC Tape Drive and QIC Tape
64
Hardware Components
65
In this Chapter
65
Accessories
65
Operator Control Panel (OCP)
66
Power-Up Display
66
DC On/Off Button
67
Halt Button
67
Reset Button
68
Doors and Panels
69
Door and Panel Removal
69
Door and Panel Removal
70
System Front
72
System Rear
74
System Module Locations
76
Card Cage
76
System Module Locations
77
Accessories
78
Options and Upgrades
80
In this Chapter
80
Upgrade Overview
81
Planning Your Upgrade
81
Adding Third-Party Devices
82
Supported Options
83
Access from the Internet
83
Access from Compuserve
83
Digital Systems and Options Catalog
83
Verifying System Configuration
84
Before You Begin
84
Firmware Menu Options for Windows NT
84
Viewing ARC Hardware Display
84
Viewing ARC Environment Variables
87
Device Names
87
ARC Firmware Environment Variables
88
For more Information
89
Openvms
89
Show Device
92
Device Name Convention
92
Show Memory
95
System Bus Options
97
System Bus Option Locations
98
CPU Modules
99
System Bus Configurations According to Number of
100
Standard VO Module
102
EISA Bus Options
103
ISA Bus Options
105
Identifying ISA and EISA Options
107
ISA and EISA Boards
107
Configuring EISA and ISA Options
108
System Configuration Diskette
108
Before You Run the ECU
108
Starting the ECU
109
Configuring EISA Options
112
Summary of Procedure for Configuring EISA Bus
113
Configuring EISA/ISA Options
114
Summary of Procedure for Configuring EISA Bus with ISA
115
PCI Board
116
Installing PC! Boards
117
SCSI Buses
118
Internal SCSI Bus
118
Removable-Media Bus Configurations
120
Internal Storageworks Shelves
121
SCSI Cable Routing to Internal Storageworks Shelves
122
Installing Storageworks Fixed Disks
123
RAID Subsystem Documentation
125
Power Supply Configurations
126
Power Supply Modes
126
Ordering Guidelines
127
Troubleshooting the System
129
Introduction
129
In this Chapter
129
Before You Begin
130
Determine Service Provider
130
Identifying Problems
132
Task Overview
132
Steps to Identifying a Problem
132
Steps to Resolving Problems
132
Determining Type of Problem
133
Problem Reference
133
Reporting Problems to Digital Services
134
Pre-Call Checklist
134
Digital Support Centers
135
Power Problems
138
Troubleshooting Power Problems
138
Problems Getting to Console Mode
139
Troubleshooting Problems Getting to Console Mode
139
Interpreting the Operator Control Panel Power-Up Display
140
Console Reported Problems
143
Troubleshooting Console Reported Problems
143
Mass Storage Problems Indicated at Power-Up
148
Troubleshooting Fixed-Media Problems
148
Troubleshooting Removable-Media Problems
150
EISA Bus Problems Indicated at Power-Up
151
Troubleshooting EISA Problems
152
PCI Bus Problems Indicated at Power-Up
153
Troubleshooting PCI Problems
153
Boot Problems
154
Troubleshooting Boot Problems
154
Operating System Reported Problems
156
Troubleshooting Operating System Reported Errors
156
Problems with RAID Devices
157
Troubleshooting RAID Problems
157
Glossary
158
Index
176
Advertisement
Digital Equipment AlphaServer 2100 Manual (60 pages)
CPU Upgrade
Brand:
Digital Equipment
| Category:
Computer Hardware
| Size: 0 MB
Table of Contents
Table of Contents
3
How to Use this Document
8
Upgrade Overview
11
Upgrade Kit Contents
11
Restrictions
12
Alphaserver 2000 4/200 Systems
12
Storageworks RAID Array Subsystem Firmware
12
Upgrade Process
13
Updating the Operating System
15
Before You Begin
15
Minimum Operating System Revisions
16
Installing New Windows NT System Files
17
Step 1: Boot the Windows NT Operating System
17
Step 2: Copy the New HAL System File to the System Directory
17
Step 3: Prepare to Update the Firmware
17
Updating the Arc and Srm Console Firmware
19
Procedure
19
Step 2: Record any ARC Configuration Parameters, then Clear the ARC NVRAM Data
20
Step 3: Update the Firmware
20
Cpu Module Installation
25
Before You Begin
25
Procedure
26
Step 1: Perform a Power Shutdown
26
Step 2: Remove All Kn45X or KN460 CPU Modules
31
Step 3: Determine the New CPU Configuration
32
Step 4: Install New CPU Modules
35
Step 5: Install Airflow Modules in Unused Slots
36
Step 6: Reinstall Panels and Doors and Reconnect Power Cords
37
Step 7: Power on the System and Peripherals
37
Step 8: Verify the Installation
37
Step 9: Update the Fail-Safe Loader (Optional)
38
Step 10: Verify Environment Variables
38
Step 11: Optionally, Apply KN490 Patch
39
Step 12: Boot the Operating System
40
Updating Configuration Data
41
Rebuilding EISA Configuration Data
41
Step 1: Start the ECU
42
Step 2: Correct Your Configuration Data
42
Step 3: Step through the ECU Dialog Boxes
43
Updating the Storageworks RAID Controller Firmware
44
Step 1: Create a Standalone Configuration Utility Floppy
44
Step 2: Run the Utility to Set Controller Parameters
45
Step 3: Update the RAID Controller Firmware
46
Updating the Fail-Safe Loader
49
Update Procedure
50
Step 1: Enable the Fail-Safe Loader Update Jumper or Switch
50
Step 2: Boot the Loadable Firmware Utility
54
Step 3: Disable the Fail-Safe Loader Update Jumper or Switch
56
Downgrading Your System
57
Procedure
57
Step 1: Windows NT Only: Copy the Old System HAL File to the System Directory
57
Step 2: Digital UNIX or Openvms: Shut down Your Operating System, if Necessary
57
Step 3: Boot the Loadable Firmware Utility
58
Step 3: Press the DC On/Off Button to the "Off" Position
60
Step 4: Remove New Modules and Install Kn45X or KN460 Modules
60
Advertisement
Related Products
Digital Equipment AlphaServer 2000
Digital Equipment AlphaServer 1000
Digital Equipment AlphaServer 2 00 Series
Digital Equipment AlphaPC64
Digital Equipment AlphaStation 500 Series
Digital Equipment AlphaStation 600 Series
Digital Equipment Alpha
Digital Equipment Digital AlphaStation 400 Series
Digital Equipment AlphaStation
Digital Equipment AH8508
Digital Equipment Categories
Desktop
Server
Computer Hardware
Printer
Storage
More Digital Equipment Manuals
Login
Sign In
OR
Sign in with Facebook
Sign in with Google
Upload manual
Upload from disk
Upload from URL