Sign In
Upload
Manuals
Brands
DGSHAPE Manuals
Dental equipment
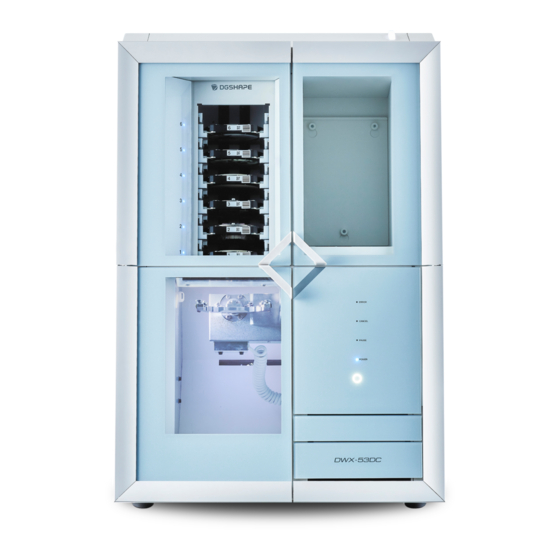
DWX-53DC
DGSHAPE DWX-53DC Manuals
Manuals and User Guides for DGSHAPE DWX-53DC. We have
2
DGSHAPE DWX-53DC manuals available for free PDF download: User Manual, Installer's Manual
DGSHAPE DWX-53DC User Manual (147 pages)
Brand:
DGSHAPE
| Category:
Dental equipment
| Size: 2 MB
Table of Contents
Table of Contents
2
Basic Handling Methods
6
Basic Information
7
Part Names and Functions
8
Front
8
Side/Rear
12
Statuses Indicated by Status Light Color
13
What Is Vpanel
15
Vpanel Display
15
Exiting Vpanel
16
Usable Tools
17
Workpiece
17
Milling Bur
18
Adapter/Adapter ID
19
Basic Operation
20
Power Supply Operations
21
Switching the Power on
21
Switching the Power off
22
Milling
23
Milling
24
Preparing for Milling
25
CAM Settings Necessary for Milling
25
Step 1: Mounting Disc Workpieces on Adapters
26
Step 1: Mounting Pin-Type Workpieces on Adapters
31
Step 2: Attaching the Adapter to the Machine
39
Step 3: Setting the Milling Bur
41
Step 4: Adjusting the Pressure of the Compressed Air
44
Step 5: Setting Milling Burs to Use in Milling
46
Starting Milling
49
Outputting Milling Data and Starting Milling
49
Removing the Adapter Cap from the Machine
52
Aborting and Canceling Milling
53
Aborting Output
53
Removing Milling Data in Standby from the Output List
54
Other Milling
55
Continuous Milling
56
Automatically Switching out the Worn Milling Bur (Intelligent Tool Control)
56
Purchasing Additional Adapters
58
Optimizing Quality and Efficiency
59
Optimizing the Milling Quality
60
Recommended CAD Data Thickness Values
61
Correcting the Milling Position According to the Milling Results for Correction (Manual Correction)
62
Correcting for Errors Caused by Temperature Changes (Temperature Change Correction)
64
Optimizing Operation Management
66
Checking the Workpiece Milling Status
67
Maintenance
68
Getting Started
69
Maintenance Precautions
70
Daily Maintenance
71
Cleaning after Milling Finishes
72
Milling Area Cleaning
72
Cleaning the Tool Area
76
Cleaning the Milling Bur/Adapter
77
Care and Storage of Detection Pin and Automatic Correction Jig
79
Periodic Maintenance
80
When Maintenance Is Required
81
Spindle Run-In (Warm-Up)
82
Disc Changer Run-In
84
Correcting the Milling Position
86
Automatic Correction
86
Retightening the Collet
94
Regulator Maintenance
97
Cleaning the Bowl
97
Replacing Consumable Parts
101
Replacing Parts Used in Milling
102
Replacing Milling Burs
102
Troubleshooting Methods
103
Machine Trouble
104
Initialization Is Not Performed or Initialization Fails
105
Are any Covers Open
105
Is the Milling Bur Caught on Anything
105
Is Anything Caught on the Spindle Unit or Rotary Axis Unit
105
Non-Responsive Built-In Panel Touch Sensor
106
Is the Milling Area Cover or Tool Area Cover Open
106
Are You Wearing Gloves
106
Vpanel Does Not Recognize the Machine
107
Is the Cable Connected
107
Is the Driver Installed Correctly
107
DID You Verify the Connection Procedure When Connecting more than One Machine
107
Was the Machine ID Changed
107
Chine
107
Adapter Ids Cannot be Read
108
Is Part of the Barcode on the Adapter ID Label Missing or Is this Barcode Dirty
108
Has Milling Waste Affixed to the Barcode Sensor
108
No Data Can be Output to the Machine or the Machine Does Not Operate Even Though Data Is Being Output
109
Are any Covers Open
109
Does Vpanel Recognize the Machine
109
If Multiple Machines Are Connected, Is the Correct Machine Selected
109
Is Operation Paused
109
Is Initialization or a Data Cancel in Progress
109
Is the Milling Data Correct
109
Has an Error Occurred
109
The Computer Shuts down When Connecting Multiple Machines
110
Are Machines with the same ID Connected to the Computer at the same Time
110
The Spindle Does Not Rotate
111
Is the Spindle Belt Damaged or Disconnected
111
The Ionizer Is Ineffective
112
Is the Workpiece Being Milled a PMMA Workpiece
112
Is There Milling Waste Around the Ionizer
112
Is the Machine Grounded
112
Compressed Air Does Not Come out
113
Does the Operation Require Compressed Air
113
Is the Regulator Properly Connected and Are the Pressure Settings Correctly Configured
113
Is the Knob at the Bottom of the Regulator Open
113
Automatic Correction Fails
114
Is the Automatic Correction Jig, Detection Pin, ATC Magazine, or Clamp Dirty
114
Is the Automatic Correction Jig Properly Attached
114
Is the Detection Pin Properly Attached
114
Milling Quality Problems
115
The Milled Surface Is Not Attractive
116
Is the Workpiece Secured Loosely
116
Is the Milling Bur Worn
116
Are the Milling Conditions too Strict
116
There Is a Line of Level Difference in the Milling Results
117
Is the Machine out of Correction
117
Are the CAM Milling Conditions Correct
117
Chipping (Edges of Milling Products Become Chipped) Occurs
118
Is the Installation Base of the Machine Secure
118
Is the Workpiece Secured Loosely
118
Is the Milling Bur Worn
118
Are the Milling Conditions too Strict
118
Is the Thickness Specified in the CAD Data Excessively Thin
118
A Hole Opens in the Milling Results
119
Do the Milling Bur Diameter and the Milling Bur Stocker Number Match the CAM Settings
119
Is the Machine out of Correction
119
Are the Milling Conditions too Strict
119
The Dimensions of the Milling Results Do Not Match
120
Does the Milling Bur Diameter Match the CAM Settings
120
Is the CAM Shrinkage Factor Setting Appropriate for the Workpiece
120
Do the Settings of the Sintering Program Match the Workpiece
120
Installation Trouble
121
Driver Installation Is Impossible
122
Installing the Driver in Windows 11 (Procedure A)
122
Installing the Driver in Windows 11 (Procedure B)
123
Installing the Driver in Windows 10 or 8.1 (Procedure A)
124
Installing the Driver in Windows 10 or 8.1 (Procedure B)
125
Uninstalling the Driver
126
Uninstalling the Driver in Windows 11
126
Uninstalling the Driver in Windows 10 or 8.1
127
Uninstalling Vpanel
128
Uninstalling Vpanel in Windows 11
128
Uninstalling Vpanel in Windows 10 or 8.1
129
Message Handling
130
Vpanel Error Messages
131
[1000-****][The % Limit Switch was Not Found.]
131
[1006-02**][The % Axis Position Has Been Shifted.]
131
[The Milling Area Cover or Tool Area Cover was Opened.]
132
[The Milling Area Cover, Tool Area Cover, or Adapter Cover was Opened.]
132
[The Milling Area Cover, Tool Area Cover, or Adapter Area Cover Is Open. Milling Cannot Continue.]
132
[101C-0000][The Milling Bur Sensor was Not Found.]
133
[101D-00**][The % Milling Bur Cannot be Released.]
133
[101D-01**] [The % Milling Bur Cannot be Released. It Might be Broken from the Root.]
134
[101E-****][The % Milling Bur Might be Broken.]
134
[101F-****][The % Milling Bur Chucking Has Slipped Out.]
135
[1020-****][The % Milling Bur Is too Long.]
136
[1021-****][The % Milling Bur Is too Short.]
136
[1022-****][The % Milling Bur was Not Found.]
136
To [1028-0000] [Milling Data Error. ]
137
[The Spindle Experienced an Overload.]
138
[102A-0000][The Spindle Experienced an Overload.]
138
[102B-0000][The Spindle Motor Temperature Is too High.]
138
[102D-0000][The Spindle Can Not be Turned.]
139
[102E-0000][A Moving Part Has Collided with Other Components. ]
139
[102E-0001][The Changer Has Collided with the Adapter.]
139
[The Dust Collector Is Not Working.]
139
[The Dust Collector Filter Needs to be Replaced.]
140
[Milling Data Error. no Milling Bur Is Selected.]
140
[103B-0000][The Automatic Correction Is Not yet Finished.]
140
[103D-0000][Milling Data Error. the Milling Bur Cannot Reach the Milling Position.]
141
[1049-****][The Adapter with ID Number % Cannot be Released.]
141
[103D-0000][Milling Data Error. the Milling Bur Cannot Reach the Milling Posi
141
Position.]
141
[104A-****][The Adapter with ID Number % Could Not be Grasped.]
142
[104B-****][The Adapter with ID Number {0} was Not Found.]
142
[104C-****][All Stockers Are Full, so the Adapter Could Not be Returned.]
142
[104D-****][An Adapter with the same ID was Found.]
143
[104E-****][The L Limit Switch was Not Found.]
143
[104F-02**][The L Axis Position Has Been Shifted.]
143
[1050-****][The Operation to Read a Barcode Failed.]
144
[105F-****][The Pressure of the Compressed Air for Blowing Away the Milling Waste Is out of Range.]
144
[105F-****][The Pressure of the Compressed Air for Blowing Away the Mill- Ing Waste Is out of Range.]
144
[****-****][An Unknown Error Occurred.]
145
Other Error Messages
146
[A Machine that Has the same ID Has Been Connected.]
146
[The Adapter to Use During Milling Has Not Been Set.]
146
Advertisement
DGSHAPE DWX-53DC Installer's Manual (70 pages)
Brand:
DGSHAPE
| Category:
Dental equipment
| Size: 2 MB
Table of Contents
Table of Contents
2
Introduction
4
About the Machine
5
Unique Features
5
Pre-Installation Check
6
Installation and Installation
6
Installation Location
7
Temperature and Humidity
8
Installation Space
9
What's in the Box
11
Installation
13
Preparation to Use the Machine
14
Check before Operation
14
Install the Aircraft
17
Remove the Fasteners
17
Connect the Power Cord
21
Turn on the Power
23
Retighten the Screws of the Air Nozzle
24
Attach the Dust Collector
26
Install the Regulator
27
Connect to a Computer
31
System Requirements
31
Software to be Installed
32
Install Software
33
Connect to a Computer
34
Show Vpanel
41
Exiting Vpanel
42
Connect Multiple Units
43
Registering Another Aircraft
43
Switching the Aircraft Operated by Vpanel
46
Changing the Name and Images of the Aircraft Displayed on Vpanel
47
Before Starting Work
49
Selecting the Aircraft to Use with Vpanel for DWX
49
Running in the Disc Changer
50
Perform Spindle Habituation Operations
52
Correcting the Cutting Position Automatically
54
Turn off
60
Appendix
61
Specifications
62
Expansion Terminal
62
Coordinate
63
Dimensions
64
List of Specifications
68
System-Requirements for USB Connectivity
69
Advertisement
Related Products
DGSHAPE DWX-52D
DGSHAPE DWX-42W
DGSHAPE DWX-52DCi
DGSHAPE DWX-4
DGSHAPE DWX-52DC
DGSHAPE DWP-80S
DGSHAPE DE-3
DGSHAPE Categories
Printer
Dental equipment
Power Tool
Medical Equipment
Engraver
More DGSHAPE Manuals
Login
Sign In
OR
Sign in with Facebook
Sign in with Google
Upload manual
Upload from disk
Upload from URL