Sign In
Upload
Manuals
Brands
Daikin Manuals
Industrial Equipment
LREN8A7Y1B
Daikin LREN8A7Y1B Manuals
Manuals and User Guides for Daikin LREN8A7Y1B. We have
2
Daikin LREN8A7Y1B manuals available for free PDF download: Installer And User Manual, Installation And Operation Manual
Daikin LREN8A7Y1B Installer And User Manual (156 pages)
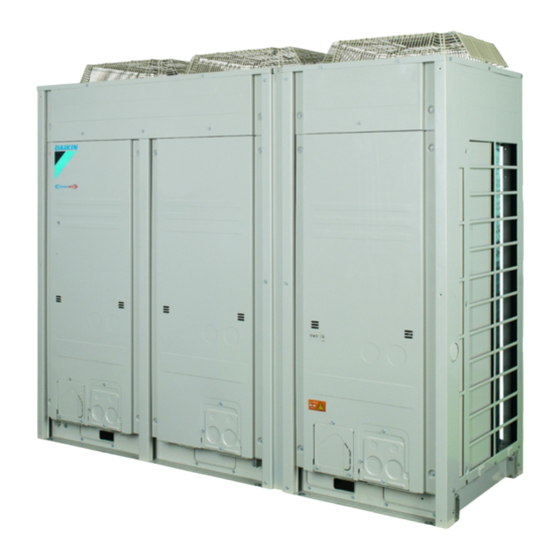
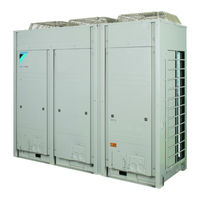
CO2 ZEAS outdoor unit and capacity up unit
Brand:
Daikin
| Category:
Chiller
| Size: 14.25 MB
Table of Contents
Table of Contents
2
About the Documentation
5
About this Document
5
General Safety Precautions
6
About the Documentation
6
Meaning of Warnings and Symbols
6
For the Installer
7
General
7
Installation Site
8
Refrigerant - in Case of R744
10
Electrical
11
Specific Installer Safety Instructions
13
For the User
22
User Safety Instructions
23
General
23
Instructions for Safe Operation
24
About the System
29
System Layout
30
Operation
31
Operation Modes
31
Operation Range
31
Field Piping Pressure
31
Energy Saving and Optimum Operation
32
Maintenance and Service
33
Maintenance before a Long Stop Period
33
Maintenance after a Long Stop Period
33
About the Refrigerant
34
Recommended Maintenance and Inspection
34
Troubleshooting
35
Error Codes: Overview
36
Relocation
38
Disposal
39
For the Installer
40
About the Box
41
Outdoor Unit
41
To Transport the Pallet
41
To Unpack the Outdoor Unit
42
To Handle the Outdoor Unit
42
To Remove the Accessories from the Outdoor Unit
43
About the Units and Options
45
Identification
45
Identification Label: Outdoor Unit
45
About the Outdoor Unit
46
Labels on Outdoor Unit
47
System Layout
53
Combining Units and Options
53
Possible Options for the Outdoor Unit
53
Indoor Unit Constraints
54
Constraints for Refrigeration
54
Unit Installation
56
Preparing the Installation Site
56
Installation Site Requirements of the Outdoor Unit
57
Additional Installation Site Requirements of the Outdoor Unit in Cold Climates
60
Additional Installation Site Requirements for CO₂ Refrigerant
60
Opening and Closing the Unit
65
About Opening the Units
65
To Open the Outdoor Unit
65
To Open the Electrical Component Box of the Outdoor Unit
66
To Close the Outdoor Unit
67
Mounting the Outdoor Unit
68
About Mounting the Outdoor Unit
68
Precautions When Mounting the Outdoor Unit
68
To Provide the Installation Structure
68
To Install the Outdoor Unit
70
To Remove the Transportation Stay
70
To Provide Drainage
71
Piping Installation
72
Preparing Refrigerant Piping
72
Refrigerant Piping Requirements
72
Refrigerant Piping Material
73
Refrigerant Piping Length and Height Difference
73
To Select the Piping Size
75
To Select Refrigerant Branch Kits
77
To Select Expansion Valves for Refrigeration
77
Using Stop Valves and Service Ports
78
Overview Stop Valves and Service Ports for Connection and Charging
79
Overview Stop Valves for Maintenance
79
To Handle the Stop Valve
80
Tightening Torques
81
To Handle the Service Port
81
Connecting the Refrigerant Piping
83
About Connecting the Refrigerant Piping
83
Precautions When Connecting the Refrigerant Piping
84
To Cut off the Spun Pipe Ends
85
To Connect the Refrigerant Piping to the Outdoor Unit
86
To Braze the Pipe End
89
Guidelines to Connect T-Joints
91
Guidelines to Install a Dryer
92
Guidelines to Install a Filter
92
About Safety Valves
93
Guidelines to Install Blow-Off Piping
96
Checking the Refrigerant Piping
96
About Checking the Refrigerant Piping
97
Checking Refrigerant Piping: General Guidelines
97
Checking Refrigerant Piping: Setup
97
To Perform a Strength Pressure Test and Leak Test
98
To Perform Vacuum Drying
98
Insulating the Refrigerant Piping
99
To Insulate the Gas Stop Valve
99
Electrical Installation
101
About Connecting the Electrical Wiring
101
Precautions When Connecting the Electrical Wiring
101
Guidelines When Connecting the Electrical Wiring
102
About Electrical Compliance
104
Field Wiring: Overview
105
Guidelines When Knocking out Knockout Holes
106
Specifications of Standard Wiring Components
107
Connections to the Outdoor Unit
108
Low Voltage Wiring - Outdoor Unit
108
High Voltage Wiring - Outdoor Unit
110
Connections to the Capacity up Unit
112
Low Voltage Wiring - Capacity up Unit
112
High Voltage Wiring - Capacity up Unit
114
Charging Refrigerant
116
About Charging Refrigerant
116
Precautions When Charging Refrigerant
116
About the Refrigerant
117
To Determine the Refrigerant Amount
119
To Charge Refrigerant
120
To Fix the Refrigerant Charge Label
121
Finishing the Outdoor Unit Installation
122
To Check the Insulation Resistance of the Compressor
122
Configuration
123
Making Field Settings
123
About Making Field Settings
123
To Access the Field Setting Components
123
Field Setting Components
124
To Access Mode 1 or 2
126
To Set Field Settings
127
Commissioning
128
Overview: Commissioning
128
Precautions When Commissioning
128
Checklist before Commissioning
129
About the Test Run
130
To Perform a Test Run (7-Segment Display)
130
Test Run Checks
131
Correcting after Abnormal Completion of the Test Run
133
Operating the Unit
133
Logbook
133
Hand-Over to the User
135
Maintenance and Service
136
Precautions for Maintenance and Service
136
To Prevent Electrical Hazards
136
To Release Refrigerant
137
To Remove Refrigerant Using the Service Ports
137
Troubleshooting
139
Precautions When Troubleshooting
139
Prerequisites: Troubleshooting
139
Solving Problems Based on Error Codes
139
Error Codes: Overview
140
Disposal
144
Technical Data
145
Service Space: Outdoor Unit
145
Piping Diagram: Outdoor Unit
148
Piping Diagram: Capacity up Unit
149
Wiring Diagram: Outdoor Unit
150
Glossary
155
Advertisement
Daikin LREN8A7Y1B Installation And Operation Manual (52 pages)
CO₂ ZEAS outdoor unit and capacity up unit
Brand:
Daikin
| Category:
Industrial Equipment
| Size: 9.98 MB
Table of Contents
Table of Contents
3
About the Documentation
4
About this Document
4
Specific Installer Safety Instructions
4
For the User
7
User Safety Instructions
7
General
7
Instructions for Safe Operation
8
About the System
10
System Layout
10
Operation
10
Operation Modes
10
Operation Range
10
Field Piping Pressure
10
Maintenance and Service
10
About the Refrigerant
10
Recommended Maintenance and Inspection
11
Troubleshooting
11
Error Codes: Overview
12
Relocation
12
Disposal
12
For the Installer
12
About the Box
12
Outdoor Unit
12
To Transport the Pallet
12
To Unpack the Outdoor Unit
12
To Handle the Outdoor Unit
13
To Remove the Accessories from the Outdoor Unit
13
11 About the Units and Options
14
About the Outdoor Unit
14
Labels on Outdoor Unit
14
System Layout
15
Indoor Unit Constraints
16
12 Unit Installation
16
Preparing the Installation Site
16
Installation Site Requirements of the Outdoor Unit
16
Additional Installation Site Requirements of the Outdoor Unit in Cold Climates
17
Additional Installation Site Requirements for CO₂ Refrigerant
17
Opening and Closing the Unit
18
To Open the Outdoor Unit
18
To Open the Electrical Component Box of the Outdoor Unit
18
To Close the Outdoor Unit
18
Mounting the Outdoor Unit
19
To Provide the Installation Structure
19
To Install the Outdoor Unit
20
To Remove the Transportation Stay
20
To Provide Drainage
20
13 Piping Installation
20
Preparing Refrigerant Piping
20
Refrigerant Piping Requirements
20
Refrigerant Piping Material
21
Refrigerant Piping Length and Height Difference
21
To Select the Piping Size
22
To Select Refrigerant Branch Kits
22
To Select Expansion Valves for Refrigeration
22
Using Stop Valves and Service Ports
23
To Handle the Stop Valve
23
Tightening Torques
23
To Handle the Service Port
23
Connecting the Refrigerant Piping
24
To Cut off the Spun Pipe Ends
24
To Connect the Refrigerant Piping to the Outdoor Unit
25
Guidelines to Connect T-Joints
26
Guidelines to Install a Dryer
26
Guidelines to Install a Filter
27
About Safety Valves
27
To Install Safety Valves
27
About Changeover Valves
28
Safety Valve Reference Information
28
Checking the Refrigerant Piping
28
Checking Refrigerant Piping: Setup
29
To Perform a Strength Pressure Test and Leak Test
29
To Perform Vacuum Drying
29
Insulating the Refrigerant Piping
29
To Insulate the Gas Stop Valve
30
14 Electrical Installation
30
About Electrical Compliance
30
Field Wiring: Overview
31
Guidelines When Knocking out Knockout Holes
32
Guidelines When Connecting the Electrical Wiring
32
Specifications of Standard Wiring Components
32
Connections to the Outdoor Unit
33
Low Voltage Wiring - Outdoor Unit
33
High Voltage Wiring - Outdoor Unit
34
Connections to the Capacity up Unit
35
Low Voltage Wiring - Capacity up Unit
35
High Voltage Wiring - Capacity up Unit
36
15 Charging Refrigerant
37
Precautions When Charging Refrigerant
37
To Determine the Refrigerant Amount
37
To Charge Refrigerant
38
To Fix the Refrigerant Charge Label
38
16 Configuration
38
Making Field Settings
38
About Making Field Settings
38
To Access the Field Setting Components
38
Field Setting Components
39
To Access Mode 1 or 2
39
To Set Field Settings
40
17 Commissioning
40
Precautions When Commissioning
40
Checklist before Commissioning
40
About the Test Run
41
To Perform a Test Run (7-Segment Display)
41
Test Run Checks
42
Correcting after Abnormal Completion of the Test Run
42
Logbook
42
Troubleshooting
43
Solving Problems Based on Error Codes
43
Error Codes: Overview
43
19 Technical Data
46
Piping Diagram: Outdoor Unit
46
Piping Diagram: Capacity up Unit
47
Wiring Diagram: Outdoor Unit
48
Advertisement
Related Products
Daikin LREN10A7Y1B
Daikin LREN12A7Y1B
Daikin LREQ6B7Y1
Daikin LREQ8B7Y1
Daikin LREQ15
Daikin LREQ20
Daikin LREQ-BY1R
Daikin LREQ-BY1
Daikin LREQ15B7Y1
Daikin BEV2N112A7V1B
Daikin Categories
Air Conditioner
Heat Pump
Remote Control
Chiller
Fan
More Daikin Manuals
Login
Sign In
OR
Sign in with Facebook
Sign in with Google
Upload manual
Upload from disk
Upload from URL