Sign In
Upload
Manuals
Brands
Daikin Manuals
Heat Pump
EHVX04S18E 3V Series
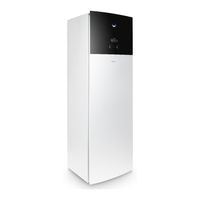
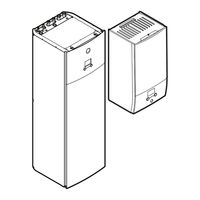
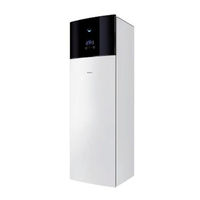
Daikin EHVX04S18E 3V Series Manuals
Manuals and User Guides for Daikin EHVX04S18E 3V Series. We have
4
Daikin EHVX04S18E 3V Series manuals available for free PDF download: Installer's Reference Manual, User Reference Manual, Installation Manual
Daikin EHVX04S18E 3V Series Installer's Reference Manual (288 pages)
Brand:
Daikin
| Category:
Heat Pump
| Size: 16 MB
Table of Contents
Table of Contents
2
1 About this Document
6
Meaning of Warnings and Symbols
7
Installer Reference Guide at a Glance
8
2 General Safety Precautions
10
For the Installer
10
General
10
Installation Site
11
Refrigerant - in Case of R410A or R32
11
Water
13
Electrical
13
3 Specific Installer Safety Instructions
16
4 About the Box
22
Overview: about the Box
22
Outdoor Unit
22
To Unpack the Outdoor Unit
22
To Handle the Outdoor Unit
23
To Remove the Accessories from the Outdoor Unit
23
Indoor Unit
24
To Unpack the Indoor Unit
24
To Remove the Accessories from the Indoor Unit
25
To Handle the Indoor Unit
25
5 About the Units and Options
26
Identification
26
Identification Label: Outdoor Unit
26
Identification Label: Indoor Unit
26
Combining Units and Options
27
Possible Options for the Outdoor Unit
27
Possible Options for the Indoor Unit
28
Possible Combinations of Indoor Unit and Outdoor Unit
30
6 Application Guidelines
31
Overview: Application Guidelines
31
Setting up the Space Heating/Cooling System
32
Single Room
33
Multiple Rooms - One LWT Zone
37
Multiple Rooms - Two LWT Zones
41
Setting up an Auxiliary Heat Source for Space Heating
46
Setting up the Domestic Hot Water Tank
48
System Layout - Integrated DHW Tank
48
Selecting the Volume and Desired Temperature for the DHW Tank
48
Setup and Configuration - DHW Tank
50
DHW Pump for Instant Hot Water
50
DHW Pump for Disinfection
51
Setting up the Energy Metering
51
Produced Heat
52
Consumed Energy
52
Normal Kwh Rate Power Supply
53
Preferential Kwh Rate Power Supply
54
Setting up the Power Consumption Control
55
Permanent Power Limitation
56
Power Limitation Activated by Digital Inputs
56
Power Limitation Process
57
BBR16 Power Limitation
58
Setting up an External Temperature Sensor
59
7 Unit Installation
60
Preparing the Installation Site
60
Installation Site Requirements of the Outdoor Unit
60
Additional Installation Site Requirements of the Outdoor Unit in Cold Climates
63
Installation Site Requirements of the Indoor Unit
64
Special Requirements for R32 Units
65
Installation Patterns
65
Opening and Closing the Units
69
About Opening the Units
69
To Open the Outdoor Unit
69
To Close the Outdoor Unit
70
To Open the Indoor Unit
70
To Lower the Switch Box on the Indoor Unit
72
To Close the Indoor Unit
73
Mounting the Outdoor Unit
73
About Mounting the Outdoor Unit
73
Precautions When Mounting the Outdoor Unit
73
To Provide the Installation Structure
73
To Install the Outdoor Unit
76
To Provide Drainage
77
To Prevent the Outdoor Unit from Falling over
79
Mounting the Indoor Unit
80
About Mounting the Indoor Unit
80
Precautions When Mounting the Indoor Unit
80
To Install the Indoor Unit
80
To Connect the Drain Hose to the Drain
81
8 Piping Installation
82
Preparing Refrigerant Piping
82
Refrigerant Piping Requirements
82
Refrigerant Piping Insulation
83
Connecting the Refrigerant Piping
83
About Connecting the Refrigerant Piping
83
Precautions When Connecting the Refrigerant Piping
84
Guidelines When Connecting the Refrigerant Piping
85
Pipe Bending Guidelines
85
To Flare the Pipe End
85
To Braze the Pipe End
86
Using the Stop Valve and Service Port
87
To Connect the Refrigerant Piping to the Outdoor Unit
88
To Connect the Refrigerant Piping to the Indoor Unit
89
Checking the Refrigerant Piping
89
About Checking the Refrigerant Piping
89
Precautions When Checking the Refrigerant Piping
90
To Check for Leaks
90
To Perform Vacuum Drying
91
To Insulate the Refrigerant Piping
92
Charging Refrigerant
92
About Charging Refrigerant
92
Precautions When Charging Refrigerant
93
To Determine the Additional Refrigerant Amount
93
To Determine the Complete Recharge Amount
94
To Charge Additional Refrigerant
94
To Fix the Fluorinated Greenhouse Gases Label
94
Preparing Water Piping
95
Water Circuit Requirements
95
Formula to Calculate the Expansion Vessel Pre-Pressure
98
To Check the Water Volume and Flow Rate
98
Changing the Pre-Pressure of the Expansion Vessel
100
To Check the Water Volume: Examples
101
Connecting Water Piping
101
About Connecting the Water Piping
101
Precautions When Connecting the Water Piping
102
To Connect the Water Piping
102
To Connect the Recirculation Piping
103
To Fill the Water Circuit
104
To Fill the Domestic Hot Water Tank
104
To Insulate the Water Piping
104
9 Electrical Installation
105
About Connecting the Electrical Wiring
105
Precautions When Connecting the Electrical Wiring
106
Guidelines When Connecting the Electrical Wiring
106
Specifications of Standard Wiring Components
108
About Electrical Compliance
108
About Preferential Kwh Rate Power Supply
108
Overview of Electrical Connections Except External Actuators
109
Connections to the Outdoor Unit
109
To Connect the Electrical Wiring to the Outdoor Unit
109
Connections to the Indoor Unit
111
To Connect the Main Power Supply
114
To Connect the Backup Heater Power Supply
116
To Connect the Shut-Off Valve
119
To Connect the Electricity Meters
120
To Connect the Domestic Hot Water Pump
121
To Connect the Alarm Output
122
To Connect the Space Cooling/Heating ON/OFF Output
123
To Connect the Changeover to External Heat Source
124
To Connect the Power Consumption Digital Inputs
125
To Connect the Safety Thermostat (Normally Closed Contact)
126
To Connect a Smart Grid
127
To Connect the WLAN Cartridge (Delivered as Accessory)
131
After Connecting the Electrical Wiring to the Indoor Unit
131
10 Configuration
133
Overview: Configuration
133
To Access the most Used Commands
134
To Connect the PC Cable to the Switch Box
136
Configuration Wizard
137
Possible Screens
138
Possible Screens: Overview
138
Home Screen
139
Main Menu Screen
141
Menu Screen
142
Setpoint Screen
142
Detailed Screen with Values
143
Preset Values and Schedules
144
Using Preset Values
144
Using and Programming Schedules
144
Schedule Screen: Example
147
Setting the Energy Prices
151
Weather-Dependent Curve
153
What Is a Weather-Dependent Curve
153
2-Points Curve
154
Slope-Offset Curve
155
Using Weather-Dependent Curves
156
Settings Menu
158
Malfunctioning
158
Room
159
Main Zone
163
Additional Zone
174
Space Heating/Cooling
178
Tank
187
User Settings
195
Information
199
Installer Settings
200
Commissioning
222
User Profile
222
Operation
223
Wlan
223
Menu Structure: Overview User Settings
226
Menu Structure: Overview Installer Settings
227
11 Commissioning
229
Overview: Commissioning
229
Precautions When Commissioning
230
Checklist before Commissioning
230
Checklist During Commissioning
231
Minimum Flow Rate
231
Air Purge Function
232
Operation Test Run
233
Actuator Test Run
234
Underfloor Heating Screed Dryout
235
12 Hand-Over to the User
239
13 Maintenance and Service
240
Maintenance Safety Precautions
240
Yearly Maintenance
241
Yearly Maintenance Outdoor Unit: Overview
241
Yearly Maintenance Outdoor Unit: Instructions
241
Yearly Maintenance Indoor Unit: Overview
241
Yearly Maintenance Indoor Unit: Instructions
241
To Drain the Domestic Hot Water Tank
243
About Cleaning the Water Filter in Case of Trouble
244
To Remove the Water Filter
244
To Clean the Water Filter in Case of Trouble
245
To Install the Water Filter
246
14 Troubleshooting
247
Overview: Troubleshooting
247
Precautions When Troubleshooting
247
Solving Problems Based on Symptoms
248
Symptom: the Unit Is NOT Heating or Cooling as Expected
248
Symptom: Hot Water Does NOT Reach the Desired Temperature
248
Symptom: the Compressor Does NOT Start (Space Heating or Domestic Water Heating)
249
Symptom: the System Is Making Gurgling Noises after Commissioning
249
Symptom: the Pump Is Making Noise (Cavitation)
250
Symptom: the Pressure Relief Valve Opens
250
Symptom: the Water Pressure Relief Valve Leaks
251
Symptom: the Space Is NOT Sufficiently Heated at Low Outdoor Temperatures
251
Symptom: the Pressure at the Tapping Point Is Temporarily Unusually High
252
Symptom: Decoration Panels Are Pushed Away Due to a Swollen Tank
252
Symptom: Tank Disinfection Function Is NOT Completed Correctly (AH-Error)
252
Solving Problems Based on Error Codes
253
To Display the Help Text in Case of a Malfunction
253
Error Codes: Overview
254
15 Disposal
258
Overview: Disposal
258
To Pump down
258
16 Technical Data
260
Piping Diagram: Outdoor Unit
261
Piping Diagram: Indoor Unit
262
Wiring Diagram: Outdoor Unit
263
Wiring Diagram: Indoor Unit
265
ESP Curve: Indoor Unit
274
17 Glossary
275
18 Field Settings Table
276
Advertisement
Daikin EHVX04S18E 3V Series Installer's Reference Manual (288 pages)
Brand:
Daikin
| Category:
Heat Pump
| Size: 15 MB
Table of Contents
Table of Contents
2
About this Document
6
Meaning of Warnings and Symbols
7
Installer Reference Guide at a Glance
8
General Safety Precautions
10
For the Installer
10
General
10
Installation Site
11
Refrigerant - in Case of R410A or R32
11
Water
13
Electrical
13
Specific Installer Safety Instructions
16
About the Box
22
Outdoor Unit
22
To Unpack the Outdoor Unit
22
To Handle the Outdoor Unit
22
To Remove the Accessories from the Outdoor Unit
23
Indoor Unit
24
To Unpack the Indoor Unit
24
To Remove the Accessories from the Indoor Unit
24
To Handle the Indoor Unit
24
About the Units and Options
26
Identification
26
Identification Label: Outdoor Unit
26
Identification Label: Indoor Unit
26
Combining Units and Options
27
Possible Combinations of Indoor Unit and Outdoor Unit
27
Possible Options for the Outdoor Unit
27
Possible Options for the Indoor Unit
28
Application Guidelines
31
Overview: Application Guidelines
31
Setting up the Space Heating/Cooling System
32
Single Room
33
Multiple Rooms - One LWT Zone
37
Multiple Rooms - Two LWT Zones
41
Setting up an Auxiliary Heat Source for Space Heating
44
Setting up the Domestic Hot Water Tank
47
System Layout - Integrated DHW Tank
47
Selecting the Volume and Desired Temperature for the DHW Tank
47
Setup and Configuration - DHW Tank
49
DHW Pump for Instant Hot Water
49
DHW Pump for Disinfection
50
Setting up the Energy Metering
50
Produced Heat
51
Consumed Energy
51
Normal Kwh Rate Power Supply
51
Preferential Kwh Rate Power Supply
53
Setting up the Power Consumption Control
54
Permanent Power Limitation
54
Power Limitation Activated by Digital Inputs
55
Power Limitation Process
56
BBR16 Power Limitation
57
Setting up an External Temperature Sensor
57
Unit Installation
59
Preparing the Installation Site
59
Installation Site Requirements of the Outdoor Unit
59
Additional Installation Site Requirements of the Outdoor Unit in Cold Climates
62
Installation Site Requirements of the Indoor Unit
63
Special Requirements for R32 Units
64
Installation Patterns
65
Opening and Closing the Units
68
About Opening the Units
68
To Open the Outdoor Unit
68
To Close the Outdoor Unit
69
To Open the Indoor Unit
69
To Lower the Switch Box
71
To Close the Indoor Unit
72
Mounting the Outdoor Unit
72
About Mounting the Outdoor Unit
72
Precautions When Mounting the Outdoor Unit
72
To Provide the Installation Structure
72
To Install the Outdoor Unit
75
To Provide Drainage
76
To Prevent the Outdoor Unit from Falling over
78
Mounting the Indoor Unit
79
About Mounting the Indoor Unit
79
Precautions When Mounting the Indoor Unit
79
To Install the Indoor Unit
79
To Connect the Drain Hose to the Drain
80
Piping Installation
81
Preparing Refrigerant Piping
81
Refrigerant Piping Requirements
81
Refrigerant Piping Insulation
82
Connecting the Refrigerant Piping
82
About Connecting the Refrigerant Piping
82
Precautions When Connecting the Refrigerant Piping
83
Guidelines When Connecting the Refrigerant Piping
84
Pipe Bending Guidelines
84
To Flare the Pipe End
84
To Braze the Pipe End
85
Using the Stop Valve and Service Port
86
To Connect the Refrigerant Piping to the Outdoor Unit
87
To Connect the Refrigerant Piping to the Indoor Unit
88
Checking the Refrigerant Piping
88
About Checking the Refrigerant Piping
88
Precautions When Checking the Refrigerant Piping
89
To Check for Leaks
89
To Perform Vacuum Drying
90
To Insulate the Refrigerant Piping
91
Charging Refrigerant
91
About Charging Refrigerant
91
Precautions When Charging Refrigerant
92
To Determine the Additional Refrigerant Amount
93
To Determine the Complete Recharge Amount
93
To Charge Additional Refrigerant
93
To Fix the Fluorinated Greenhouse Gases Label
93
Preparing Water Piping
94
Water Circuit Requirements
94
Formula to Calculate the Expansion Vessel Pre-Pressure
97
To Check the Water Volume and Flow Rate
97
Changing the Pre-Pressure of the Expansion Vessel
99
To Check the Water Volume: Examples
100
Connecting Water Piping
100
About Connecting the Water Piping
100
Precautions When Connecting the Water Piping
101
To Connect the Water Piping
101
To Connect the Recirculation Piping
103
To Fill the Water Circuit
103
To Fill the Domestic Hot Water Tank
103
To Insulate the Water Piping
104
Electrical Installation
105
About Connecting the Electrical Wiring
105
Precautions When Connecting the Electrical Wiring
106
Guidelines When Connecting the Electrical Wiring
106
About Electrical Compliance
108
About Preferential Kwh Rate Power Supply
108
Overview of Electrical Connections Except External Actuators
109
Connections to the Outdoor Unit
109
Specifications of Standard Wiring Components
110
Erga04~08E + Ehvh/X04+08S18+23E
110
To Connect the Electrical Wiring to the Outdoor Unit
110
Connections to the Indoor Unit
112
To Connect the Main Power Supply
115
To Connect the Backup Heater Power Supply
117
To Connect the Shut-Off Valve
120
To Connect the Electricity Meters
121
To Connect the Domestic Hot Water Pump
122
To Connect the Alarm Output
123
To Connect the Space Cooling/Heating ON/OFF Output
124
To Connect the Changeover to External Heat Source
125
To Connect the Power Consumption Digital Inputs
126
To Connect the Safety Thermostat (Normally Closed Contact)
127
To Connect a Smart Grid
128
To Connect the WLAN Cartridge (Delivered as Accessory)
132
After Connecting the Electrical Wiring to the Indoor Unit
132
Configuration
134
Overview: Configuration
134
To Access the most Used Commands
135
To Connect the PC Cable to the Switch Box
137
Configuration Wizard
138
Possible Screens
139
Possible Screens: Overview
139
Home Screen
140
Main Menu Screen
142
Menu Screen
143
Setpoint Screen
143
Detailed Screen with Values
144
Preset Values and Schedules
145
Using Preset Values
145
Using and Programming Schedules
145
Schedule Screen: Example
148
Setting the Energy Prices
152
Weather-Dependent Curve
154
What Is a Weather-Dependent Curve
154
2-Points Curve
155
Slope-Offset Curve
156
Using Weather-Dependent Curves
157
Settings Menu
159
Malfunctioning
159
Room
160
Main Zone
164
Additional Zone
175
Space Heating/Cooling
179
Tank
188
User Settings
196
Information
201
Installer Settings
202
Commissioning
222
User Profile
223
Operation
223
Wlan
223
Menu Structure: Overview User Settings
226
Menu Structure: Overview Installer Settings
227
Commissioning
228
Overview: Commissioning
228
Precautions When Commissioning
229
Checklist before Commissioning
229
Checklist During Commissioning
230
Minimum Flow Rate
230
Air Purge Function
231
Operation Test Run
232
Actuator Test Run
233
Underfloor Heating Screed Dryout
234
Hand-Over to the User
238
Maintenance and Service
239
Maintenance Safety Precautions
239
Yearly Maintenance
240
Yearly Maintenance Outdoor Unit: Overview
240
Yearly Maintenance Outdoor Unit: Instructions
240
Yearly Maintenance Indoor Unit: Overview
240
Yearly Maintenance Indoor Unit: Instructions
240
To Drain the Domestic Hot Water Tank
242
About Cleaning the Water Filter in Case of Trouble
243
To Remove the Water Filter
243
To Clean the Water Filter in Case of Trouble
244
To Install the Water Filter
245
Troubleshooting
246
Overview: Troubleshooting
246
Precautions When Troubleshooting
246
Solving Problems Based on Symptoms
247
Symptom: the Unit Is NOT Heating or Cooling as Expected
247
Symptom: Hot Water Does NOT Reach the Desired Temperature
248
Symptom: the Compressor Does NOT Start (Space Heating or Domestic Water Heating)
248
Symptom: the System Is Making Gurgling Noises after Commissioning
248
Symptom: the Pump Is Making Noise (Cavitation)
249
Symptom: the Pressure Relief Valve Opens
250
Symptom: the Water Pressure Relief Valve Leaks
250
Symptom: the Space Is NOT Sufficiently Heated at Low Outdoor Temperatures
251
Symptom: the Pressure at the Tapping Point Is Temporarily Unusually High
252
Symptom: Decoration Panels Are Pushed Away Due to a Swollen Tank
252
Symptom: Tank Disinfection Function Is NOT Completed Correctly (AH-Error)
252
Solving Problems Based on Error Codes
252
To Display the Help Text in Case of a Malfunction
253
Error Codes: Overview
253
Disposal
257
Overview: Disposal
257
To Pump down
257
Technical Data
259
Piping Diagram: Outdoor Unit
260
Piping Diagram: Indoor Unit
261
Wiring Diagram: Outdoor Unit
262
Wiring Diagram: Indoor Unit
264
ESP Curve: Indoor Unit
273
Glossary
274
Field Settings Table
275
Daikin EHVX04S18E 3V Series User Reference Manual (68 pages)
Brand:
Daikin
| Category:
Heat Pump
| Size: 2 MB
Table of Contents
Table of Contents
2
About this Document
4
Meaning of Warnings and Symbols
5
User Safety Instructions
7
General
7
Instructions for Safe Operation
8
About the System
10
Components in a Typical System Layout
10
Quick Guide
11
User Permission Level
11
Space Heating/Cooling
11
Domestic Hot Water
15
Operation
16
User Interface: Overview
16
Back Button
17
Help Button
17
Menu Structure: Overview User Settings
18
Possible Screens: Overview
19
Home Screen
19
Main Menu Screen
22
Setpoint Screen
23
Detailed Screen with Values
24
Turning Operation on or off
24
Visual Indication
24
To Turn on or off
25
Reading out Information
25
Space Heating/Cooling Control
26
About Space Heating/Cooling Control
26
Setting the Space Operation Mode
26
Determining Which Temperature Control You Are Using
28
To Change the Desired Room Temperature
28
To Change the Desired Leaving Water Temperature
29
Domestic Hot Water Control
30
About Domestic Hot Water Control
30
Reheat Mode
31
Scheduled Mode
32
Scheduled + Reheat Mode
32
To Change the Domestic Hot Water Temperature
33
Using DHW Powerful Operation
33
Preset Values and Schedules
34
Using Preset Values
34
Using and Programming Schedules
35
Schedule Screen: Example
38
Setting the Energy Prices
42
Weather-Dependent Curve
44
What Is a Weather-Dependent Curve
44
2-Points Curve
45
Slope-Offset Curve
46
Using Weather-Dependent Curves
47
Other Functionalities
49
To Configure Time and Date
49
Using Quiet Mode
50
Using Holiday Mode
50
Using WLAN
51
Energy Saving Tips
54
Maintenance and Service
55
Overview: Maintenance and Service
55
Troubleshooting
57
To Display the Help Text in Case of a Malfunction
57
To Check the Malfunction History
57
Symptom: You Are Feeling too Cold (Hot) in Your Living Room
58
Symptom: the Water at the Tap Is too Cold
58
Symptom: Heat Pump Failure
59
Symptom: the System Is Making Gurgling Noises after Commissioning
59
Relocation
61
Overview: Relocation
61
Disposal
62
Glossary
63
Installer Settings: Tables to be Filled in by Installer
64
Configuration Wizard
64
Settings Menu
65
Advertisement
Daikin EHVX04S18E 3V Series Installation Manual (44 pages)
Brand:
Daikin
| Category:
Heat Pump
| Size: 8 MB
Table of Contents
1 About this Document
3
Table of Contents
3
2 Specific Installer Safety Instructions
4
3 About the Box
5
Indoor Unit
5
To Remove the Accessories from the Indoor Unit
5
To Handle the Indoor Unit
5
4 Unit Installation
5
Preparing the Installation Site
5
Installation Site Requirements of the Indoor Unit
6
Special Requirements for R32 Units
6
Installation Patterns
7
Opening and Closing the Unit
9
To Open the Indoor Unit
9
To Lower the Switch Box on the Indoor Unit
10
To Close the Indoor Unit
10
Mounting the Indoor Unit
11
To Install the Indoor Unit
11
To Connect the Drain Hose to the Drain
11
5 Piping Installation
11
Preparing Refrigerant Piping
11
Refrigerant Piping Requirements
11
Refrigerant Piping Insulation
12
Connecting Refrigerant Piping
12
To Connect the Refrigerant Piping to the Indoor Unit
12
Preparing Water Piping
12
To Check the Water Volume and Flow Rate
13
Connecting Water Piping
13
To Connect the Water Piping
13
To Connect the Recirculation Piping
13
To Fill the Water Circuit
13
To Fill the Domestic Hot Water Tank
14
To Insulate the Water Piping
14
6 Electrical Installation
14
About Electrical Compliance
14
Guidelines When Connecting the Electrical Wiring
14
Connections to the Indoor Unit
14
To Connect the Main Power Supply
15
To Connect the Backup Heater Power Supply
16
To Connect the Shut-Off Valve
18
To Connect the Electricity Meters
18
To Connect the Domestic Hot Water Pump
19
To Connect the Alarm Output
19
To Connect the Space Cooling/Heating ON/OFF Output
20
To Connect the Changeover to External Heat Source
20
To Connect the Power Consumption Digital Inputs
21
To Connect the Safety Thermostat (Normally Closed Contact)
21
To Connect a Smart Grid
22
To Connect the WLAN Cartridge (Delivered as Accessory)
24
After Connecting the Electrical Wiring to the Indoor Unit
24
7 Configuration
24
Overview: Configuration
24
To Access the most Used Commands
24
Configuration Wizard
25
Configuration Wizard: Language
25
Configuration Wizard: Time and Date
25
Configuration Wizard: System
25
Configuration Wizard: Backup Heater
27
Configuration Wizard: Main Zone
27
Configuration Wizard: Additional Zone
28
Configuration Wizard: Tank
29
Weather-Dependent Curve
29
What Is a Weather-Dependent Curve
29
2-Points Curve
29
Slope-Offset Curve
30
Using Weather-Dependent Curves
30
Settings Menu
31
Main Zone
31
Additional Zone
31
Information
31
Menu Structure: Overview Installer Settings
32
8 Commissioning
33
Checklist before Commissioning
33
Checklist During Commissioning
33
To Check the Minimum Flow Rate
34
To Perform an Air Purge
34
To Perform an Operation Test Run
34
To Perform an Actuator Test Run
34
To Perform an Underfloor Heating Screed Dryout
35
9 Hand-Over to the User
35
10 Technical Data
36
Piping Diagram: Indoor Unit
36
Wiring Diagram: Indoor Unit
37
Ventilation: Indoor Unit
40
Advertisement
Related Products
Daikin EHVX04S18EA3V
Daikin EHVX04S18EJ3V
Daikin EHVX04S18EA6V
Daikin EHVX04S18EJ6V
Daikin EHVX04S18EA6VG
Daikin EHVX04S18E 6V(G) Series
Daikin EHVX04S18E
Daikin Altherma 3 R F EHVX04S18E 6V Series
Daikin EHVX04S18DA6VG
Daikin EHVX04S18DA3V7
Daikin Categories
Air Conditioner
Heat Pump
Chiller
Remote Control
Air Handlers
More Daikin Manuals
Login
Sign In
OR
Sign in with Facebook
Sign in with Google
Upload manual
Upload from disk
Upload from URL