Sign In
Upload
Manuals
Brands
DAB Manuals
Inverter
MCE-15/P
DAB MCE-15/P Manuals
Manuals and User Guides for DAB MCE-15/P. We have
2
DAB MCE-15/P manuals available for free PDF download: Instructions Manual, Instruction For Installation And Maintenance
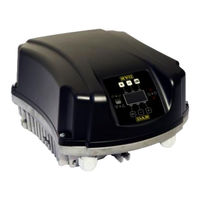
DAB MCE-15/P Instructions Manual (1024 pages)
Brand:
DAB
| Category:
Inverter
| Size: 13 MB
Table of Contents
Italiano
3
Table of Contents
3
Responsabilita
7
Legenda
7
Avvertenze
7
Generalita
8
Applicazioni
8
Caratteristiche Tecniche
9
Temperatura Ambiente
10
Tabella 1: Caratteristiche Tecniche
10
Installazione
11
Fissaggio Dell'apparecchio
11
Fissaggio Tramite Tiranti
11
Fissaggio Tramite Viti
12
Collegamenti
12
Collegamenti Elettrici
12
Tabella 1A: Tipologia Delle Possibili Correnti DI Guasto Verso Terra
12
Tabella 1B: Distanza Minima Tra I Contatti Dell'interruttore DI Alimentazione
13
Tabella 1C: Correnti Assorbite E Dimensionamento del Magnetotermico Per la Massima Potenza
14
Collegamento Alla Linea DI Alimentazione MCE-22/P - MCE-15/P - MCE-11/P
14
Collegamenti Elettrici All'elettropompa
15
Collegamenti Elettrici All'elettropompa MCE-22/P - MCE-15/P - MCE-11/P
15
Tabella 2: Sezione del Cavo DI Alimentazione Linea Monofase
15
Collegamento Alla Linea DI Alimentazione MCE-150/P - MCE-110/P - MCE-55/P - MCE-30/P
15
Collegamenti Idraulici
16
Tabella 4: Sezione del Cavo 4 Conduttori (3 Fasi + Terra)
16
Collegamento Dei Sensori
17
Collegamento del Sensore DI Pressione
18
Tabella 5: Collegamento del Sensore 4 - 20 Ma
19
Collegamento del Sensore DI Flusso
20
Collegamenti Elettrici Ingressi E Uscite Utenti
20
Tabella 6: Caratteristiche Dei Contatti DI Uscita
21
Contatti DI Ingresso (Fotoaccoppiati)
21
Contatti DI Uscita out 1 E out 2
21
Tabella 7: Caratteristiche Degli Ingressi
22
Tabella 8: Collegamento Ingressi
23
La Tastiera E Il Display
25
Menù
25
Tabella 9: Funzioni Tasti
25
Accesso Ai Menù
26
Accesso Diretto con Combinazione DI Tasti
26
Tabella 10: Accesso Ai Menù
26
Accesso Per Nome Tramite Menù a Tendina
27
Tabella 11: Struttura Dei Menù
27
Struttura Delle Pagine DI Menù
28
Tabella 12: Messaggi DI Stato Ed Errore Nella
29
Blocco Impostazione Parametri Tramite Password
30
Tabella 13: Indicazioni Nella Barra DI Stato
30
Sistema Multi Inverter
31
Introduzione Ai Sistemi Multi Inverter
31
Realizzazione DI un Impianto Multi Inverter
31
Cavo DI Comunicazione (Link)
31
Sensori
32
Sensori DI Flusso
32
Gruppi con Il solo Sensore DI Pressione
32
Sensori DI Pressione
32
Parametri con Significato Locale
33
Parametri Sensibili
33
Parametri DI Interesse Per Il Multi Inverter
33
Parametri Legati al Funzionamento Multi Inverter
33
Collegamento E Impostazione Degli Ingressi Fotoaccoppiati
33
Parametri con Allineamento Facoltativo
34
Primo Avvio DI un Sistema Multi-Inverter
35
Regolazione Multi-Inverter
35
Assegnazione Dell'ordine DI Partenza
35
Tempo Massimo DI Lavoro
35
Raggiungimento del Tempo Massimo DI Inattività
35
Riserve E Numero DI Inverter Che Partecipano al Pompaggio
36
Impostazione del Senso DI Rotazione
37
Impostazione Della Frequenza Nominale
37
Impostazione Della Corrente Nominale
37
Operazioni DI Prima Accensione
37
Accensione E Messa in Opera
37
Impostazione Della Pressione DI Setpoint
38
Impianto con Sensore DI Flusso
38
Impianto Senza Sensore DI Flusso
38
Impostazione DI Altri Parametri
39
Risoluzione Dei Problemi Tipici Alla Prima Installazione
40
Significato Dei Singoli Parametri
40
Tabella 14: Risoluzione Dei Problemi
40
Tabella 15: Visualizzazione del Monitor DI Sistema SM
41
VE: Visualizzazione Della Versione
41
SM: Monitor DI Sistema
41
PO: Visualizzazione Della Potenza Erogata
41
C1: Visualizzazione Della Corrente DI Fase
41
Visualizzazione Della Frequenza DI Rotazione
41
Menù Utente
41
VP: Visualizzazione Della Pressione
41
Menù Monitor
42
VF: Visualizzazione del Flusso
42
TE: Visualizzazione Della Temperatura Dei Finali DI Potenza
42
BT: Visualizzazione Della Temperatura Della Scheda Elettronica
42
FF: Visualizzazione Storico Fault
42
CT: Contrasto Display
42
LA: Lingua
42
P2: Impostazione Della Pressione Ausiliaria 2
43
Tabella 16: Pressioni Massime DI Regolazione
43
P4: Impostazione Della Pressione Ausiliaria 4
43
P3: Impostazione Della Pressione Ausiliaria 3
43
Menù Setpoint
43
P1: Impostazione Della Pressione Ausiliaria 1
43
Impostazione Delle Pressioni Ausiliarie
43
SP: Impostazione Della Pressione DI Setpoint
43
HO: Ore DI Funzionamento
43
Menù Manuale
44
FP: Impostazione Della Frequenza DI Prova
44
VP: Visualizzazione Della Pressione
44
C1: Visualizzazione Della Corrente DI Fase
44
PO: Visualizzazione Della Potenza Erogata
44
RC: Impostazione Della Corrente Nominale Dell'elettropompa
45
FN: Impostazione Della Frequenza Nominale
45
RT: Impostazione del Senso DI Rotazione
45
VF: Visualizzazione del Flusso
45
Menù Installatore
45
OD: Tipologia DI Impianto
46
RP: Impostazione Della Diminuzione DI Pressione Per Ripartenza
46
AD: Configurazione Indirizzo
46
PR: Sensore DI Pressione
46
MS: Sistema DI Misura
47
Impostazione Sensore DI Flusso
47
Funzionamento Senza Sensore DI Flusso
47
Tabella 17: Impostazione del Sensore DI Pressione
47
Tabella 18: Sistema DI Unità DI Misura
47
Tabella 19: Impostazioni del Sensore DI Flusso
47
FK: Impostazione del Fattore DI Conversione Impulsi / Litro
49
Funzionamento con Sensore DI Flusso Generico
49
FD: Impostazione Diametro del Tubo
49
Funzionamento con Sensore DI Flusso Specifico Predefinito
49
FZ: Impostazione Della Frequenza DI Zero Flusso
50
FT: Impostazione Della Soglia DI Spegnimento
50
Tabella 20: Diametri Dei Tubi, Fattore DI Conversione FK, Flusso Minimo E Massimo Ammissibile
50
SO: Fattore DI Marcia a Secco
51
MP: Pressione Minima DI Spegnimento Per Mancanza Acqua
51
Menù Assistenza Tecnica
51
TB: Tempo DI Blocco Mancanza Acqua
51
T1: Tempo DI Spegnimento Dopo Il Segnale Bassa Pressione
51
T2: Ritardo DI Spegnimento
51
Impostazione del Numero DI Inverter E Delle Riserve
52
NA: Inverter Attivi
52
GI: Coefficiente DI Guadagno Integrale
52
FL: Frequenza Minima DI Rotazione
52
FS: Frequenza Massima DI Rotazione
52
GP: Coefficiente DI Guadagno Proporzionale
52
NC: Inverter Contemporanei
53
IC: Configurazione Della Riserva
53
Tempo DI Scambio
53
CF: Portante
54
AC: Accelerazione
54
AE: Abilitazione Della Funzione Antibloccaggio
54
Setup Degli Ingressi Digitali Ausiliari IN1, IN2, IN3, IN4
54
Tabella 21: Configurazioni DI Fabbrica Degli Ingressi
54
Tabella 23: Funzione Galleggiante Esterno
55
Impostazione Funzione Galleggiante Esterno
55
Tabella 22: Configurazione Degli Ingressi
55
Disabilitazione Delle Funzioni Associate All'ingresso
55
Impostazione Funzione Ingresso Pressione Ausiliaria
56
Impostazione Abilitazione del Sistema E Ripristino Fault
56
Tabella 24: Setpoint Ausiliario
56
Impostazione Della Rilevazione DI Bassa Pressione (KIWA)
57
Setup Delle Uscite OUT1, OUT2
57
Tabella 25: Abilitazione Sistema E Ripristino Dei Fault
57
Tabella 26: Rilevazione del Segnale DI Bassa Pressione (KIWA)
57
Tabella 27: Configurazioni DI Fabbrica Delle Uscite
58
Tabella 28: Configurazione Delle Uscite
58
O1: Impostazione Funzione Uscita 1
58
PW: Impostazione Password
58
RF: Reset Dello Storico Dei Fault E Warning
58
O2: Impostazione Funzione Uscita 2
58
Password Sistemi Multi Inverter
59
Sistemi DI Protezione
60
Descrizione Dei Blocchi
60
BL Blocco Per Mancanza Acqua
60
Bpx" Blocco Per Guasto Sul Sensore DI Pressione
60
Tabella 29: Allarmi
60
Tabella 30: Indicazioni Dei Blocchi
60
Autoripristino Delle Condizioni DI Errore
61
Reset Manuale Delle Condizioni DI Errore
61
SC" Blocco Per Corto Circuito Diretto Tra le Fasi del Morsetto DI Uscita
61
HP" Blocco Per Tensione DI Alimentazione Interna Alta
61
LP" Blocco Per Tensione DI Alimentazione Bassa
61
Reset E Impostazioni DI Fabbrica
62
Reset Generale del Sistema
62
Impostazioni DI Fabbrica
62
Ripristino Delle Impostazioni DI Fabbrica
62
English
64
Key
68
Liability
68
Warnings
68
Applications
69
General Information
69
Technical Specifications
70
Table 1: Technical Specifications
71
Ambient Temperature
72
Fixing the Unit
72
Installation
72
Connections
73
Electrical Connections
73
Fixing with Screws
73
Fixing with Tie Rods
73
Table 1A: Type of Possible Fault Currents to Earth
74
Connection to the Power Line MCE-22/P - MCE-15/P - MCE-11/P
75
Table 1B: Minimum Distance between the Contacts of the Power Switch
75
Table 1C: Current Absorption and Thermal Magnetic Circuit Breaker Sizing for Maximum Power
75
Connection to the Power Line MCE-150/P - MCE-110/P - MCE-55/P - MCE-30/P
76
Electrical Connections to the Electric Pump MCE-22/P - MCE-15/P - MCE-11/P
76
Electrical Connections to the Pump
76
Table 2: Single Phase Line Power Cable Section
76
Hydraulic Connections
77
Table 4: Section of 4-Wire Cable (3 Phases + Earth)
77
Connection of Sensors
78
Connecting the Pressure Sensor
79
Table 5: Connecting the 4 - 20 Ma Pressure Sensor
80
Connecting the Flow Sensor
81
Input Contacts (Photocoupled)
82
OUT 1 and out 2 Output Contacts
82
Table 6: Output Contact Specifications
82
Utility Input and Output Electrical Connections
82
Table 7: Input Specifications
83
Table 8: Input Connection
84
Keyboard and Display
86
Menus
86
Table 9: Button Functions
86
Access to Menus
87
Direct Access with Button Combinations
87
Table 10: Access to Menus
87
Table 11: Menu Structure
88
Access by Name Via Drop-Down Menus
89
Structure of Menu
89
Table 12: Error Status Messages on Main Page
90
Parameter Setting Block Via Password
91
Table 13: Status Bar Indications
91
Communication Cable (Link)
92
Introduction to Multi Inverter Systems
92
Multi Inverter System
92
Setting up a Multi Inverter System
92
Flow Sensors
93
Pressure Sensors
93
Sensors
93
Sets with One Pressure Sensor Only
93
Connection and Setting of the Optical Coupling Inputs
94
Local Parameters
94
Multi Inverter Operating Parameters
94
Parameters Related to Multi Inverter Systems
94
Sensitive Parameters
94
Parameters with Optional Alignment
95
Assigning the Start-Up Order
96
Initial Start-Up of Multiple Inverter System
96
Maximum Operating Time
96
Multi-Inverter Settings
96
Reaching of Maximum Inactivity Time
96
Initial Power-Up Operations
97
Power-Up and Start-Up
97
Rated Current Settings
97
Rated Frequency Settings
97
Reserves and Number of Inverters Involved in Pumping
97
Setting the Direction of Rotation
98
Setting the Setpoint Pressure
98
System with Flow Sensor
98
System Without Flow Sensor
98
Setting Other Parameters
99
Table 14: Troubleshooting
100
Troubleshooting on Initial Installation
100
C1: Display of Phase Current
101
Display of Rotation Frequency
101
Key to Individual Parameters
101
PO: Display of the Power Delivered
101
SM: System Monitor
101
Table 15: Display of SM System Monitor
101
User Menu
101
VP: Display of Pressure
101
BT: Display of Electronic Board Temperature
102
CT: Display Contrast
102
FF: Display of Fault Log
102
LA: Language
102
Monitor Menu
102
TE: Display of Final Power Stage Temperature
102
VE: Display of Version
102
VF: Flow Display
102
Auxiliary Pressure Settings
103
HO: Operating Hours
103
P1: Auxiliary Pressure 1 Setting
103
P2: Auxiliary Pressure 2 Setting
103
Setpoint Menu
103
SP: Setting the Setpoint Pressure
103
Table 16: Maximum Regulation Pressure Values
103
C1: Display of Phase Current
104
FP: Test Frequency Setting
104
Manual Menu
104
P3: Auxiliary Pressure 3 Setting
104
P4: Auxiliary Pressure 4 Setting
104
VP: Display of Pressure
104
Installer Menu
105
PO: Display of the Power Delivered
105
RC: Electric Pump Rated Current Setting
105
RT: Setting the Direction of Rotation
105
VF: Flow Display
105
AD: Address Configuration
106
FN: Rated Frequency Settings
106
OD: Type of System
106
RP: Setting the Pressure Drop for Restart
106
Flow Sensor Setting
107
MS: Measurement System
107
Operation Without Flow Sensor
107
PR: Pressure Sensor
107
Table 17: Pressure Sensor Settings
107
Table 18: Unit of Measurement System
107
Table 19: Flow Sensor Settings
107
FD: Pipeline Diameter Setting
109
FK: Pulse/Litre Conversion Factor Settings
109
Operation with General Flow Sensor
109
Operation with Specific Pre-Defined Flow Sensor
109
FT: Shutdown Threshold Setting
110
FZ: Setting Zero Flow Frequency
110
Table 20: Diameter of Pipelines, FK Conversion Factor, Minimum and Maximum Admissible Flow
110
MP: Minimum Pressure Pump Stop Due to Water Failure
111
SO: Dry Running Factor
111
T1: Shutdown Time after Low Pressure Signal
111
T2: Shutdown Delay
111
TB: Water Failure Block Time
111
Technical Assistance Menu
111
FL: Minimum Rotation Frequency
112
FS: Maximum Rotation Frequency
112
GI: Integral Gain Coefficient
112
GP: Proportional Gain Coefficient
112
NA: Active Inverters
112
Setting the Number of Inverters and Reserves
112
Exchange Time
113
IC: Reserve Configuration
113
NC: Simultaneous Inverters
113
AC: Acceleration
114
AE: Enabling the Anti-Blocking Function
114
CF: Carrier Frequency
114
Setup of Auxiliary Digital Inputs IN1, IN2, IN3, IN4
114
Table 21: Default Settings of Inputs
114
Disabling Functions Associated with Input
115
Setting the External Float Function
115
Table 22: Input Configuration
115
Table 23: External Float Function
115
Setting the Auxiliary Pressure Input Function
116
Setting the System Enable and Fault Reset
116
Table 24: Auxiliary Setpoints
116
Setting Low Pressure Detection (KIWA)
117
Setup of Outputs OUT1, OUT2
117
Table 25: System Enable and Fault Reset
117
Table 26: Low Pressure Signal Detection (KIWA)
117
O1: Output 1 Function Setting
118
O2: Output 2 Function Setting
118
RF: Fault and Warning Log Reset
118
Table 27: Default Output Settings
118
Table 28: Output Configuration
118
Multiple Inverter System Password
119
BL Block Due to Water Failure
120
Bpx" Block Due to Fault on Pressure Sensor
120
Description of Blocks
120
HP Block Due to High Internal Power Supply Voltage
120
LP Block Due to Low Power Supply Voltage
120
Protection Systems
120
SC Block Due to Direct Short Circuit between the Phases on the Output Terminal
120
Table 29: Alarms
120
Table 30: Block Information
120
Auto-Reset of Error Conditions
121
Manual Reset of Error Conditions
121
General System Reset
122
Reset and Default Settings
122
Restoring Default Settings
122
Table 31: Auto-Reset of Blocks
122
Default Settings
123
PW Password Settings
123
Français
124
Avertissements
128
Légende
128
Responsabilités
128
Applications
129
Généralités
129
Caractéristiques Techniques
130
Tableau 1: Caractéristiques Techniques
131
Fixation de L'appareil
132
Fixation Par Tirants
132
Installation
132
Température Ambiante
132
2.2.1 Connexions Électriques
133
Connexions
133
Fixation Par Vis
133
Tableau 1A: Typologie des Courants de Défaut à la Terre Possibles
133
Tableau 1B: la Distance Minimale entre les Contacts de L'interrupteur D'alimentation
134
Connexion à la Ligne D'alimentation MCE-22/P - MCE-15/P - MCE-11/P
135
Tableau 1C: Courants Absorbés et Dimensionnement du Relais Magnétothermique pour la Puissance Maximum
135
Tableau 2: Section du Câble D'alimentation Ligne Monophasée
135
Connexion à la Ligne D'alimentation MCE-150/P - MCE-110/P - MCE-55/P - MCE-30/P
136
Connexions Électriques à L'électropompe
136
Connexions Électriques à L'électropompe MCE-22/P - MCE-15/P - MCE-11/P
136
Connexions Hydrauliques
137
Tableau 4: Section du Câble 4 Conducteurs (3 Phases + Terre)
137
Connexion des Capteurs
138
Connexion du Capteur de Pression
139
Tableau 5: Connexion du Capteur de Pression 4 - 20 Ma
140
Connexion du Capteur de Débit
141
Connexions Électriques Entrées et Sorties Systèmes Utilisateurs
141
Contacts D'entrée (Photo-Couplés)
142
Contacts de Sortie out 1 et out 2
142
Tableau 6: Caractéristiques des Contacts de Sortie
142
Tableau 7: Caractéristiques des Entrées
143
Tableau 8: Connexion Entrées
144
Le Clavier et L'afficheur
146
Menus
146
Tableau 9: Fonctions des Touches
146
Accès aux Menus
147
Accès Direct Par Combinaison de Touches
147
Tableau 10: Accès aux Menus
147
Accès Par Nom à Travers le Menu Déroulant
148
Tableau 11: Structure des Menus
148
Structure des Pages de Menu
149
Tableau 12: Messages D'état et D'erreur Dans la
150
Blocage de la Configuration des Paramètres Par Mot de Passe
151
Système Multi-Convertisseur
151
Tableau 13: Indications Dans la Barre D'état
151
Câble de Communication (Link)
152
Introduction aux Systèmes Multi-Convertisseur
152
Réalisation D'une Installation Multi-Convertisseur
152
Capteurs
153
Capteurs de Débit
153
Capteurs de Pression
153
Groupes Avec Uniquement le Capteur de Pression
153
Connexion et Configuration des Entrées Photo-Couplées
154
Paramètres Avec Signification Locale
154
Paramètres Intéressants pour le Multi-Convertisseur
154
Paramètres Liés au Fonctionnement Multi-Convertisseur
154
Paramètres Sensibles
154
4.4 Première Mise en Marche D'un Système Multiconvertisseur
155
Paramètres Avec Alignement Facultatif
155
4.5 Régulation Multi-Convertisseur
156
4.5.1 Attribution de L'ordre de Démarrage
156
4.5.1.1 Temps Maximum de Travail
156
Atteinte du Temps Maximum D'inactivité
156
4.5.2 Réserves et Nombre de Convertisseurs Qui Participent au Pompage
157
Configuration de la Fréquence Nominale
157
Configuration du Courant Nominal
157
Mise en Marche et Mise en Service
157
Opérations de Première Mise en Marche
157
Installation Avec Capteur de Débit
158
Installation Sans Capteur de Débit
158
Réglage de la Pression de Consigne
158
Réglage du Sens de Rotation
158
Configuration D'autres Paramètres
159
Résolution des Problèmes Typiques de la Première Mise en Service
159
Signification des Divers Paramètres
160
Tableau 14: Résolution des Problèmes
160
Affichage de la Fréquence de Rotation
161
C1: Affichage du Courant de Phase
161
Menu Utilisateur
161
PO : Affichage de la Puissance Fournie
161
SM : Afficheur de Système
161
Tableau 15: Visualisation de L'afficheur de Système SM
161
VP : Affichage de la Pression
161
BT : Affichage de la Température de la Carte Électronique
162
CT : Contraste Afficheur
162
FF : Affichage de L'historique des Erreurs
162
LA : Langue
162
Menu Afficheur
162
TE : Affichage de la Température des Étages Finaux de Puissance
162
VE : Affichage de la Version
162
VF : Affichage du Débit
162
Configuration des Pressions Auxiliaires
163
HO : Heures de Fonctionnement
163
Menu Point de Consigne
163
P1: Configuration de la Pression Auxiliaire 1
163
P2: Configuration de la Pression Auxiliaire 2
163
P3: Configuration de la Pression Auxiliaire 3
163
SP : Réglage de la Pression de Consigne
163
Tableau 16: Pressions Maximums de Régulation
163
C1 : Affichage du Courant de Phase
164
FP : Configuration de la Fréquence D'essai
164
Menu Manuel
164
P4: Configuration de la Pression Auxiliaire 4
164
PO : Affichage de la Puissance Fournie
164
VP : Affichage de la Pression
164
FN : Configuration de la Fréquence Nominale
165
Menu Installateur
165
RC : Configuration du Courant Nominal de L'électropompe
165
RT : Réglage du Sens de Rotation
165
VF : Affichage du Débit
165
AD : Configuration Adresse
166
OD : Typologie D'installation
166
PR : Capteur de Pression
166
RP : Configuration de la Diminution de Pression pour Redémarrage
166
Configuration du Capteur de Débit
167
Fonctionnement Sans Capteur de Débit
167
MS : Système de Mesure
167
Tableau 17: Configuration du Capteur de Pression
167
Tableau 18: Système D'unité de Mesure
167
Tableau 19: Configurations du Capteur de Débit
167
FD Configuration Diamètre du Tuyau
169
FK : Configuration du Facteur de Conversion Impulsions / Litre
169
Fonctionnement Avec Capteur de Débit Générique
169
Fonctionnement Avec Capteur de Débit Spécifique PréDéfini
169
FT : Configuration du Seuil D'extinction
170
FZ : Configuration de la Fréquence de Flux Zéro
170
Tableau 20: Diamètres des Tuyaux, Facteur de Conversion FK, Débit Minimum et Maximum Admissible
170
GP : Coefficient de Gain Proportionnel
171
Menu Assistance Technique
171
MP : Pression Minimum D'extinction pour Absence D'eau
171
SO : Facteur de Marche à Sec
171
T1: Temps D'extinction après le Signal de Basse Pression
171
T2 : Retard D'extinction
171
TB : Temps de Blocage Absence D'eau
171
Configuration du Nombre de Convertisseurs et des Réserves
172
FL : Fréquence Minimum de Rotation
172
FS : Fréquence Maximum de Rotation
172
GI : Coefficient de Gain Intégral
172
NA : Convertisseurs Actifs
172
NC : Convertisseurs Simultanés
172
IC : Configuration de la Réserve
173
Temps D'échange
173
AC : Accélération
174
AE : Activation de la Fonction Antiblocage
174
CF : Portante
174
Configuration des Entrées Numériques Auxiliaires IN1, IN2, IN3, IN4
174
Tableau 21: Configurations D'usine des Entrées
174
Configuration Fonction Flotteur Externe
175
Désactivation des Fonctions Associées à L'entrée
175
Tableau 22: Configurations des Entrées
175
Tableau 23: Fonction Flotteur Externe
175
Configuration Activation du Système et Réinitialisation des Erreurs
176
Configuration Fonction Entrée Pression Auxiliaire
176
Tableau 24: Point de Consigne Auxiliaire
176
Configuration de la Détection de Basse Pression (KIWA)
177
Configuration des Sorties OUT1, OUT2
177
Tableau 25: Activation Système et Réinitialisation des Alarmes
177
Tableau 26: Détection du Signal de Basse Pression (KIWA)
177
O1 : Configuration Fonction Sortie 1
178
O2 : Configuration Fonction Sortie 2
178
PW: Configuration Mot de Passe
178
RF : Réinitialisation de L'historique des Erreurs et Alarmes
178
Tableau 27: Configurations D'usine des Sorties
178
Tableau 28: Configuration des Sorties
178
Mot de Passe Systèmes Multiconvertisseur
179
BL Blocage pour Absence Eau
180
Bpx " Blocage pour Panne Sur le Capteur de Pression
180
Description des Blocages
180
Systèmes de Protection
180
Tableau 29: Alarmes
180
Tableau 30: Indications des Blocages
180
HP " Blocage pour Tension D'alimentation Interne Élevée
181
LP " Blocage pour Tension D'alimentation Basse
181
Réinitialisation Automatique des Conditions D'erreur
181
Réinitialisation Manuelle des Conditions D'erreur
181
SC " Blocage pour Court-Circuit Direct entre les Phases de la Borne de Sortie
181
Configurations D'usine
182
Réinitialisation des Configurations D'usine
182
Réinitialisation et Configurations D'usine
182
Réinitialisation Générale du Système
182
Tableau 31: Réinitialisation Automatique en cas de Blocages
182
Advertisement
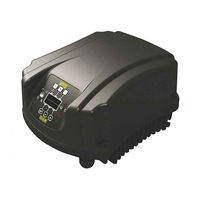
DAB MCE-15/P Instruction For Installation And Maintenance (600 pages)
Brand:
DAB
| Category:
Inverter
| Size: 7 MB
Table of Contents
Italiano
5
Table of Contents
5
Legenda
9
Avvertenze
9
Responsabilita
9
1 Generalita
10
Applicazioni
10
Caratteristiche Tecniche
11
Tabella 1: Caratteristiche Tecniche
11
2 Installazione
12
Fissaggio Dell'apparecchio
12
Fissaggio Tramite Tiranti
12
Fissaggio Tramite Viti
12
Collegamenti
12
Collegamenti Elettrici
13
Collegamento Alla Linea DI Alimentazione
13
Collegamenti Elettrici All'elettropompa
14
Collegamenti Idraulici
15
Tabella 2: Sezione del Cavo DI Alimentazione
15
Tabella 3: Sezione del Cavo Della Pompa
15
Tabella 4: Correnti
15
Collegamento Dei Sensori
16
Collegamento del Sensore DI Pressione
17
Tabella 5: Collegamento del Sensore DI Pressione 4 - 20 Ma
17
Collegamento del Sensore DI Flusso
18
Collegamenti Elettrici Ingressi E Uscite Utenti
18
Tableau 2: Section du Câble D'alimentation
18
Tableau 3: Section du Câble de la Pompe
18
Caratteristiche Dei Contatti DI Ingresso Fotoaccoppiati
19
Caratteristiche Dei Contatti DI Uscita out 1 E out 2
19
Tabella 6: Caratteristiche Dei Contatti DI Uscita
19
Tabella 7: Caratteristiche Degli Ingressi
20
3 La Tastiera E Il Display
21
Tabella 8: Funzioni Tasti
21
Menù
22
Accesso Ai Menù
22
Accesso Diretto con Combinazione DI Tasti
22
Tabella 9: Accesso Ai Menù
22
Accesso Per Nome Tramite Menù a Tendina
24
Tabella 10: Struttura Dei Menù
24
Struttura Delle Pagine DI Menù
25
Tabella 11: Messaggi DI Stato Ed Errore Nella
25
Tabella 12: Indicazioni Nella Barra DI Stato
26
4 Sistema Multi Inverter
27
Introduzione Ai Sistemi Multi Inverter
27
Realizzazione DI un Impianto Multi Inverter
27
Cavo DI Comunicazione (Link)
27
Sensori
28
Sensori DI Flusso
28
Sensori DI Pressione
28
Collegamento E Impostazione Degli Ingressi Fotoaccoppiati
28
Parametri Legati al Funzionamento Multi Inverter
29
Parametri DI Interesse Per Il Multi Inverter
29
Parametri con Significato Locale
29
Parametri Sensibili
29
Parametri con Allineamento Facoltativo
30
Regolazione Multi-Inverter
30
Assegnazione Dell'ordine DI Partenza
31
Raggiungimento del Tempo Massimo DI Inattività
31
Tempo Massimo DI Lavoro
31
Riserve E Numero DI Inverter Che Partecipano al Pompaggio
31
5 Accensione E Messa in Opera
32
Operazioni DI Prima Accensione
32
Impostazione Della Corrente Nominale
32
Impostazione Della Frequenza Nominale
32
Impostazione del Senso DI Rotazione
33
Impostazione del Sensore DI Flusso E del Diametro Della Tubazione
33
Impostazione Della Pressione DI Setpoint
33
Impostazione DI Altri Parametri
33
Risoluzione Dei Problemi Tipici Alla Prima Installazione
34
Tabella 13: Risoluzione Dei Problemi
34
6 Significato Dei Singoli Parametri
35
Menù Utente
35
Visualizzazione Della Frequenza DI Rotazione
35
VP: Visualizzazione Della Pressione
35
C1: Visualizzazione Della Corrente DI Fase
35
PO: Visualizzazione Della Potenza Erogata
35
SM: Monitor DI Sistema
35
Tabella 14: Visualizzazione del Monitor DI Sistema SM
35
VE: Visualizzazione Della Versione
36
Menù Monitor
36
BT: Visualizzazione Della Temperatura Della Scheda Elettronica
36
CT: Contrasto Display
36
FF: Visualizzazione Storico Fault
36
TE: Visualizzazione Della Temperatura Dei Finali DI Potenza
36
VF: Visualizzazione del Flusso
36
HO: Ore DI Funzionamento
37
LA: Lingua
37
Menù Setpoint
37
P1: Impostazione Della Pressione Ausiliaria 1
37
P2: Impostazione Della Pressione Ausiliaria 2
37
SP: Impostazione Della Pressione DI Setpoint
37
Tabella 15: Pressioni Massime DI Regolazione
37
P3: Impostazione Della Pressione Ausiliaria 3
38
P4: Impostazione Della Pressione Ausiliaria 4
38
Menù Manuale
38
FP: Impostazione Della Frequenza DI Prova
38
VP: Visualizzazione Della Pressione
38
C1: Visualizzazione Della Corrente DI Fase
39
PO: Visualizzazione Della Potenza Erogata
39
RT: Impostazione del Senso DI Rotazione
39
VF: Visualizzazione del Flusso
39
Menù Installatore
39
RC: Impostazione Della Corrente Nominale Dell'elettropompa
39
FN: Impostazione Della Frequenza Nominale
40
OD: Tipologia DI Impianto
40
RP: Impostazione Della Diminuzione DI Pressione Per Ripartenza
40
RT: Impostazione del Senso DI Rotazione
40
AD: Configurazione Indirizzo
41
MS: Sistema DI Misura
41
PR: Sensore DI Pressione
41
Tabella 16: Impostazione del Sensore DI Pressione
41
Tabella 17: Sistema DI Unità DI Misura
41
Impostazione Sensore DI Flusso
42
Funzionamento Senza Sensore DI Flusso
42
Tabella 18: Impostazioni del Sensore DI Flusso
42
Funzionamento con Sensore DI Flusso Specifico Predefinito
43
Funzionamento con Sensore DI Flusso Generico
44
FD: Impostazione Diametro del Tubo
44
FK: Impostazione del Fattore DI Conversione Impulsi / Litro
44
FT: Impostazione Della Soglia DI Spegnimento
45
FZ: Impostazione Della Frequenza DI Zero Flusso
45
Tabella 19: Diametri Dei Tubi E Fattore DI Conversione FK
45
SO: Fattore DI Marcia a Secco
46
MP: Pressione Minima DI Spegnimento Per Mancanza Acqua
46
Menù Assistenza Tecnica
46
T1: Tempo DI Spegnimento Dopo Il Segnale Bassa Pressione
46
TB: Tempo DI Blocco Mancanza Acqua
46
FL: Frequenza Minima DI Rotazione
47
FS: Frequenza Massima DI Rotazione
47
GI: Coefficiente DI Guadagno Integrale
47
GP: Coefficiente DI Guadagno Proporzionale
47
T2: Ritardo DI Spegnimento
47
IC: Configurazione Della Riserva
48
Impostazione del Numero DI Inverter E Delle Riserve
48
NA: Inverter Attivi
48
NC: Inverter Contemporanei
48
AC: Accelerazione
49
AE: Abilitazione Della Funzione Antibloccaggio
49
CF: Portante
49
Tempo DI Scambio
49
Disabilitazione Delle Funzioni Associate All'ingresso
50
Impostazione Funzione Galleggiante Esterno
50
Setup Degli Ingressi Digitali Ausiliari IN1, IN2, IN3, IN4
50
Tabella 20: Configurazioni DI Fabbrica Degli Ingressi
50
Tabella 21: Configurazione Degli Ingressi
50
Impostazione Funzione Ingresso Pressione Ausiliaria
51
Impostazione Abilitazione del Sistema E Ripristino Fault
51
Tabella 22: Funzione Galleggiante Esterno
51
Tabella 23: Setpoint Ausiliario
51
Impostazione Della Rilevazione DI Bassa Pressione
52
Setup Delle Uscite OUT1, OUT2
52
Tabella 24: Abilitazione Sistema E Ripristino Dei Fault
52
Tabella 25: Rilevazione del Segnale DI Bassa Pressione
52
Tabella 26: Configurazioni DI Fabbrica Delle Uscite
52
O1: Impostazione Funzione Uscita 1
53
O2: Impostazione Funzione Uscita 2
53
RF: Reset Dello Storico Dei Fault E Warning
53
Tabella 27: Configurazione Delle Uscite
53
7 Sistemi DI Protezione
54
Descrizione Dei Blocchi
54
BL" Blocco Per Mancanza Acqua
54
Tabella 28: Allarmi
54
Tabella 29: Indicazioni Dei Blocchi
54
BP" Blocco Per Guasto Sul Sensore DI Pressione
55
LP" Blocco Per Tensione DI Alimentazione Bassa
55
HP" Blocco Per Tensione DI Alimentazione Interna Alta
55
SC" Blocco Per Corto Circuito Diretto Tra le Fasi del Morsetto DI Uscita
55
Reset Manuale Delle Condizioni DI Errore
55
Autoripristino Delle Condizioni DI Errore
55
Tabella 30: Autoripristino Dai Blocchi
56
8 Reset E Impostazioni DI Fabbrica
57
Reset Generale del Sistema
57
Impostazioni DI Fabbrica
57
Ripristino Delle Impostazioni DI Fabbrica
57
Tabella 31: Impostazioni DI Fabbrica
58
English
59
Warnings
63
Key
63
Liability
63
1 General Information
64
Applications
64
Figure 1: Layout and Dimensions
64
Technical Specifications
65
Table 1: Technical Specifications
65
2 Installation
66
Fixing the Unit
66
Fixing with Tie Rods
66
Fixing with Screws
66
Connections
66
Electrical Connections
67
Connection to the Power Line
67
Figure 2: Electrical Connections
67
Electrical Connections to the Pump
68
Figure 3: Connection of the Earth Cable
68
Hydraulic Connections
69
Table 2: Power Supply Cable Section
69
Table 3: Pump Cable Section
69
Table 4: Current Values
69
Connection of Sensors
70
Figure 4: Hydraulic Installation
70
Connecting the Pressure Sensor
71
Figure 5: Connections
71
Table 5: Connecting the 4 - 20 Ma Pressure Sensor
71
Connecting the Flow Sensor
72
Utility Input and Output Electrical Connections
72
Figure 6: Connecting the 4 - 20 Ma Pressure Sensor
72
Figure 7: Example of Output Connections
73
OUT 1 and out 2 Output Contact Specifications
73
Photocoupled Input Contact Specifications
73
Table 6: Output Contact Specifications
73
Figure 8: Example of Input Connections
74
Table 7: Input Specifications
74
3 Keyboard and Display
75
Table 8: Button Functions
75
Figure 9: User Interface Layout
75
Menus
76
Access to Menus
76
Direct Access with Button Combinations
76
Table 9: Access to Menus
76
Table 10: Menu Structure
77
Access by Name Via Drop-Down Menus
78
Figure 10: Drop-Down Menu Selection
78
Table 11: Optional Menu Access Scheme
78
Structure of Menu
79
BP Block Due to Fault on Pressure Sensor
79
Figure 11: Error Status Messages on Main Page
79
Figure 12: Status Bar Indications
80
Table 12: Menu Parameter Display
80
4 Multi Inverter System
81
Introduction to Multi Inverter Systems
81
Setting up a Multi Inverter System
81
Communication Cable (Link)
81
Sensors
82
Flow Sensors
82
Pressure Sensors
82
Connection and Setting of the Optical Coupling Inputs
82
Multi Inverter Operating Parameters
82
Parameters Related to Multi Inverter Systems
83
Local Parameters
83
Sensitive Parameters
83
Parameters with Optional Alignment
84
Multi-Inverter Settings
84
Assigning the Start-Up Order
85
Maximum Operating Time
85
Reaching of Maximum Inactivity Time
85
Reserves and Number of Inverters Involved in Pumping
85
5 Power-Up and Start-Up
86
Initial Power-Up Operations
86
Rated Current Settings
86
Rated Frequency Settings
86
Setting the Direction of Rotation
87
Setting the Flow Sensor and Pipeline Diameter
87
Setting the Setpoint Pressure
87
Setting Other Parameters
87
Troubleshooting on Initial Installation
88
Table 13: Troubleshooting
88
6 Key to Individual Parameters
89
User Menu
89
Display of Rotation Frequency
89
VP: Display of Pressure
89
C1: Display of Phase Current
89
PO: Display of the Power Delivered
89
SM: System Monitor
89
Table 14: Display of SM System Monitor
89
VE: Display of Version
90
Monitor Menu
90
VF: Flow Display
90
TE: Display of Final Power Stage Temperature
90
BT: Display of Electronic Board Temperature
90
FF: Display of Fault Log
90
CT: Display Contrast
90
LA: Language
91
HO: Operating Hours
91
Setpoint Menu
91
SP: Setting the Setpoint Pressure
91
P1: Auxiliary Pressure 1 Setting
91
P2: Auxiliary Pressure 2 Setting
91
Table 15: Maximum Regulation Pressure Values
91
P3: Auxiliary Pressure 3 Setting
92
P4: Auxiliary Pressure 4 Setting
92
Manual Menu
92
FP: Test Frequency Setting
92
VP: Display of Pressure
92
C1: Display of Phase Current
93
PO: Display of the Power Delivered
93
RT: Setting the Direction of Rotation
93
VF: Flow Display
93
Installer Menu
93
RC: Electric Pump Rated Current Setting
93
RT: Setting the Direction of Rotation
94
FN: Rated Frequency Settings
94
OD: Type of System
94
RP: Setting the Pressure Drop for Restart
94
AD: Address Configuration
95
PR: Pressure Sensor
95
MS: Measurement System
95
Table 16: Pressure Sensor Settings
95
Table 17: Unit of Measurement System
95
Figure 13: Setting the Restart Pressure
95
Flow Sensor Setting
96
Operation Without Flow Sensor
96
Table 18: Flow Sensor Settings
96
Operation with General Flow Sensor
97
Operation with Specific Pre-Defined Flow Sensor
97
FD: Pipeline Diameter Setting
98
FK: Pulse/Litre Conversion Factor Settings
98
FZ: Setting Zero Flow Frequency
99
FT: Shutdown Threshold Setting
99
Table 19: Pipeline Diameters and KF Conversion Factor
99
SO: Dry Running Factor
100
MP: Minimum Pressure Pump Stop Due to Water Failure
100
Technical Assistance Menu
100
TB: Water Failure Block Time
100
T1: Shutdown Time after Low Pressure Signal
101
T2: Shutdown Delay
101
GP: Proportional Gain Coefficient
101
GI: Integral Gain Coefficient
101
FS: Maximum Rotation Frequency
101
FL: Minimum Rotation Frequency
101
Setting the Number of Inverters and Reserves
102
IC: Reserve Configuration
102
NA: Active Inverters
102
NC: Simultaneous Inverters
102
Exchange Time
103
CF: Carrier Frequency
103
AC: Acceleration
103
AE: Enabling the Anti-Blocking Function
103
Setup of Auxiliary Digital Inputs IN1, IN2, IN3, IN4
104
Disabling Functions Associated with Input
104
Setting the External Float Function
104
Table 20: Default Settings of Inputs
104
Table 21: Input Configuration
104
Setting the Auxiliary Pressure Input Function
105
Setting the System Enable and Fault Reset
105
Table 22: External Float Function
105
Table 23: Auxiliary Setpoints
105
Setting Low Pressure Detection
106
Setup of Outputs OUT1, OUT2
106
Table 24: System Enable and Fault Reset
106
Table 25: Low Pressure Signal Detection
106
Table 26: Default Output Settings
106
O1: Output 1 Function Setting
107
O2: Output 2 Function Setting
107
RF: Fault and Warning Log Reset
107
Table 27: Output Configuration
107
Protection Systems
108
Description of Blocks
108
BL" Block Due to Water Failure
108
LP" Block Due to Low Power Supply Voltage
108
HP" Block Due to High Internal Power Supply Voltage
108
Table 28: Alarms
108
Table 29: Block Information
108
SC" Block Due to Direct Short Circuit between the Phases on the Output Terminal
109
Manual Reset of Error Conditions
109
Auto-Reset of Error Conditions
109
Table 30: Auto-Reset of Blocks
110
8 Reset and Default Settings
111
General System Reset
111
Default Settings
111
Restoring Default Settings
111
Table 31: Default Settings
112
Advertisement
Related Products
DAB MCE-15/C
DAB MCE-11/C
DAB MCE-11/P
DAB MCE-110/C
DAB MCE-150/P
DAB MCE-110/P MCE-55/P
DAB MCE-55/C
DAB MCE-30/P
DAB MCE/C Series
DAB MCE-55/P
DAB Categories
Water Pump
Inverter
Water System
Controller
Control Unit
More DAB Manuals
Login
Sign In
OR
Sign in with Facebook
Sign in with Google
Upload manual
Upload from disk
Upload from URL