Sign In
Upload
Manuals
Brands
Bruker Manuals
Analytical Instruments
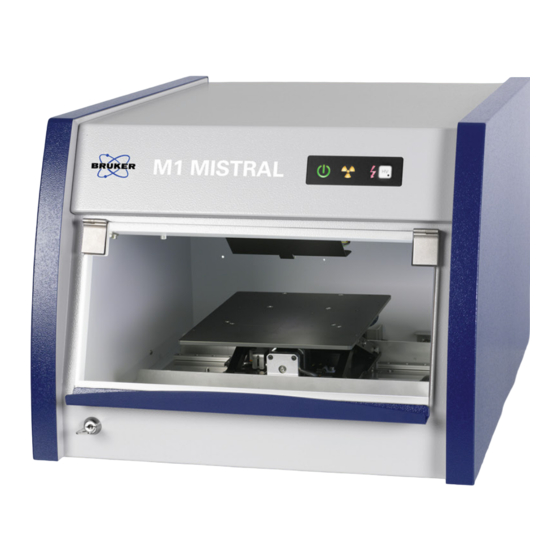
M1 MISTRAL
Bruker M1 MISTRAL Tabletop XRF Analyzer Manuals
Manuals and User Guides for Bruker M1 MISTRAL Tabletop XRF Analyzer. We have
1
Bruker M1 MISTRAL Tabletop XRF Analyzer manual available for free PDF download: User Manual
Bruker M1 MISTRAL User Manual (122 pages)
Micro-XRF Benchtop Spectrometer
Brand:
Bruker
| Category:
Analytical Instruments
| Size: 11 MB
Table of Contents
Table of Contents
3
1 Introduction
9
About this Manual
9
User Information
9
Intended Usage
10
Warranty and Liability
11
2 Safety Instructions
12
Basic Safety Requirements
12
Safety Requirements on the Place of Installation
13
Radiation Protection
13
Protection from Electric Current
14
Staff Requirements
15
Safety Equipment
15
Table 1 Safety Equipment of the M1 ORA/MISTRAL
15
Fig. 1 Safety Equipment on the Front Panel of the M1 ORA/MISTRAL
16
Name Plates and Warning Labels
17
Table 2 Name Plates and Warning Labels on the M1 ORA/MISTRAL Instrument
17
3 Functional Principles
18
Physical Background of X-Ray Generation
18
X-Ray Fluorescence
18
Fig. 2 Schematic Visualization of the X-Ray Fluorescence Process in an Atom
18
Bremsstrahlung
19
Detection of X-Ray Quanta
20
Digitalization and Channel Allocation
21
Fig. 3 Schematic Working Principle of a Silicon Drift Detector (SDD)
21
Spectrometer Resolution
22
Fig. 4 Origin of a X-Ray Fluorescence Spectrum
22
Fig. 5 Fitting Process with Two Gaussian Shaped Profiles
23
Composition of a Spectrum
24
Fig. 6 Definition of the Full Width at Half Maximum (FWHM)
24
Fig. 7 Typical XRF Spectra of Glass, Precious Metal Alloy and Steel
24
Evaluation of X-Ray Fluorescence Spectra
25
Table 3 Steps During Spectrum Evaluation
25
4 The M1 ORA/MISTRAL System
28
Product Description
28
Product Versions
28
M1 Ora
28
M1 Mistral
29
Fig. 8 M1 ORA with Computer
29
Fig. 9 M1 MISTRAL with Computer
29
Hardware System Components
30
Fig. 10 Main Components of the M1 ORA/MISTRAL
30
Table 4 Connections of the M1 ORA/MISTRAL System Components
30
Table 5 Technical Parameters of the M1 ORA/MISTRAL
31
Technical Parameters
31
Hardware Installation
33
Room Planning
33
Electrical Connection
33
Fig. 11 Room Planning for the Installation of the M1 ORA/MISTRAL
33
Table 6 Specifications for the Electrical Connections
33
External Requirements
34
Software
34
Software Description
34
Table 7 External Installation Requirements
34
Program Installation
35
Fig. 12 „Run as Administrator" Option for Program Installation
35
Fig. 13 Select Setup Language
36
Fig. 14 Select Type of Installation
36
Fig. 15 Select Folder for Installation
37
Fig. 16 Select Data Folder
37
Fig. 17 Select Components for Installation
38
Fig. 18 Installation of the Video Driver Software
38
Fig. 19 Installation of Acrobat Reader
39
Fig. 20 Installation of XML Notepad
39
Installation of Drivers
40
Fig. 21 Restart of the Computer and Creation of a New Xspect Pro Database
40
Fig. 22 Windows Device Manager after Connecting the M1 ORA/MISTRAL
41
Fig. 23 Properties Dialog for the M1 ORA/MISTRAL before Installing the Correct Driver
41
Fig. 24 Setting the Driver Path Manually for the Unknown Devices
42
Fig. 25 Windows Security Warning During Driver Installation
42
Fig. 26 Finishing the Successful Instrument Driver Installation
42
Configuration Files
43
Establishing the Operational State
43
Table 8 Steps for the Instrument Start-Up
43
5 Using the Xspect Pro Program
46
Xspect Pro Program Start-Up
46
Fig. 27 Status Display During Initialization of the Xspect Pro Program
46
Fig. 28 Switching on the High Voltage
46
Fig. 29 Main Screen of the Xspect Pro Program
47
Display and Control Elements
48
Instrument Status Bar
48
Navigation Bar
48
Table 9 Displays in the Instrument Status Bar
48
Table 10 Functions in the Xspect Pro Navigation Bar
48
Print Report/ Additional Information
49
Fig. 30 Additional Information Dialog
49
Stage Control and Video Settings
50
Manual Z Stage
50
Motorized Z Stage
50
Fig. 31 Stage Control for the Manual Z Stage
50
Fig. 32 Stage Control for the Motorized Z Stage
50
Motorized X-Y-Z Stage
51
Fig. 33 Stage Control for the Motorized X-Y-Z Stage
51
Table 11 Functions for the Stage Movement
51
Easy Load
52
Video Settings
52
Fig. 34 Cross Hair Parameters Dialog
52
Fig. 35 Video Settings Dialog
53
Fig. 36 Save Dialog
53
System Spectra Measurements
54
Measuring Reference Spectra
54
Fig. 37 Main Screen of the System Spectra Workspace
54
Measuring Pure Element Spectra
55
Fig. 38 Recording Reference Spectra
55
Measuring Primary Spectra
56
Fig. 39 Recording Pure Element Spectra
56
Measuring Standard Spectra
57
Fig. 40 Recording Primary Spectra
57
Fig. 41 Recording Standard Sample Spectra
58
Sample Measurement
59
Fig. 42 Measurement Workspace
59
Table 12 Functions in the Main Panel for Measurements with Xspect Pro
59
Measurement Methods
61
Fig. 43 Selection of an Existing Measurement Method
61
Keyboard Shortcuts
62
Result Tab
62
Fig. 44 Pre-Examination Tab
62
Table 13 Keyboard Shortcuts
62
Fig. 45 Measurement Workspace - Results Tab
63
Fig. 46 Measurement Workspace - Table Tab
63
Trend Tab
64
Fig. 47 Measurement Workspace - Trend Tab
64
Spectrum Tab
65
Fig. 48 Measurement Workspace - Spectrum Tab
65
Table 14 Display Options in the Spectrum Tab
66
Table 15 Peak Identification
67
Touch Screen User Interface
67
Fig. 49 Touch Screen User Interface
68
Table 16 Control Elements in the Touch Screen Mode
68
Stage Program Workspace
69
Fig. 50 Stage Program Screen
69
Load/Create Stage Programs
70
Fig. 51 Selection or Creation of a Stage Program
70
Table 17 Main Functions in the Stage Program Workspace
70
Graphic Display of Measurement Points
71
Reference Points Table
71
Fig. 52 Graphic Display of the Stage Program
71
Measure Points Table
72
Create/Edit Stage Programs
72
Fig. 53 Table of Measurement Positions
72
Fig. 54 Create/Edit a Stage Program
73
Table 18 Options for Selected Single Entries in the Measure Points Table
73
Table 19 Options for Selected Multiple Entries in the Measure Points Table
74
6 Using the Xdata Program
75
Xdata Program Start-Up
75
Display and Control Elements
75
Fig. 55 Status Display During Initialization of the Xdata Program
75
Fig. 56 Start-Up Screen of the Xdata Program
76
Table 20 Functions in the Navigation Bar of Xdata
76
Managing Standards
77
Fig. 57 Standards Workspace
77
Saving a List of Standards
78
Loading a List of Standards
78
Editing Basic Data
78
Fig. 58 List of Files Needed to Save a List of Standards
78
Creating New Standards
79
Fig. 59 Basic Data Editor
79
Fig. 60 Sample Editor
79
Managing Methods
80
Creating a Method
81
Fig. 61 Methods Workspace
81
Fig. 62 Method Editor - Structure Tab
82
Fig. 63 Element Properties Editor
83
Table 21 Settings in the Element Properties Editor
83
Fig. 64 Method Editor - Normation Tab
85
Fig. 65 Method Editor - Calibration Tab Without Added Standards
86
Fig. 66 the Available Samples Dialog
86
Fig. 67 Method Editor - Calibration Tab with Added Standards before Calibration
87
Fig. 68 Method Editor - Calibration Tab after Calibration
87
Fig. 69 Method Calibration with Several Calibration Ranges
88
Fig. 70 Method Calibration Tab with Highlighted Outlier
89
Fig. 71 Method Editor - Structure Tab
90
Fig. 72 Element Properties Editor
91
Fig. 73 Method Editor - Normation Tab
92
Fig. 74 Method Editor - Calibration Tab Without Added Standards
93
Fig. 75 the Available Samples Dialog
93
Fig. 76 Method Editor - Calibration Tab with Added Standards before FP Calculation
94
Fig. 77 Method Editor - Calibration Tab after FP Calculation, but before Calibration
94
Fig. 78 Method Editor - Calibration Tab after First Calibration
95
Fig. 79 Method Editor - Structure Tab
96
Fig. 80 Element Properties Editor
97
Fig. 81 Method Editor - Normation Tab
98
Fig. 82 Method Editor - Calibration Tab Without Added Standards
99
Fig. 83 the Available Samples Dialog
99
Fig. 84 Method Editor - Calibration Tab with Added Standards before FP Calculation
100
Fig. 85 Method Editor - Calibration Tab after FP Calculation, but before Calibration
101
Fig. 86 Method Editor - Calibration Tab after First Calibration
102
Managing System Spectra
103
Fig. 87 Spectra Workspace
103
Adding Spectra to the Database
104
Delete a Spectrum from the Database
104
Fig. 88 Adding Spectra to the Database
104
System Settings
105
Managing the Database
105
Report Templates
105
Fig. 89 Report Templates Tab
105
Fig. 90 Report Editor
106
Integrity
107
Data Processing
107
Fig. 91 Data Processing - Selection Tab
108
Fig. 92 Data Processing - Results Tab
109
7 Shutdown
110
Switching off the Instrument
110
Standby Mode
110
8 Maintenance of the M1 ORA/MISTRAL
111
Fuse Replacement
111
Table 22 Fuse Replacement
111
Cleaning the Sample Chamber
112
9 Transportation
113
10 Disposal
114
A Standard Delivery Contents
115
Table 23 Standard Delivery Contents of the M1 ORA/ MISTRAL
115
B General Safety Precautions
116
C Biological Effects of X-Ray Radiation
117
Index
119
Advertisement
Advertisement
Related Products
Bruker M1 ORA
Bruker M4 TORNADO
Bruker minispec mq20
Bruker minispec LF Series
Bruker Ascend MS 500'54
Bruker minispec
Bruker NMR MS 300 54 Ascend ULH
Bruker NMR MS 600 89 Ascend DNP
Bruker NMR MS 500 54 Ascend
Bruker MPA I
Bruker Categories
Laboratory Equipment
Measuring Instruments
Industrial Equipment
Security Sensors
Medical Equipment
More Bruker Manuals
Login
Sign In
OR
Sign in with Facebook
Sign in with Google
Upload manual
Upload from disk
Upload from URL