Sign In
Upload
Manuals
Brands
Beckman Coulter Manuals
Measuring Instruments
Multisizer 4
Beckman Coulter Multisizer 4 Manuals
Manuals and User Guides for Beckman Coulter Multisizer 4. We have
1
Beckman Coulter Multisizer 4 manual available for free PDF download: User Manual
Beckman Coulter Multisizer 4 User Manual (238 pages)
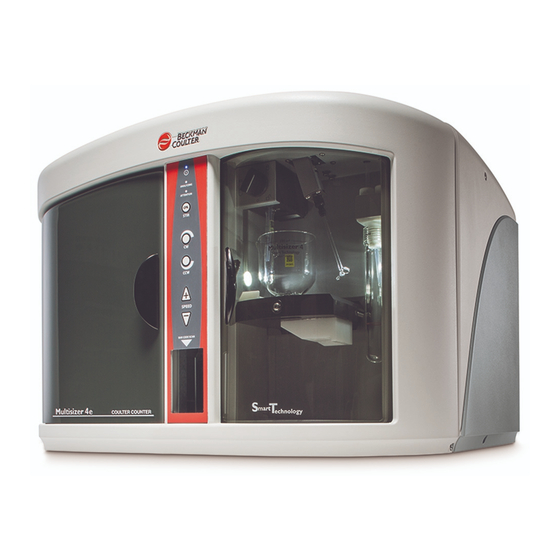
Particle Analyzer
Brand:
Beckman Coulter
| Category:
Measuring Instruments
| Size: 3.09 MB
Table of Contents
Table of Contents
3
List of Tables
13
Introduction
15
Particle Size Determination
16
Displaying Multisizer
17
Environmental Conditions
18
Regulatory Compliance
19
Before You Start: Warnings and Cautions
19
Warnings
19
Electrical Warnings
20
Chemical Warnings
20
Mechanical Warnings
20
Fire Warnings
20
Cautions
21
Electrical Cautions
21
Chemical Cautions
21
CHAPTER 1 Analyzer Overview
23
Overview
23
New Multisizer
23
Bar Code Reader
23
Sample Platform Beaker and Accuvette® Guides
23
Automatic Stirrer Positioning
23
Automatic Blockage Detection
24
Extended Dynamic Range
24
Multisizer
24
Multisizer 4 Analyzer Components
24
Power ON/OFF Switch
25
Sample Compartment
25
Control Panel
25
Electrolyte Jar
25
Waste Jar
26
Electrolyte and Waste Jar Fluid Levels
26
Installing and Removing the Electrolyte and Waste Jars
26
Installing the Waste Jar
26
Control Panel
27
Disabling the Control Panel Buttons
27
Viewing Control Panel Actions in Run Information
28
ON Light
28
Analyzing and Attention Lights
28
Stir on Button
28
Stirrer Direction Controls
28
Stirrer Speed Controls
29
Bar Code Reader
29
Sample Compartment
30
Aperture Tube
30
Aperture Tube Knob
30
Sample Platform
31
Platform in Loading Position: Beaker Side
31
Reversing the Sample Platform
32
Platform in Loading Position: Accuvette® ST Side
32
Platform Release
33
External Electrode
33
Stirrer
33
Reversing the Sample Platform
33
Particle Trap
34
Status and Illumination Lights
34
Accessories
35
Beakers
35
Accuvette® Sts
35
Calibrators
35
Aperture Tubes
36
Handling Aperture Tubes
36
Cleaning the Aperture Tube, Beakers, and Accuvette® Sts
37
Cleaning an Aperture Tube
38
Cleaning the Analyzer
38
Closed Circuit Filtration System
39
Pre-Filtering the Electrolyte and Cleaning Fluid
39
Preparing the Analyzer for Sample Runs
40
Starting the Analyzer
40
CHAPTER 2: Software Overview
43
Opening the Multisizer
43
Connecting the Software to the Analyzer
43
Connecting Analyzer and Software on Startup
43
Connecting to the Analyzer Using the Software Main Menu
44
Disconnecting from the Analyzer Using the Software Main Menu
44
Multisizer 4 Software Window
44
Main Menu
45
Main Toolbar Buttons
47
Default Main Toolbar Configuration
47
Main Toolbar Buttons: First Group
48
Main Toolbar Buttons: Second Group
48
Main Toolbar Buttons: Third Group
49
Main Toolbar Buttons: Fourth
50
Status Panel
50
Viewing Area
52
Run Menu
52
Instrument Toolbar
53
Instrument Toolbar: Run
53
Reset Button
53
Instrument Toolbar: Reset
54
Instrument Toolbar: Fluid Control
54
Status Bar
54
Instrument Toolbar: Function
54
CHAPTER 3: Installing and Calibrating an Aperture
55
Overview
55
When to Install a New Aperture
55
Selecting an Aperture Size
55
Installing an Aperture Tube
56
Aperture Sizes
56
Using Small Aperture Tubes
57
Handling Small Aperture
58
Proper Handling of a Small Aperture Tube
58
Unblocking Small Aperture
59
Reducing Environmental Factors that Create
59
Create a Dust-Free Lab
59
Reduce Acoustic Noise Levels
59
Block Electrical
59
Pre-Filtering the Electrolyte and Cleaning
59
Cleaning the Analyzer Prior to Using a Small
60
Cleaning System Components and Small Aperture Noise
60
Closed-Circuit Filtration System
60
Cleaning an ST Aperture Tube with a Squeeze Bottle
61
Noise Profile, Clean System (20 ΜM Aperture)
62
Using Appropriate Current and Gain
63
Storing Small Aperture
63
Noise Profile, Contaminated System (20 ΜM Aperture)
63
Calibrating the Aperture
64
Choosing Calibrator Size
64
Standards
65
Pausing or Stopping Calibration
68
Completing the Calibration Run
69
Pausing / Stopping
69
Obtaining the Mean Kd
70
Example
71
Updating the Mean Kd
71
Verifying the Calibration
72
Saving the Calibration File
75
The Change Aperture Tube
75
Step 1: Select the New Aperture Tube
77
Entering and Editing Aperture Tube
77
Step 2: Remove the Currently Installed Aperture Tube
80
Step 3: Install the New Aperture Tube
80
Step 4: Place a Beaker of Clean Electrolyte on the Platform
81
Step 6: Fill the System
82
Step 7: Adjust the Metering Pump
82
Step 8: Set Current and Gain
82
Step 9: Measure Noise Level
84
Step 10: Verify Calibration
85
Verify Aperture Calibration
86
Step 11: All Done
87
Setting Control Sample
87
CHAPTER 4 : Selecting Analysis Settings: SOM and SOP ,4-1
91
Definitions: SOM, Preferences, and
91
Using the Create SOM
91
Standard Operating Method
91
Sop
91
Som)
92
Creating Automatically Generated Analysis File
94
Names
94
Write-Protecting Saved Analysis
96
Standard Operating Method: Control
96
Standard Operating Method: Run
98
Settings
98
Standard Operating Method: Stirrer
100
Settings
100
Copying Manual Stirrer
101
Standard Operating Method: Threshold, Current and
103
Threshold, Current and Gain (Step 5): Entries or
104
Standard Operating Method: Pulse to Size
105
Standard Operating Method: Concentration
107
Information
107
Standard Operating Method: Blockage
108
Detection
108
Saving an SOM to a File
112
Editing SOM Settings
113
The SOM Settings (SOP Loaded)
115
Loading an SOM
115
Using a Standard Operating Procedure
116
Creating an SOP
116
Loading an SOP
118
CHAPTER 5 : Setting View and Print Preferences ,5-1
119
Creating a Preferences File
119
Window
121
Printing Sample Information in
121
Selecting Graphs, Statistics, and Data for Printing
122
Including a Size Distribution Graph in Printed Reports
122
Including Statistics in Printed Reports
124
Including Averaged Statistics in Printed Reports
124
Including a Comparison to Sample Specifications in Printed Reports
124
Including Overlay Statistics in Printed Reports
124
Including a Listing in Printed Reports
125
Including Interpolation Data in Printed Reports
126
Interpolation Display Data
127
Including Size Trend Information in Printed Reports
128
Preferences: Printed Report
128
Including Size Statistics in Printed Reports
130
Including Filtration Efficiency in Printed Reports
130
Including Pulse Data in Printed Reports
130
Including Blockage Monitor Data in Printed Reports
132
Setting the Print Order for Reports
133
Preferences: Statistics
133
Statistics Display Preferences
134
Reports
134
Using Statistical Category Names
135
Preferences: Averaging and Trend
135
Reports
135
Preferences: Export
137
Reports
138
Preferences: Graph Options
139
Preferences: Fonts and Colors
139
Reports
140
Preferences: View Options
141
Preferences Wizard: Set View
141
Reports
141
Reviewing Your Preferences Settings
142
Saving a Preferences File
143
Automatically Updating the Default Preferences File
144
CHAPTER 6 Analyzing a Sample
145
Analyzer Checklist
145
Selecting Analysis Settings
145
Loading an SOM
146
Loading Preference Settings
146
Loading an SOP
146
Removing an SOP
147
Verifying Preference Settings
147
Copy and Print Preference
147
Verifying SOM Settings
148
Verify SOM Settings
148
Entering Sample Information
149
Entering Sample Info for Next
150
Settings
150
Editing Sample Information
151
Using Sample Specifications
151
Editing Sample Specifications
153
Including Sample Specifications in a Printed Report
153
Viewing Sample Specifications
153
Editing Size Data
154
Running an Analysis
154
Sample Analysis Variations
156
Running a Multi-Tube Overlap Analysis
156
Determining Particle Concentration Using Time Mode
157
Using Blank Runs
158
Running a Blank Analysis
158
Enabling Blank Subtraction for Analysis Runs
159
Disabling Blank Analysis Subtraction
159
Loading a Blank Run into an Open Analysis File
159
Removing a Blank Run from an Open Analysis File
159
CHAPTER 7: Working with Analysis Files
161
Setting File Preferences
161
Changing Print Settings
161
Viewing Analysis Files
162
Changing the Display of an Open File
162
Run Menu Behaviors
162
Graphs
162
Listings and Interpolation
162
Viewing Graphs
162
Graph Menu
162
Calculate Menu
163
Display Menu
163
Using Cursors in Graphs
163
Viewing Listings
164
Listing Menu
164
Size Column Format
164
Pulses Column Format
165
Blockage Monitors Column Format
166
Calculate Menu
166
Viewing Interpolations
166
Size Interpolation Data
167
Changing the Column Display
168
Viewing Statistics
168
Using Cursors in Graphs
168
Comparing Statistics to Sample Specifications
169
Comparing an Analysis to a Standard Run
169
Converting Pulses to Size
169
Converting Pulses to Size between Cursors
171
Converting Pulses to Size for the Widest Distributions
171
Printing Report(S) for One or more Analysis Files
172
Printing a Report of an Open Analysis File
174
Printing with Current Analysis Settings
175
Open Analysis File Print
175
Saving an Analysis File
176
Saving Analysis Data Automatically
176
Saving Analysis Data Manually
177
Opening a Saved Analysis File
177
Importing a File
178
Working with Multiple Analysis Files
179
Using Overlay Files
179
Saving an Overlay File
180
Opening a Saved Overlay File
180
Averaging Analysis Files
180
Opening Files for Averaging
181
Adding Data to an Average
181
Saving Averaged Files
181
Opening a Saved List of Averaged Files
182
Creating a Size Trend Analysis
182
Opening Files for a Size Trend
183
Adding a File to a Size Trend
183
Saving a Size Trend
183
Opening a Size Trend
184
Merging Runs
184
Saving a Merged Run
185
Moving between Multiple Files (Cursor Menu and Shortcut)
185
Filtration Efficiency
186
Saving a Filtration Efficiency Analysis
186
Including Filtration Efficiency in a Printed Report
186
CHAPTER 8 Configuring Software and Security
187
Configuration Overview
187
Configuration Options
187
Security Modes and Configuration
187
Customizing Main Menus
189
Names
189
Customizing Run Menus
191
Customizing Toolbars
193
Customizing the Status Panel
194
Panel
195
Customizing Sample Info Names
196
Customizing Recent File and Folder Lists
197
Selecting a New Folder from the Recent Folder List
198
Adding a Folder to the Recent Folders List
198
Customizing the Save Preferences Default Setting
199
Choosing a Language
199
Multisizer 4 Configuration Options
200
Bar Code Reader Configuration Options
201
Customizing Security Settings
202
Logging in
204
Logging out
204
Changing Your Password
204
Administrator Menu Options
205
Customizing User Privileges
206
CHAPTER 9 Troubleshooting
207
Resolving Common Problems
207
Reducing Noise
207
Measuring the Noise Level
208
Purging the Metering Pump
208
Adjusting the Metering Pump
209
Setting the Vacuum Regulator
209
Measuring Gain Stage Offsets
209
Setting Custom Measurement Intervals
210
System Error: Unable to Measure Gain Stage Offsets
210
Resolving Error Messages on Software Startup
211
Viewing Advanced Multisizer Settings
212
Waste Tank Settings
212
Calibrating Waste Tank Sensors
212
Vacuum Settings
213
Flow Rate Error Messages
214
Adjusting Volumetric Flow Settings
214
Fill, Flush, and Drain Settings
215
Viewing System Flush Time
215
Draining the System
217
Aperture Resistance Settings
218
Calibrating the Electrolyte and Waste Jars
219
Working with Field Service
221
Requesting Service and Technical Support
221
Identifying the Instrument
221
Updating Firmware and FPGA Software
222
Viewing the Instrument Schematic
223
Viewing the Error Log
224
Opening Service Mode
224
CHAPTER 10: Regulatory Compliance
225
Regulatory Compliance
225
Electronic Signatures (21 CFR Part 11)
225
Electronic Records
225
FDA Requirements
225
Security Controls
226
Electronic Controls
226
System Validation
226
Audit Trail
227
File History and Audit Trail
227
Accessing File History
227
Setting Audit Trail Options
228
Maintaining Electronic Signatures
229
Generating Electronic Signatures
229
Applying Electronic Signatures
230
Additional Security Features
231
Starting the Multisizer 4 with Security Enabled
231
Advertisement
Advertisement
Related Products
Beckman Coulter Biomek 4000
Beckman Coulter StatSpin Express 4 M510
Beckman Coulter AU2700
Beckman Coulter AU5800
Beckman Coulter CEQ 8000 series
Beckman Coulter COULTER LH 750 System
Beckman Coulter Cytomics FC 500
Beckman Coulter DU 600 Series
Beckman Coulter DU 700 Series
Beckman Coulter DU 800 Series
Beckman Coulter Categories
Laboratory Equipment
Measuring Instruments
Medical Equipment
Desktop
Cash Counter
More Beckman Coulter Manuals
Login
Sign In
OR
Sign in with Facebook
Sign in with Google
Upload manual
Upload from disk
Upload from URL