Sign In
Upload
Manuals
Brands
Barco Manuals
Projector
SIM 7D
Barco SIM 7D Manuals
Manuals and User Guides for Barco SIM 7D. We have
3
Barco SIM 7D manuals available for free PDF download: User Manual, Installation Manual, Brochure & Specs
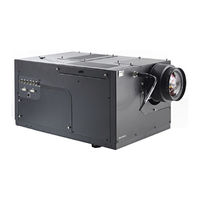
Barco SIM 7D User Manual (184 pages)
LCOS ( Liquid Crystal on Silicon) based high resolution projector
Brand:
Barco
| Category:
Projector
| Size: 19 MB
Table of Contents
Table of Contents
5
Disposal Information
3
1 Introduction
9
About
9
RACU Hand Held Control Unit
9
2 Packaging
11
Unpacking
11
Silicagel
11
Unpacking the Cardboard Box: Exploded View
13
3 Installation Guidelines
15
Safety Warnings
15
Image Size
16
What about Ambient Light
16
Which Screen Type
16
4 Installation
17
Dimensions
17
Fixation Points at the Bottom of the Projector
18
Dimensions
18
Projector Tilt
19
Fixation Points
19
Projector Tilt Range
19
RCU Battery Installation
20
Projector Tilt Range
20
Lens Installation
21
Lens Range
21
Lens Formulas
22
Shift Capabilities
22
Projection Distance (PD) and Screen Width (SW)
22
Lens Shift: Maximum Horizontal Shift (Vertical Shift = 0)
22
Lens Shift: Maximum Horizontal Shift (Vertical Shift = Maximum = 100%)
23
Lens Shift: Range
23
Installing the Lens and Adjusting the Scheimpflug
24
Screws to Lock the Lens Scheimpflug Settings (Left Side)
25
Screws to Lock the Lens Scheimpflug Settings (Right Side)
25
Top Lens Cover: Fixing Screws
25
Bottom Lens Cover: Fixing Screws
26
Lens: Scheimpflug Springs
26
Lens Positioned
26
Connecting the Lens
27
Lens Fixation Nuts
27
Lens: Scheimpflug Securing Bolts and Nuts
27
Lens Data
28
Projector Lens Connection
28
Lens Connector Pinout
28
Projector Configuration
29
Connections
29
Power Connection
29
Projector Configurations
29
Signal Connections
30
Barco SIM7 Power Connection
30
Input Specifications
31
The Input Section
31
Projector Left Side View
31
Input Section
31
DVI Digital Input Board
31
Connecting a DVI Source
32
Source Specification
32
Connections : Connecting a DVI Source
32
Communications
33
The LAN Inputs
33
Connecting to the Network
34
Network Settings
34
Controls
36
Controls Overview
36
Infrared Receivers
38
Local Keypad: Location
38
Location of the IR Receivers
39
5 Setup
41
Warranty: Continuous Mode / Automatic Shutdown Mode
41
Powering the SIM 7 Projector
41
Setting the RCU Address
42
Barco SIM7 : Power Switch
42
Standby State : L3 Is Red
42
Starting the Projector
43
Setting the Projector Address (Only if Necessary)
44
Setting up the Orientation
45
Lens Adjustments
45
Locking the Lens Holder (Rugged Option)
45
Lens Top Cover: Fixing Screws
46
Horizontal Shift: Free
46
Horizontal Shift: Blocked
46
Fixation Screws for Horizontal Lens Shift Locking System
46
Locking / Unlocking the Zoom Ring and the Focus Ring of the Lens
47
Fixation Screw for Vertical Lens Shift Locking System
47
Back Focal Length Adjustment
48
Engaging the Zoom/Focus Locking System
48
Unlocking the Zoom/Focus Locking System
48
Back Focal Length Adjustment
49
How to Adjust
49
Back Focal Length: Fixation Screws
50
Back Focal Length Adjustment Tool
50
Back Focal Length Adjustment Range
50
Adjusting the Lens
51
6 Getting Started
55
Starting up the Projector
55
Selecting a Source
55
Adjusting the Image
56
Switching the Projector to Standby
56
7 Advanced
57
Using the Dialog Boxes
57
Source Selection
58
Selecting a Source
58
Selecting the L1 DVI Source
58
Selecting a PC Source (L1 PC, L2 PC)
59
Selecting the L2 DVI Source
59
Image
59
Introduction
59
Image Settings
60
Setting the Brightness
60
Setting the Contrast
60
Gamma
61
Phase (RGB Signals Only)
61
Time of Day (TOD)
62
Image Files
63
Load File
63
Auto Image
64
Edit File
65
Save as (Create a Custom File)
67
Copy
68
Rename File
68
Delete
69
Forced File Load
70
Geometry
71
Geometry Files
71
Introduction
71
Geometry File Notation
71
Accessing the Geometry Menu
72
Geometry Distortions
72
Each Frustum Is Divided in 33X33 Regions
73
Total Image after Warping (and Soft Edge)
73
Geometry Levels
74
Load
75
Geometry Level Hierarchy
75
Edit
76
Accessing the Geometry Edit Menu
77
Geometry Edit Wizard
77
Interaction and Selection Boxes
78
Unaffected Regions
78
Geometry Edit Modes
79
Editing a Geometry File
81
Shift Adjustment
84
Transport Delay
86
Transport Delay Basic Principle
87
Geometry Reset
88
Reset All Levels
88
Restore to a Level
89
Geometry Restore Example : Restoring to a 9X9 Level
90
Rename a Geometry File
91
Copy a Geometry File
92
Delete a Geometry File
93
Lamps
94
Runtimes
94
History
95
Lamp Runtime Warning
95
Reset Lamp Runtime
96
Lamp Power Mode
97
CLO Mode
98
Constant Light Output (CLO)
98
CLO Target
99
General
99
Pause
99
Identification
100
Display Setup
101
Menu Bar Position
101
Textbox
101
Slider Box Position
102
Sync Variance Limit
103
Introduction
104
Soft Edge
104
Soft Edge : Purpose
105
Soft Edge Basic Principle
105
Accessing the Soft Edge Menu
106
Soft Edge Edit
106
The Soft Edge Edit Wizard
106
The Soft Edge Edit Modes
107
Creating/Editing a Soft Edge
109
Alpha Planes
114
Black Level
116
Black Level : Double Brightness Compensation
116
Introduction
116
Beta Planes
117
Internal Black Level
117
Blanking
118
Autoimage Setup
119
Introduction
120
Smearing Reduction (Optional)
120
Enabling Smearing Reduction
121
With Smearing (Smearing Reduction Off)
121
Without Smearing (Smearing Reduction On)
121
Adjusting the Phase
122
Color Temperature
123
Tmr
123
7.8.10 Dynacolor
124
7.8.10.1 Introduction
124
The CIE Chromaticity Diagram
125
The Projector Color Gamut Is Defined by the Triangle Formed by the X, y Coordinates of Red Green and Blue
125
The Color Gamut of each Projector will Differ
125
Common Color Gamut
126
Enabling Dynacolor
128
7.8.10.3 Dynacolor Adjustment
129
7.8.10.3.1 Introduction
129
Calibration (for Multiple Projectors)
130
7.8.10.3.3 Common Color Values
133
7.8.10.3.4 Factory Preset
133
7.8.10.4 Black Color Matching
133
7.8.10.4.1 Introduction
133
7.8.10.4.2 Black Color Adjustment
133
7.8.10.5 CLO-TOD Color Tracking
134
7.8.11 Gray Level Definition
135
7.8.11.1 Description
135
7.8.11.2 Illustrating the Influence of GLD Correction
136
GLD: Response Curve
136
GLD Correction on Level 1
137
GLD Correction on Level 3
137
7.8.11.3 GLD Correction
138
Preparing the GLD Correction
138
GLD Correction on Level 1 and 3
138
7.8.11.3.2 Performing GLD Correction
139
7.8.12 Convergence
141
Installation
142
Lens Adjustments
142
Automatic Shutdown
143
Frustum Resolution
143
Network Settings
143
Orientation
143
Projector Address
143
Internal Patterns
144
Internal Outline Pattern
145
Internal Hatch Pattern
145
Internal Color Bars Pattern
145
Internal Checkerboard Pattern
146
Internal Full White Pattern
146
Internal HGBWS Pattern
146
Internal Character Set Pattern
147
Internal H-Pattern
147
Convergence Pattern
148
ANSI Pattern
148
Internal Focus Pattern
149
Internal Fine Res H Layout Pattern
149
Internal Purity Dialog Box
149
Scaled Patterns
150
Scaled Purity Pattern
151
Change Password
152
8 Maintenance
155
Cleaning the Lens
155
Cleaning the Exterior of the Projector
155
Air Filter Replacement
156
Air Filters: Location
156
Removing the X-Cube Filter
157
X-Cube Air Filter (Thicker Seal)
157
Electronics Air Filter (Thinner Seal)
157
Installing the X-Cube Filter
158
X-Cube Filter Cover: Fixation Screws
158
X-Cube Filter Cover: Lift to Remove
158
X-Cube Filter: Lift It to Remove
158
Removing the Electronics Filter
159
X-Cube Filter: Place It in Its Housing
159
X-Cube Filter: Put the Cover in the Right Position
159
X-Cube Filter Cover: Fixation Screws
159
Electronics Filter Cover: Fixation Screws
160
Electronics Filter: Pull It out a few Centimeters
160
Electronics Filter: Release the Side Filter Cover
160
Installing the Electronics Filter
161
Electronics Filter: Removing
161
Electronics Filter: Install
161
Electronics Filter Cover: Mounting
161
Exact Position of the Cover against the Electronics Filter
161
Lamp Replacement
162
Electronics Filter: Push It in
162
Electronics Filter Cover: Fixation Screws
162
Removing the Lamp Cover
163
Removing the Lamp Door
163
Lamp Cover Removal
163
Lamp: Power Connector
163
Lamp: Power Connector Unplugged
163
Removing the Lamp
164
Lamp Door: Fixation Screws
164
Lamp Door: Removed
164
Lamp Locking Handle: Lift It to Release the Lamp
164
Installing the Lamp
165
Lamp: Removing
165
Lamp: Removed
165
Lens Locking System: Open
165
Lamp: Inserting
165
Installing the Lamp Door
166
Lamp Inserting: Firmly Push the Bottom Side First
166
Lamp Inserting: Firmly Push the Top Side
166
Lamp Inserting
166
Lamp Door: Positioning Points & Holes
166
Lamp Door: Positioning Holes
166
Installing the Lamp Cover
167
Lamp Door: Fixation Screws
167
Lamp: Power Connector
167
Lamp Cover: Installing
167
Resetting the Lamp Runtime
168
Lamp Cover: Fixation Screws
168
9 Troubleshooting
169
Diagnostic Leds
169
Basic Troubleshooting Guide
169
SIM 7: Leds
169
NVG Option
171
A.1 Description
171
A.2 Description of a Full Dimming Cycle
171
GLD Alignment
173
B.1 Gamma Values
173
Glossary
175
Index
177
List of Images List of Images
183
List of Tables
183
List of Images
183
Advertisement
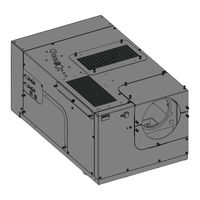
Barco SIM 7D Installation Manual (25 pages)
Brand:
Barco
| Category:
Projector Accessories
| Size: 1 MB
Table of Contents
Table of Contents
5
1 Safety
7
Safety Guidelines and Warnings
7
2 Kit Description
9
Introduction
9
Kit Content
10
Kit Content: General Drawings
10
Kit Content: Parts
11
Kit Content: Parts
12
Dimensions
13
Dimensions: General
13
Dimensions: SIM 7Q
14
Dimensions: SIM 7D
14
3 Mounting the Rugged Frame
15
Inserting a T-Nut Inside the Rugged Frame
15
Fixing the Front Frame to the Bottom Frame
15
Inserting the T-Nut
15
Frame Bracket
16
Corner Frame Side View
16
Mounting the Projector to the Rugged Frame
17
Corner Frame Bottom View
17
Fixing the Lens Clamp Assembly to the Projector Lens
18
Position of the Tightening Screws of the Lens Clamps
19
Fix the Lens Clamp to the Lens
19
Fixing the Lens Clamp Assembly
19
Fixing the Bottom Frame
20
Tightening of All the Seven Screws
20
Fixing the Bottom Frame
21
Index
23
List of Images List of Images
25
List of Images
25
Barco SIM 7D Brochure & Specs (2 pages)
High-resolution simulation projector
Brand:
Barco
| Category:
Projector
| Size: 0 MB
Advertisement
Advertisement
Related Products
Barco SIM 7QP HC
Barco SIM 7Q HB
Barco SIM 7Q
Barco SIM 7QP
Barco SIM 7QP HB
Barco SIM 7QP C
Barco SIM 7Q HC
Barco SIM 5H
Barco BarcoReality SIM 6 Ultra II
Barco BARCOREALITY SIM 6 MK II + WARP 6
Barco Categories
Projector
Monitor
Projector Accessories
Controller
Medical Equipment
More Barco Manuals
Login
Sign In
OR
Sign in with Facebook
Sign in with Google
Upload manual
Upload from disk
Upload from URL