Sign In
Upload
Manuals
Brands
Barco Manuals
Projector
FLM R20+ Performer
Barco FLM R20+ Performer Manuals
Manuals and User Guides for Barco FLM R20+ Performer. We have
3
Barco FLM R20+ Performer manuals available for free PDF download: Service Manual, User Manual, Brochure & Specs
Barco FLM R20+ Performer User Manual (241 pages)
Brand:
Barco
| Category:
Projector
| Size: 18 MB
Table of Contents
Software License Agreement
3
Disposal Information
4
Table of Contents
5
1 Safety
9
General
9
Important Safety Instructions
10
Important Warnings Concerning FLM Flight Cases
12
2 General
13
Installation Requirements
13
Unpacking the Projector
14
Box Content
15
FLM Flight Case
16
Projector Configurations
16
Rear Projection
17
Positioning the Projector
18
Shift Range
18
Projector Air Inlets and Outlets
20
Free Download of Projector Toolset
20
3 Physical Installation
21
Remote Control Unit (RCU)
21
RCU Battery Installation
22
RCU Rugged Case Installation
23
RCU XLR Adaptor Installation
23
Using the XLR Adaptor of the RCU
23
RCU Usage Possibilities
24
Lenses
25
Available Lenses
25
Lens Selection
26
Lens Formulas
26
Lens Installation
27
Lens Removal
28
Alignment of a Table Mount FLM Projector
29
Alignment of a Ceiling Mount FLM Projector
30
Suspension of the FLM Projector with Rigging Clamps
30
4 Stacking FLM Projectors
35
Aligning Stacked FLM Projectors
37
5 Connections
39
Power Connection
39
Input Source Connections
41
Communication Connections
42
Projector Status
42
Usb Port
45
6 Getting Started
47
RCU & Local Keypad
47
Terminology Overview
47
Operating the Projector
49
Switching on
49
Errors, Warnings and Messages During Start up
50
Switching to Standby
50
Switching off
51
Using the RCU
51
Quick Setup Adjustments
53
Text Boxes on or off
53
Quick Lens Adjustment
53
Quick Lens Adjustment Via LENS Key
53
Direct Lens Adjustment (RCU)
54
Quick Picture in Picture
54
Quick Layout Selection with Rigging Key
55
Quick Language Selection
55
Projector Address
56
Displaying and Programming Addresses
56
Controlling the Projector
57
Source Selection
57
Controlling the Projector
58
7 Start up of the Adjustment Mode
59
About the Adjustment Mode
59
About the Use of the Remote Control and the Local Keypad
59
Start up the Adjustment Mode
59
Navigation and Adjustments
60
Shortcut Keys to the Menus
60
On Screen Menus Versus LCD Display Menus
61
Test Patterns in Adjustment Mode
61
Menu Memory
61
8 Input Menu
63
Overview Flow
63
Slot Module Type
63
About Input Setup
63
Input Configuration
64
Input Locking
65
Minimum Delay
67
Native Resolution
67
Source Switching
69
No Signal
69
Background Color
69
Shutdown Setting
70
Shutdown Retarding Time
70
9 Image Menu
73
Overview Flow
73
How to Select the Image Adjustments
74
Image Settings
74
Contrast
75
Brightness
75
Saturation
76
Tint (Hue)
77
Phase
77
Sharpness
78
Noise Reduction
79
Color Temperature
80
Predefined Color Temperature
80
Set a Custom Color Temperature
81
Input Balance
82
Introduction to Input Balance
82
Adjusting the Input Balance
83
Black Balance
84
Aspect Ratio
86
Timings
87
How to Select an Aspect Ratio
87
Source Timings
87
Advanced Settings
88
Advanced Settings, Film Mode Detection
90
Connecting a New Source
92
Image Files Services
92
Files and File Manipulations
92
Manual Load File
92
The Image Is Not Perfect
93
Delete File
93
Delete All Custom Files
94
Rename a File
94
Copy a File
95
File Options
96
Save Custom Settings
97
10 Layout Menu
99
Overview Flow
99
Main Window
99
Source Selection
100
Size Adjustment
100
How to Adjust Height and Width Separately
102
Position Adjustment
103
PIP Window
104
Introduction to PIP
104
Picture in Picture Activation
105
Picture in Picture Source Selection
105
Picture in Picture Size of the Window
106
How to Change the Height and Width Separately
108
Picture in Picture, Position Window
109
Layout File Services
110
Load Layout
110
Rename a Layout
111
Delete a Layout
111
Copy / Save as a Layout
112
Zoom - Focus
113
11 Lamp Menu
115
Overview Flow
115
Lamp Power Mode
115
Lamp Power
116
Constant Light Output Mode (CLO Mode)
117
CLO Target
118
Lamp Identification
118
How to Display
119
Z-Axis Adjustment
119
12 Alignment Menu
121
Overview Flow
121
Orientation
122
Lens Adjustment
123
Side Keystone
124
Warp Geometry Settings
125
About Warp Geometry Settings
125
Warp Status
126
Horizontal Keystone Correction
127
Vertical Keystone Correction
128
Rotation
129
Pincushion - Barrel Correction
130
Corner Correction
131
Reset Warp Settings
132
Load Warp File
133
Contrast Enhancement
134
Blanking
134
How to Adjust the Blanking
135
Gamma
136
Internal Pattern
136
Color Space
137
Scenergix
138
Introduction
138
Preparations
139
Scenergix Activation
139
Scenergix Overlap Zone (Horizontal Scenergix)
140
Scenergix Overlap Zone (Vertical Scenergix)
141
Scenergix Size Adjustment (White Level)
143
Adjusting the Black Level of the Images
145
How to Adjust
147
13 Projector Control
149
Overview Flow
149
Projector Address
150
Individual Projector Address
150
Common Address
151
Serial Communication
152
Baud Rate Setup
152
Interface Standard
152
RS422 Termination
153
Network
153
Introduction to a Network Connection
154
DHCP Setup
154
IP-Address Set up
155
Subnet-Mask Set up
155
Default Gateway Set up
156
IR Control Switching
157
Art-Net DMX
157
DMX Address
158
DMX Universe
158
DMX Monitor
159
DMX Mode
160
Art-Net Activation
161
Home Lens at Startup
161
Buttons
162
Standby Button
162
APA (Auto) Button
163
Shortcut Keys
163
Menu Position
164
On Screen Menu
164
Bar Scale
165
Local LCD
165
Local LCD Time out
165
Local LCD Contrast
166
Language Selection
166
How to Change the Language
167
14 Service Menu
169
Overview Flow
169
Identification
170
Diagnosis
171
How to Start up the Diagnosis
171
Versions
171
Voltages
172
I²C Diagnosis
173
Temperatures
173
Fan Speeds Overview
174
Spi
175
Error Logging Overview
176
Convergence
176
Internal Service Patterns
177
Restore Factory Defaults
178
Reset Formatter
179
Save Custom Settings
180
Refill Mode
180
Broadcast Mode
181
USB Memory
182
15 Maintenance
185
Replacement of the Dust Filter on the Front Side
185
Replacement of the Dust Filter on the Bottom Side
186
Replacement of the Dust Filter on the Top Side
187
Pressure Verification of the Liquid Cooling Circuit
187
Cleaning the Lens
188
Cleaning the Exterior of the Projector
188
16 Servicing
189
Removal of the Lamp House
189
Removal of the Input & Communication Unit
190
Removal of an Input Module
191
Installation of the Lamp House
192
Installation of the Input & Communication Unit
193
Installation of an Input Module
194
Realignment of the Lamp in Its Reflector
195
17 Removal of the Projector Covers
197
Removal of the
197
Removal of the Side Cover
198
Removal of the Lamp Cover
199
Removal of the Input Cover
199
Installation of the
200
Installation of the Side Cover
201
Installation of the Lamp Cover
202
Installation of the Input Cover
203
Dimensions
205
Dimensions of the FLM R20+ Performer
205
A.1 Dimensions of the FLM R20+ Performer
205
Dimensions of the FLM Flight Case
206
Dimensions of the Rigging Clamps
207
Standard Source Files
209
B.1 Table Overview
209
DMX Chart
211
DMX Chart, Basic
211
DMX Chart, Extended
212
DMX Chart, Full
213
Troubleshooting
217
Error Codes
217
D.1 Error Codes
217
Specifications
225
Specifications FLM R20+ Performer
225
E.1 Specifications FLM R20+ Performer
225
Specifications FLM 5 Cable Input (Multi Purpose)
227
Specifications FLM HDSDI - SDI Input
228
Specifications FLM DVI Input
229
Specifications FLM DVI HDCP Input
230
Order Info
231
Spare Part Order Info
231
Glossary
233
Index
235
Advertisement
Barco FLM R20+ Performer Service Manual (331 pages)
Brand:
Barco
| Category:
Projector
| Size: 57 MB
Table of Contents
Table of Contents
3
1 Safety
7
Safety Instructions
8
2 General Info
11
Location of Modules
12
Spare Part Kits
15
3 Troubleshooting
17
1000 → 1017 : Lamp Parameters Related Errors
18
1692 → 1699 : Formatter Related Errors
19
2000 → 2808 : Lamp Power Supply (LPS) Related Errors
23
4000 : Incompatible Hardware Error
28
4198 : Pixel Map Related Error
29
5095 → 5098 : Flash Memory Related Errors
30
7658 → 7999 : Temperature, Fan & Motor Related Errors
31
8000 → 8001: Shutter Related Errors
57
8002 : Lamp EEPROM Error
58
9198 → 9398: CPU Related Errors
59
10498 : Input Module Related Error
60
4 About Lenses
61
Available Lenses
62
Lens Selection
63
Lens Formulas for FLM R20
64
Lens Formulas for FLM HD Projectors
65
Lens Installation
66
Lens Removal
68
5 Carrying Handle
69
Replacement of the Bottom Carrying Handle
70
Installing the Carrying Handle on Top of the Projector
71
6 Removal and Installation of Projector Covers
73
Removal of the
74
Removal of the Side Cover
75
Removal of the Lamp Cover
76
Removal of the Input Cover
77
Removal of the
78
Removal of the Top Cover
79
Installation of the Top Cover
80
Installation of the
81
Installation of the
82
Installation of the Side Cover
83
Installation of the Lamp Cover
84
Installation of the Input Cover
85
7 Dust Filters
87
Replacement of the Dust Filter on the Front Side
88
Replacement of the Dust Filter on the Bottom Side
89
Replacement of the Dust Filter on the Top Side
90
8 Lamp and Lamp House
91
Removal of the Lamp House
92
Installation of the Lamp House
93
Realignment of the Lamp in Its Reflector
95
9 Input & Communication Unit
97
Removal of the Input & Communication Unit
98
Installation of the Input & Communication Unit
99
Removal of an Input Module
100
Installation of an Input Module
101
10 Light Processor + Light Pipe Assembly
103
Diagnostics
104
Removal of the Light Processor
105
Installing the Light Processor
108
11 Integration Rod
111
Rod Diagnostic
113
Removal of the Integration Rod Assembly
114
Installing a New Integration Rod Assembly
115
Adjusting the Integration Rod
117
12 UV Filter
119
UV Filter Replacement
120
13 Cold Mirror Assembly
121
Diagnostic
122
Removal of the Cold Mirror Assembly
123
Mounting the New Cold Mirror + Fan Assembly
126
Adjusting the Cold Mirror
129
14 Lens Holder
131
Removing the Lens Holder
132
Installing the Lens Holder
134
Adjusting the Lens Holder
137
15 Vertical and Horizontal Shift Motors
141
Removing the Vertical Shift Motor
142
Mounting a New Vertical Shift Motor
145
Removal of the Horizontal Lens Motor
148
Mounting the New Horizontal Lens Motor
151
16 FLM Liquid Cooling Circuit
155
Safety
157
Introduction
158
Diagnostics
159
Pressure Verification of the Liquid Cooling Circuit
161
Draining the Liquid Cooling Circuit
162
Filling the Liquid Cooling Circuit
165
Refreshing the Liquid Cooling Circuit
169
Expelling Air from the Liquid Cooling Circuit
172
Pressurizing the Liquid Cooling Circuit
174
Calibrating the Liquid Cooling Circuit
177
17 Heat Exchanger
181
Removing the Defective Heat Exchanger
182
Disassembling the Heat Exchanger Assembly
184
Assembling the New Heat Exchanger
186
Mounting the Heat Exchanger Assembly into the Projector
188
18 Cooling Pump
191
Maintaining the Cooling Pump
192
Opening the Cooling Pump and Rotor Movement
193
Cleaning Pump
194
Closing the Pump
195
Cooling Pump Body Replacement
196
Removing the Pump Body
197
Mounting the New Pump Body
198
Cooling Pump Replacement
199
Removing the Pump
200
Mounting the New Pump
202
19 Shutter Replacement
205
Shutter Replacement
206
20 Formatter Interface Board
209
Removing the FIB
210
Mounting a New FIB
211
21 Pixel Map Processor Board
213
Diagnostics
214
Building out the PMP
215
Mounting a New PMP Board
218
22 LCD Panel Replacement
221
Removing the LCD Panel
222
Mounting a New LCD Panel
225
23 Keypad Board Replacement
229
Removing the Keypad Unit
230
Mounting the New Keypad Unit
232
24 Fan Replacements
235
Heat Exchanger Fan
236
Building out the Heat Exchanger Assembly
237
Replacing the Old Fan with a New Fan
239
Mounting the Heat Exchange Assembly into the Projector
240
Cold Mirror Fan
241
Removal of the Cold Mirror Fan
242
Mounting a New Cold Mirror Fan
244
Light Processor Compartment Fan
246
Remove of the Top Plate
247
Removal of the Axial Fan
248
Mounting a New Axial Fan
249
Mounting the Top Plate
250
Cathode Fan Replacement
251
Removal of the Fan Assembly
252
Fan Replacement
255
Mounting the Fan Assembly
256
Anode Fan Replacement
259
Access to the Anode Fan
260
Removing the Anode Fan
262
Fan Replacement
264
Mounting the Fan Assembly
266
Finalizing the Replacement
268
Mains Input Fan
269
Replacing the Mains Input Fan
270
SMPS Fans
272
Replacing the Right Fan
273
Replacing the Left Fan
275
25 Peltier Replacement
277
Remove a Peltier Element from the DMD
278
Mounting a Peltier Element on the DMD
281
Remove a Peltier Element on the Heat Pipe Cooling Block
284
Mounting a Peltier Element on the Heat Pipe Cooling Block
286
26 Power Input
289
Getting Access to the Power Elements
290
Mains Filter Replacement
292
Removing the Mains Filter
293
Mounting a New Mains Filter
294
Mains Switch Replacement
295
Removing the Mains Switch
296
Mounting the New Mains Switch
297
Closing the Power Input Compartment
298
27 Lamp Power Supply
299
LPS Diagnostic Led's
301
Removing the LPS Module
303
Installing the LPS Module
305
28 Start Pulse Generator
307
Troubleshooting
308
Removal of the Start Pulse Generator
309
Installation of the Start Pulse Generator
311
29 Convergence Adjustment
315
Action of the Convergence Controls
316
Re-Converging Green on Blue
317
Readjustment of the Plungers
320
Re-Converging Red on Blue
321
Glossary
325
Index
327
Barco FLM R20+ Performer Brochure & Specs (4 pages)
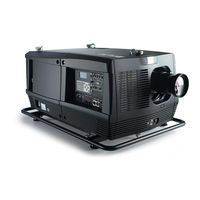
FLM Series Ultra quiet, compact 20k lumens projector
Brand:
Barco
| Category:
Projector
| Size: 0 MB
Advertisement
Advertisement
Related Products
Barco FLM HD20
Barco FLM HD18
Barco FLM HD14
Barco FLM R22+
Barco FLM series
Barco FL35
Barco FL40 series
Barco FL40-WU
Barco FL40 - 4K
Barco FL-FS40 MKII
Barco Categories
Projector
Monitor
Projector Accessories
Medical Equipment
Controller
More Barco Manuals
Login
Sign In
OR
Sign in with Facebook
Sign in with Google
Upload manual
Upload from disk
Upload from URL