Sign In
Upload
Manuals
Brands
Avocent Manuals
Server
Cyclades ACS8
Avocent Cyclades ACS8 Manuals
Manuals and User Guides for Avocent Cyclades ACS8. We have
6
Avocent Cyclades ACS8 manuals available for free PDF download: Installation/Administration/User Manual, Brochure, Supplementary Manual, Quick Installation Manual, Specification Sheet
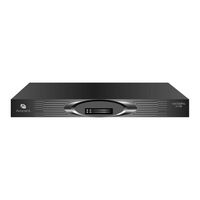
Avocent Cyclades ACS8 Installation/Administration/User Manual (212 pages)
Advanced Console Server
Brand:
Avocent
| Category:
Server
| Size: 2 MB
Table of Contents
English
5
Console Server
3
Table of Contents
5
List of Tables
9
List of Figures
13
Chapter 1: Introduction
17
Overview
17
Connectors on the ACS Console Server
17
Figure 1.1: Front of the ACS Console Server
17
Figure 1.2: ACS Console Server Connectors
17
Accessing the ACS Console Server and Connected Devices
18
Web Manager
18
Table 1.1: ACS Console Server Connectors
18
Prerequisites for Using the Web Manager
19
Types of Users
19
Security
19
Authentication
20
Table 1.2: Authentication Methods Supported
20
Ipv6
21
Services Not Supporting Ipv6
21
Vpn
21
Packet Filtering
22
Structure of IP Filtering
22
Add Rule and Edit Rule Options
23
Table 1.3: Add Rule and Edit Rule Option Definitions
23
Table 1.4: TCP Protocol Option Definitions
23
Snmp
24
Notifications, Alarms and Data Buffering
24
Syslog Servers
24
Managing Users of Connected Devices
25
Configuring Access to Connected Devices
25
ACS Console Server and Power Management
25
Table 1.5: Common Administrator Tasks for Configuring Software
25
Configuring Power Management
27
Options for Managing Power
27
Hostname Discovery
28
Chapter 2: Installation
29
Important Pre-Installation Requirements
29
Basic Installation Procedures
29
Figure 2.1: Placement of Mounting Brackets (Forward Mounting Configuration Shown)
29
Making an Ethernet Connection
30
Making a Direct Connection to Configure the Network Parameters
30
Powering up the Console Server and the Connected Devices
31
Table 2.1: ACS Console Server Serial Port Pin-Out
31
Performing Basic Network Configuration Using the Wiz Command
32
Figure 2.2: Configuration Wizard Screen
33
Figure 2.3: Current Configuration Wizard Screen for Option 0 (Ipv4 Enabled)
34
Adding Users and Configuring Ports Using the Web Manager
36
Other Methods of Accessing the Web Manager
36
Installing PC Cards
37
Connecting Cyclades PM Ipdus
37
Table 2.2: Tasks Related to Connecting Cyclades Ipdus
38
Chapter 3: Web Manager for Regular Users
39
Using the Web Manager
39
Features of Regular User Forms
40
Connect
40
Table 3.1: Description of Regular User Web Interface
40
Figure 3.1: Regular User Form
40
Connect to the Console Server
41
Connect to Serial Ports
41
Table 3.2: Java Applet Buttons for Connecting to the Console Server
41
Connection Protocols for Serial Ports
42
Table 3.3: Available Serial Port Protocols
42
IPDU Power Management
43
Outlets Manager
43
Table 3.4: Regular User - Outlet Management Buttons
43
Figure 3.2: Regular User - IPDU Power Mgmt. Form
43
Outlets Group Ctrl
44
View IPDU Info
44
Figure 3.3: Regular User - IPDU Power Mgmt. - Outlet Groups Ctrl
44
Table 3.5: Power Management Display Information by Configured Port
45
Figure 3.4: Regular User - View Ipdus Info
45
Security
46
Chapter 4: Web Manager for Administrators
47
Common Tasks for ACS Console Server Administrators
47
Table 4.1: Administrator - Common Administrative Tasks
47
Common Features of Administrator Forms
48
Table 4.2: Description of Administrator Web Manager Buttons
48
Figure 4.1: Administrator - Web Manager Buttons
48
Logging into the Web Manager
49
Table 4.3: Administrator - Options for Trying, Saving and Restoring Configuration Change
49
Table 4.4: Administrator - Logout Button and Other Information in the Upper Right
49
Overview of Administrative Modes
50
Wizard Mode
50
Expert Mode
51
Figure 4.2: Example of Web Manager Form in Wizard Mode
51
Figure 4.3: Example of Web Manager Form in Expert Mode
52
Chapter 5: Configuring the ACS Console Server in Wizard Mode
53
Step 1: Security Profile
53
Table 5.1: Wizard - Serial Port Enabled Services for each Security Profile
54
Table 5.2: Wizard - Serial Port Enabled Services for each Security Profile
54
Table 5.3: Wizard - Enabled Protocols for each Security Profile
54
Figure 5.1: Administrator - Physical Ports Factory Settings
55
Figure 5.2: Wizard - Step 1: Security Profile Form
56
Step 2: Network Settings
57
Figure 5.3: Custom Security Profile Dialog Box
57
Figure 5.4: Wizard - Step 2: Network Settings - DHCP Disabled
58
Figure 5.5: Wizard - Step 2: Network Settings - DHCP Enabled
58
Step 3: Port Profile
59
Table 5.4: Port Profile Setup Options
59
Figure 5.6: Wizard - Step 3: Port Profile
59
Step 4: Access
60
Figure 5.7: Wizard - Step 4: Access
61
Figure 5.8: Wizard - Step 4: Access Add User Dialog Box
61
Table 5.5: Wizard - Add User Dialog: Field Names and Definitions
62
Figure 5.9: Wizard - Step 4: Change Password Dialog Box
62
Step 5: Data Buffering
63
Figure 5.10: Wizard - Step 5: Data Buffering [Local]
64
Figure 5.11: Wizard - Step 5: Data Buffering [Remote]
64
Table 5.6: Wizard - Data Buffering Field Names and Definitions
65
Table 5.7: Differences Beween Remote and Local Data Buffering
65
Step 6: System Log
66
Figure 5.12: Wizard - Step 6: System Log
66
Chapter 6: Applications
69
Configuring the Console Server in Expert Mode
69
Overview of Menus and Forms
69
Table 6.1: Expert Mode Screen Elements
70
Figure 6.1: Expert Mode Screen Elements
70
Applications Menu and Forms
71
Connect
71
Figure 6.2: Expert - SSH Session Java Applet
71
IPDU Power Management
72
Figure 6.3: Expert - Applications - IPDU Power Mgmt. - Outlets Manager
73
Table 6.2: Expert - Outlets Manager Icons Description
74
Figure 6.4: Expert - Applications - IPDU Power Mgmt. - Outlets Manager - Show Outlets
74
Applications - IPDU Power Mgmt. - Outlets Group Ctrl
75
Applications - IPDU Power Mgmt. - View Ipdus Info
76
Table 6.3: Expert - Outlet Groups Ctrl Information
76
Figure 6.5: Expert - Applications - IPDU Power Mgmt - Outlet Groups Ctrl
76
Table 6.4: Expert - Applications - Ipdu Power Mgmt - View Ipdus Info Description
77
Figure 6.6: IPDU Power Mgmt. - View Ipdus Info
77
Applications - IPDU Power Mgmt. - Configuration
78
Table 6.5: IPDU Power Mgmt Configuration Description
79
Figure 6.7: Expert - Applications - IPDU Power Mgmt. - Configuration
79
Applications - IPDU Power Mgmt. - Software Upgrade
80
Expert - Applications - PMD Configuration
81
Applications - PMD Configuration- General
81
Figure 6.8: Applications - PMD Configuration
81
Applications - PMD Configuration- Outlet Groups
82
Figure 6.9: PMD Configuration - Outlet Groups
82
Applications - PMD Configuration- Users Management
83
Figure 6.10: PMD Configuration - Users Management
83
Table 6.6: Conventions Used in Specifying Outlets for User Accessibility
84
Table 6.7: Outlet Designations on Daisy-Chained Ipdus (PM10 Shown)
85
Figure 6.11: Various Outlet Designations on Daisy-Chained Ipdus
85
Expert - Applications - Terminal Profile Menu
86
Table 6.8: Methods for Specifying a Specific Port on Daisy-Chained Ipdus
86
Figure 6.12: Expert - Applications - Terminal Profile Menu
86
Figure 6.13: Expert - Terminal Profile Menu Example
87
Chapter 7: Network Menu and Forms
89
Table 7.1: Expert - Network Menu Descriptions
89
Host Settings
90
General Host Settings
90
Table 7.2: Network - Host Settings General Tab Form Field
90
Figure 7.1: Expert - Network - Host Settings
90
Disabling and Enabling Ipv4 or Ipv6 Protocols
91
Ipv4 Settings
92
Figure 7.2: Expert - Network - Host Settings - Ipv4 (DHCP Disabled)
92
Ipv6 Settings
93
Table 7.3: Network - Host Setting - Ipv4 Field Defintions
93
Figure 7.3: Expert - Network - Host Settings - Ipv6
93
Table 7.4: Network - Host Setting - Ipv6 Field Defintions
94
Syslog
97
Figure 7.4: Expert - Network - Syslog
97
PCMCIA Management
98
Figure 7.5: Expert - Network - PCMCIA Management
98
Figure 7.6: PC Card Type by Slot
99
Table 7.5: Modem Dialog Box Fields
100
Table 7.6: ISDN Dialog Box Fields
101
Table 7.7: GSM Dialog Box Fields
102
Table 7.8: Ethernet Dialog Box Fields
103
Table 7.9: Compactflash / Hard Drive Dialog Box Fields
104
Figure 7.7: Expert - Compactflash/Hard Disk PC Card Configuration Dialog Box
104
Table 7.10: Wireless LAN Dialog Box Fields
105
Figure 7.8: Expert - Wireless LAN PC Card Configuration Dialog Box
105
Table 7.11: CDMA Dialog Box Fields
106
VPN Connections
107
Figure 7.9: Expert - VPN New/Modify Connection Dialog Box
108
Table 7.12: Field and Menu Options for Configuring a VPN Connection
109
Figure 7.10: Security Custom Profile Dialog
110
Snmp
111
Figure 7.11: Expert - Network - SNMP
112
Table 7.13: Expert - Fields and Menu Options for SNMP Configuration
113
Figure 7.12: Expert - New/Mod SNMP V1 V2 Configuration Dialog Box
113
Figure 7.13: Expert - New/Mod SNMP V3 Configuration Dialog Box
114
Firewall Configuration
115
Figure 7.14: Expert - Network - Firewall Configuration
115
Figure 7.15: Expert - Firewall Configuration Edit Chain Dialog Box
116
Figure 7.16: Firewall Configuration User-Defined Chain Message
116
Figure 7.17: Expert - Firewall Configuration Add Chain Dialog Box
116
Figure 7.18: Firewall Configuration Edit Rules for Chain_Name Form
117
Figure 7.19: Firewall Configuration Edit Rules for Chain_Name Buttons
117
Figure 7.20: Expert - Firewall Configuration Add Rule and Edit Rule Dialog Boxes
117
Figure 7.21: Firewall Configuration TCP Protocol Fields and Menu Options
118
Table 7.14: Expert - TCP Options Fields
119
Table 7.15: UDP Options
119
Figure 7.22: Firewall Configuration Add Rule and Edit Rule UDP Protocol Fields
119
Table 7.16: Expert - Firewall Configuration Input/Output Interface and Fragments Fields
120
Figure 7.23: Input/Output Interface Fields and Fragments Menu Options
120
Table 7.17: Expert - Target LOG Options Selection Fields
121
Figure 7.24: Firewall Configuration Add Rule and Edit Rule LOG Target Fields
121
Figure 7.25: Firewall Configuration Add Rule and Edit Rule REJECT Target Menu Options
121
Table 7.18: Reply Packet Names and Definitions
122
Figure 7.26: Edit Chain Dialog Box
123
Host Table
124
Figure 7.27: Expert - Network - Host Tables
124
Static Routes
125
Figure 7.28: Expert - Network - Static Routes
125
Figure 7.29: Expert - Static Routes Add and Edit Dialog Boxes - Default Route
125
Table 7.19: Routing Type Fields in the New/Modify Route Dialog Box
126
Figure 7.30: Expert - Static Routes Add and Edit Dialog Boxes - Network Route
126
Figure 7.31: Expert - Static Routes Add and Edit Dialog Boxes - Host Route
126
Chapter 8: Security Menu and Forms
129
Users and Groups
129
Figure 8.1: Expert - Security - Users and Groups Form
129
Table 8.1: Expert - Add User Dialog Field Names and Definitions
130
Active Ports Sessions
132
Table 8.2: Expert - Active Ports Sessions Information
132
Figure 8.2: Expert - Security - Active Ports Sessions
132
Authentication
133
Configuring Authentication for Console Server Logins
133
Figure 8.3: Expert - Security - Authentication
133
Table 8.3: Tasks for Setting up Authentication Servers
134
Figure 8.4: Expert - Security - Authentication - LDAP
137
Figure 8.5: Expert - Administration - Time/Date
139
Figure 8.6: Expert - Security - Authentication - Kerberos
139
Security Profiles
140
Figure 8.7: Expert - Security - Authentication - NIS
140
Figure 8.8: Expert - Security - Security Profile
140
Table 8.4: Enabled Services to Access the Console Server under each Security Profile
141
Table 8.5: Enabled Services to Access the Serial Ports under each Security Profile
141
Table 8.6: Enabled Protocols for each Security Profile Shown with a Check Mark
142
Figure 8.9: Expert - Physical Ports Default Factory Settings
143
Figure 8.10: Serial Ports Protocol Incompatibility Dialog Box
143
Security Certificates
144
Figure 8.11: Custom Security Profile Dialog Box
144
Chapter 9: Ports Menu and Forms
147
Physical Ports
147
Figure 9.1: Ports - Physical Ports
147
Figure 9.2: Ports - Physical Ports - General Form
148
Table 9.1: Connections Protocols When Serial Port Is Connected to Device Console Port
149
Table 9.2: Available Connection Protocols When Terminal Is Connected to a Serial Port
150
Table 9.3: Connection Protocols for Modems or Ipdus
151
Table 9.4: Access Form Menu and Fields
155
Table 9.5: Expert - Authentication Methods and Fallback Mechanisms
156
Table 9.6: List of Authentication Method Procedures
157
Figure 9.3: Ports - Physical Ports - Data Buffering Enabled
158
Table 9.7: Data Buffering Form Fields
159
Table 9.8: Expert - Multi User Form Fields
161
Table 9.9: Available Options from the Allow Multiple Sessions Pull-Down
161
Figure 9.4: Ports - Physical Ports - Power Management, Enable IPMI Checked
162
Table 9.10: Expert - Power Management Form Fields
163
Table 9.11: Other Form Fields
165
Figure 9.5: Ports - Physical Ports - Power Management-Allow All Users
165
Figure 9.6: Ports - Physical Ports -Power Management -Allow Users and Groups
165
Virtual Ports
168
Figure 9.7: Ports - Virtual Ports
168
Table 9.12: New/Modify Port Dialog Box Fields
169
Figure 9.8: Ports - Virtual Ports - New/Modify Port Dialog Box
169
Figure 9.9: Ports - Virtual Ports - New/Modify Port Dialog Box
170
Ports Status
171
Figure 9.10: Ports - Virtual Ports - New/Modify - Port Names Dialog Box
171
Figure 9.11: Ports - Ports Status (Read-Only)
171
Ports Statistics
172
Table 9.13: Expert - Port Status Read-Only Form
172
Table 9.14: Expert - Ports-Port Status Read-Only Form
172
Figure 9.12: Ports - Port Statistics (Read-Only)
172
Expert - Ports - Hostname Discovery
173
Table 9.15: Expert - Ports - Hostname Discovery Fields
173
Chapter 10: Administration Menu and Forms
175
System Information
175
Table 10.1: System Information Form
175
Notifications
176
Table 10.2: Notifications Form Fields
176
Table 10.3: Email Notifications Dialog Box Fields
177
Table 10.4: Pager Notification Add/Edit Dialog Box Fields
178
Table 10.5: SNMP Trap Notifications Add/Edit Dialog Box Fields
179
Time/Date
180
Figure 10.1: Expert - Administration - Time/Date
180
Figure 10.2: Expert - Administration - Time and Date - NTP Enable
181
Boot Configuration
182
Figure 10.3: Expert - Administration - Time/Date - Edit Custom
182
Table 10.6: Boot Configuration Form Fields
183
Backup Configuration
184
Table 10.7: Backup Configuration Settings if Using FTP Server
184
Table 10.8: Backup Configuration if Using Storage Device
185
Upgrade Firmware
186
Table 10.9: Expert - Upgrade Firmware Form Fields
186
Reboot
187
Online Help
187
Figure 10.4: Expert - Administration - Online Help
188
Appendices
191
Appendix A: Technical Specifications
191
Table A.1: ACS Console Server Product Specifications
191
Deutsch
192
Appendix B: Safety, Regulatory and Compliance Information
192
Described in this Appendix.
192
Safety and Environmental Guidelines for Rack-Mounting the Console Server
192
Safety Precautions for Operating the Console Server
194
Sicherheitsvorkehrungen Beim Betrieb des Cyclades ACS
194
NEBS Certification
195
Working Inside the Console Server
196
Austausch der Batterie
197
FCC Warning Statement
197
Notice about FCC Compliance for All Cyclades ACS Advanced Console Server Models on Page
197
Remplacement de la Batterie
197
Replacing the Battery
197
Aviso de Precaución S-Mark Argentina
198
Canadian DOC Notice
198
Trabajar dentro del Cyclades ACS Advanced Console Server
198
Appendix C: Technical Support
200
Index
201
Advertisement
Avocent Cyclades ACS8 Supplementary Manual (2 pages)
Avocent Cyclades ACS Series ACS1 Console Servers: Supplementary Guide
Brand:
Avocent
| Category:
Server
| Size: 0 MB
Table of Contents
Overview
1
Challenge
1
Profile
1
CASE STUDY – Telecommunications
1
Remote Access and Management of Servers
1
Solution
2
Results
2
About Avocent
2
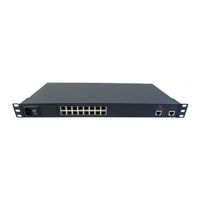
Avocent Cyclades ACS8 Brochure (6 pages)
Advanced Console Server
Brand:
Avocent
| Category:
Server
| Size: 1 MB
Advertisement
Avocent Cyclades ACS8 Quick Installation Manual (2 pages)
Advanced Console Server
Brand:
Avocent
| Category:
Server
| Size: 0 MB
Avocent Cyclades ACS8 Supplementary Manual (2 pages)
Avocent Cyclades ACS 5000 Series ACS5004 Console Servers: Supplementary Guide
Brand:
Avocent
| Category:
Server
| Size: 0 MB
Avocent Cyclades ACS8 Specification Sheet (2 pages)
Advanced Console Server
Brand:
Avocent
| Category:
Server
| Size: 0 MB
Advertisement
Related Products
Avocent Cyclades ACS4
Avocent ACS V6000
Avocent ACS 6000
Avocent Cyclades ACS48
Avocent Cyclades CS
Avocent Cyclades ACS
Avocent Advanced Console Server ACS 6000
Avocent Cyclades ACS 5000 SERIES
Avocent AutoView Wireless
Avocent AMX 5121
Avocent Categories
Switch
Extender
Network Hardware
Server
Software
More Avocent Manuals
Login
Sign In
OR
Sign in with Facebook
Sign in with Google
Upload manual
Upload from disk
Upload from URL