Sign In
Upload
Manuals
Brands
Avid Technology Manuals
Mixer
VENUE S6L
Avid Technology VENUE S6L Manuals
Manuals and User Guides for Avid Technology VENUE S6L. We have
6
Avid Technology VENUE S6L manuals available for free PDF download: System Manual, Installation Manual, Handbook, Quick Start Manual, Manual
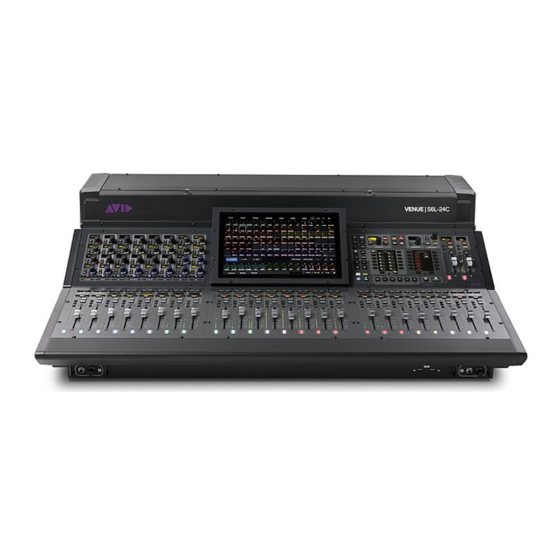
Avid Technology VENUE S6L System Manual (432 pages)
Brand:
Avid Technology
| Category:
Recording Equipment
| Size: 47 MB
Table of Contents
Table of Contents
5
Part I Overview
13
Introduction to the VENUE | S6L System
13
Installation and Setup
13
S6L System Features
13
S6L Control Surface Features
14
E6L Engine Features
17
Stage 64 I/O Rack Features
18
Stage 32 I/O Rack Features
19
Stage 16 Remote IO Features
20
Local 16 I/O Features
21
What's Included
21
Expansion Options
22
Operational Requirements
23
Cabling Requirements
24
System Requirements and Compatibility
24
Resources
25
Activation
25
Conventions Used in this Guide
26
S6L Control Surface Overview
27
S6L Control Surface Top Panel Overview
27
Fader Banks
28
Channel Knob Modules (CKM)
33
Channel Touch Module (CTM)
38
Master Live Module (MLM)
40
Master Touch Screen (MTS)
49
S6L Control Surface Connections
54
E6L Engine Overview
58
E6L Cards and Features
58
E6L Front Panel
59
E6L Back Panel
60
Stage and Local I/O Rack Overview
62
Stage 64 and Stage 32 I/O Card Features and Capabilities
63
Stage 64 Front Panel
64
Making Stage I/O Unit Connections
66
Stage 64 Controller Display
66
Using MADI Outs on Stage 64 and Stage 32
71
Part II Using S6L
73
Configuring System Audio
73
Powering the System up and down
74
Confirming System Components
76
Pairing the E6L and S6L
77
Enabling Config Mode
79
Assigning Stage I/O Units
80
Assigning Local 16
83
Setting the System Clock
88
Configuring Mains and MIX Buses
89
Managing Connections
91
How to Proceed
95
Banking Channels on the S6L Control Surface
96
Channel Banking Overview
96
Banking a Combination of Inputs and Outputs
97
Banking Only User Layouts, Vcas, Inputs, or Outputs
100
Spill Mode for Outputs
101
User Layouts
102
Bank Safing Channels
109
Selecting and Attentioning Channels
112
Selecting Channels
112
Attentioning Channels
114
Attention on Fader
115
Selecting/Attentioning Multiple Channels (Multi-Select)
116
Adjusting Channel Parameters
118
Configuring and Patching Channels
118
Assigning Channels to Outputs
119
Assign Vcas and Mute Groups from Channel Control Encoders
121
Adjusting Input Parameters on the Control Surface
122
Adjusting EQ on the Control Surface
130
Adjusting Dynamics on the Control Surface
134
Adjusting Plug-Ins on the Control Surface
137
Using the CHANNEL Function
139
Flipping Parameters to Faders (Flip to Faders Mode)
140
Encoder Assign Mode
141
Working with Mains and Vcas
142
Working with Mains
142
Working with Vcas
146
Working with Aux Sends
149
Adjusting Aux Sends in Channel Control Mode
149
Adjusting Aux Sends in Channel Strip Mode
152
Adjusting Aux Sends on Faders (Sends on Faders Mode)
153
Vcas Trim Aux Sends in Sends on Faders Mode
156
Adjusting Aux Sends on the External Screen
157
Classifying Auxes for Snapshots
158
Matrix Mixers
159
Matrix Mixers Overview
159
Assigning Input Sources to Matrix Mixers
160
Adjusting Matrix Mixer Input Controls
161
Delay Compensation with Matrix Mixers
164
Adjusting Matrix Mixer Output Controls
164
Snapshot Data and Parameters for Matrix Mixers
165
Muting and Mute Groups
166
Muting Individual Channels
166
Mute Groups
168
Snapshot Data and Parameters for Mute
173
Soloing and the Monitor Buses
174
Configuring the Monitor Buses and solo Options
174
Adjusting Monitor Buses
176
Soloing Channels
178
Using the Headphone Outputs
182
Part III External VENUE Software Screen
183
External VENUE Software Screen Overview
184
Viewing Pages and Tabs
184
Overview of Software Pages
187
Banner Display
191
Type Text Search
192
Overview, Inputs, and Outputs Pages
193
Navigating the Overview, Inputs, Outputs Pages
193
Attentioning Channels from the External Screen
195
Adjusting Parameters on the External Screen
196
Working with EQ and Dynamics on the External Screen
198
Input Direct
202
Copying and Pasting Settings
203
Configuring Channels on the External Screen
205
Inserting Plug-Ins on Channels
209
Input Channel, EQ, and Dynamics Presets
210
Assigning Channels to Buses and Vcas on the External Screen
212
Managing Output Channel Assignments (Members)
213
Color-Coding Channels from the External Screen
214
Filing
215
Creating Shows
215
Loading a Show
217
Working with Presets
218
Transferring Settings, Shows and Presets
220
Import Snapshots and Events
222
Undoing Changes Using the History Feature
223
Snapshots
225
Snapshots Page Overview
226
Creating Snapshots
232
Hierarchical Snapshots (Parent and Child Snapshots)
233
Momentary Snapshots
236
Snapshot Groups
237
Recalling Snapshots
238
Managing Snapshots
242
Making Changes to Snapshots
245
Preview Mode
248
Adding MIDI and Plug-In Data to Snapshots
252
Snapshot Options
257
User Aux Scope
259
Recall Safe
264
Automation Safing Channels
270
Snapshot Data Types and Parameters
273
Patchbay
274
Accessing the Patchbay
274
Overview of the Patchbay
274
Patching Input Sources to Input Channels
277
Patching Output Channels to Hardware Outputs
278
Patching Direct Outputs
279
Unpatching and Clearing Assignments
280
Multiple Input and Output Patching
281
Warning When Stealing Inputs or Outputs in the Patchbay
282
Naming Channels from the Patchbay
282
Type Text Search
283
Patch List Export
283
Plug-Ins
284
Plug-Ins Quick Start
284
Installing and Authorizing Plug-Ins
285
Plug-In Version Checker
289
Plug-In Racks
290
Rack Slots
295
Routing Plug-Ins
298
Adjusting Plug-Ins on the External Screen
302
Plug-In Presets and Snapshots
303
Plug-In DSP Usage
304
Plug-In Levels
305
Plug-In Latency and Processing Delay
305
Initializing the Plug-In Racks
305
Tap Tempo for Plug-Ins
306
WSG-HD Waves Soundgrid Option Card and Waves Plug-Ins
307
Events
314
The Events Tab
315
Creating Events
319
Events Presets
322
Creating Triggers
323
Creating Actions
327
Testing Events
329
Resetting Events
329
Snapshots and Events
330
Default Settings, Templates and Examples
331
Trigger Types
334
Action Types
336
Examples of Logical Operators
340
Options
341
System
341
Buses
345
Pickoffs
347
Snapshots
348
Misc
350
Interaction
354
Devices
358
Plug-Ins
361
Part IV Recording and Playback
362
Pro Tools Recording and Playback
363
Pro Tools Compatibility
363
Part V Reference
364
Synchronization
365
Clock Synchronization Overview
365
Time Code Overview
365
Synchronizing External Devices Using Word Clock
366
Synchronizing Using AES/ADAT or MADI Clock
369
Time Code
374
Connecting and Using the MADI-192 MADI Option Card
379
Making Audio Connections
379
Using MADI
380
Enabling Virtual Soundcheck Recording
381
Performing a Virtual Soundcheck Using MADI-192
382
Enabling Redundant Outputs
383
Using MADI for Hardware Inserts
383
Hardware Inserts
384
Connecting External Hardware
384
Assigning Hardware Inserts to Channels
385
Activating and Bypassing Hardware Inserts
386
Setting the Hardware Insert Location
386
GPI Port Reference
387
GPI Input Specifications
387
GPI Output Specifications
388
GPI Wiring Diagrams
389
Troubleshooting
392
Problem Solving
392
Restarting Your System
396
Resetting Hardware Components
397
Resetting Channel Touch Modules (Ctms)
397
Offline or Unavailable Devices
398
Hardware Monitoring Window
399
E6L Engine Emergency Shutdown
399
Utility Mode
399
Resetting the Plug-In Racks
400
Using the System Restore Software
400
Updating HDX-192 DSP Card Firmware
401
Updating MADI Card Firmware
401
Configuring S6L Master Touch Screen (MTS) and External Monitor
402
LED Brightness
403
Part VI Specifications
404
Mechanical Specifications
405
S6L-16C Control Surface
405
S6L-24C Control Surface
406
S6L-24/24D Control Surface
407
S6L-32D Control Surface
408
E6L Engine
409
Stage 64
410
Stage 32
411
Stage 16
412
Local 16 I/O
413
S6L System Components LED Codes
414
Replacing S6L and E6L Psus
415
S6L Secure USB Port
416
Making Fiber-Optic Connections
417
Audio Specifications
418
Signal Flow Diagrams
422
Input Channel Signal Flow
422
Output Channel Signal Flow
423
Part VII Appendices
424
Environmental Compliance
425
EMC (Electromagnetic Compliance)
425
Index
426
Advertisement
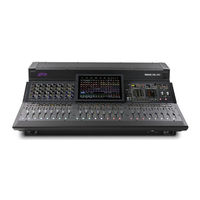
Avid Technology VENUE S6L Installation Manual (87 pages)
Brand:
Avid Technology
| Category:
Music Mixer
| Size: 13 MB
Table of Contents
Legal Notices
2
Safety Compliance
3
Power Safety Input Rating
3
Warning
3
Important Safety Instructions for E6L
3
Introduction
5
System Requirements and Compatibility
5
How to Use this PDF Guide
6
Conventions Used in this Guide
6
First Time Setup
8
Setting up a VENUE S6L System for the First Time
9
What’s Included
9
With the S6L Control Surface
9
VENUE | S6L Control Surface Software & Plug-Ins Pack
9
With the E6L Engine
10
With the Stage I/O Unit
10
VENUE | E6L Engine Restore Software Pack
10
Additional Required Items
11
Optional Items
11
Expansion Options
12
Operational Requirements
12
Temperature and Ventilation
12
Water and Moisture
12
Cabling Requirements
13
Power Connections
13
Audio Network Connections
13
Copper
13
Unpacking and Assembling Basic System Components
14
Rack Mounting
14
Connecting Power
14
Disconnecting the Included IEC Power Cables
14
How to Proceed
15
Connecting a Monitor
15
Connecting a USB Keyboard and Mouse
15
Activating S6L System Components at Avid.com
16
To Obtain Licenses and Download Links for Your Software
16
S6L Network Connections
17
S6L Network Connections Overview
17
AVB Audio Network Connections
17
S6L System Components
17
Making S6L Network Connections
18
Ecx Ethernet Control Connections
18
Redundant Ring Networks and Star Networks
18
AVB-192 Network Cards
18
Redundant Ring, 2X AVB-192 Cards
19
Redundant Ring, 1X AVB-192 Network Card
20
About Redundant Star Configurations
20
Multiple Stage I/O Units
21
To Connect Multiple Stage I/O Units
21
Multiple Stage I/O, One AVB-192 Network Card
22
Connection Guidelines for Multiple Stage I/O Units
22
Local 16 I/O
23
About I/O Sharing
23
VENUE System Restore for First Time Setup
24
Required Items
24
System Restore Software Installation Overview
24
Downloading VENUE System Restore Software
25
Creating System Restore USB Drives
25
Creating an E6L Engine System Restore USB Drive
26
Creating an S6L Control Surface System Restore USB Drive
26
Installing VENUE System Restore Software for the First Time
27
Installing VENUE System Restore Software on E6L
27
Installing VENUE Software on the S6L Control Surface
29
Installing VENUE Software on S6L
29
Configuring S6L Master Touch Screen (MTS) and External Monitor
31
Accept the Avid End User License Agreement
31
S6L Console Activation
31
Example Prompt During First Time Configuration
32
Activating Windows on S6L
33
To Activate Windows on the S6L Control Surface
33
To Activate Windows on Your S6L Control Surface
33
Upgrading VENUE
35
VENUE Software Installation Options When Upgrading
36
Backing up System Settings
37
To Back up Current Settings
37
Upgrading Using VENUE Software Update
38
Downloading VENUE Software
38
Updating the BIOS
38
Installing a VENUE Software Update
39
Unified Software Update
39
Manually Updating VENUE Software
40
Updating the E6L Engine
40
Updating the S6L Control Surface
40
Upgrading Using VENUE System Restore
41
VENUE System Restore Upgrade Overview
41
Comparison of Unified and Manual System Restore
41
Upgrading Using the Unified System Restore
44
Before You Begin
44
Minimum Connections, 2X AVB-192 Network Cards
45
Minimum Connections, 1X AVB-192 Network Card
45
S6L Control Surface USB Drive
46
S6L Control Surface Power Switch (S6L-24D Shown)
46
System Restore Dialog
47
Restore Dialog
47
How to Proceed
49
Completing the Installation
50
Powering up and Configuring the System
51
Installing the E6L Bezel
51
Powering the System up and down
52
First Time Power up
52
Please Select Engine Screen on the MTS
52
Confirming System Components
53
To Confirm System Components
53
Pairing the E6L and S6L
54
Please Select Engine
54
Enabling Config Mode
55
Assigning Stage I/O Units
56
Virtual Soundcheck: Important Note
57
Identifying Stage I/O Units
58
Assigning Local 16
59
Setting the System Clock (Time and Time Zone)
60
System ID and Serial Number in VENUE Software
61
To Enter System ID and Serial Numbers
61
Optional Connections for Pro Tools and Ecx Ethernet Control
62
To Make Pro Tools AVB/VENUE Link Connections
62
To Make Connections for Ecx Ethernet Control
62
Installing VENUE Plug-Ins
63
Transferring Plug-In Licenses
63
Copying the Plug-Ins Installer to a USB Drive
63
Installing Plug-Ins
64
Installing Optional S6L System Software
64
VENUE Standalone Software
64
VENUE On-Stage
64
Installing Pro Tools
65
Transferring the Live Sound Production Toolkit License
65
I/O Sharing Connections
66
Required Connections for Stage I/O Sharing
66
To Connect Two S6L Systems for I/O Sharing
66
About Synchronization in Shared I/O Configurations
67
Reference
69
Powering up the System
70
Powering down the System
70
Appendix A: Day to Day Powering up and down
70
Updating MLN-192 Milan Option Card Firmware
71
Appendix B: Updating Option Card and Other Firmware
71
Updating MADI-192 MADI Option Card Firmware
72
Required Components
73
Creating the BIOS 50 Update Key
73
Updating the BIOS on the E6L
74
To Make a Fiber-Optic Connection to an S6L System Component
75
To Remove the Fiber-Optic Cable from the SFP Module
75
Appendix C: Making Fiber Connections
75
Managing Stage I/O Unit Connections
76
Naming System Components
76
Managing Stage IO Unit Connections
76
Removing a Stage I/O Rack
76
Managing S6L–E6L Connections in Shared I/O Configurations
77
Managing E6L–Stage I/O Connections in Shared I/O Configurations
77
Show File Compatibility
77
Configuring Stage Slots for Stage 16S, Stage 32S, or Stage 64S
78
Appendix E: Performing a Manual System Restore
80
VGA Monitor
80
Activating Windows on E6L
82
Activating RTX64 on E6L
82
Venue
83
Installing VENUE Software on the S6L Control
83
Avid Technology VENUE S6L Installation Manual (74 pages)
Brand:
Avid Technology
| Category:
Mixer
| Size: 10 MB
Table of Contents
Safety Compliance
3
Important Safety Instructions
3
System Requirements and Compatibility
5
How to Use this PDF Guide
6
Conventions Used in this Guide
6
Hardware Switches on Control Surfaces
6
Setting up a VENUE S6L System for the First Time
9
What's Included
9
With the S6L Control Surface
9
With the E6L Engine
10
With the Stage I/O Unit
10
Additional Required Items
11
Optional Items
11
Expansion Options
11
Operational Requirements
12
Cleaning and Maintenance
12
Cabling Requirements
13
Power Connections
13
Unpacking and Assembling Basic System Components
14
Installing the E6L Bezel
14
Connecting Power
15
Connecting a Monitor
15
How to Proceed
15
Activating S6L System Components
16
VENUE Software Installation Options
18
VENUE System Restore
19
System Restore Software Installation Overview
19
Downloading VENUE System Restore Software
20
Creating System Restore USB Drives
20
Creating an E6L Engine System Restore USB Drive
21
Creating an S6L Control Surface System Restore USB Drive
21
Installing and Activating VENUE Software on the E6L Engine
22
Installing VENUE Software on E6L
22
VGA Monitor
22
Activating Windows and RTX on E6L
23
Installing VENUE Software on the S6L Control Surface
25
Installing VENUE Software on S6L
25
Configuring S6L Master Touch Screen (MTS) and External Monitor
27
VENUE Software Update
28
Downloading VENUE Software
29
Backing up System Settings
30
Updating the BIOS
30
Installing a VENUE Software Update
31
Unified Software Update
31
Manually Updating VENUE Software
32
S6L Network Connections
34
S6L Network Connections Overview
34
Making S6L Network Connections
35
Redundant Ring Network
35
Multiple Stage I/O Units
36
AVB-192 Network Cards
36
Connection Guidelines for Multiple Stage I/O Units
36
Example Configurations
37
Example 1: Basic Single System
38
Example 2: Single System with 2X Stage I/O Units
39
Example 3: Single System Expanded I/O (Stage 64S)
40
Example 4: Single System Expanded I/O (Stage 16S)
41
Example 5: Single System Expanded I/O (Stage 32S and Stage 16S)
42
Example 6: Single System Expanded I/O (Mixed Stage I/O and Local 16)
43
Example 7: Dual Systems for I/O Sharing
44
Installation
46
Powering up and Configuring the System
47
Powering the System up and down
47
First Time Power up
47
Confirming System Components
49
Pairing the E6L and S6L
50
Please Select Engine
50
Activating Windows on S6L
51
Enabling Config Mode
53
Assigning Stage I/O Units
54
Identifying Stage I/O Units
56
Setting the System Clock
58
How to Proceed
58
Optional Connections for Pro Tools and Ecx Ethernet Control
59
Installing VENUE Plug-Ins
60
Transferring Plug-In Licenses
60
Copying the Plug-Ins Installer to a USB Drive
60
Installing Plug-Ins
61
Installing Optional S6L System Software
61
Installing Pro Tools
62
Transferring the Live Sound Production Toolkit License
62
Appendix A: Day to Day Powering up and down
64
Powering up the System
64
Powering down the System
64
Appendix B: Updating Option Card and Other Firmware
65
Updating MADI Card Firmware
65
Required Components
66
Creating the BIOS 50 Update Key
66
Updating the BIOS on the E6L
67
Appendix C: Making Fiber Connections
68
Appendix D: Managing Stage I/O Unit Connections
69
Naming System Components
69
Reassigning a Stage I/O Rack
69
Removing a Stage I/O Rack
69
Managing S6L-E6L Connections in Shared I/O Configurations
70
Managing E6L-Stage I/O Connections in Shared I/O Configurations
70
Show File Compatibility
70
Configuring Stage Slots for Stage 16S, Stage 32S, or Stage 64S
71
Advertisement
Avid Technology VENUE S6L Handbook (40 pages)
modular live mixing system
Brand:
Avid Technology
| Category:
Mixer
| Size: 2 MB
Avid Technology VENUE S6L Manual (9 pages)
Rack Supports
Brand:
Avid Technology
| Category:
I/O Systems
| Size: 2 MB
Table of Contents
Stage 64
2
Components
2
Attaching the Rack Ears
3
Mounting Stage 64 in a Case
4
Stage 32
5
Components
5
Stage 16
6
Configuring Stage 16 as Handles
6
Local 16
8
Components
8
Avid Technology VENUE S6L Quick Start Manual (11 pages)
Control Surface: Replacing the Master Touch Screen
Brand:
Avid Technology
| Category:
Recording Equipment
| Size: 5 MB
Advertisement
Related Products
Avid Technology VENUE S6L16
Avid Technology VENUE S6L24
Avid VENUE Stage 16
Avid VENUE Stage 32
Avid VENUE Stage 64
Avid Technology VENUE S6L32
Avid VENUE Local 16
Avid Technology VENUE E6L
Avid Technology S6L Control Surface
Avid Technology S6L-32D
Avid Technology Categories
Recording Equipment
Music Mixer
Server
Accessories
Desktop
More Avid Technology Manuals
Login
Sign In
OR
Sign in with Facebook
Sign in with Google
Upload manual
Upload from disk
Upload from URL