Sign In
Upload
Manuals
Brands
Asus Manuals
Motherboard
AAEON PICO-APL1-SEMI
Asus AAEON PICO-APL1-SEMI Manuals
Manuals and User Guides for Asus AAEON PICO-APL1-SEMI. We have
2
Asus AAEON PICO-APL1-SEMI manuals available for free PDF download: User Manual, Quick Installation Manual
Asus AAEON PICO-APL1-SEMI User Manual (80 pages)
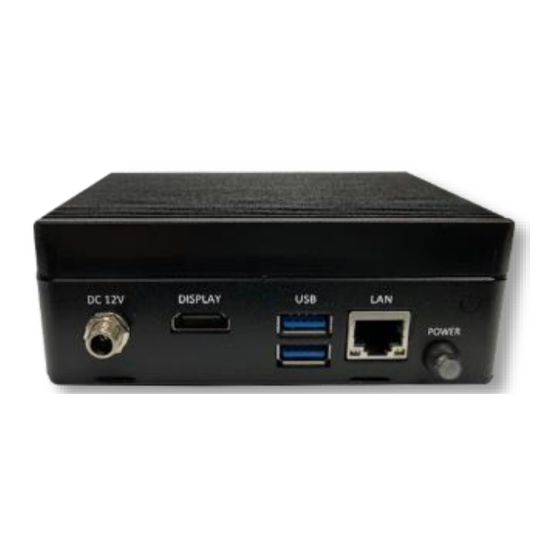
PICO-SEMI System
Brand:
Asus
| Category:
Desktop
| Size: 2 MB
Table of Contents
Table of Contents
11
Chapter 1 - Product Specifications
14
Specifications
15
Function Block
18
Chapter 2 - Hardware Information
19
Dimensions
20
Jumpers and Connectors
24
List of Jumpers
26
Clear CMOS Jumper (JP1 Pins 1, 3, 5)
26
Auto Power Button Mode Selection (JP1 Pins 2, 4, 6)
26
List of Connectors
27
Front Panel (CN3)
28
Mini Card Slot (Half-Size) (CN4)
28
Mini Card/Msata Slot (Full-Size) (CN6)
30
Sata (Cn8)
32
Battery (CN9)
33
USB 3.2 Gen 1 Port 1/2 (CN11)
33
Output for SATA HDD (CN12)
34
HDMI Port (CN13)
34
External +12V Input (CN14)
35
DDR3L SODIMM Slot (CN15)
35
COM Port 1/2 and Line-Out Connector (CN17)
36
LPC Port (CN18)
38
USB 2.0 Port 1 (CN19)
39
LAN Port (CN20)
40
Specifications for I/O Ports
41
Installation Guide
42
Installation Steps
43
Chapter 3 - AMI BIOS Setup
48
System Test and Initialization
49
AMI BIOS Setup
50
Setup Submenu: Main
51
Setup Submenu: Advanced
52
CPU Configuration
53
SATA Configuration
54
Hardware Monitor
55
SIO Configuration
56
Serial Port Configuration
57
DIO Configuration
58
Trusted Computing
59
Power Management
61
Setup Submenu: Chipset
62
North Bridge
63
South Bridge
64
Setup Submenu: Security
65
Secure Boot
66
Key Management
67
Setup Submenu: Boot
69
BBS Priorities
70
Setup Submenu: Save & Exit
71
Chapter 4 - Drivers Installation
72
Driver Download/Installation
73
Appendix A - I/O Information
75
I/O Address Map
76
A.2 Memory Address Map
77
Advertisement
Asus AAEON PICO-APL1-SEMI Quick Installation Manual (4 pages)
Brand:
Asus
| Category:
Motherboard
| Size: 0 MB
Table of Contents
Parts
1
Install Guide Steps
2
Step 1: on the Heatsink, Remove the Two Plastic Coverings as Shown.
2
Step 2: Place Top Chassis on Heatsink and Secure
2
Step 3: on the PICO-APL1 Board, Remove the Nut and Washer from the Power Input Port.
2
Step 4: Install RAM Module at ~30° Angle and Secure
2
Step 5: to Install M.2 Storage Module, Remove the Securing Screw.
2
Step 6: Insert M.2 Module at ~30° Angle and Secure
2
Step 7: Insert PICO-APL1 Board into Chassis, Avoid CMOS Battery Placement
3
Step 8: Check I/O Ports Alignment and Secure Board
3
Step 9: Connect Power Button Cable and Secure Button
3
Step 10: Secure CMOS Battery Onto PICO-APL1 Board
3
Step 11: Attach Bottom Chassis by Lining up and Swiveling into Place
3
Step 12: Secure Bottom Chassis with Black Screws
3
Step 13: Replace Washer and Nut for Power Input Port.
4
Advertisement
Related Products
Asus AAEON PICO-APL3-SEMI
Asus AAEON PICO-APL1
Asus AAEON PICO-TGU4
Asus AAEON PICO-BT01-A12
Asus AAEON PICO-BT01-A11
Asus AAEON PICO-BT01-A10
Asus P/I-XP55T2P4
Asus P/I-P6NP5
Asus P/I-XP6NP5
Asus P/I-AP6N
Asus Categories
Motherboard
Laptop
Desktop
Monitor
Network Router
More Asus Manuals
Login
Sign In
OR
Sign in with Facebook
Sign in with Google
Upload manual
Upload from disk
Upload from URL