Sign In
Upload
Manuals
Brands
Amazone Manuals
Farm Equipment
KX Series
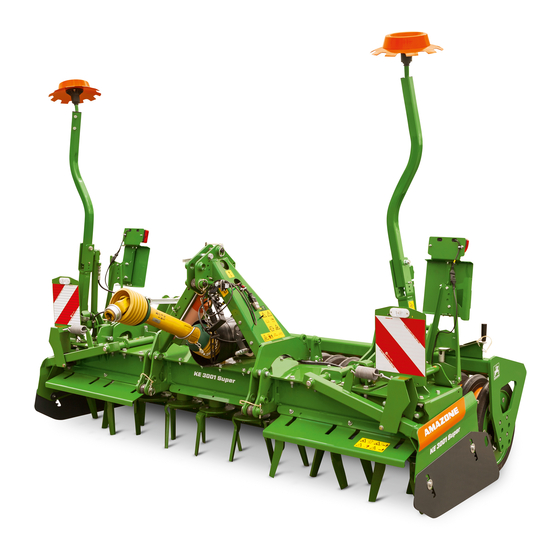
Amazone KX Series Rotary Cultivator Manuals
Manuals and User Guides for Amazone KX Series Rotary Cultivator. We have
2
Amazone KX Series Rotary Cultivator manuals available for free PDF download: Operating Manual, Operating Instruction
Amazone KX Series Operating Manual (174 pages)
Soil Tillage Implements
Brand:
Amazone
| Category:
Farm Equipment
| Size: 12 MB
Table of Contents
Table of Contents
5
1 User Information
10
Purpose of the Document
10
Location Information in the Operating Manual
10
Presentations Used
10
2 General Safety Instructions
11
Obligations and Liability
11
Presentation of Safety Symbols
13
Organisational Measures
14
Safety and Protection Equipment
14
Informal Safety Measures
14
User Training
15
Safety Measures in Normal Operation
16
Danger from Residual Energy
16
Maintenance and Repair Work, Fault Elimination
16
Design Changes
17
Spare and Wear Parts and Aids
17
Cleaning and Disposal
17
Workstation of the Operator
17
Warning Symbols and Other Markings on the Machine
18
Positions of Warning Symbols and Other Labels
23
Dangers in Case of Non-Observance of the Safety Instructions
24
Safety-Conscious Working
24
Safety Information for Users
24
General Safety Instructions and Accident Prevention Instructions
25
Mounted Implements
28
Hydraulic System
29
Electrical System
30
PTO Shaft Operation
30
Cleaning, Maintenance and Repair
32
3 Loading and Unloading
33
4 Product Description
34
Overview of Assembly Groups
34
Safety and Protection Equipment
35
Overview - Supply Lines between the Tractor and the Implement
36
Transportation Equipment
37
Proper Use
38
Danger Areas and Danger Points
39
Rating Plate and CE Mark
40
Noise Production Data
40
Technical Data
41
KE Special / Super Rotary Harrow
41
Rotary Cultivator KX
43
Rotary Cultivator KG Special / Super
44
Rollers
47
Necessary Tractor Equipment
48
Gearbox - Oils and Filling Capacities
49
Spur Gear Trough - Oils and Filling Quantities
49
Hydraulic Oil for the Implement Supply
50
5 Structure and Function
51
Threaded Cartridge
53
Mounting Category
53
KE Special / Super Rotary Harrow
53
KX / KG Special / Super Rotary Cultivator
54
Adapter Frame Cat. 4 (Optional)
54
Three-Point Hitch Extension (Option)
55
Three-Point Hitch Extension for KE Rotary Harrows
55
Three-Point Extension Cat. 2 for KX/KG Rotary Cultivators
56
Three-Point Extension Cat. 3 for KX/KG Rotary Cultivators
57
Wheel Mark Eradicator (Optional)
58
Rollers
59
Cage Roller SW
60
Tooth Packer Roller PW
61
Wedge Ring Roller KW
61
KWM Wedge Ring Roller with Matrix Tyre Profile
62
TRW Trapeze Ring Roller
62
Drive
63
Gearbox / Tractor PTO Shaft Speed / Tine Speed
64
WHG/KE Special / Super Gearbox
65
Gearbox WHG/KX
66
WHG/KG Special / Super Gearbox
67
Oil Cooler (Optional)
67
Universal Joint Shafts
68
Electronic Drive Monitoring (Optional, KG Super Only)
70
Tool Tines
72
Tool Tine Minimum Length
74
Stone Release
74
Working Depth of the Soil Tillage Implement
75
Mechanical Adjustment
75
Hydraulic Adjustment (Optional)
75
Side Panel
76
Side Panel, Swivelling
76
Side Plate, with Sliding and Swivelling Bearing
76
Side Panel, Spring-Mounted
77
Soil Guiding Angle Bracket (Optional)
77
Levelling Board (Optional)
78
Operating Tool
78
Combination Possibilities with Other AMAZONE Implements
79
Lifting Frame
79
Quicklink
80
Working with an AMAZONE Mounted Seed Drill
81
Coupling Parts (Optional)
81
Lifting Frame (Optional)
81
Lift Height Limiter (Optional)
83
Side Stabiliser for Lifting Frame 2.2 (Optional)
83
Shaft-Mounted Gearbox (Optional)
84
Track Markers (Optional)
85
Greendrill 200-E / 200-H Catch Crop Seeding Unit (Optional)
86
6 Initial Operation
87
Checking the Suitability of the Tractor
88
Calculating the Actual Values for the Total Tractor Weight, Tractor Axle Loads and Load Capacities, as Well as the Minimum Ballast
89
Data Required for the Calculation (Attached Implement)
90
Calculation of the Required Minimum Ballasting at the Front G
91
Min of the Tractor to Ensure
91
Calculation of the Actual Front Axle Load of the Tractor T
91
Calculation of the Actual Total Weight of the Combined Tractor and Implement
91
Tat
91
Calculation of the Actual Rear Axle Load of the Tractor T
91
Tractor Tyre Load Capacity
91
H Tat
91
Table
92
Securing the Tractor/Implement against Unintentional Start-Up and Rolling
93
Attachment of the Wheel Mark Eradicators
94
Adjusting the Length of the Universal Joint Shaft to the Tractor (Specialist Workshop)
94
Fitting the Coupling Parts (Specialist Workshop)
96
Attaching the Lifting Frame (Specialised Workshop)
97
Attaching Lifting Frame 2.2 (Specialist Workshop)
98
Installing Lifting Frame 3.2 (Specialist Workshop)
99
Fitting the Lift Height Limiter (Specialist Workshop)
100
7 Coupling and Uncoupling the Implement
101
Coupling the Implement
103
Uncoupling the Implement
105
Coupling the Mounted Seed Drill
106
Attaching the Seed Drill with the Coupling Parts
106
Attaching the Seed Drill to the Lifting Frame
108
Greendrill Supply Line
110
Hydraulic Hose Lines
110
Coupling the Hydraulic Hose Lines
111
On Lifting Frame
112
On Soil Tillage Implement
112
Uncoupling the Hydraulic Hose Lines
112
8 Settings
113
Adjusting the Working Depth
114
Mechanical Adjustment
114
Hydraulic Adjustment (Optional)
115
Adjusting the Side Panel
116
Side Plate KE Super / KX / KG
116
Vertical Adjustment
116
Adjusting the Spring Tension
116
Side Plate KE Special
117
Vertical Adjustment
117
Adjusting the Spring Tension
117
Adjusting the Soil Guiding Angle Bracket (Optional)
117
Adjusting the Wheel Mark Eradicator (Optional)
118
Exceeding the Maximum Working Depth
120
Adjusting the Roller Scraper
121
Wedge Ring Roller KW / KWM
122
Tooth Packer Roller PW
122
TRW Trapeze Ring Roller
122
Adjusting the Levelling Board
123
Setting with Decentralised Levelling Board Adjustment
124
Transport Locking Mechanism for Lifting Frame (All Types)
125
Locking the Lifting Frame
125
Unlocking the Lifting Frame
125
Adjusting the Lift Height Limiter
126
Deactivating the Lift Height Limiter
126
Adjusting the Track Marker
127
9 Transportation
128
Moving the Implement in the Transport Position
130
Transporting with a Transport Vehicle
130
10 Use of the Implement
131
Filling the Hopper (Optional)
133
On the Field
134
Work Commencement
134
Moving the Wheel Mark Eradicator into Working Position
134
Moving the Track Marker into Working Position
134
Moving the Sliding Side Plate into Working Position
136
During Operation
137
Turning at End of the Field
137
After Use
138
Moving the Wheel Mark Eradicator into Transport Position
138
Moving the Track Marker to Transport Position
139
Moving the Sliding Side Plate into Transport Position
140
11 Faults
141
Initial Use of the Tooth Packer Roller
141
Tool Tines Stopping When Work Is in Progress
141
Hall Sensor on the Gearbox
142
Shearing of the Track Marker Safety
142
12 Cleaning, Maintenance and Repair
143
Safety
143
Cleaning the Machine
144
Adjustment Work
145
Repositioning the Bevel Wheels on the WHG/KE Special / Super (Specialised Workshop)
145
Repositioning / Replacing the Gear Wheels on the WHG/KX / WHG/KG Special / Super (Specialised Workshop)
146
12.3.2.1 Repositioning/Replacing the Gear Wheels on the WHG/KX
146
Repositioning / Replacing the Gear Wheels on the WHG/KG Special / Super (Specialised Workshop)
147
Replacing the Tool Tines (Specialist Workshop)
148
Checking the Wheel Mark Eradicators
149
Changing the Coulters (Specialist Workshop)
149
Replacing the Tension Springs of the Overload Safety Device (Workshop Work)
150
Lubrication Specifications
150
Lubricants
151
Greasing Points - Overview
152
Maintenance Schedule - Overview
154
WHG/KE Special / Super Gearbox
156
Venting
156
Check the Oil Level
156
Changing Transmission Fluid (Specialist Workshop)
156
Gearbox WHG/KX
157
Venting
157
Check the Oil Level
157
Changing Transmission Fluid (Specialist Workshop)
157
WHG/KG Special / Super Gearbox
158
Venting
158
Check the Oil Level
158
Changing Transmission Fluid (Specialist Workshop)
158
Spur Gear Trough
159
12.10.1 Venting
159
Checking the Oil Level (Only KG and KX Rotary Cultivator)
159
Checking the Oil Level (Only KE Rotary Harrow)
159
Changing the Oil Filter in the Cooling Kit (Specialist Workshop)
160
Checking the Wheel Mark Eradicators
160
Changing the Coulters (Workshop Work)
161
Replacing the Tension Springs of the Overload Safety Device (Workshop Work)
162
Checking the Upper and Lower Link Pins
162
Checking/Cleaning/Lubricating the Ratchet Clutch (Specialist Workshop)
162
Hydraulic System
163
12.15.1 Identification of Hydraulic Hose Lines
164
12.15.2 Maintenance Intervals
164
12.15.3 Inspection Criteria for Hydraulic Hose Lines
165
12.15.4 Installing and Removing Hydraulic Hose Lines
166
Hydraulic Diagram
167
Bolt Tightening Torques
169
13 Notes
172
Advertisement
Amazone KX Series Operating Instruction (172 pages)
Soil Tillage Implements
Brand:
Amazone
| Category:
Farm Equipment
| Size: 22 MB
Table of Contents
Table of Contents
5
1 User Information
9
Purpose of the Document
9
Locations in the Operating Manual
9
Diagrams
9
2 General Safety Instructions
10
Obligations and Liability
10
Representation of Safety Symbols
12
Organisational Measures
13
Safety and Protective Equipment
13
Informal Safety Measures
13
User Training
14
Safety Measures in Normal Operation
15
Danger from Residual Energy
15
Maintenance and Repair Work, Fault Elimination
15
Design Changes
16
Spare and Wear Parts and Aids
17
Cleaning and Disposal
17
User Workstation
17
Warning Symbols and Other Labels on the Implement
18
Positions of Warning Symbols and Other Labels
24
Dangers if the Safety Information Is Not Observed
25
Safety-Conscious Working
25
Safety Information for Users
26
General Safety Instructions and Accident Prevention Instructions
26
Mounted Implements
30
Hydraulic System
31
Electrical System
32
PTO Shaft Operation
32
Cleaning, Maintenance and Repair
34
3 Loading and Unloading
35
4 Product Description
36
Overview of Assembly Groups
36
Safety and Protective Equipment
37
Overview - Supply Lines between the Tractor and the Implement
38
Transportation Equipment
39
Intended Use
40
Danger Areas and Danger Points
41
Rating Plate and CE Mark
42
Noise Production Data
42
Technical Data
43
Cdw 3000-550/125 Kg
52
Carrying Arms for the Roller KG
53
Total Weight G
53
Roller KG
53
Carrying Arms
53
Distance D [M]
53
Necessary Tractor Equipment
55
Gearbox - Oils and Filling Capacities
56
Spur Gear Trough - Oils and Filling Quantities
56
Hydraulic Oil for the Implement Supply
57
5 Layout and Function
58
KE Rotary Harrows
59
KX Rotary Cultivator/Kg Rotary Cultivator
60
Threaded Cartridge
61
Attachment Category
62
Three-Point Hitch Extension (Option)
63
Three-Point Hitch Extension for KE Rotary Harrows
63
Three-Point Extension Cat. 2 for KX/KG Rotary Cultivators
64
Three-Point Extension Cat. 3 for KX/KG Rotary Cultivators
65
Tractor Wheel Mark Eradicator (Optional)
66
Rollers
67
Cage Roller SW
68
Tooth Packer Roller PW
68
Wedge Ring Roller KW
68
Cracker Disk Roller
69
Drive
70
Gearbox / Tractor PTO Shaft Speed / Tine Speed
71
WHG/KE Special Gearbox / WHG/KE Super Gearbox
72
Gearbox WHG/KX
74
WHG/KG Special / Super Gearbox
75
Oil Cooler (Optional)
75
Universal Joint Shafts
76
Electronic Drive Monitoring (Optional, KG Super Only)
78
Tool Tines
79
Tool Tine Minimum Length
81
Stone Release
81
Working Depth of the Soil Tillage Implement
82
Mechanical Adjustment of the Working Depth
82
Hydraulic Adjustment of the Working Depth (Optional)
82
Side Panel
83
Side Panel, Spring-Mounted
83
Side Panel, Swivelling
84
Soil Guiding Angle Bracket (Optional)
84
Levelling Board
85
Front Mounting Frame (Optional, KE Special / Super Only)
85
Combination Possibilities with AMAZONE Implements
86
Working with an AMAZONE Mounted Seed Drill
87
Coupling Parts (Optional)
87
Lifting Frame (Optional)
87
Lift Height Limiter (Optional)
89
Side Stabiliser for Lifting Frame 2.1 (Optional)
89
Shaft-Mounted Gearbox (Optional)
90
Track Markers (Optional)
91
Greendrill 200-E Catch Crop Seeding Unit (Optional)
92
6 Initial Operation
93
Checking the Suitability of the Tractor
94
Calculating the Actual Values for the Total Tractor Weight, Tractor Axle Loads and Load Capacities, as Well as the Minimum Ballast
95
Data Required for the Calculation (Attached Implement)
96
Of the Tractor to
97
Ensure Steering Capability
97
Calculation of the Actual Front Axle Load of the Tractor T
97
Calculation of the Actual Total Weight of the Combined Tractor and Implement
97
Tat
97
Tractor Tyre Load Capacity
97
H Tat
97
Table
98
Securing the Tractor/Implement against Unintentional Start-Up and Rolling
99
Attaching the Side Panels
100
Attaching the Protective Panels
100
Attachment of the Wheel Mark Eradicators
101
Attaching the Roller (Specialist Workshop)
101
Adjusting the Length of the Universal Joint Shaft to the Tractor (Specialist Workshop)
103
Fitting the Coupling Parts (Specialist Workshop)
104
Attaching the Lifting Frame (Specialised Workshop)
105
Attaching Lifting Frame 2.1 (Specialist Workshop))
106
Attaching Lifting Frame 3.1 (Specialist Workshop)
107
Fitting the Lift Height Limiter (Specialist Workshop)
108
Hydraulic Hose Lines
109
Coupling the Hydraulic Hose Lines
109
6.10.1.1 on Lifting Frame
110
6.10.1.2 on Soil Tillage Implement
110
Uncoupling the Hydraulic Hose Lines
111
7 Coupling and Uncoupling the Implement
112
Coupling the Implement to the Tractor
114
Uncoupling the Implement
116
Coupling the Mounted Seed Drill
117
Attaching the Seed Drill with the Coupling Parts
117
Attaching the Seed Drill to the Lifting Frame
119
Attaching the Front-Mounted Soil Tillage Implement
121
8 Settings
122
Setting the Working Depth of the Tool Tines
123
Mechanical Adjustment
123
Seed Drill in the Lifting Frame/Without Semi-Mounted Seed Drill
125
Hydraulic Adjustment (Optional)
125
Adjusting the Side Panel
125
Adjusting the Tractor Wheel Mark Eradicator (Optional)
126
Exceeding the Maximum Working Depth
127
Adjusting the Cutting Rail (Optional, Only with Cracker Disc Roller)
129
Adjusting the Levelling Board
130
Transport Locking Mechanism for Lifting Frame (All Types)
131
Adjusting the Track Marker
132
Adjusting the Lift Height Limiter
133
Deactivating the Lift Height Limiter
133
9 Transportation
134
Move the Implement in the Transport Position
136
Transporting with a Transport Vehicle
136
10 Use of the Implement
137
On the Field
140
Work Commencement
140
Moving the Tractor Wheel Mark Eradicator into Working Position
140
Moving the Track Marker into Working Position
141
During the Work
142
Turning at End of the Field
142
After Use
143
Moving the Tractor Wheel Mark Eradicator into Transport Position
143
Moving the Track Marker to Transport Position
144
11 Faults
145
Initial Use of the Tooth Packer Roller
145
Tool Tines Stopping When Work Is in Progress
145
Hall Sensor on the Gearbox
146
Shearing of the Track Marker Boom
146
12 Cleaning, Maintenance and Repair
147
Safety First
147
Cleaning the Implement
148
Adjustment Work
149
Repositioning the Bevel Wheels on the WHG/KE Special / Super (Specialised Workshop)
149
Repositioning/Replacing the Gear Wheels on the WHG/KX / WHG/KG Special / Super (Specialised Workshop)
150
12.3.2.1 Repositioning/Replacing the Gear Wheels on the WHG/KX
150
Repositioning/Replacing the Gear Wheels on the WHG/KG Special / Super (Specialised Workshop)
151
Replacing the Tool Tines (Specialist Workshop)
152
Adjusting the Cutting Rail of the Cracker Disk Roller (Specialist Workshop)
153
12.3.4.1 Increasing the Spring Force that Is Acting on the Cutting Rail
153
12.3.4.2 Readjusting Worn Blades
153
Checking/Adjusting the Wedge Ring Roller Scrapers
154
Checking/Adjusting the Tooth Packer Roller Scrapers
154
Changing the Coulters (Workshop Work)
155
Replacing the Tension Springs of the Overload Safety Device (Workshop Work)
155
Lubrication Specifications
156
Lubricants
156
Lubrication Points - Overview
157
Maintenance Schedule - Overview
159
WHG/KE Special Gearbox and WHG/KE Super Gearbox
161
Ventilation
161
Check the Oil Level
161
Changing Transmission Fluid (Specialist Workshop)
161
Gearbox WHG/KX
162
Ventilation
162
Check the Oil Level
162
Changing Transmission Fluid (Specialist Workshop)
162
WHG/KG Special Gearbox and WHG/KG Super Gearbox
163
12.10.1 Ventilation
163
12.10.2 Check the Oil Level
163
Changing Transmission Fluid (Specialist Workshop)
163
Spur Gear Trough
164
12.11.1 Ventilation
164
Checking the Oil Level (Only KG and KX Rotary Cultivatory)
164
Checking the Oil Level (Only KE Rotary Harrow)
164
Changing the Oil Filter in the Cooling Kit (Specialist Workshop)
165
Checking the Upper and Lower Link Pins
165
Checking/Cleaning/Lubricating the Ratchet Clutch (Specialist Workshop)
165
Hydraulic System
166
12.15.1 Identification of Hydraulic Hose Lines
167
12.15.2 Maintenance Intervals
167
12.15.3 Inspection Criteria for Hydraulic Hose Lines
167
12.15.4 Installing and Removing Hydraulic Hose Lines
168
Screw Tightening Torques
169
Advertisement
Related Products
Amazone KX 3001
Amazone KX 3000
Amazone KG Super Series
Amazone KE 3501 Super
Amazone KG 3000 Super
Amazone KE 4002
Amazone KMLS 150
Amazone KE 4002-190
Amazone KE 3502-190
Amazone KE 3002-190
Amazone Categories
Farm Equipment
Tiller
Spreader
Paint Sprayer
Desktop
More Amazone Manuals
Login
Sign In
OR
Sign in with Facebook
Sign in with Google
Upload manual
Upload from disk
Upload from URL