Table of Contents
Advertisement
Available languages
Available languages
Advertisement
Chapters
Table of Contents

Related Manuals for Ariens 961465


Summary of Contents for Ariens 961465
- Page 1 961465 (961460005) Owner’s Manual • Español, p. 18...
-
Page 2: Table Of Contents
TABLE OF CONTENTS Safe ty Rules ...........2-4 Maintenance ........10-13 Prod uct Spec i fi ca tions ......4 Ser vice and Ad just ments ....13-14 Assembly / Pre-Operation ......5 Stor age ..........14-15 Op er a tion ..........6-9 Trou ble shoot ing .........16-17 Maintenance Sched ule ......10 Re pair Parts ........34-37 Warranty ..........38-41... - Page 3 • Mow only in daylight or good artificial • Use extra care when approaching blind light. corners, shrubs, trees, or other objects • Do not operate the machine while under that may obscure vision. the influence of alcohol or drugs. IV.
-
Page 4: Product Specifications
• Grass catcher components are sub ject • Mower blades are sharp and can cut. to wear, dam age, and de te ri o ra tion, Wrap the blade(s) or wear gloves, and which could expose moving parts or use extra caution when ser vic ing them. allow objects to be thrown. -
Page 5: Assembly / Pre-Operation
ASSEMBLY / PRE-OPERATION Read these instructions and this manual Operator MOWING in its entirety before you attempt to as- presence POSITION semble or operate your new lawn mower. control bar IMPORTANT: This lawn mower is shipped LIFT WITHOUT OIL OR GASOLINE in the engine. -
Page 6: Operation
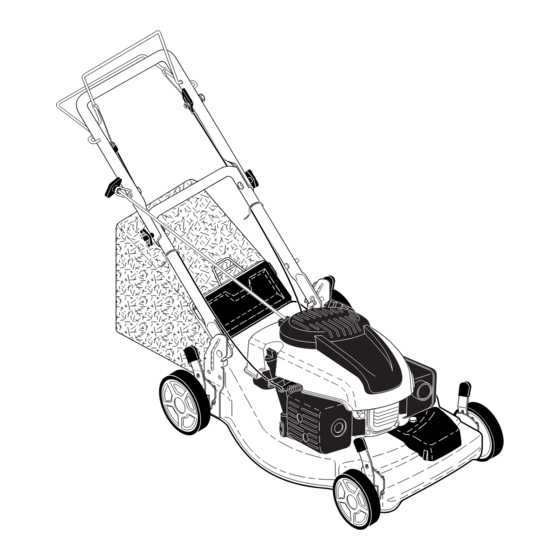
OPERATION KNOW YOUR LAWN MOWER READ THIS OWNER'S MANUAL AND ALL SAFETY RULES BEFORE OP ER AT ING YOUR LAWN MOWER. Compare the illustrations with your lawn mower to familiarize yourself with the location of various controls and adjustments. Save this manual for future refer- ence. - Page 7 TO ADJUST CUTTING HEIGHT The operation of any lawn Raise wheels for low cut and lower wheels mower can result in foreign for high cut, adjust cutting height to suit objects thrown into the eyes, your requirements. Me di um position is which can result in severe eye best for most lawns.
- Page 8 NOTE: Initial oil fill requires only 18 oz. Grass due to residual oil in engine from the catcher manufacturers 100% quality testing. When frame changing oil you may need 20 oz. handle 4. Insert and tighten dipstick. IMPORTANT: • Check oil level before each use. Add oil if needed.
- Page 9 TO STOP ENGINE MULCHING MOWING TIPS • To stop engine, release operator pres- IMPORTANT: For best performance, ence con trol bar. keep mower housing free of built-up grass and trash. See “CLEANING” in the Maintenance section of this manual. TO START ENGINE •...
-
Page 10: Maintenance Sched Ule
MAINTENANCE BEFORE AFTER EVERY EVERY EVERY BEFORE EACH EACH 25 HOURS STORAGE HOURS OR SEASON HOURS Check for Loose Fasteners Clean / Inspect Grass Catcher * Check Tires Check Drive Wheels *** Clean Lawn Mower **** Clean under Drive Cover *** Check Drive Belt / Pulleys *** Check / Sharpen / Replace Blade Lubrication... - Page 11 LAWN MOWER 3. Install the blade bolt with the lock washer and hardened washer into Always observe safety rules when per- blade adapter and crankshaft. form ing any main te nance. 4. Use block of wood between blade and TIRES lawn mower housing and tighten the •...
- Page 12 ENGINE 7. Continue adding small amounts of oil, rechecking the dipstick until oil level LUBRICATION settles at FULL. DO NOT overfill, or Use only high quality detergent oil rated engine will smoke heavily from the with API service classification SJ–SL. muffler on startup.
-
Page 13: Service And Adjustments
Clamp Clamp CAUTION: Disconnect spark plug wire from spark plug and place wire where it cannot come in contact with plug. • Clean the underside of your lawn mower by scraping to remove build-up of grass and trash. Fuel Filter •... -
Page 14: Storage
TO ADJUST HANDLE The handle can be mounted in a high or low position. The mounting holes in the bottom of lower handle are off center for raising or lowering the handle. 1. Remove upper handle and wire tie(s) securing cable(s) to lower handle. 2. - Page 15 HANDLE • Empty the fuel tank by starting the en- gine and letting it run until the fuel lines You can fold your mower handle for storage. and car bu re tor are empty. 1. Squeeze the bottom ends of the •...
-
Page 16: Trou Ble Shoot Ing
TROUBLESHOOTING - See appropriate section in manual unless directed to a qualified service center. PROBLEM CAUSE CORRECTION Does not start 1. Dirty air filter. 1. Clean/replace air filter. 2. Out of fuel. 2. Fill fuel tank. 3. Stale fuel. 3. Empty fuel tank and refill tank with fresh, clean gasoline. -
Page 17: Trou Ble Shoot Ing
TROUBLESHOOTING - See appropriate section in manual unless directed to a qualified service center. PROBLEM CAUSE CORRECTION Poor cut – 1. Worn, bent or loose blade. 1. Replace blade. Tighten uneven blade bolt. 2. Wheel heights uneven. 2. Set all wheels at same height. -
Page 18: Reglas De Seguridad
TABLA DE MATERIAS Reglas de Seguridad ........ 18-20 Mantenimiento .......... 26-29 Servicio y Adjustes ........29-30 Especificaciones del Producto .......20 Almacenamiento ........31-32 Montaje / Pre-Operación .........21 Operación ..........22-25 Identificación de problemas ..... 32-33 Programa de Mantenimiento ......26 Partes de repuesto ........34-37 Garantía ............. - Page 19 • Nunca opere la maquina cuando la hierba IV. MANEJO SEGURO DE GASOLINA esté mojada. Asegúrese siempre de tener Usar mucha atención cuando se maneja gaso- buena tracción en sus pies; mantenga el lina. La gasolina es extremamente inflamable y mango firmemente y camine;...
-
Page 20: Especificaciones Del Producto
• Los componentes del receptor de la hierba • Las cuchillas de la segadora están afiladas van sujetos a desgaste, daños y deterioro, y pueden cortar. Cubrir las hojas o llevar que pueden exponer las partes en mov- guantes, y utilizar precauciones especiales imiento o permitir que objetos sean dispara- cuando se efectúa mantenimiento sobre las dos. -
Page 21: Montaje / Pre-Operación
MONTAJE / PRE-OPERACIÓN Lea estas instrucciones y este manual completamente antes de tratar de montar u operar su segadora nueva. IMPORTANTE: Este cortacésped viene SIN ACEITE O GASOLINA en el motor. Su segadora nueva ha sido montada en la fábrica con la excepción de aquellas partes que se deja- ron sin montar por razones de envío. -
Page 22: Operación
OPERACIÓN FAMILIARICESE CON SU SEGADORA LEA ESTE MANUAL DEL DUENO Y LAS REGLAS DE SEGURIDAD ANTES DE OPARAR SU SEGA- DORA. Compare las ilustraciones con su segadora para familiarizarse con la ubicación de los diversos controles y ajustes. Guarde este manual para referencia en el futuro. Estos símbolos pueden apareser sobre su segadora o en la literatura proporcionada con el producto. - Page 23 PARA AJUSTAR LA ALTURA DE CORTE La operación de cualquier sega- Levante las ruedas para el corte bajo y baje las dora puede hacer que salten ruedas para el corte alto., ajuste la altura de objetos extraños dentro de sus corte para que se acomode a sus requisitos.
- Page 24 PARA VACIAR EL RECOGEDOR DE CÉSPED PRECAUCIÓN: NO sobrellene el motor con 1. Levante el recogedor de césped usando el aceite, o fumará pesa demante del silenciador mango del bastidor. cuando lo valla a arrancar. 2. Remueva el recogedor de césped, con 1.
- Page 25 problemas con el motor, se debe vaciar el CONSEJOS PARA SEGAR Y ACOL- sistema del combustible antes de guardarlo CHAR por un período de 30 días o más. Vacíe el IMPORTANTE: Para obtener el mejor estanque del combustible, haga arrancar el rendimiento mantenga la caja de la segadora motor y hágalo funcionar hasta que las líneas sin acumulacion de cesped y basura.
-
Page 26: Programa De Mantenimiento
MANTENIMENTO ANTES DESPUES CADA CADA CADA ANTES DEL DE CADA DE CADA 25 HORAS O ALMACE- HORAS TEMPORADA HORAS NAMIENTO Revisar si hay Sujetadores Sueltos Limpiar/Inspeccionar el Recogedor de Césped * Controlar los Neumáticos Controlar las Ruedas Motrices *** Limpiar la Segadora **** Limpiar debajo la Cubierta de la Transmisión *** Revisar las Correas y las Poleas Impulsadas *** Revisar / Afilar / Cambiar la Cuchilla... - Page 27 SEGADORA AVISO: Remueva el adaptador de la cuchilla y revise el cubo interior de la ranura del adapta- Siempre observe las reglas de seguridad dor de la cuchilla. La ranura tiene que estar en cuando haga el mantenimiento. buenas condiciones para que funcione en forma adecuada.
- Page 28 RECOGEDOR DE CÉSPED 2. Remueva la tapa del depósito del aceite; • El recogedor de césped puede ser rociado déjela a un lado en una superficie limpia. con el agua de la manguera pero tiene que 3. Incline la cortadora de césped por este estar seco cuando se vaya a usar.
-
Page 29: Servicio Y Adjustes
BUJÍA Cartucho Ranuras Cambie el bujía al comienzo de cada tempo- rada de siega o después de cada 100 horas de operación, lo que suceda pri me ro. El tipo de bujía y el ajuste de la abertura aparecen en “ES PE CI FI CA CIO NES DEL PRODUCTO”... - Page 30 PARA REMOVER CORREA DE IMPULSIÓN APRIETE 1. Remueva la cubierta de la impulsión. PARA AJUSTE 2. Remueva la correa de la polea de la caja de engranajes empujando hacia abajo. Mango inferior 3. Haga descansar la segadora en su lado con el filtro de aire y el carburador mirando Clavija de montaje hacia arriba.
-
Page 31: Almacenamiento
ALMACENAMIENTO Inmediatamente prepare su segadora para el almacenamiento al final de cada temporada o si la unidad no se va a usar por 30 días o más. SEGADORA APRIETE PARA DOBLAR Cuando se va a guardar la segadora por cierto período de tiempo, límpiela cuidadosamente, remueva toda la mugre, la grasa, las hojas, etc. -
Page 32: Identificación De Problemas
CILINDRO • Si es posible, guarde su unidad en un 1. Remueva la bujía. recinto cerrado y cúbrala para protegerla 2. Vacíe una onza (29 ml) de aceite a través contra el polvo y la mugre. del agujero de la bujía en el cilindro. •... - Page 33 SOLUCIÓN DE PROBLEMAS - Vea la sección apropiada en el manual amenos que esté dirigido a un centro de servico cualificado. PROBLEMA CAUSA CORRECCIÓN Falta de 1. Cuchilla desgastada, doblada 1. Eleve la altura de corte. fuerza o suelta. 2. Altura de las ruedas dispareja. 2.
-
Page 34: Repair Parts
REPAIR PARTS... - Page 42 SERVICE NOTES...
- Page 43 NOTAS SERVICIO...
- Page 44 08.04.14 BY 448660 Rev. 2 / 21548858B Printed in U.S.A.
Need help?
Do you have a question about the 961465 and is the answer not in the manual?
Questions and answers