
Related Manuals for Ariens A173K22 (96146600


Summary of Contents for Ariens A173K22 (96146600
- Page 1 A1 73 196146600) Owner's Manual • EspaSol, p. 18 431593 Rev. 2 03.31.10 BY Printed in U.S.A.
-
Page 2: Table Of Contents
Maintenance ........10-13 Safety Rules .......... 2-4 Product Specifications ......4 Service and Adjustments ....13-14 Assembly / Pre-Operation ......5 Storage ..........14-15 Operation ..........6-9 Troubleshooting ......... 16-17 Maintenance Schedule ......10 Repair Parts........34-37 Warranty ..........40 IMPORTANT: This cutting machine is I, GENERAL OPERATION... -
Page 3: Operation
IV. SAFE HANDLING OF GASOLINE • Do not operate the machine while under the influence of alcohol or drugs. Use extreme care in handling gasoline, • Never operate machine in wet grass. Gasoline is extremely flammable and the Always be sure of your footing: keep a vapors are explosive, firm hold on the handle;... - Page 4 ° Grass c atcher components are subject • Mower blades aresharp a nd can cut. towear, damage, and deterioration, Wrap t heblade(s) orwear gloves, and which c ould e xpose m oving parts o r use extra c aution when s ervicing them. allow objects tobethrown.
- Page 5 Read these instructions and this manual in Operator MOWING POSITION its entirety before you attempt to assemble or operate your new lawn mower, control bar IMPORTANT: This lawn mower is shipped WITHOUT OIL OR GASOLINE in the engine. Your new lawn mower has been assem- bled at the factory with the exception of Upper handle...
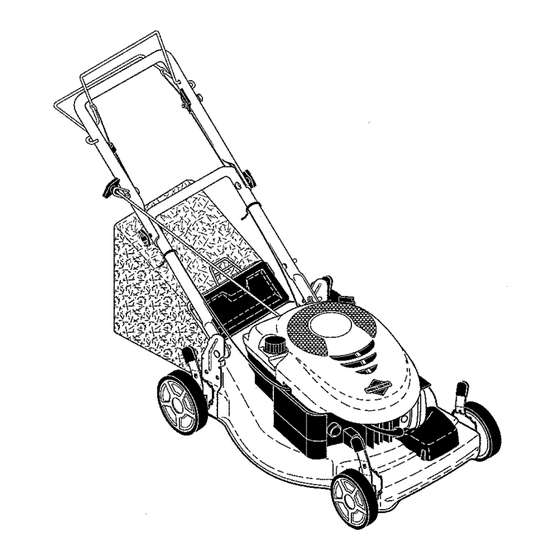
- Page 6 KNOW YOUR LAWN MOWER READ THIS OWNER'S MANUALAND ALL SAFETY RULES BEFORE OPERATING YOUR LAWN MOWER. Compare the illustrations with your lawn mower to familiarize yourself with the location of various controls and adjustments, Save this manual for future reference. IIIIIIII IIII iiiiiiiii...
- Page 7 Theoperation of anylawn TO ADJUST CUTTING HEIGHT mower canresult inforeign Raise wheels for low cut and lower wheels objects thrown into the eyes, for high cut, adjust cutting height to suit which canresult i nsevere your requirements. Medium position is eyedamage.
- Page 8 NOTE: initial oil fill requires only 18 oz. / "_ Grass due to residual oil in engine from the i_ _k._k'_ catcher manufacturers 100% quality testing. When changing oil you may need 20 oz. 4. Insert and tighten dipstick. IMPORTANT: •...
- Page 9 TO STOP ENGINE MULCHING MOWING TIPS • To stop engine, release operator pres- IMPORTANT: For best performance, ence control bar. keep mower housing free of built-up grass and trash. See "CLEANING" in the Maintenance section of this manual. TO START ENGINE , The special mulching blade will recut NOTE: Due to protective coatings on the the grass clippings many times and...
-
Page 10: Maintenance Schedule
MAINTENANCE BEFORE AFTER EVERY EVERY EVERY BEFORE EACH EACH 25HOURS SCHEDULE STORAGE HOURS SEASON HOURS iiiiiinlllliiiii iiiii i,,' Check for Loose Fasteners Clean / inspect Grass Catcher* v" Check Tires Check Drive Wheels "" v" C_ean Lawn Mower ..IM C}ean under Drive Cover "* Check Drive Belt'/F%]Jeys... - Page 11 LAWN MOWER 4. Use block of wood between blade and Always observe safety rules when per- lawn mower housing and tighten the forming any maintenance. blade bolt, turning clockwise, Recommendedtighteningtorque:35-40ft.lbs. TIRES IMPORTANT: Blade bolt is heat treated. • Keep tires free of gasoline, oil, or insect If bolt needs replacing, replace only with control chemicals which can harm rubber.
- Page 12 ENGINE 6. Stop adding oil when you reach the FULL mark on the dipstick. Wait a LUBRICATION minute to allow oil to settle. Use only high quality detergent oil rated 7. Continue adding small amounts of oil, with API service classification SG-SL rechecking the dipstick until oil level Select the oil's SAE viscosity grade settles at FULL.
- Page 13 • Keep finished surfaces and wheels free CLEANING of all gasoline, oil, etc. IMPORTANT: For best performance, • We do not recommend using a garden keep mower housingfree of built-grass hose to clean lawn mower unless the and trash. Clean the underside of your electrical system, muffler, air filter and mower after each use.
- Page 14 TO ADJUST HANDLE The handle can be mounted in a high or low position. The mounting holes in the bottom of lower handle are off center for raising or lowering the handle. 1. Remove upper handle and wire tie(s) securing cable(s) to lower handle. 2.
-
Page 15: Storage
HANDLE • Emptythe fuel tank by starting the en- gine and letting it run until the fuel lines "You can fold yourmower handlefor storage. and carburetor are empty. 1. Squeeze the bottom ends of the lower • Never use engine or carburetor cleaner hand[etoward each other until the products in the fuel tank or permanent lower handle clears the handle bracket,... -
Page 16: Troubleshooting
TROUBLESHOOTING - See appropriate section in manual unless directed to a qualified service center. PROBLEM CAUSE CORRECTION Does not start Dirty air filter. 1, Clean/replace air filter. Out of fuel. 2. Fill fuel tank. Stale fuel. 3, Empty fuel tank and refill tant_ with fresh, clean gasoline. - Page 17 TROUBLESHOOTING - See appropriate section in manual unless directed to a qualified service center....CAUSE . CORRECTION PROBLEM Poor cut- 1. Worn, bent or loose blade. 1. Replace blade. Tighten uneven blade bolt. 2. Set atl wheels at same 2.
- Page 18 Reglas de Seguridad ........ I8-20 Mantenimiento .......... 26-29 Especificaciones def Producto ....... 20 Servicio y Adjustes ........29-30 Monta|e / Pre-OperaciSn ....... 21 Almacenamiento ........31-32 OperaciSn ..........22-25 Identificaci6n de problemas ...... 32-33 Programa de Mantenimiento ......26 Partes de repuesto ........34-37 Garantia ............
- Page 19 IV. MANEJO SEGURO DE GASOLINA • Nunca opere la maquina cuando la hierba est_ mojada. Aseg_rese siempre de tenet Usar mucha atenci6n cuando se maneja gaso- buena traoci6n en sus pies; mantenga el lina. La gasoline es extremamente inflamable y mango firmemente y camine;...
- Page 20 , Los c omponentes deI receptor deIahierba o Las c uchillas delasegadora est_n afiladas van sujetos adesgaste, daSos ydeterioro, ypueden cortar. Cubrir las hojas o [Ievar que pueden exponer tas p artes enmov- guantes, y utilizar precauciones especiales imiento opermitir que objetos sean dispara- cuando se efectL_amantenimiento sobre las...
- Page 21 Lea estas instrucciones y este manual completamente antes de tratar de montar u operar su sega- dora nueva, IMPORTANTE: Este co_ac_sped viene SIN ACEtTE O GASOLINA en el motor, Su segadora nueva ha sido montada en la fdbrica con la excepci6n de aquellas panes qua se de- jaron sin montar por razones de envfo.
- Page 22 FAMILIARICESE CON SU SEGADORA LEA ESTE MANUAL DEL DUENO Y LAS REGLAS DE SEGURIDAD ANTES DE OPARAR SU SEGADORA. Compare ]as ilustraciones con su segadora para familiarizarse con ta ubicaci6n de Ios diversos controfes y ajustes. Guarde este manual para referencia en el futuro. ::::::::::::::::::::: = ill Estos s{mbolos pueden apareser sobre su segadora o en la Ilteratura proporcionada con el...
- Page 23 PARA AJUSTAR LA ALTURA DE CORTE La operaci6n de cualquier Levante tas ruedas para el corte bajo y baje las segadora puede hacer que . ruedas para el corte alto,, ajuste ta altura de salten objetos extrafios dentro de corte para que se acomode a sus requisites. La sus ojos, Io que puede producir posici6ndeI medio es la mejor para la mayoda dafios graves en _stos.
- Page 24 PARA VACIAR EL RECOGEDOR DE ClaSPED _,PRECAUCI6N: NO sobretlene el motor con 1. Levante el recogedor de c_sped usando el aceite, o fumar_ pesa demante del silenciador mango del bastidor. cuando Io vatla a arrancar. 2. Remueva el recogedor de c_sped, con los 1.
- Page 25 sistema del combustible antes deguardado CONSEJOS PARA SEGAR Y ACOL- pot u nperfodo de30 dias o m_s. Vacfe el CHAR estanque del combustible, haga a rrancar |MPORTANTE: Para obtener el major motor yh&galo funcJonar hasta qua las lineas rendimiento mantenga Ia caja de Ia segadora del combustible yelcarburador queden...
- Page 26 PROGRAMA DESPUES CADA " CADA ANTESDE_ DE CADA DE CADA 25 HORAS O ALMACE- MANTENIMIENTO HORAS TEMPORADAHORAS NAMIENTO illll i ill ..Flev_sar si hay Slljetadores Su_ltos ..= / Limpiar/inspeccionare.IR_cogedordeC_.sped* ConVolar los Neum_,ticos Conlrolar la5 Ruecras MotricBs ' = Limpiar Ia Segadora ..
- Page 27 AVISO: Remueva el adaptador de la cuchilla y SEGADORA revise el cubo interior de la ranura del adap- Siempre observe las reglas de seguddad cu- tador de la cuchilla. La ranura tiene que estar ando haga el mantenimiento. en buenas condiciones para que funcione en forma adecuada.
- Page 28 RECOGEDOR ClaSPED 1. Desconecte el alambre de la bujfa y - El recogedor de cesped puede ser rociado pdngalo de modo que no pueda entmr en con el agua de Ia manguera pero tiene que contacto con 6sta. estar seco cuando se vaya a user. 2.
- Page 29 LIMPIEZA Labio Plancha trasera IMPORTANTE: Para obtener el mejor rendimineto, mantenga la caja de la segadora sin acumulacion de cesped y basura. Umpie la parte de abajo de su segadora despues de cada uso. _PREOAUCl6N: Desconecte el alambre de la bujfa y pSngalo en donde no pueda entrar en contacto con _sta.
- Page 30 PARA REMOVER CORREA DE IMPULSI(3N Remueva la cubierta de la impulsibn. PARAAJUSTE 2. Remueva la correa de la polea de Ia caja de engranajes empujando hacia abajo. APRIETE Mangoinferior 3. Haga descansar Ia segadora en su lado con el filtro de aire y el carburador mirando hacia arriba.
- Page 31 Inmediatamente prepare su segadora para el atmacenamiento al final de cada temporada o sila unidad no se va a usar pot 30 dias o m&s. APRtETE SEGADORA PARA DOBLAR Cuando se va a guardar la segadora pot cierto periodo de tiempo, lfmpiela euidadosamente, remueva toda Ia mugre, la grasa, las hojas, etc.
- Page 32 OlLINDRO ° Si es posible, guarde su unidad en un recinto 1. Remueva Ia bujfa. cerrado y c_brala para protegerla contra el 2. Vacfe una onza (29 mI) de aceite a trav_s polvo y la mugre. del agujero de la bujia en el citindro. °...
- Page 33 SOLUCION DE PROBLEMAS - Vea la secci6n apropiada en el manual amenos que est_ dirigido a un centro de servico cualificado. CORRECC]ON PROBLEMA CAUSA 1. Eleve la altura de corte. Faita de 1. Cuchi[la de sgastada, doblada iuerza o suelta. 2.
- Page 34 ROTARY LAWN MOWER -- MODEL NUMBER At73K22 (MFG. I.D. NUMBER 96146000600) ..¢..o ./° °...
- Page 35 ROTARY LAWN MOWER - - MODEL NUMBER At 73K22 (MFG. I,D. NUMBER 96146000600) PART PART PART DESCRIPTION DESCRIPTION DESCRIPTION 427619X479 Upper Handle 409148 Nut, Hex, Ftanged 170031 Kit, Front Baffle 183567 Engine Zone Control Cable 184193 Bolt, Rear Door (Includes Key Number 53) 850733X004 Bracket, Upstop 400247X428...
- Page 36 ROTARY LAWN MOWER - - MODEL NUMBER A173K22 (MFG. I.D, NUMBER 96146000600)
- Page 37 ROTARY LAWN MOWER-- MODEL NUMBER A173K22 (MFG. I.D. NUMBER 96146000600) PART PART DESCRIPTION DESCRIPTION 194653 Cable, Drive Control 401271X428 Drive Cover 194t85X428 Bar, Drive Control 409148 Locknut, Hex 193912X428 Wheel & TireAssembty, Front 146527 V-Belt 12000058 E-Ring 424201 Kit, Wheel Adjuster, LH 403849 Pinion (Includes Knob and Bearing)
- Page 38 SERVICE NOTES...
- Page 39 SERVICE NOTES...
- Page 40 LIMITED WARRANTY The Manufacturer warrants to the original consumer purchaser that this product as manufactured is free from defects in materials and workmanship. For a period of two (2) years from date of purchase by the original consumer purchaser, we will re- pair or replace, at our option, without charge for parts or labor incurred in replacing parts, any part which we find to be defective due to materials or workmanship.
Need help?
Do you have a question about the A173K22 (96146600 and is the answer not in the manual?
Questions and answers