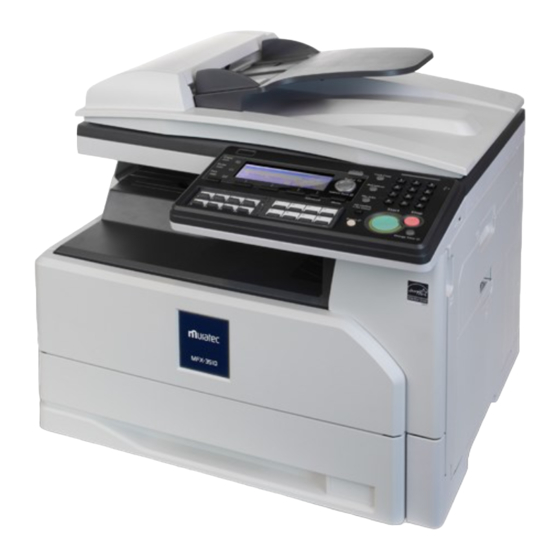
Muratec MFX-3510 User Manual
Hide thumbs
Also See for MFX-3510:
- User manual (160 pages) ,
- Printer manual (114 pages) ,
- Administrator's manual (98 pages)
Table of Contents
Advertisement
Muratec America, Inc.
3301 East Plano Parkway, Suite 100
Plano, Texas 75074
http://www.muratec.com
©2012 MURATA MACHINERY, LTD.
Printed in China
Part Number: DD1-90010-62
MAI Order Number: OMMFX3510
User's Guide
Part names ..........................................................4
Control panel .......................................................5
Loading paper......................................................6
Turning the machine on and off .........................12
About the display screens .................................13
Copy..................................................................14
Scan ..................................................................16
Fax.....................................................................22
Print ...................................................................28
Using OfficeBridge ............................................32
Replacing the consumables ..............................38
Clearing paper jams ..........................................40
Clearing document jams....................................42
If an error occurs ...............................................43
Troubleshooting .................................................44
Regulatory information ......................................46
Limited warranty................................................48
How to read PDF manuals ................................50
Consumables and options ................................51
Index..................................................................52
Advertisement
Table of Contents
Troubleshooting

Related Manuals for Muratec MFX-3510


Summary of Contents for Muratec MFX-3510
-
Page 1: Table Of Contents
Clearing document jams........42 If an error occurs ..........43 Troubleshooting ..........44 Appendix Regulatory information ........46 Limited warranty..........48 Muratec America, Inc. How to read PDF manuals ........50 3301 East Plano Parkway, Suite 100 Consumables and options ........51 Plano, Texas 75074 Index..............52 http://www.muratec.com... -
Page 2: How To Read This Manual
For your safety Please observe the safety precautions laid out in the separate booklet “Safety Information” to prevent electric shocks and injury to people or damage to property that may occur through misuse of this ma- chine. Also read “Cautions for using the machine” in the Administrator’s Guide. How to read this manual „... -
Page 3: About The Manuals
Welcome Thank you for choosing the MFX-3510. Before using this machine, be sure to read the User’s Guide (this booklet) thoroughly in order to ensure that you use the machine effi ciently. After you have reviewed the manual, please keep it available to users at all times. - Page 4 Powerful document solution using the OfficeBridge page 32 Print page 28 Copy page 14 Scan page 16 page 22 Telephone line...
- Page 5 Internet The MFX-3510 is a multifunction product that can copy, scan, fax and print. It produces letter/legal size output (the most common office docu- ment sizes) and enables users to quickly scan and deliver docu- ments directly to their workstation.
-
Page 6: Preparation
Preparation Part names Document tray Document guide Document output tray ADF cover USB connector 2-bin tray (Optional) Control panel Front cover Paper cassette 2 (Optional) Side cover 1 Bypass tray Paper cassette 1 Side cover 2 Platen cover Network connector USB port Document glass ADF glass... -
Page 7: Control Panel
Control panel 9 10 1213 14 15 Name Description 1 Mode lamps Shows whether the machine is in the copy, scan or fax mode. 2 Power button This button is used to turn the power on or off. 3 Display The display shows the machine status, interactive displays, and all machine functions. -
Page 8: Loading Paper
Loading paper Loading paper into the cassettes „ Loading paper into the cassette You can load up to 500 sheets of letter(8.5"×11"), legal(8.5"×14") or half-letter(5.5"×8.5") paper into the paper cassette. For details on the acceptable paper sizes, see chapter 5, “Acceptable paper”... - Page 9 „ Setup the paper size Setting the paper size that has been loaded into the cassette. This operation is not required if you are loading the same size paper that was previously used in the cassette. Press <Menu>. Press [Setting]. Select “Paper Settings”, and press [Enter].
-
Page 10: Loading Paper Into The Bypass Tray
Loading paper into the bypass tray „ Loading paper into the bypass tray You can load up to 100 sheets of paper. For details on the acceptable paper types, see chapter 5, “Acceptable paper” in “Specifications” in the Administrator’s Guide. NOTE •... - Page 11 „ Setup the paper size Setting the paper size that has been loaded into the bypass tray. This operation is not required if you are loading the same size paper that was previously used in the bypass tray. Press <Menu>. Press [Setting].
-
Page 12: Printing/Copying On Envelopes
Printing or copying on envelopes When you print or copy on envelopes, use the following procedures to reduce wrinkles. The fuser unit, as well as the area around the fuser, becomes extremely hot during machine operation. When changing the switch positions, be careful not to touch other areas around the fuser unit than the switches. -
Page 13: Close The Side Cover
Load the envelopes into the bypass tray. • Follow the instructions on page 8 for the details of loading. • Follow the instructions on page 9, and set the size of the envelope. Print or copy. Open the side cover, and return the switches to their original positions. -
Page 14: Turning The Machine On And Off
Turning the machine on and off Turning the machine on and off (Daily use) Before turning off the machine, make sure that the machine has completed all jobs and that the information lamp is off. Press the power button. When you are turning the power off, “Shutting down” will be displayed, and then the display turns off. -
Page 15: About The Display Screens
About the display screens Ready screens You can switch the machine between the copy, scan, or fax modes. Copy ready screen Scan ready screen Fax ready screen Menu screen Press <Menu> to enter the menu screen. Menu Description Machine info. Select this to display the machine information which includes the page counter data. -
Page 16: Operation
Operation Copy Basic operation See the Copier Guide for more information. Set the document. Switch the machine to copy mode. In the automatic document feeder Set the document face up. Align the document guides to the document width. Press the mode switch key. -
Page 17: Advanced Settings
Change the settings Press <Start>. if needed. • To make two or more copies enter the desired number of copies using the numeric keys. • Press <Advanced> to set advanced settings. Press <Stop> to stop the copy job. Advanced settings Here are a few examples of useful copy settings. -
Page 18: Scan
Scan Basic operation See the Scanner and Fax Guide for more information. Document FTP server Shared folder e-mail TWAIN application USB memory Prerequisite To use the machine as a scanner the following requirements must be met: • The machine must be connected to the network using a LAN cable or directly to a computer using a USB cable •... - Page 19 Set the document. Switch the machine to scan mode. In the automatic document feeder Set the document face up. Align the document guides to the document width. Press the mode switch key. The scan mode lamp will illuminate. On the document glass ...
- Page 20 Select the destination. Scan to e-mail Press [Select Address]. Select “e-mail”, and press [Enter]. NOTE You can also select an e-mail address by pressing the one-touch key in which the desired e-mail address has been registered. In this case, this concludes the procedure.
- Page 21 Press <Start>. Select either “Shared” or “Personal”, and press [Enter]. Select the destination and press [Select]. NOTE If the document was set on the To use the personal address book, document glass, “Set next document.” log in to the machine. See chapter will be displayed once the scan has 1, “Logging in / Logging out”...
-
Page 22: Advanced Scan Settings
Advanced scan settings See the Scanner and Fax Guide for more information. Entering a fi le name The default fi le name for scanned images is a 14-digit number consisting of the current year, month, day, hour, minute, and second. ex.: 20120115143045.pdf. You can customize the fi... - Page 23 Scanning color documents Switch the machine to scan mode. Press [Color]. The button switches between “Mono” and “Color” each time you press [Color]. Selecting the fi le format Scanned images will be converted into PDF format as the factory default. You can also convert images into TIFF format when scanning monochrome documents, or JPEG format when scanning color documents.
-
Page 24: Fax
Basic transmission See the Scanner and Fax Guide for more information. Prerequisite To send and receive faxes, the following requirements must be met: • The telephone line cable has been connected to the machine and the wall outlet. • The machine has been setup for communication. For details, see chapter 7, “Initial setup (User Install)”... -
Page 25: Direct Input
Switch the machine Enter destination. to fax mode. Direct input Press the mode switch key. The fax mode lamp will illuminate. Use the numeric keys to enter the fax number and press [Enter]. Using one-touch keys Press the one-touch key in which the desired fax number has been registered. - Page 26 Press <Start>. How to specify multiple destinations... When you specify multiple destinations using the one-touch keys, set [Broadcast] to ON before specifying the destinations. When you specify destinations using the numeric keys, “Broadcast” setting will be turned ON automatically when you enter a destination.
-
Page 27: Canceling The Transmission
Canceling the transmission Here we describe how to cancel faxes that are being transmitted. Press <Job Confirm. Fax Cancel>. Press [Delete]. When you have scheduled a broadcast, you can remove a destination from the transmission by pressing [Detail]. Select the destination to delete and press [Delete]. NOTE For details on canceling a delayed transmission, see chapter 3, “Canceling / Checking faxes”... -
Page 28: Print Menu
Select “Print” from menu. • The driver name is “Muratec Direct Fax”. • Click [Preferences] to change the settings as needed. • To use your personal address book, register your user name to the driver. - Page 29 Click [Print]. Click [Send]. Enter the destina- tions. Select “Shared Address Book”, “Personal Address Book”, or “Direct Input”. When you have selected “Shared Address Book” or “Personal Address Book”, select the desired address. When you have selected “Direct Input”, enter your desired fax number to the “Fax Number”...
-
Page 30: Print
• A printer driver has been installed on the computer. For details on installing the drivers, see chapter 1, “Installing the driver” in the Printer Guide. Select “Print” from Select the Muratec the menu. printer driver. Click [Preferences] to change the settings as needed. - Page 31 Change preferences Click [Print]. as needed. Advanced settings Here are a few examples of the advanced print settings. See the Printer Guide for more information. • Duplex printing •Sorting •Printing water mark...
-
Page 32: Canceling A Print Job
Canceling a print job When canceling a print job, first try to cancel it on the computer. If you cannot cancel printing on the computer, cancel it on the machine. Canceling printing on the computer Double click the printer icon on the computer. Right click on the print job you wish to cancel, and click [Cancel]. -
Page 33: Printing From A Usb Memory Device
Printing from a USB memory device You can print documents you have scanned with your machine. Connect the USB memory device to the machine. Select “USB To Print” and press [Enter]. Press [Browse]. Select the fi le to print, and press [Enter]. Files located in the root directory of the USB memory device can be printed. -
Page 34: Using Officebridge
Using Offi ceBridge Accessing Offi ceBridge When the machine is connected to the network, you can operate it using the web browser on your computer. See the Offi ceBridge Guide for more information. Prerequisite To use Offi ceBridge, the following requirements must be met: •... - Page 35 Enter the user ID and password, and click [Login]. • If a user has not been registered, this step is not necessary. • To access OfficeBridge as a guest, click [Guest User Login]. • When the user list is displayed on the right, you can enter the user ID by selecting your user name on the list.
- Page 36 Registering e-mail and fax destinations See the Offi ceBridge Guide for more information. Click “User Infor- Click “Address mation”. Book”. For details on how to access Offi ceBridge, see “Accessing Offi ceBridge” (page 32). Click [Add]. NOTE According to the user policy, you cannot edit the address book.
- Page 37 Enter the contact information and click [Save]. • Number : The lowest available address book number will be displayed. You can change it to any available number between 1 - 9999. One-touch keys 1 - 48, located on the control panel, correspond to numbers 1 to 48.
- Page 38 Registering a folder or FTP destination See the Offi ceBridge Guide for more information. Click “User Infor- Click “Shortcut”. mation”. For details on how to access Offi ceBridge, see “Accessing Offi ceBridge” (page 32). Click “Folder Short- cut” or “FTP Short- NOTE cut”.
- Page 39 Enter the shortcut information and click [Save]. Details for folder shortcut • Shortcut Number : The lowest available number will be displayed. You can change it to any available number between 1 - 300. • Shortcut Name : Enter the shortcut name within 24 characters. •...
-
Page 40: Replacing The Consumables
Replacing the consumables Replacing the toner cartridge NOTE • The shape of the new toner cartridge differs from what has been set at the shipment. • Before you set the new toner cartridge, gently shake it to distribute the toner evenly inside the cartridge. -
Page 41: Replacing The Drum Cartridge
Replacing the drum cartridge NOTE When you have replaced the drum cartridge, the following screen will be displayed. Press [Yes] to use the new drum cartridge. -
Page 42: Troubleshooting
Troubleshooting Clearing paper jams • The fuser unit, as well as the area around the fuser, become extremely hot during machine operation. When attempting to clear a paper jam, or inspect the inside of the machine, be careful not to touch areas around the fuser unit. Doing so may cause burns. - Page 43 Clearing paper jams in the optional second cassette Clearing paper jams in the optional 2-bin tray...
-
Page 44: Clearing Document Jams
Clearing document jams Clearing document jam Document jam recovery When the following message appears after you have cleared the jam, you can restart scanning from the continuous page of the document. Press [Yes] and set the document from the page listed on the display. Then press <Start>. When you press [No] the job will be canceled. -
Page 45: If An Error Occurs
If an error occurs If an error occurs, the information lamp will illuminate and you will hear an audible beep. Check the message on the display or on the printed message, and clear the error. Some errors may not initiate a message on the screen and you may have to press the mode switch key to display the message. -
Page 46: Troubleshooting
Troubleshooting Troubleshooting checklist If you detect odd sounds, smoke or odor emitting from your machine, unplug the power cord immediately and contact your authorized Muratec dealer. Do not attempt to disassemble or repair the machine yourself. IMPORTANT Attempting to repair the machine yourself may void the limited warranty. -
Page 47: If You Cannot Solve The Problem
If you cannot solve the problem If you have a problem with your machine that you cannot solve with the information provided in these manuals, contact your authorized Muratec dealer or call the Muratec Customer Support Center at (800) 347-3296 (from U. S. only). -
Page 48: Appendix
Customer information United States of America The MFX-3510 hereafter referred to as “product”, complies with Part 68 of the FCC rules and the requirements adopted by the ACTA. On the rear panel of the product is a label that contains, among other information, a product identifi er in the format US:AAAEQ##TXXXX. - Page 49 telephone number of the sending machine or such business, other entity, or individual. (The telephone number provided may not be a 900 number or any other number for which charges exceed local or long-distance transmission charges.) For instructions on programming this information into the product, see chapter 7, “Initial setup (User Install)”...
-
Page 50: Limited Warranty
1. This warranty will be honored only on presentation of the original dated authorized Muratec bill of sale or Muratec dealer bill of sale or sales slip to an authorized Muratec service representative or service center. For the name of your authorized service center, contact Muratec (from the United States, call 1-469-429-3350;... - Page 51 4. Muratec will not be required to make adjustments, repairs or replacements if the product is installed or used at a location deemed by Muratec to be hazardous to health or safety, or if Muratec is not provided with free and reasonable access to the product and a telephone during service availability hours, or if the product location is not accessible by an authorized Muratec service vehicle.
-
Page 52: How To Read Pdf Manuals
How to read PDF manuals The following manuals are included on the CD and can be viewed on your computer. • Administrator’s Guide • Copier Guide • Scanner and Fax Guide • Printer Guide • Offi ceBridge Guide Insert the installation disk into the CD drive of the computer. •The installer will start automatically. -
Page 53: Consumables And Options
Consumables and options Consumables Consumables for this product include the following: To order consumables, please contact your authorized Muratec dealer. Items Description Toner cartridge Please order a new toner cartridge when the “The toner is almost empty” message is displayed. -
Page 54: Index
Index Clearing jams Paper size setting Document jams ........42 Bypass tray ........9 Cassette ..........7 Paper jams ........40 Copy .............14 PC-Fax ..........26 Print Basic operation ........28 Drum cartridge Cancel a print job ......30 Consumables ........51 Replacing the drum cartridge ..39 Ready screens ........13 Registering destinations Energy save key ........5 e-mail and fax destination ....34...