Table of Contents
Advertisement
Advertisement
Table of Contents

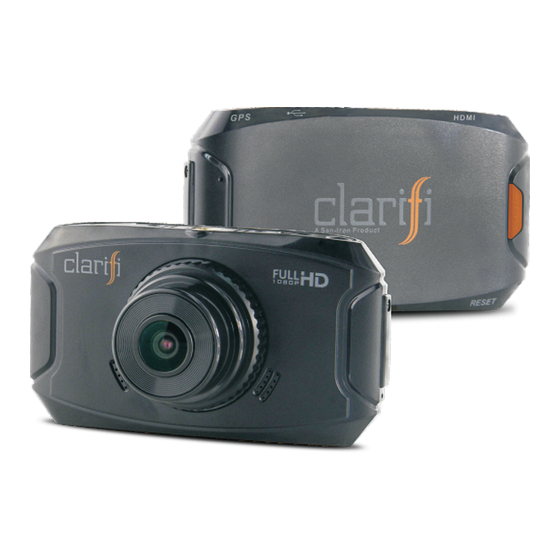
Summary of Contents for San-tron Clarifi
-
Page 2: Table Of Contents
TABLE OF CONTENTS Table of Contents ……………………………………………………………………… 1 Vehicle Camera Record ……………………………………………………………… SAFETY: Warning indicators and Safety Instructions ……………………………… 2 Contents in the Camera Box ………………………………………………………… Camera Specifications ………………………………………………………………… 4 Camera Design ………………………………………………………………………… 4 Instructions for the buttons / interface / indicators ………………………………… 5 Installation Installation instructions for the camera and camera mount …………………………... -
Page 3: Vehicle Camera Record
Important: Before operating this new Clarifi Forward Facing Video Camera, read the manual thoroughly, and retain it for future reference. Vehicle Camera Record The serial numbers are located on the back. Record the serial number in the space provided below. Refer to these numbers whenever you call upon your dealer regarding this product. -
Page 4: Contents In The Camera Box
Do not place the camera in any wet or damp environment. This camera is not waterproof, so please avoid placing the device in any wet environment, or being exposed to any wet weather conditions. Do not use the camera in any extreme dust conditions to avoid having the lens ... -
Page 5: Camera Specifications
Camera specifications Processor Ambarella A7LA30 Video Resolution FULL HD1920 x 1080p 30fps Viewing Angle 140 degree view angle Video Encode/Format H.264, Audio: AAC, MOV. Recording Cycle recording Camera on/off Supporting automatic camera is on when the vehicle starts, and when vehicle turns off when vehicle shuts down. -
Page 6: Instructions For The Buttons / Interface / Indicators
Then lock TF Card Slot Memory card slot the slot with the screw. Seal the screw with a “Clarifi” fragile label to secure the TF card. (Authorized personnel only) When the red indicator stops flash during recording... -
Page 7: Installation Instructions For The Camera And Camera Mount
Installation instructions for the camera and camera mount Fasten the screw of the mount into the screw hole on the top of the camera (Refer to image 1 & 3). Then, screw down the black rotary knob (Refer to image 2) and lock the camera in place. Image 1 Image 2 Image 3... -
Page 8: Installation Of Voltage Transformer Cable
Installation Instructions for the Voltage Transformer Cable Attach the black and red cables of the voltage transformer cable to the power source by connecting the red cable to the positive pole and the black cable to the negative pole. Connect the end with USB joint to the USB interface on the camera (See pictures below). -
Page 9: Instructions For Connecting The Gps Module And The Camera
Instructions for connecting the GPS Module to the Camera. The external GPS module unit should be positioned in full view of the sky Determine the best position to place the GPS unit attachment before installing. Once the attachment is in place, connect the module cable to the GPS interface located on the top side of the camera. - Page 10 Image 1 AMCAP.EXE --BlackView--Player--Installer-V1.101.exe Image 2 Image 3 Image 4 9 /16...
-
Page 11: Confirming The Installation Was Successful
Confirming the Installation was successful. Check whether the mount is installed in place, locked tightly, and stuck firmly where placed. Check whether the voltage transformer cable is firmly inserted into the USB port. Check whether GPS module is secured and snuggly plugged into the camera. After the first (3) steps are confirmed, start the vehicle: a. -
Page 12: Advanced Operations Recording Images With Gps
Advanced Operations Recording images with GPS: a) Install the GPS player software on your PC by clicking the button (shown below as Image1) when your camera is connected with PC. This "Blackview CAM Player" tool is built right into the memory of the camera. AMCAP.EXE --BlackView--Player--Installer-V1.101.exe Image 1... -
Page 13: Formatting The Tf Card
Formatting the TF card A TF card can be formatted by a special sample unit (with LCD), or with the TF card inserted into a TF adaptor utilizing the PC with WIN 7 system under FAT32. This needs to be completed prior to using the camera. The formatted TF card can then be inserted into the TF card slot located on the side of the camera;... -
Page 14: Installing The Software On A Tf Card
Installing the software on the TF card. After formatting, copy the firmware.bin file onto the TF card. Plug in the camera to power it on and insert the TF card into the camera. The software will install automatically. After several minutes, unplug the camera. Remove the TF card once the camera has powered off. -
Page 15: Potential Problems Troubleshooting
Potential Problems Troubleshooting If the power does not turn on. a) The USB connector of the voltage transformer cable has been disconnected from the camera. Reconnect it to the camera. b) The built-in battery in the camera does not power and needs to recharge. Turn on the vehicle engine to charge the battery or connect the camera for 30 minutes to a computer that has an USB power source for 30 minutes until the blue LED light flash turns off. -
Page 16: En D - U S E R Li C E N S E Ag R E E M E N T Fo R Ma P Da T A Fo R Ve H I C L E
Software), and any copies of the Software, are owned by San-tron, licensors and suppliers to San-tron and their respective affiliates (such licensors and suppliers to San-tron, together with their respective affiliates, are hereinafter collectively referred to as "San-tron's Licensors"). All rights are reserved by San-tron or San-tron's licensors. - Page 17 San-tron has been advised of the possibility of such damages except in the event of San-tron's gross negligence or willful, misconduct, of death or personal injury, and of damages due to the defective nature of the product.
Need help?
Do you have a question about the Clarifi and is the answer not in the manual?
Questions and answers