
Related Manuals for Solfex IRC 2.1

Summary of Contents for Solfex IRC 2.1
-
Page 1: System Installation
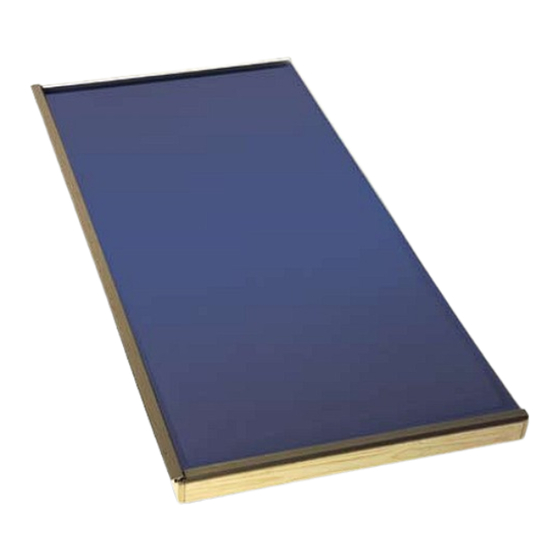
IRC 2.1 Roof Integrated Solar Collector Solar Keymark No. 011-75347F System Installation, Commissioning and Maintenance Manual www.solfex.co.uk solar energy innovation... -
Page 2: Table Of Contents
Contents • Health and Safety ............• Installing the collectors ........4 - 24 • Installing the pump station ........• System schematics ..........26 - 27 • Installing the stainless steel pipe ......• Flushing and filling the system ........ -
Page 3: Health And Safety
Installation instructions – Wooden frame collectors In-roof installation Health and Safety SAFETY INSTRUCTION! The basic equipment includes: + safety shoes + hard hat + cut-proof safety gloves + safety harness Ladder Lean ladders only on strong and secure support points. Before climbing, be sure that the ladder can not exile, fall over or sink in. - Page 4 DIN CERTCO in 2004. Con- and building products, as listed in Features of IRC 2.1 roof integrated solar collector national standard became less struction is characterised by a the certification scheme, conform...
-
Page 5: Installing The Collectors
Installing the Collectors Installation instructions – Wooden frame collectors In-roof installation Page 4 of 24 Technical changes may be made without notice Installing the collectors - page 5... - Page 6 Installation instructions – Wooden frame collectors In-roof installation ROOF INTEGRATION: Uncover the area needed for the installation of the collectors. Width: width of a collector group + 0,5m (left) + 0,5m (right) Height: 2,5m (for one-row fields) Install a 70/70mm support bracket on every rafter. Place this bracket below the lowest slat and screw into the rafter with 2 Torx 4 x 80mm screws.
- Page 7 Installation instructions – Wooden frame collectors In-roof installation Haul up the second collector on the roof. Unscrew the covering aluminium profile. To do so, you have to unscrew 6 4, 2 x 19 mm screws. Caution: keep those screws. They will be used later. Lay down a layer of silicon on the left collector’s part, which will be fixed to the right’s collector aluminium profile.
- Page 8 Installation instructions – Wooden frame collectors In-roof installation Firmly screw the two collectors with a Torx 4x80mm screw that you will screw sideways through the frames of both collectors. Collector’s 1 and 2 are now installed. ( 10) The following collectors will be installed following the exact same procedure as the one described in stages (5) to (10).
- Page 9 Installation instructions – Wooden frame collectors In-roof installation (11) the collectors will be fastened to the roof’s structure only after they are all placed on the roof in a correct way. See stages (14) to (17) (12) Fix the collectors to the lower support brackets by means of Torx 4x30mm screws.
- Page 10 Installation instructions – Wooden frame collectors In-roof installation (15) On the right hand side of the collector field: As for the left hand side, fasten the collector to the slats. To do so, use Torx 4x80mm screws and screw sideways through the frame all the way through to the slat.
- Page 11 Installation instructions – Wooden frame collectors In-roof installation (19) Place the linings, mounds the junctions and secure using a hex spanner. Do NOT fasten too strongly. This might damage the collector’s connections. (20) Make the group’s inlet and outlet connections run through the attic space by means of clamping ring bends.
- Page 12 Installation instructions – Wooden frame collectors In-roof installation (21) The sensor tube and collector sensor should be inserted in the last solar collector with the flow of hot solar transfer fluid down to the solar cylinder / store, this will give accurate temperature collector readings on the solar controller.
- Page 13 Installation instructions – Wooden frame collectors In-roof installation INSTALLATION OF THE INTEGRATION COVER: (25) At the bottom of each collector, by the centre of the collector, mount the wooden slats with 2 4x80mm screws for each one of them. Advice: The slat’s upper face must be, at the highest, at the level of the upper edge of the collector’s frame.
- Page 14 Installation instructions – Wooden frame collectors In-roof installation (29) In the same way, on the side, fix this cover section to the collector. (30) As the bottom, place the straight pieces of the cover: Start by inserting the new elements sideways into the ones previously installed before completely fitting them (31) Nail these pieces to the frame using sealed plumbing...
- Page 15 Installation instructions – Wooden frame collectors In-roof installation (33) As in stage (32), nail the covers to the wooden frame using sealed plumbing nails. (34) Mounting of the cover’s superior left corner: The sheet must be meticulously inserted into the collector’s upper profile.
- Page 16 Installation instructions – Wooden frame collectors In-roof installation (37) As for the corner part, nail these elements to the wedge using sealed plumbing nails, at the juncture. (38) Firmly fix the side left and right side pieces. (39) Place the right hand side cover sheet on top of the side gasket.
- Page 17 Installation instructions - Wooden frame collectors In-roof installation (41) Place the left hand side cover sheet on top of the side gasket. Fasten with sealed plumbing screws: 1× at the top, 1× at mid-length and 1× at the bottom. (42) Sealed plumbing screw, top left.
- Page 18 Installation instructions - Wooden frame collectors In-roof installation (45) At the bottom sheets and by the mix-collector, underneath the glass cover, add a sealed plumbing screw (into the wooden slat installed in (29)). (46) Fasten the side parts to the roof slats thanks to metal retainer and roofing nails.
- Page 19 Installation instruction – Wooden frame collectors In-roof installation (49) Glue the lead skirting to the tile with silicon gel or PU foam. In case this stage is not well carried out, the collector field’s lower edge can be seriously damaged in storms or strong wind periods.
- Page 20 Installation instructions – Wooden frame collectors In-roof installation MULTIPLE ROW INSTALLATION cover and protect horizontal junctures between rows, covering pieces are provided. They should be inserted into the upper collectors’ runner. (53) Insert the left hand cover strip and only fix it first with a sealed plumbing screw on the side.
- Page 21 Installation instructions – Wooded frame collectors In-roof installation 57) Collectors installed on several rows: the installation of such sets is done by following the instructions (1) to (28). Between rows a 70mm separation batten will be installed. Page 20 of 24 Technical changes may be made without notice Installing the collectors - page 21...
- Page 22 Installation instructions - Wooden frame collectors In-roof installation Page 19 of 24 Technical changes may be made without notice page 22 - Installing the collectors...
- Page 23 Installation instructions - Wooden frame collectors In-roof installation One-row set, field size Without flushing With flushing Number Area IRC 2.1 gross Disposition SMK12 gross Total length Total height Total length Total height 2026 2030 2296 2630 3019 2030 3289 2630...
- Page 24 6190 8254 6790 8977 6190 9247 6790 Wooden frame Solar Panel IRC 2.1 anchorage components a) panels + completing kit + mounting material + hydraulic connection panels single row, area in m2 Art.Nr. Name 14148 Number of panels basic kit for 2 panels +...
-
Page 25: Installing The Pump Station
Wooden frame Solar Panel IRC 2.1 anchorage components a) panels + completing kit + mounting material + hydraulic connection Collector Field m Art.Nr. 14107 Number of panels basic kit for 2 panels + 24100 wooden wedges on the top basic kit for 3 panels +... -
Page 26: Page 26 - System Schematics
System with one collector field The Solfex Solar product Optional AAV (Not needed range has been specially if using filling developed for use in solar pump) thermal systems, where high temperatures can normally be reached and where, depending on the kind of system, there can be glycol. - Page 27 System with two collector fields / East - West System Optional AAV (Not needed if using filling pump) Pressure pump filling points Optional Heat Metering Accessories Technical changes may be made without notice System Schematics - page 27...
-
Page 28: Installing The Stainless Steel Pipe
Installing the stainless steel solar pipe Cutting 1. Split the pipes and cut the insulation using a sharp knife. Be careful not to damage the wire. 2. Push the insulation back along the pipe to allow access for cutting the pipes. -
Page 29: Flushing And Filling The System
Flushing and filling the system Before filling and pressurising, the system must be flushed, using a solar filling machine, to remove any contaminants. It is recommended that the solar heat transfer fluid is used as some parts of the system may not be able to be drained down. -
Page 30: Commissioning The Pump Station
Commissioning the pump station To ensure the primary solar system is free from air you must manually switch on the circulation pump on the pump station via the solar differential temperature controller. To see you have circulation through the system the flow setter should give a reading of around 7 to 10 litres per minute. -
Page 31: System Maintenance And Warranty
System maintenance and warranty System maintenance The solar heat transfer fluid must be checked once every year to investigate its antifreeze and pH value. These checks can be made using a refractometer. • Antifreeze concentration of 40 - 45%. If the reading is below 30% then the fluid will need to be replaced. • pH Value of 8.5 - 9.5. -
Page 32: Commissioning Checklist & Warranty Form
SOLFEX system commissioning checklist and warranty form Solar Collector Details Manufacturers Name . Model ....................... Evacuated Tube Yes Flat Panel Direct Flow Heat Pipe On roof Roof Integrated Gross collector area . - Page 33 Solar System Details Controller type............. Pipe work used Copper pipe work Flexible Stainless steel Insulation type High temperature Pre-insulated Length of pipe work in meters............. Expansion Vessel type : Solar rated Size of expansion vessel.
-
Page 34: Commissioning Checklist & Warranty Form
..Please see web site for warranty details and manufactures instructions for system annual maintenance check. SOLFEX SOLAR KEYMARK COLLECTORS COME WITH A TEN YEAR MANUFACTURES WARRANTY. Please contact us directly in writing within 7 days of any warranty issues. -
Page 35: Maintenance Record
Maintenance Record Date Engineer Company Details Findings Technical changes may be made without notice Maintenance record - page 35... - Page 36 Energy Arena, Bannister Hall Works, off Shop Lane, Higher Walton, Preston, Lancashire PR5 4DZ Tel. 01772 312847 Fax. 01772 335277 sales@solfex.co.uk www.solfex.co.uk...
Need help?
Do you have a question about the IRC 2.1 and is the answer not in the manual?
Questions and answers