Table of Contents
Advertisement
Available languages
Available languages
Quick Links
Advertisement
Table of Contents

Subscribe to Our Youtube Channel
Related Manuals for Steren RM-12

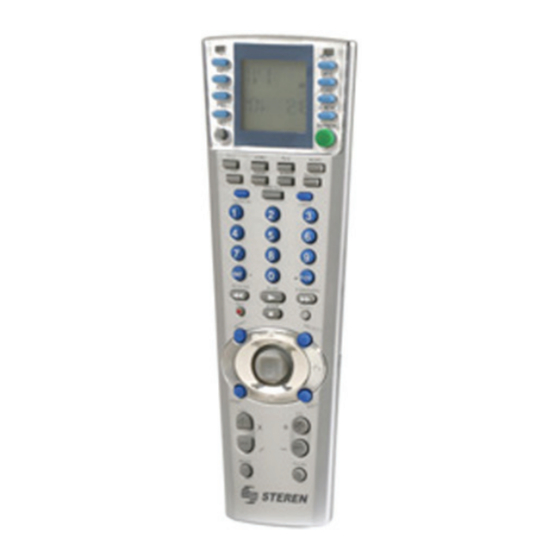
Summary of Contents for Steren RM-12
- Page 2 Before using your new Universal Remote Control, please read this instruction manual to prevent any damage. Put them away in a safe place for future references. IMPORTANT Clean only with a soft, dry cloth. Please insert new batteries within 5 minutes after replacing, in order to avoid the reprogramming.
-
Page 3: Search Method
1.- Turn on the device that you want to program. 2.- Press the button which correspond to the device to be programmed. In the screen you will see the selected device. 3.- Press and hold SET for 3 seconds, in the screen you will see the message CODE SETUP. -
Page 4: Deleting Codes
Do not press different button as mentioned in this user’s Do not press different button as mentioned in this user’s manual. manual. You have 30 seconds as a maximum time to press a button You have 30 seconds as a maximum time to press a button in each programming step, otherwise, you will leave the in each programming step, otherwise, you will leave the Search Method and must repeat from step 2. - Page 5 LOCK / UNLOCK DEVICES Use this option to restrict the use of certain devices. 1.- Press and hold SET for 3 seconds, in the screen you will see the message CODE SETUP. 2.- Use the multi-control to choose DEVICE SET option. Then press SELECT.
-
Page 6: Troubleshooting
You can program up to two button sequences (MACRO 1 You can program up to two button sequences (MACRO 1 and MACRO 2). and MACRO 2). CALCULATOR 1.- Press REM / CAL button. 2.- Use the numerical buttons to performs math calculations. 3.- Buttons with special function in calculator mode: ENT: Shows the result of a calculation (=) -
Page 7: Specifications
Trouble Solution You may be using the wrong code. The remote control is not Try the next code listed for your performing commands brand. Start the automatic Search properly Method Make sure you are using new The remote control does batteries and they put on the right not respond after pressing position. - Page 9 Antes de utilizar su nuevo Control Remoto Universal lea Antes de utilizar su nuevo Control Remoto Universal lea este instructivo para evitar cualquier mal funcionamiento. este instructivo para evitar cualquier mal funcionamiento. Guárdelo para futuras referencias. Guárdelo para futuras referencias. IMPORTANTE Siempre utilice un paño suave y seco para limpiar su equipo.
- Page 10 de su aparato programado, por favor intente con los códigos de la lista que corresponden a su marca. De ser necesario utilice el método de búsqueda automática. 1.- Encienda el equipo que desea programar. 2.- Presione el botón que corresponde al dispositivo que desee programar.
-
Page 11: Ajustando El Reloj
7.- Mueva hacia arriba o hacia abajo el botón multicontrol, en pantalla se mostrarán diferentes códigos. 8.- Cuando su equipo se apague, presione SELECT para elegir el código. 9.- Oprima la tecla de Encendido (Power) nuevamente para comprobar que su equipo enciende. Pruebe que el control acciones la mayoría de las funciones de su equipo, en caso contrario repita las instrucciones. -
Page 12: Ajuste De Volumen
AJUSTE DE VOLUMEN Si un dispositivo cuenta con control de volumen y no desee que se active mediante el control remoto universal, siga estos pasos: 1.- Presione el botón SET por tres segundos, en pantalla se muestra el mensaje CODE SETUP. 2.- Utilice el botón multi-control para seleccionar la opción VOLUME SET. - Page 13 Ejemplo: Ejemplo: Seleccionar TV, encenderla, cambiar al canal 2, y aumentar Seleccionar TV, encenderla, cambiar al canal 2, y aumentar volumen en dos niveles (5 pasos). volumen en dos niveles (5 pasos). 1.- Presione el botón SET por tres segundos, en pantalla se muestra el mensaje CODE SETUP.
-
Page 14: Problemas Y Soluciones
COMO CAMBIAR DE UN APARATO A OTRO Simplemente presione el botón del aparato que desea utilizar (TV, Sat, , Aux, VCR, etc.). REINICIO Si desea regresar a las opciones predeterminadas de fábrica: 1.- Presione el botón SET por tres segundos, en pantalla se muestra el mensaje CODE SETUP. - Page 15 APPENDIX A / APÉNDICE A...
- Page 16 APPENDIX A / APÉNDICE A...
- Page 17 APPENDIX A / APÉNDICE A...
-
Page 18: Warranty
3.- The repairing time will not exceed 30 natural days, from the day the claim was received. 4.- Steren sell parts, components, consumables and accesories to costumer, as well as warranty service, at any of the addresses mentioned later. THIS WARRANTY IS VOID IN THE NEXT CASES:... -
Page 19: Póliza De Garantía
1.- Para hacer efectiva la garantía, presente ésta póliza y el producto, en donde fue adquirido o en Electrónica Steren S.A. de C.V. 2.- Electrónica Steren S.A de C.V. se compromete a reparar el producto en caso de estar defectuoso sin ningún cargo al consumidor. Los gastos de transportación serán cubiertos por el proveedor.
Need help?
Do you have a question about the RM-12 and is the answer not in the manual?
Questions and answers