
Subscribe to Our Youtube Channel
Related Manuals for Vesta DWV335BBS


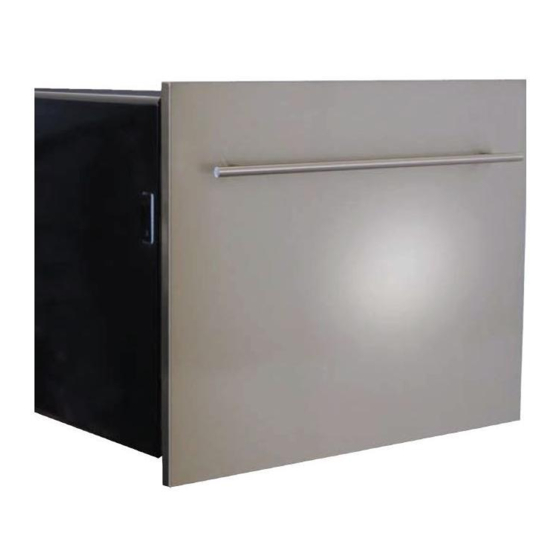
Summary of Contents for Vesta DWV335BBS
-
Page 1: Table Of Contents
™ VESTA™DWV335BBS Automatic Built-In Compact Dishwasher Unit Parts Identification Important Safety Instructions Installation Installation Instructions Instructions and Installation Requirements Dishwasher Dimensions Use & Care Guide Installation Location, Connecting Inlet Hose Installing the Drain Hose Finish the Installation Use and Care Guide... -
Page 3: Unit Parts Identification
UNIT PARTS IDENTIFICATION Control Panel Heav y Norm al Li ght Sp eed Glas sR in se Soak Power Light Rinse Aid Warning Light Program Indicator LED’s ON/OFF Button PROGRAM Button Delay Time Display DELAY START Button NOTE: Controls can only be set when door is open. -
Page 4: Important Safety Instructions
IMPORTANT SAFETY INSTRUCTIONS IMPORTANT SAFETY INSTRUCTIONS WHEN LOADING ITEMS TO BE WASHED • Locate sharp items so that they are not likely to damage the door seal. Load sharp knives with the WARNING handles up to reduce the risk of cut-type injuries. •... -
Page 5: Important Safety Instructions
IMPORTANT SAFETY INSTRUCTIONS ELECTRICAL INSTRUCTIONS GROUNDING INSTRUCTIONS Refer to the rating label to connect the dishwasher to the This appliance must be grounded. In the event of malfunction, appropriate power supply. Use the required 15 amp fuse, or breakdown, grounding will reduce the risk of electric shock time delay fuse or circuit breaker and make sure that a by providing the path of least resistance for electric current. -
Page 6: Installation Instructions
INSTALLATION INSTRUCTIONS INSTALLATION REQUIREMENTS All Installations For Best Results • Remove all packing materials carefully. Your dishwasher cleans by spraying a mixture of hot clean water and detergent (under pressure) against the • Make sure the electrical power supply is within easy soiled surface of dishes. -
Page 7: Dishwasher Dimensions
INSTALLATION INSTRUCTIONS DISHWASHER DIMENSIONS... -
Page 8: Installation Location, Connecting Inlet Hose
INSTALLATION INSTRUCTIONS LOCATION AND WATER CONNECTION Installation Location Connect the Inlet Hoses • For cutout dimensions, refer to the drawing below. • The water inlet hose from the machine terminates in a 3/4” “female” connector. The water supply should therefore terminate in a similar “male” connector and •... -
Page 9: Water Drainage
INSTALLATION INSTRUCTIONS WATER DRAINAGE Install the Drain Hose Insert the drain hose into a drain pipe with a minimum as electrical or duct tape to cover sharp edges that could diameter of 1½”, or let it run into the sink, making sure to damage the drain hose. -
Page 10: Finish The Installation
INSTALLATION INSTRUCTIONS FINISH THE INSTALLATION Secure the Unit to the Cabinet To finish the installation, secure the unit to the cabinet using a screwdriver and the two installation screws provided (there is one screw hole on each side). Once the screws are installed, cover them with the included screw caps (shown right). -
Page 11: Use And Care Guide
USE AND CARE LOADING THE DISHWASHER Wash Up to Six Place Settings The dishwasher is designed to receive a standard “6 piece” plate setting consisting of the following: • 6 Dinner Plates • 6 Bread & Butter Plates • 6 Fruit Bowls •... -
Page 12: Using Detergent
USE AND CARE USING DETERGENT Using the Right Detergent Use only a mild detergent specifically made for use in dishwashers, as other types will cause oversudsing. If your detergent is old and/or lumpy, throw it away. Old detergent loses it’s washing power. Lumpy detergent won’t dissolve. The amount of detergent you use depends if your water is “hard”... -
Page 13: Using A Rinse Agent
USE AND CARE USING A RINSE AGENT Using a Rinse Agent You can help prevent unsightly spots on dishes and glassware and reduce drying time by using a rinse agent. A rinse agent is specially formulated to rinse away food and detergent residues that can be left behind on your dishes. -
Page 14: Selecting A Cycle
USE AND CARE SELECTING A CYCLE Refer to the chart below to select the correct wash cycle for your dishes based on the type of items you’re washing and their degree of soil. Description of Detergent Running Energy Water Rinse Aid Program Cycle Selection Information Cycle... -
Page 15: Additional Features
USE AND CARE ADDITIONAL FEATURES Delay Start Pause DELAY START allows you to delay the start of any cycle A forgotten dish can be added any time before the detergent by 1 to 24 hours. To activate this feature, press the DELAY dispenser lid opens. -
Page 16: About The Controls
USE AND CARE GUIDE ABOUT THE CONTROLS Heav y Norm al Li ght Sp eed Glas sR in se Soak Power Light Rinse Aid Warning Light: Turns on when the Rinse Aid Dispenser needs to be refilled. ON/OFF: Use this button to turn power to the dish- washer ON/OFF. -
Page 17: Quick Operation Instructions
USE AND CARE GUIDE QUICk OPERATION GUIDE To Operate Your Dishwasher 1. Make sure the water inlet and drain hoses are correctly 14. After washing, dishes should be allowed to cool down for and securely connected and the water supply is turned approx. -
Page 18: Cleaning The Filter
USE AND CARE About the Filter Assembly The dishwasher’s filtering system prevents objects from blocking the pump and removes food particles from the wash water, allowing it to be recirculated. The FILTER ASSEMBLY consists of three filters: A. Coarse Filter Larger items that could block the drain are trapped in the coarse filter. -
Page 19: Caring For The Dishwasher
USE AND CARE Caring for Your Dishwasher After Every Wash Turn the water supply to the dishwasher OFF. Leave the door IMPORTANT slightly open so moisture and odors are not trapped inside Unplug the Dishwasher • Never use a spray cleaner to clean the Before cleaning or performing any maintenance, always door panel as it could damage the door unplug the dishwasher from the electrical socket. -
Page 20: Winterization
USE AND CARE Cleaning Instructions The Control Panel The Door The control panel can be cleaned using a damp cloth and The edge around the inside of the dishwasher door can be then dried thoroughly. cleaned using a damp cloth. Avoid dripping water into the door latch and electrical components, DO NOT use a spray Rubber Seals cleaner of any kind. -
Page 21: Troubleshooting
TROUBLESHOOTING COMMON PROBLEMS & SOLUTIONS PROBLEM POSSIBLE CAUSE SOLUTION Dishwasher will not start • Dishwasher not receiving • Check electrical connection fuse/circuit breaker electrical power • Power supply not turned on • Make sure the dishwasher is turned on and the power cord is properly plugged into the wall socket •... - Page 22 TROUBLESHOOTING COMMON PROBLEMS & SOLUTIONS PROBLEM POSSIBLE CAUSE SOLUTION The dishes are not • Dishes are not dishwasher • Only wash and dry items that are dishwasher safe safe drying (cont’d) Cloudiness on • Soft water and too much • Use less detergent and select a shorter wash cycle detergent glassware...
-
Page 23: Error Code Chart
IF YOU NEED SERVICE This Vesta™ appliance comes with a Limited Warranty Call our Technical Service and Assistance (please read the Limited Warranty Statement that came Department toll-free at with your dishwasher for complete details.) You’ll find many... - Page 24 ™ Vesta DWV335BBS Automatic Compact Dishwasher Westland Sales Corporate Headquarters : Clackamas, OR Westland Sales Elkhart Operations: Elkhart, IN Phone: 503-655-2563 Toll-Free: 800-356-0766 www.westlandsales.com © 2011 Westland Sales...
Need help?
Do you have a question about the DWV335BBS and is the answer not in the manual?
Questions and answers