Table of Contents
Advertisement
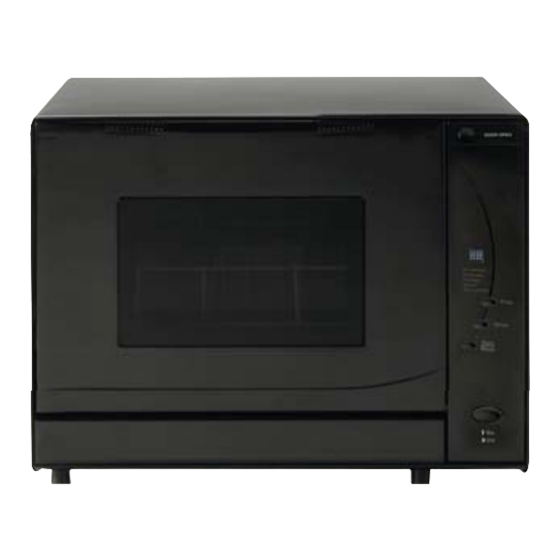
VESTA™ DWV303DB
Automatic Compact
Dishwasher
Installation
Instructions and
Use & Care Guide
™
READ ALL INSTRUCTIONS BEFORE USING
Contents
Use & Care Guide
Troubleshooting
P1-Intensive
P2-Normal
P3-Rapid
P4-Eco
P5-Pre-wash
Prog.
Delay
Start
Reset
On
Off
1
2
3
4
5
6
7
7
8
9
10
11
12
13
13
Advertisement
Table of Contents

Summary of Contents for Vesta DWV303DB
-
Page 1: Table Of Contents
™ P1-Intensive P2-Normal P3-Rapid P4-Eco P5-Pre-wash Prog. VESTA™ DWV303DB Delay Start Reset Automatic Compact Dishwasher Contents Unit Parts Identifi cation Installation Important Safety Instructions Instructions and Installation Instructions Use & Care Guide Installation Requirements Built-in Installation Countertop Installation Use & Care Guide... -
Page 3: Unit Parts Identifi Cation
UNIT PARTS IDENTIFICATION 1. WINDOW 18. DISH RACK (NOT SHOWN) 2. FRONT PANEL 19. SILVERWARE 3. DOOR RELEASE BUTTON BASKET (NOT SHOWN) 4. LED DISPLAY 20. RINSE AGENT MEASURING 5. PROGRAM BUTTON CONTAINER (NOT SHOWN) 6. DELAY START BUTTON 7. START/RESET BUTTON 8. -
Page 4: Important Safety Instructions
IMPORTANT SAFETY INSTRUCTIONS IMPORTANT SAFETY INSTRUCTIONS - Items with wooden or bone handles, or items joined WARNING together with glue are unsuitable as they cannot resist hot water. When using your dishwasher, follow basic safety - Do not touch the heating element during or immediately precautions: after use. -
Page 5: Installation Instructions
INSTALLATION INSTRUCTIONS INSTALLATION REQUIREMENTS All Installations For Best Results Remove all packing materials carefully. Your dishwasher cleans by spraying a mixture of hot Make sure the electrical power supply is within easy clean water and detergent (under pressure) against the reach of the machine. -
Page 6: Built-In Installation
INSTALLATION INSTRUCTIONS BUILT-IN INSTALLATION If you specifi ed a built-in installation, your dishwasher came with the Built-In Hose Kit (Part# DWVBIHK) and CUTOUT FOR BUILT-IN Built-In Trim Kit (Part# DWVTKBL). Water Supply Water Installation Location Inlet - This dishwasher is approved for built-in installations. Water - Air space requirements: Sides and Bottom=1/4”... -
Page 7: Countertop Installation
INSTALLATION INSTRUCTIONS COUNTERTOP INSTALLATION Installation Location The minimum height clearance required to install your dishwasher on a countertop surface with overhead cupboards is 17-1/8” (45 cm). Follow These Steps 1. Screw the faucet adapter onto the faucet, then check Bleeder Button for leaks. -
Page 8: Loading The Dishwasher
LOADING THE DISHWASHER The dishwasher is designed to receive four standard “4 piece” plate settings consisting of the following: - 4 Dinner Plates Your dishwasher is not a “waste disposal unit”, - 4 Bread & Butter Plates clean off large particles of food sediments before - 4 Fruit Bowls placing dishes in your dishwasher. -
Page 9: Using The Right Detergent
USE AND CARE GUIDE USING THE RIGHT DETERGENT USING A RINSING AGENT Use only detergent specifi cally made for use in You can help prevent unsightly spots on dishes and dishwashers, as other types will cause over-sudsing. If glassware and reduce drying time by using a rinse your detergent is old and/or lumpy, throw it away. -
Page 10: Pre Wash, Delay Start & Eco Features
USE AND CARE GUIDE DELAY START ECO CYCLE DELAY START allows you to delay the start of any cycle The ECO CYCLE gives you the option of washing dishes at normal incoming water temperature. When activated, the by 1 to 24 hours. To activate this feature, press the DELAY START button and refer to the LED DISPLAY. -
Page 11: Program Summary/Selection Chart
USE AND CARE GUIDE PROGRAM SUMMARY / SELECTION CHART PROGRAM SUMMARY/SELECTION P1 - INTENSIVE WASH Water Temperature: Wash 129˚F / Rinse 156˚F NOTE: At the beginning of each cycle, the Program Duration: 125 Minutes (+ heating time) dishwasher always starts in the “drain” mode. Water Consumption: 2.74 gal. -
Page 12: Operating Your Dishwasher
USE AND CARE GUIDE OPERATING YOUR DISHWASHER Make sure the water inlet and drain hoses are correctly and securely connected. DOOR OPEN Push the DOOR OPEN button to open the door. Place the dishes on the Dish Rack and cutlery (unsorted) inside the Silverware Basket. -
Page 13: Disconnecting Your Dishwasher
USE AND CARE GUIDE DISCONNECTING YOUR DISHWASHER When the cycle is complete, always relieve water pressure CAUTION from the inlet hose: - Close the HOT water supply at the faucet. DO NOT LET CHILDREN DISCONNECT THE - Disconnect the Power Supply Cord DISHWASHER QUICK-CONNECT HOSE ASSEMBLY. -
Page 14: Troubleshooting Chart
TROUBLESHOOTING COMMON PROBLEMS & SOLUTIONS TROUBLESHOOTING CHART You’ll fi nd many answers to common problems in the Troubleshooting section below. If you read this section fi rst, you may not need to call for service at all. PROBLEM POSSIBLE CAUSE SOLUTION Dishwasher will not start - Dishwasher not receiving... -
Page 15: Error Code Key
- Too much inlet water. IF YOU NEED SERVICE This Vesta™ appliance comes with a Limited Warranty (please read the Limited Warranty Statement that came with your dishwasher for complete details.) Please refer to the Troubleshooting Chart and Error Code Key before calling for service. - Page 16 ™ Vesta DWV303DB Automatic Compact Dishwasher Westland Sales Corporate Headquarters : Clackamas, OR Westland Sales Elkhart Operations: Elkhart, IN Phone: 503-655-2563 Toll-Free: 800-356-0766 www.westlandsales.com © 2008 Westland Sales...


Need help?
Do you have a question about the DWV303DB and is the answer not in the manual?
Questions and answers