Table of Contents
Advertisement
Quick Links
IH328B
INSTRUCTION MANUAL
Contents
Warnings and Precautions ............................................................................... 2
Important Safety Instructions ............................................................................ 3
In the Box & Features ....................................................................................... 4
Powering the Unit & Connecting the Speakers ................................................ 5
Listening to the AM/FM Radio .......................................................................... 8
Saving AM/FM Radio Stations to the Unit's Memory ........................................ 8
Setting the Clock & Setting the Timer ............................................................... 9
Using the Video Output .................................................................................. 10
Connecting to an Audio Player using the Aux Input ....................................... 10
Changing the Remote Battery .........................................................................11
Location of Controls & Control Definitions ................................................. 12-19
Service Information......................................................................................... 20
Advertisement
Table of Contents

Subscribe to Our Youtube Channel
Related Manuals for iLive IH328B


Summary of Contents for iLive IH328B
-
Page 1: Table Of Contents
IH328B INSTRUCTION MANUAL Contents Warnings and Precautions ................2 Important Safety Instructions ................3 In the Box & Features ..................4 Powering the Unit & Connecting the Speakers ..........5 Docking an iPod & Playing a docked iPod ............6 Playing a CD &... -
Page 2: Warnings And Precautions
Warnings and Precautions TO PREVENT FIRE OR SHOCK HAZARDS, DO NOT EXPOSE THIS UNIT TO RAIN OR MOISTURE. This symbol, located on back or bottom of the unit, is WARNING: The remote control’s button cell battery intended to alert the user to the presence of uninsulated contains mercury. -
Page 3: Important Safety Instructions
Important Safety Instructions 1. Read Instructions - All the safety and operating instruction should be read 15. Outdoor Antenna Grounding - If an outside antenna is connected to before the product is operated. the receiver, be sure the antenna system is grounded so as to provide some protection against voltage surges and built-up static charges. -
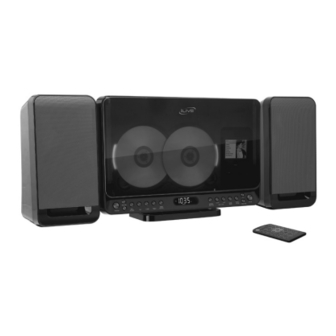
Page 4: In The Box & Features
In the Box 2-CD Home Music Speaker Docking System Speaker Remote Control iPod Brackets (7) Features Certified iPod Connector installed for Digital Volume Control iPod docking Preset EQ: Rock, Classic, Jazz, Pop Recharge Circuit for iPod/mini/nano/ LCD Display with Backlit photo/video Digital Clock Controls connected iPod players... -
Page 5: Powering The Unit & Connecting The Speakers
Powering the Unit Power the unit by connecting it to a standard AC outlet (120V ~ 60Hz) via the attached AC cord. Connecting the Speakers Connect the speakers by inserting the speakers wires into the speaker connection inputs. The color of the speaker wire needs to correspond to the color of the connection input. -
Page 6: Docking An Ipod & Playing A Docked Ipod
Docking an iPod 1. Locate the numbered Bracket that fits the iPod that will be docked. Each included Bracket has a number on it, indicating which iPod model that bracket is compatible with. See the separate bracket chart page to identify which bracket is needed. -
Page 7: Playing A Cd & Programming A Cd
Playing a CD 1. Press the Power Button to turn the unit on. 2. Press the Open/Close Button to open the CD/iPod door. 3. Load a CD into the CD player. Press the Open/Close Button to close the CD/iPod door. Always load the CD into the left opening first. A second CD should only be loaded into the CD opening on the right. -
Page 8: Listening To The Am/Fm Radio
Listening to the AM/FM Radio 1. Press the Power Button to turn the unit on. 2. Press the Source Button to switch the unit to radio mode. 3. Press the Stop/AM/FM Button to switch between AM and FM radio. 4. Press the Skip/Search/Tune Buttonss to tune the AM or FM radio. Saving AM/FM Radio Stations to the Unit’s Memory 1. -
Page 9: Setting The Clock & Setting The Timer
Setting the Clock 1. Press the Power Button to turn the unit off. 2. Press and hold the Mem/Clk Adj Button. 3. Press the Skip/Search/Tune Buttonss to select 12 hour or 24 hour. 4. Press the Mem/Clk Adj Button. 5. Press the Skip/Search/Tune Buttonss to adjust the hour. 6. -
Page 10: Using The Video Output
Using the Video Output When connecting two products using an RCA Cable, match the colored ports with the same colored connection. (Red to Red, White to White, and Yellow to Yellow) 1. Connect an RCA Cable to the RCA Composite Video Output on the unit, and to the video input on the Television. 2. -
Page 11: Changing The Remote Battery
Changing the Remote Battery WARNING: Danger of explosion if the remote control’s batteries are incorrectly installed. Replace only with the same or equivalent battery. CR2025 OPEN PUSH Push the Release Button and pull out the Battery Compartment to access the battery. Replace the old battery with an equivalent new battery (CR2025). -
Page 12: Location Of Controls & Control Definitions
Location of Controls Location of Controls 1 Disc Repeat Button Press the Disc Repeat Button consecutively in CD mode to repeat all discs. Press the Disc Repeat Button to display the time in radio mode. 2 Disc Select Button Press the Disc Select Button in CD mode to switch between disc 1 and disc 2. 3 Mem/Clk Adj Button Press the Mem/Clk Adj Button to save a radio station to the units memory. -
Page 13: Control Definitions
Control Definitions 4 Sleep/Timer Button Press the Sleep/Timer Button consecutively to set the sleep timer between 10 and 90 minutes. 5 EQ Button (Rock, Classic, Jazz, Pop) Press the EQ Button to switch between the units preset equalizer settings. 6 Volume Buttons Press the Volume Buttons to adjust the volume of the unit. - Page 14 Location of Controls...
- Page 15 Control Definitions 15 External Speakers The External Speakers connect to the unit to amplify music or radio played from the unit. 16 Dual CD Player The Dual CD Player allows two CDs to be loaded into the unit at the same time. 17 AC Power Cord Use the AC Power Cord to plug the unit into a standard AC outlet (120V ~ 60Hz).
- Page 16 Location of Controls...
- Page 17 Control Definitions 24 Sleep/Timer Button Press the Sleep/Timer Button consecutively to set the sleep timer between 10 and 90 minutes. 25 Power Button Press the Power Button to turn the unit off and on. 26 Mute Button Press the Mute Button to mute the unit’s volume. 27 Play/Pause/M+ Button Press the Play/Pause/M+ Button to play or pause an loaded iPod or CD.
- Page 18 Location of Controls...
- Page 19 Control Definitions 36 Source Button Press the Source Button to switch between CD, radio, and aux mode. 37 Open/Close Button Press the Open/Close Button to open and close the CD/iPod door. 38 iPod Button Press the iPod Button to switch the unit to iPod mode. 39 Stop/AM/FM Button Press the Stop Button to stop a CD during play.
-
Page 20: Service Information
Para descargar este manual de instrucción en inglés, español, o francés visite la sección de la ayuda en www.ilive.net. Pour télécharger ce manuel d’instruction en anglais, espagnol, ou le Français visitez la section de soutien à www.ilive.net.
Need help?
Do you have a question about the IH328B and is the answer not in the manual?
Questions and answers