
Related Manuals for ADLY MOTO ATV-300S


Summary of Contents for ADLY MOTO ATV-300S
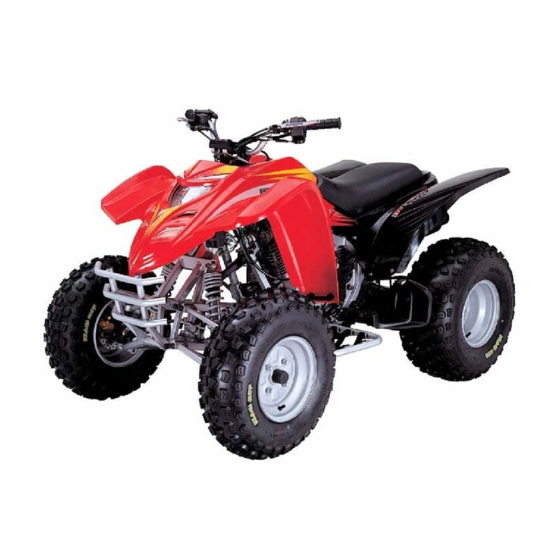
- Page 1 A D L - 3 0 0 S / U A D L - 3 0 0 S / U V E R S I O N V E R S I O N OWNER’S MANU OWNER’S MANU...
-
Page 2: Table Of Contents
CONTENTS Page 1. Foreword 2. Warning 3. Safety Notes 4. Specifications 5. Periodical Check and Services 6. Check Period to Operate 7. Operation 8. Correct Way of Driving 9. Abnormalities and Trouble Shooting 10. VIN number and service record 11. Assembly Instruction 12. -
Page 3: Foreword
FOREWORD May we, the manufacturer, take this opportunity to thank you for choosing our ATV to serve you. This Owner’s Manual is prepared for you the details as to operate and maintenance necessarily to perform in safety. Therefore, we would like you to read the manual before operate the vehicle. -
Page 4: Safety Notes
˙ THIS VEHICLE IS NOT FOR YOUTH UNDER 16 YEARS OIL. ˙ ALWAYS WEAR A HELMET ˙ READ THIS OWNER’S MANUAL CAREFULLY ˙ DO NOT OPERATE THIS VEHICLE IN THE NIGHT. IT’S DANGEROUS TO DRIVE ON AN UNCLEAR ROAD CONDITION. SAFETY NOTES Don’t allow your child to ride without your supervision. -
Page 5: Specifications
SPECIFICATIONS ENGINE CAPACITY ATV-300S ATV-300U Air-cooled_4 stroke TYPE STARTING ELECTRIC LUBRICATION Wet sump TRANSMISSION Manual shift / 5 speed with reverse SPARK PLUG NGK, CR8E BATTERY YTX9-BS OIL CAPACITY 2.0 Liter FUEL TANK 8.2 Liter OVERALL LENGTH 1740 mm 1700 mm... - Page 6 SUSPENSION Front: Dual A-arm with 5 way preload-adjustable shocks Rear: Swing arm with 5 way preload-adjustable shock FRONT TIRE 21 x 10-8 REAR TIRE 21 x 7-10...
-
Page 7: Periodical Check And Services
PERIODICAL CHECK & SERVICES Maintenance Schedule The maintenance intervals in the following table are based upon average riding conditions. Riding in unusually dusty areas, require more frequent servicing. Time of service Initial Service Monthly Quarterly Yearly Items (first week) Air cleaner Petrol filter/Fuel Tube Tire pressure/Wear Battery... - Page 8 CHECK PRIOR TO OPERATE Inspect your vehicle every day before you run it. It only takes a few minutes to check and may save your life. Check the tires condition and pressure. Check the nuts, bolts and other fasteners. Check the drive chain condition and slack. Check the engine stop switch for good function.
- Page 9 (2) Check and refill fuel CAUTIONS_ _ Stop the engine for refilling. _ Use unleaded gasoline with octane level 92 or higher. _ Turn the gasoline cap clockwise to tight up. Counter clockwise to loose it. CHECK PRIOR TO OPERATE _ Do not over fill the gasoline, it could cause fire when the engine is hot.
-
Page 10: Check Period To Operate
Check if there is any gravel in the tread grooves or any nail puncture. If so clean it. Check for any crack or heavy worn-out, then replace it with new ones, if worn-out exceeds the limit. Detailed tire specification please check the marking on tires. CHECK PRIOR TO OPERATE (1) Check battery Open the seat. -
Page 11: Operation
OPERATION MAIN SWITCH _ To turn off the engine. _ The key can be extracted. _ To start the engine. _ The key can not be taken out. _ To operate the head light. _ The key can not be taken out. -
Page 12: Electric Starter
OPERATION ELECTRIC STARTER Cranks the engine. CAUTIONS_ _ Don’t push down again the starter button as the engine is running. _ Don’t press the starter button more than 10 seconds when start up. HEADLIGHT BEAM SWITCH Low beam _ For normal condition. High beam _ For farther lighting. - Page 13 OPERATION HORN BUTTOM Turn on main switch and press down the horn buttom, the horn will sound. OPERATION SIGNAL LIGHT SWITCH Right signal light flashing indicates turning to the right. ⊥ Left signal light flashing indicates turning to the left. CAUTIONS_ Turn on signal light for turns.
- Page 14 OPERATION HAZARD WARNING AWITCH HAZARD The 4 direction lights will start blinking together. STOP ˙...
- Page 15 NOMENCLATURE & OPERATION INSTRUMENTPANEL HIGH BEAM INDICATOR LIGHT SIGNAL IMDICATOR LIGHT SIGNAL IMDICATOR LIGHT SPEED ODOMETER REVERSE Neutral...
- Page 16 OPERATION GEAR SHAFT DOWN GEAR SHAFT UP...
-
Page 17: Parking Brake Lever
OPERATION FRONT / REAR BRAKE The foot brake pedal is located on the right side in front of the foot rest. When step on the brake pedal, 4 wheels will stop at same time. PARKING BRAKE LEVER Break pedal Pull the right brake lever will perform brake function Push the locking will lock the brake. -
Page 18: Clutch Lever
OPERATION BRAKE RELEASE PARKING 1. Pull the right lever firmly. Press the lever downward to the fixed brake As brake position is fixed, the wheels will stop. 3. Pull the brake lever tightly, the fixed lever will bound off. Lever 4. - Page 19 4. the reverse indicator will on. 5. slowly release the left lever to perform reverse function.
- Page 20 OPERATION ENGINE START-UP & CAUTIONS Check oil and fuel prior to start-up. 1. Turn “Main Switch” on. 2. Start engine Use of electric starter, throttle lever should be at the “close” state and set the gear to neutral.. Then push the starter button.. CAUTIONS_ _ Release the starter button immediately after engine start-up.
-
Page 21: Correct Way Of Driving
OPERATION FUEL VALVE The fuel valve is located on the left side of the vehicle. When the arrow mark on the lever pointed at “ON” position, the fuel is supply under normal condition. When the arrow is pointed at “OFF”, the fuel can not supply. - Page 22 speed. Acceleration is to increase the speed. Slowly press the throttle lever while driving on a slope. It will activate the engine power. Deceleration is to decrease the speed. Release the lever will do. Because the rear wheel does not provide differing rate of wheel rotation.
-
Page 23: Abnormalities And Trouble Shooting
CAUTIONS_ _ Don’t turn the main switch or engine stop switch to “OFF” during operation. BRAKE-IN PROCESS During the first couple weeks of riding, do not run the vehicle very fast and do not approach maximum RPM of the engine. The brake-in process will greatly increase the lifetime and long term power of the engine. - Page 24 PRODUCT IDENTICIFICATION NUMBER Please record the frame and engine number for reference. left crankcase. The frame number (VIN) is stamped on the ENGINE NO._________________________ right side of frame. FRAME NO. RFL ENGINE NUMBER FRAME NUMBER The engine number is engraved on bottom of...
- Page 25 INSPECTION AND SERVICE DATE PURCHASED: _________________ AUTH. DEALER:______________________ INSPECTION(1) INSPECTION(2) INSPECTION(3) DATE:__________________ DATE:__________________ DATE:__________________ ___________________ ___________________ ___________________ DEALER DEALER DEALER INSPECTION(4) INSPECTION(5) INSPECTION(6) DATE:__________________ DATE:__________________ DATE:__________________ ___________________ ___________________ ___________________ DEALER DEALER DEALER...
- Page 26 INSPECTION AND SERVICE INSPECTION(7) INSPECTION(8) INSPECTION(9) DATE:__________________ DATE:__________________ DATE:__________________ ___________________ ___________________ ___________________ DEALER DEALER DEALER INSPECTION(10) INSPECTION(11) INSPECTION(12) DATE:__________________ DATE:__________________ DATE:__________________ ___________________ ___________________ ___________________ DEALER DEALER DEALER...
-
Page 27: Assembly Instruction
ASSEMBLY INSTRUCTION _For ATV-300_ 1. Take out the battery and fill with acid liquid. Pre-charge the battery will extend its life. The preparation and charge procedure is based on the battery’s instruction. 2. Install the rear wheels and parts in the following order: A. - Page 28 5. Set the handle bar into the steering base. Tie-up the 4 hex-socket bolts. 6. Pull the seat-lock and remove the seat. Install the battery with the red wire to positive (+) and the black wire to the negative (-). 7.
-
Page 29: Pre-Delivery Inspection
P.D.I. (Pre-Delivery Inspection) (For ATV-300) 1. Record the frame and engine number into the owner’s manual. 2. Check that all tires have correct pressure specified on the tire or in the owner’s manual. 3. Engine oil ( 4 stroke, 10W/40 or Grade SAE40 ) is enough ...
Need help?
Do you have a question about the ATV-300S and is the answer not in the manual?
Questions and answers