
Related Manuals for ADLY MOTO ATV-300


Summary of Contents for ADLY MOTO ATV-300
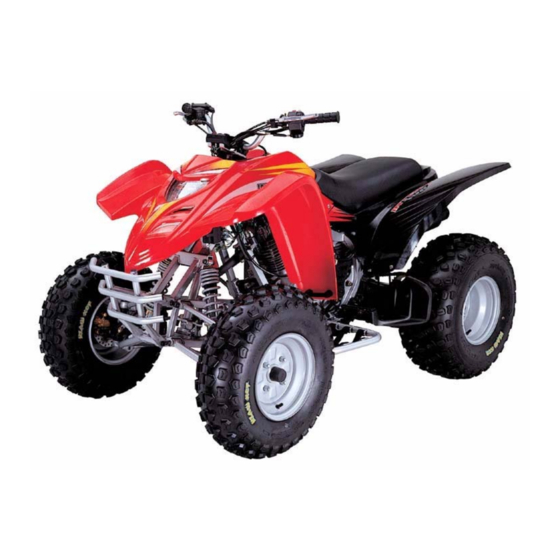
- Page 1 ADLY MOTO SERVICE MANUAL ATV-300S/U( OCTOBER, 2006 High Power Engine CHEE INDUSTRIAL CO., LTD.
- Page 2 ADLY MOTO Foreword This service manual contains information on servicing ATV-300 This manual is written for use as a guideline only. It is recommended that any mechanic, with or without sufficient experience, thoroughly read through the manual and only attempt to service those areas that are fully understood in accordance with the guidelines provided by this manual.
- Page 3 ADLY MOTO I N D E X Assembly Instruction / Pre-Delivery Information --------------------0 Information for Preparation-----------------------------------------------1 Check and Adjust-----------------------------------------------------------2 Cover parts / Muffler-------------------------------------------------------3 Engine- Lubrication System---------------------------------------------------------4 Fuel System------------------------------------------------------------------5 Engine remove and installation-------------------------------------------6 Cylinder Head / Valve------------------------------------------------------7 Cylinder / Piston------------------------------------------------------------8 Clutch / Starting System---------------------------------------------------9...
- Page 4 ADLY MOTO MAINTENANCE SPECIAL TOOLS Install crankshaft tool Bearing puller set (TLH3-01) (TLH3-04) Fly wheel puller Valve install / remove tool (TLH3-02) (TLH3-03) Valve adjustment tool (TLH3-05)
- Page 5 ADLY MOTO ASSEMBLY INSTRUCTION Take out the battery and fill with acid liquid. Pre-charge the battery will extend its life. The preparation and charge procedure is based on the battery’s instruction. Install the front and rear wheels and parts in the following order: A.
- Page 6 ADLY MOTO P.D.I. (Pre-Delivery Inspection) 1. Record the frame and engine number into the owner’s manual. 2. Check that all tires have correct pressure specified on the tire or in the owner’s manual. 3. Engine oil is enough. 4. Battery is installed properly.
-
Page 7: Information For Preparation
ADLY MOTO INFORMATION FOR PREPARATION Attention on Operation All washers, oil rings, clamp rings, opening pins shall be duly replaced by a new item when dismounted. Locking of all screws, nuts, cross screws shall be performed in the order of first the large screws and then the small ones and from inside to outside in opposite angles by tightening the torque locks. - Page 8 ADLY MOTO INFORMATION FOR PREPARATION Attention on Operation Certified lubricants in cans shall be used on all the elements to be lubricated. After assembly, performance of all elements shall be duly checked and the locking shall be duly verified. In case of an operation is performed by over 2 people, the assignment shall be conducted in coordination and safety shall be the first priority.
- Page 9 ADLY MOTO INFORMATION FOR PREPARATION SPECIFICATION ( UTILITY ) TYPE ATV-300U (92/61) LENGTH 1800 mm WIDTH 1030 mm HEIGHT 930 mm SEAT HEIGHT 800 mm WHEEL BASE 1150 mm NET WEIGHT 200 kg ENGINE TYPE 4-STROKE, Single Cylinder COOLING AIR COOLED DISPLACEMENT 282 c.c.
- Page 10 ADLY MOTO INFORMATION FOR PREPARATION SPECIFICATION ( SPORTY ) TYPE ATV-300S (92/61) LENGTH 1740 mm WIDTH 1050 mm HEIGHT 1080 mm SEAT HEIGHT 820 mm WHEEL BASE 1150 mm NET WEIGHT 190 kg ENGINE TYPE 4-STROKE, Single Cylinder COOLING AIR COOLED DISPLACEMENT 282 c.c.
- Page 11 ADLY MOTO INFORMATION FOR PREPARATION LOCKING TORQUE The standard locking torque shall apply in case of no specification. STANDARD TORQUE Type Locking Torque (kg-m) Type Locking Torque (kg-m) 5mm Bolt, Nut 5 mm Screw 6mm Bolt, Nut 6 mm Screw...
- Page 12 ADLY MOTO INFORMATION FOR PREPARATION The following drawing that shows the disassembling situation of the cover parts for ATV-300U.
- Page 13 ADLY MOTO INFORMATION FOR PREPARATION The following drawing that shows the disassembling situation of the cover parts for ATV-300S.
- Page 14 ADLY MOTO INFORMATION FOR PERPARATION DIFFICULT START OR CANN'T START Diagnose Check and Adjust Reason of Trouble loose the fuel release screw of caruretor and check if the fuel is inside of carburetor ? fuel tank without gasoline fuel supply to...
- Page 15 ADLY MOTO INFORMATION FOR PREPARATION REVOLUTION NOT SMOOTH , LOST POWER Diagnose Check and Adjust Reason of Trouble start engine and go up speed slight air cleaner blocking fuel supply isn't smooth engine speed engine speed can't air hole of air tank blocking...
- Page 16 ADLY MOTO INFORMATION FOR PREPARATION REVOLUTION NOT STABLE (LOW R.P.M.) Diagnose Check and Adjust Reason of Trouble ignition timing adjusting C.D.I damage normal abnormal pulser coil damage adjust the carburetor fuel adjuste screw fuel mixture too lean adjusting isn't (locking screw)
- Page 17 ADLY MOTO INFORMATION FOR PREPARATION REVOLUTION NOT SMOOTH(HIGH SPEED) Diagnose Check and Adjust Reason of Trouble adjusting ignition timing C.D.I damage normal abnormal ACG pulse coil damage adjusting valve gap adjusting isn't correct normal abnormal valve seat damage check fuel cup supply...
- Page 18 ADLY MOTO INFORMATION FOR PREPARATION CHARGE ABNORMAL Diagnose Check and Adjust Reason of Trouble start engine and measure voltage of both terminal on battery voltage of battery voltage of battery battery damage is normal can't go up measure the resistance of...
- Page 19 ADLY MOTO INFORMATION FOR PREPARATION SPARK PLUG NO SPARKING Diagnose Check and Adjust Reason of Trouble change spark plug and check again no sparking or the previous spark plug damage sparking strong weak check spark plug, cap, ignition coil loosen?
-
Page 20: Check And Adjust
ADLY MOTO CHECK AND ADJUST INFORMATION WARNNING Do not start the engine at a close zone, because the exhaust gases from the engine including some noxious emission such as CO, HC, NO ... etc. that can result serious damage for health. -
Page 21: Maintenance Schedule
ADLY MOTO CHECK AND ADJUST MAINTENANCE SCHEDULE Please follow the maintenance schedule to do the routine maintenance. Service Interval C Clean up L Lubricate or Grease R Replace I Inspection, check, adjust and replace if necessary D Need some special tools or techniques, suggest to be serviced on dealers site. -
Page 22: Parking Brake Lever
ADLY MOTO CHECK AND ADJUST PARKING BRAKE LEVER Pull the right brake lever will perform brake function. Push the locking will lock the brake. The main adjusting nut for throttle play is located under the handle bar Loose the fixed nut and adjust the play nut to proper position. -
Page 23: Spark Plug
ADLY MOTO CHECK AND ADJUST SPARK PLUG Pull to remove the spark plug cap. Use tools come with the vehicle to remove the spark plug. If the spark plug grimy or with carbon residue then using the copper brush to clean... - Page 24 ADLY MOTO CHECK AND ADJUST VALVE ADJUSTING Attention When you check or adjust the valve, do it when the engine temperature is low ( below 35 C) Remove the timing hole plug and the crankshaft hole plug with screwdriver. Rotate the flywheel and keep the “T” line aim at the centerline of the inspection hole.
-
Page 25: Ignition Timing
ADLY MOTO CHECK AND ADJUST ADJUSTING IDLE SPEED Engine idle speed adjustment has to do it when the engine is warm. Connect with the rpm meter then starting the engine. Before adjusting the idle speed, make sure the spark plug gap is correct. Also, turn the handlebars from left to right and note whether the idle speed changes. - Page 26 ADLY MOTO CHECK AND ADJUST IGNITION TIMING Using the timing light to check the ignition timing. Keep the engine speed about 4000 rpm, if 2 mark-lines on flywheel aim at center of inspection hole then the ignition timing is correct.
-
Page 27: Engine Oil
ADLY MOTO CHECK AND ADJUST ENGINE OIL When you check the quantity of oil, the vehicle has to stay at the ground (flat) level. Stop the engine and remove the oil level gauge. Unscrew the engine oil filler cap from the right front corner of the engine and pull out the dipstick. -
Page 28: Brake System
ADLY MOTO CHECK AND ADJUST Inspect the front sprocket teeth for excessive wear; mark sure there’s no play in the sprocket. When install the chain clip, beware the clip direction. BRAKE SYSTEM Parking brake and rear brake Check all the brake shoes. If the brake shoes have any dint or wearing very serious then change it. - Page 29 ADLY MOTO CHECK AND ADJUST FIXING OF NUTS AND BOLTS Check the fixing nuts, bolts on all parts. If the nuts, bolts loosen then tie-up with certain locking torque. SUSPENSION Front Holding the brake lever and push the handle bar. Check the fork movement and other parts if is loose or oil leaking.
- Page 30 ADLY MOTO CHECK AND ADJUST Checking the shaft and nut of front wheel whether loosen. Checking the nut of rear wheel whether loosen. Locking Torque: Front wheel 18mm nut 14 kg-m Rear wheel 18mm nut 14 kg-m MENO 2-11...
- Page 31 ADLY MOTO COVER PARTS, MUFFLER Information for preparation Don‘t enforce to remove the cover parts of the ATV, otherwise will cause the connecting nail of cover parts broken. Please according to the operating instruction when assembling the cables and wires...
- Page 32 ADLY MOTO COVER PARTS, MUFFLER Rear cover Release the L/R signal wires and light bracket then disconnect signal assembly. Taking off 2 nylon nut and release tail light connection then disconnect the tail light assembly. Taking off 8 pan-phillips bolts and 2 ladder bolts.
- Page 33 ADLY MOTO COVER PARTS, MUFFLER Muffler Locking Torque: Muffler fixed bolt 3.5 kg-m Muffler connect nut 1.2 kg-m Trouble Diagnose: Exhaust sound level is too high Muffler broken Muffler leakage Power isn‘t enough Muffler leakage Muffler blocking Muffler with dent Remove the muffler: Taking-off the 2 nuts that connect to the cylinder.
- Page 34 ADLY MOTO COVER PARTS, MUFFLER Information for preparation Don‘t enforce to remove the cover parts of the ATV, otherwise will cause the connecting nail of cover parts broken. Please according to the operating instruction when assembling the cables and wires...
- Page 35 ADLY MOTO COVER PARTS, MUFFLER Rear cover Taking off 4 hex flange bolts then disconnect rear bumpers. Release the L/R signal wires and light bracket then disconnect signal assembly. Taking off 2 nylon nut and release tail light connection then disconnect the tail light assembly.
- Page 36 ADLY MOTO COVER PARTS, MUFFLER Muffler Locking Torque: Muffler fixed bolt 3.5 kg-m Muffler connect nut 1.2 kg-m Trouble Diagnose: Exhaust sound level is too high Muffler broken Muffler leakage Power isn‘t enough Muffler leakage Muffler blocking Muffler with dent Remove the muffler: Taking-off the 2 nuts that connect to the cylinder.
-
Page 37: Lubrication System
ADLY MOTO LUBRICATION SYSTEM TROUBLE DIAGNOSE Engine burn Oil quantity reduced No oil pressure or pressure too low Normal consumption Oil thoroughfare blocking Oil leaking Oil type incorrect Piston ring wear-out or installed wrong Valve seal wear-out ENGINE OIL & FILTER... - Page 38 ADLY MOTO LUBRICATION SYSTEM CLUTCH Remove Remove the seat and body cover. ( see 3-1, 3-2 ) Remove 2 10mm Hex-flange bolts on left step bar (foot peg) and 2 Pan-Philips bolts on the rear foot fender. Remove foot peg and fender together.
- Page 39 ADLY MOTO LUBRICATION SYSTEM Remove 2 M8-25mm hex-flange bolts on master cylinder assembly. This is to lower down the brake pedal for easier. disassembly. Release brake pedal reset spring. Lift the vehicle from right side and flip over to left side. Then remove the oil tube fix bolt on top of right crankcase cover.
- Page 40 ADLY MOTO LUBRICATION SYSTEM Remove 2 M6-12mm hex-flange bolts together with the switch cover. Un-plug the contact switch connectors. Attention * Beware the light green wire is for the neutral signal, the gray wire is for the reverse signal. Remove 10 M6-32mm, 1 M6-40mm and 1 M6-50mm hex-flange bolts.
- Page 41 ADLY MOTO LUBRICATION SYSTEM Remove the right crankcase cover gasket and beware not to lost the dowel pins. Remove 4 M6-28mm hex bolts and 4 springs under the clutch lifter plate. Hold the lifter plate together with the needle roller bearing.
-
Page 42: Oil Pump
ADLY MOTO LUBRICATION SYSTEM Take off the clutch center. Use reversed procedure to setup the parts that has been removed. Attention * Beware all dowel pins are located into the crankcase. * Replace new gasket of the right crankcase cover after dis-assembly. - Page 43 ADLY MOTO LUBRICATION SYSTEM Oil Pump Disassembling: Remove the snap-ring and washer. Remove the pump cover bolts and separate the cover from the pump body. Remove the pump driven gear and shaft. Remove the rotors , wash all the components in solvent.
- Page 44 ADLY MOTO LUBRICATION SYSTEM Check: Check the gap between the pump body and outer rotor. The gap limit is 0.25 mm. Check the gap between inner and outer rotor. The gap limit is 0.2 mm. Check the gap between the rotors and a straightedge laid across the pump body.
- Page 45 ADLY MOTO LUBRICATION SYSTEM Assembling: Mounting the inner and outer rotor, then install the pump shaft. When install the pump shaft, beware the dot mark on inner rotor point to the outer rotor dot mark. Locking the screw. After installed, turning the pump slightly and confirm the function is normal.
-
Page 46: Fuel System
ADLY MOTO FUEL SYSTEM TROUBLE DIAGNOSE Ignition not continuously when accelerate Ignition system abnormal Start-up function abnormal Too thin of F/A mixture No spark of spark plug Compression pressure too low Difficult to start, Engine stops after start-up, No fuel in carburetor... - Page 47 ADLY MOTO FUEL SYSTEM CARBURETOR SET UP Before remove the A/F adjusting screw, remember turns of setup into the end position. The normal setup is 1 to 1 1/4 turns out After engine warm up, adjust the throttle valve adjusting screw to setup the standard idle speed.
- Page 48 ADLY MOTO FUEL SYSTEM Remove the Carburetor Loose the fuel releasing screw of the carburetor and release the fuel in float chamber. Remove the fuel tube and vacuum (-) pressure tube. Taking off the intake clamp. Taking off the guide pipe clip.
- Page 49 ADLY MOTO FUEL SYSTEM Unscrew and remove the slow jet Remove the needle valve Using a backup wrench on the needle jet Remove the throttle valve cover screws, holder, unscrew the main jet, then the then open the cover needle jet holder and nut.
- Page 50 ADLY MOTO FUEL SYSTEM Remove the jet needle Set the cir-clip position to adjust the jet needle. Remove the seal cover, spring and plunger Plunger Seal cover...
-
Page 51: Engine Removal
ADLY MOTO ENGINE REMOVE AND INSTALLATION ENGINE REMOVAL Remove Engine Drain the engine oil. Remove the seat and the left footpeg assembly. Remove the body cover assembly. Disconnect the negative battery cable. Remove the fuel tank. Disconnect the crankcase breather tube from cylinder head cover and on cylinder. - Page 52 ADLY MOTO ENGINE REMOVE AND INSTALLATION INSTALLATION Mounting the engine and tie-up fixed nuts with standard locking torque. Locking torque Fixed M10 nuts on bracket 4.0 kg-m Place a floor jack under the engine. Again, be sure to protect the engine from the jack head with a block of wood.
- Page 53 CYLINDER HEAD, VALVE TROUBLE DIAGNOSE Compression Pressure too high Idle Speed not Stable Too much carbon-residue inside Compression pressure too low combustion chamber. Bad adjustment of valve clearance Emission with White Smoke Valves banded or burn Valves or valve guide attrition Valve timing not correct Oil seal on valve attrition Damage of valve spring...
- Page 54 ADLY MOTO CYLINDER HEAD / VALVE Attention of Operation Can be operated when engine installed on vehicle. Must cleaning before operating, avoiding dust enter the engine. Remove the gasket dust stay on joint face. Avoid to use screwdriver harm the joint face when remove the cylinder & cylinder head.
- Page 55 ADLY MOTO CYLINDER HEAD / VALVE Disassembly the cylinder head SEQ. Operation / Parts Name Q’ty Remarks Disassembly Spark plug 6 28 Hex flange bolt 6 52 Hex flange bolt 6 35 Hex flange bolt 6 80 Hex flange bolt...
- Page 56 ADLY MOTO CYLINDER HEAD / VALVE Remove the camshaft and valve SEQ. Operation / Parts Name Q’ty Remarks Disassembly Dowel pin The dowel pins are located underneath the Rocker arm shaft comp. cylinder head cover. Valve arm rocket assembly Using 8mm bolt to pull out the shaft from R Valve cotter side.
- Page 57 ADLY MOTO CYLINDER HEAD, VALVE damaged? Check the cam surface to see if it’s wear out Working limit: Replace if IN. cam under 35.57 mm EX. cam under 35.58 mm Check the camshaft bearings to see if it’s wear out or loose. If it’s loose or damaged then...
- Page 58 ADLY MOTO CYLINDER HEAD, VALVE Check cylinder head Check the hole of spark plug and valve guide to see if it’s damaged. Check valve spring free length Working limit: Outer spring: Replace under 39.8 mm Inner spring: Replace under 37.8 mm Check valve and valve guide Check valve to see if it’s burned or banded.
- Page 59 ADLY MOTO CYLINDER HEAD, VALVE Camshaft adjustment After install the cylinder head, it’s necessary to setup the camshaft timing. Before put the timing chain on cam sprocket, turn the “T” mark on ACG flywheel aim at the crankcase sign.
- Page 60 ADLY MOTO CYLINDER, PISTON TROUBLE DIAGNOSE Low compression pressure Exhaust with white smoke Piston ring wear-out, burn, or broken Piston ring wear-out, burn, or broken Cylinder, piston wear out or damaged. Cylinder, piston wear out or damaged. Compression pressure too high...
- Page 61 ADLY MOTO CYLINDER, PISTON Cam chain tensioner Removal Loosen the cam chain tensioner sealing bolt and washer. The cam chain tensioner lifter shaft must be retracted and locked into place before removing the tensioner. Remove the tensioner mounting bolts and detach the tensioer from the cylinder block.
- Page 62 ADLY MOTO CYLINDER, PISTON Wear eye protection and pry the cir-clip out of its groove with a pointed tool. Push the piston pin part-way out, then pull it the rest of the way. Inspection of Piston Remove the top and second piston rings.
- Page 63 ADLY MOTO CYLINDER, PISTON Measure the piston ring-to-groove clearance with a feeler gauge. Working limit: Top ring: replace above 0.11mm ring: replace above 0.09 mm Take-off piston rings and put into the bottom of cylinder. Note Use piston to press the ring into cylinder.
- Page 64 ADLY MOTO CYLINDER, PISTON Measure outside diameter of piston. Note It’s important to measure the outside diameter with vertical position. The measure point is about 5mm away from the bottom. Working limit: Replace if under 73.9 mm Piston rings installation Each ring should be greased with oil.
- Page 65 ADLY MOTO CYLINDER, PISTON Cylinder Installation Put the dowel pins and gasket on top of crankcase. Cylinder inside surface, piston, and piston rings must be greased with oil. Beware of the pressure from piston ring when install into cylinder. Warning Be careful not to damage or band the piston ring.
- Page 66 CLUTCH, STARTING SYSTEM Trouble Diagnose Gear shafting is difficult Clutch sliding at accelerating Clutch gap is not setup properly. Clutch plate wearing. Clutch plate banded. Resilience of spring is fatigue. Without the free play. Clutch plate not opening The free play is too big. L.
- Page 67 ADLY MOTO CLUTCH, STARTING SYSTEM Disassembly of Clutch system Operation / Parts name Q’ty Remarks Disassembly Hex bolts Clutch lifter plate Cir clip Needle bearing Thrust washer Beware not to damage the washer, replace if Clutch spring damaged. Lock nut...
- Page 68 ADLY MOTO CLUTCH, STARTING SYSTEM Inspection of clutch To replace the needle bearing in the lifter plate, taking out this stop-ring. Measure the clutch spring free length. Spring free length limit: 34.9mm Measure the thickness of the friction plates. Working thickness limit: Replace if under 2.6mm...
- Page 69 ADLY MOTO CLUTCH, STARTING SYSTEM Disassembly of Starter Reduction Gear and Starting Motor Operation / Parts name Q’ty Remarks Disassembly Hex flange bolt M6×32, M6×25 Reduction cover Starter gear cover gasket Dowel pin Do not damage the dowel pins Starter reduction gear comp.
- Page 70 ADLY MOTO CLUTCH, STARTING SYSTEM Disassembly of Starter Gear and Generator Operation / Parts name Q’ty Remarks Disassembly Hex flange bolt M6×20 L. crankcase cover L cover gasket Dowel pin External cir-clip STW-15 Starter gear Starter reduction gear Hex socket bolt...
- Page 71 ADLY MOTO CLUTCH AND STARTING SYSTEM Disassembly of Starter Driven Gear and Starter Clutch assembly Operation / Parts name Q’ty Remarks Disassembly Hex flange bolt M12×45 Plain washer When pull out the flywheel, beware not to lost the Generator flywheel semi-cycle key on crankshaft.
- Page 72 ADLY MOTO CLUTCH, STARTING SYSTEM Disassembly the starter clutch While holding the rotor, the gear should turn smoothly clockwise, but not all counter clock wise. Lift the driven gear off the rotor. Remove the 6 star socket bolts then remove the outer clutch and the roller assembly.
- Page 73 ADLY MOTO CRANKCASE, CRANKSHAFT TROUBLE DIAGNOSE Engine noise Loose of crankshaft bearings. Loose of bearings inside crankshaft connecting rod. DISASSEMBLY OF THE CRANKCASE Parts Name Q’ty Remarks Disassembly M6 35, M6 45, M6 65 Hex flange bolt Breather tube clamp...
- Page 74 ADLY MOTO CRANKCASE, CRANKSHAFT DISASSEMBLY OF THE TRANSMISSION GEAR Parts Name Q’ty Remarks Disassembly Hex socket bolt Bearing setting plate Main shaft assembly The gear assembly should pull out at the same time with drum shaft assembly. Counter shaft assembly...
- Page 75 ADLY MOTO CRANKCASE, CRANKSHAFT DISASSEMBLY OF THE GEAR SHAFT MECHANISM SEQ. Parts Name Q’ty Remarks Disassembly Gear shift arm assembly Parts from sequence 1 to 11 are removed during previous L crankcase disassembly. Shifter collar Hex flange bolt Parts from sequence 12 to 17 are removed during previous R crankcase disassembly.
-
Page 76: Crankcase Disassembly
ADLY MOTO CRANKCASE DISASSEMBLY GEAR SHIFT MECHANISM Check the small spring locates on the gearshift arm to see if it’s too loose or not. Check the stopper plate is loose or not. Check the roller guide. Working diameter limit: Replace if under 5.7mm Check the inside diameter of the forks. - Page 77 ADLY MOTO CRANKCASE, CRANKSHAFT REMOVE OF THE CRANK SHAFT Parts Name Q’ty Remarks Disassembly Shaft comp assembly The crankshaft assembly normally is not for Crank shaft assembly disassembly. It will generate more problems if the L/R cranks are disassembled. Radial ball bearing...
- Page 78 ADLY MOTO CRANKCASE, CRANKSHAFT Check the connecting rod side clearance with a feeler gauge. The connecting rod side clearance limit is 0.80mm Check the connecting rod radial clearance with a dial indicator. The connecting rod big end radial clearance limit is 0.05mm...
- Page 79 ADLY MOTO CRANKCASE, CRANKSHAFT Check the connecting rod. Working diameter limit: Replace if over 17.10mm Check the balancer gear and bearing journals for wear or damage. Use a special tool (TLH3-01) to pull the crankshaft and push the left crankcase onto the crankshaft.
- Page 80 ADLY MOTO FRONT WHEEL / SUSPENSION / STEERING Attention of Operation Remove the body cover and support the frame body bottom before remove the front wheel, don’t invert the front wheel when front wheel depart ground. Diagnosis of Trouble Heavy steering movement Steering handle not straight Air pressure too low of front tire.
- Page 81 ADLY MOTO FRONT WHEEL / SUSPENSION / STEERING Disassembly of Front Wheels Operation / Parts name Q’ty Remarks Disassembly front wheels (L/R) Rubber cover Cotter pin Scotch nut Plain washer 18 40 4.5 Wheel nut M10 15 Front shaft hub...
- Page 82 ADLY MOTO FRONT WHEEL / SUSPENSION / STEERING Disassembly of Suspension Arm Operation / Parts name Q’ty Remarks Disassembly (L/R) Hex flange lock nut Plain washer 10 20 2 Hex washer face bolt 10 55 L/R down suspension arm Hex flange bolt...
- Page 83 ADLY MOTO FRONT WHEEL / SUSPENSION / STEERING Disassembly of Steering Shaft Assembly Operation / Parts name Q’ty Remarks Disassembly steering shaft Ass’y Cotter pin Nylon nut Oil seal Steering shaft bushing Internal cir-clip Oil seal Cotter pin Scotch nut...
- Page 84 ADLY MOTO FRONT WHEEL / SUSPENSION / STEERING Disassembly of Steering Shaft Assembly Operation / Parts name Q’ty Remarks Disassembly knuckles Handle bar bottom clamp Steering shaft assembly Hex washer face bolt 10 65 Bracket Steering shaft holder Holder spacer collar Assembling with sequence in reverse of Assembly steering shaft Ass’y...
- Page 85 ADLY MOTO REAR WHEEL / SUSPENSION / BRAKES Diagnosis of Troubles Rear wheel shaking or deviation Brake efficiency abnormal The shape of rear rim damaged. Brake lining wear-out. Rear wheel axle damaged. Brake pads adjust not correct or wear out.
- Page 86 ADLY MOTO REAR WHEEL / SUSPENSION / BRAKES Disassembly of Parking Brake and Rear Disc Operation / Parts name Q’ty Remarks Disassembly parking brake Rubber cover Cotter pin Scotch nut Plain washer Rear wheel assembly Hex nut Hex socket bolt...
- Page 87 ADLY MOTO REAR WHEEL / SUSPENSION / BRAKES Disassembly of Brake System Operation / Parts name Q’ty Remarks Disassembly brake system Cotter pin 2 20 Fix pin External cir-clip STW-16 Plain washer Oil ring Brake pedal comp Return spring Oil tube fixing bolt...
- Page 88 ADLY MOTO REAR WHEEL / SUSPENSION / BRAKES Disassembly of Brake System Operation / Parts name Q’ty Remarks Disassembly brake system Hex flange bolt M8 22 Front brake caliper assembly M6 20 Hex flange bolt Back hose Assembling with sequence in reverse of...
- Page 89 ADLY MOTO REAR WHEEL / SUSPENSION / BRAKES Disassembly / Assembly of Rear sprocket Assembly Operation / Parts name Q’ty Remarks Disassembly Rear Brake Hex flange bolt M8*15 Chain protect cover Hex flange bolt 6*30 Front chain protect Drive chain guide...
- Page 90 ADLY MOTO REAR WHEEL / SUSPENSION / BRAKES Disassembly / Assembly of Swing arm sub Assembly & Rear Cushion Operation / Parts name Q’ty Remarks Rear wheel axle Disassembly rear cushion Ass’y Nylon nut Hex flange bolt Rear axle holder...
- Page 91 ADLY MOTO ELECTRICAL DEVICE Attention of Operation WARNING Battery electrolyte contains sulfuric acid, which can cause severe burns. Avoid contact of skin, eyes, or clothing When sulfuric acid water spill into clothing will stick to skin. Take off the clothing and flush with water.
- Page 92 ADLY MOTO ELECTRICAL DEVICE Check Voltage of Battery Remove rubber strap on battery , disassembly connection wires of battery , check voltage between battery terminals. Charging sufficiently: over 12.8 V Charging insufficiently: 11.5-12.8V WARNING: Must check battery voltage with digital voltmeter.
- Page 93 ADLY MOTO ELECTRICAL DEVICE Ignition Coil Conduction Test Check first coil resistance of ignition terminal. Standard valve (20 ): 0.1 WARNING: Check ignition status with performance tester due to this test has its own standard. Check second coil resistance between spark plug cap &...
- Page 94 ADLY MOTO ELECTRICAL DEVICE Head light and position light Start switch Horn switch Signal light switch Engine stop switch Exchange of Bulbs Head light bulb Remove handle bar and front cover Press down the bulb base and turn left to change head light bulb.
Need help?
Do you have a question about the ATV-300 and is the answer not in the manual?
Questions and answers