Craftsman 316.794970 Operator's Manual
2-cycle mulching blower/vacuum
Hide thumbs
Also See for 316.794970:
- Operator's manual (48 pages) ,
- Operator's manual (49 pages) ,
- Operator's manual (48 pages)
Table of Contents
Advertisement
Operator's Manual
2-Cycle
MULCHING BLOWER/VACUUM
Model No. 316.794970
with
CAUTION: Before using
this product, read this
manual and follow all
safety rules and operating
instructions.
Sears, Roebuck and Co., Hoffman Estates, IL 60179, U.S.A.
Visit our website: www.sears.com/craftsman
769-01695
• SAFETY
• ASSEMBLY
• OPERATION
• MAINTENANCE
• PARTS LIST
Advertisement
Table of Contents

Related Manuals for Craftsman 316.794970


Summary of Contents for Craftsman 316.794970
- Page 1 Operator’s Manual 2-Cycle MULCHING BLOWER/VACUUM Model No. 316.794970 with • SAFETY • ASSEMBLY • OPERATION • MAINTENANCE CAUTION: Before using • PARTS LIST this product, read this manual and follow all safety rules and operating instructions. Sears, Roebuck and Co., Hoffman Estates, IL 60179, U.S.A.
-
Page 2: Table Of Contents
Page WARRANTY STATEMENT TWO YEAR LIMITED WARRANTY ON CRAFTSMAN GAS BLOWER/VACUUM For two years from the date of purchase, when this Blower is used and maintained according to the operator’s manual, Sears will repair any defect in material or workmanship free of charge. -
Page 3: Safety Rules Pages
RULES FOR SAFE OPERATION The purpose of safety symbols is to attract your Failure to obey a DANGER: attention to possible dangers. The safety symbols, safety warning will and their explanations, deserve your careful attention result in serious injury to yourself or to and understanding. - Page 4 Sears or a this unit. Craftsman outlet. Use of any replacement parts or • Use the unit only in daylight or good artificial light. accessories purchased elsewhere may be hazardous, and will also void your warranty.
-
Page 5: Save These Instructions
RULES FOR SAFE OPERATION WHILE OPERATING UNIT AS A BLOWER • Store the unit in a dry place, secured, or at a height to prevent unauthorized use or damage. Keep out of the • Never point the blower or blowing debris in the reach of children. - Page 6 RULES FOR SAFE OPERATION SAFETY AND INTERNATIONAL SYMBOLS This operator's manual describes safety and international symbols and pictographs that may appear on this product. Read the operator's manual for complete safety, assembly, operating and maintenance and repair information. SYMBOL MEANING SYMBOL MEANING •...
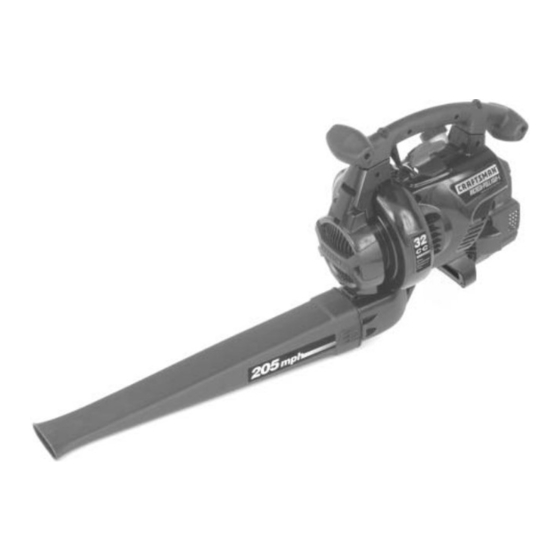
- Page 7 RULES FOR SAFE OPERATION KNOW YOUR BLOWER/VAC Throttle Control APPLICATIONS Starter Rope As a blower: Grip • Cleaning yards, garages, driveways, porches, Front Handle patios, around walls, fences and more On/Off Stop Control As a vacuum: • Picking up leaves and other light debris Fuel Blower Tube Blower...
-
Page 8: Assembly Pages
ASSEMBLY INSTRUCTIONS ASSEMBLING UNIT AS A BLOWER ASSEMBLING UNIT AS A VACUUM Blower Tube Assembly To assemble the unit as a vacuum, begin by removing the blower tube. Refer to the previous section. To prevent serious WARNING: Vacuum Tube Assembly personal injury, stop the engine and allow the impeller to stop To prevent serious... - Page 9 ASSEMBLY INSTRUCTIONS 4. Insert a flat head screwdriver under locking clip, lift Installing the Vacuum Bag upward and open vacuum door (Fig. 4). 7. Install the vacuum bag adapter over the blower outlet and push on it until both tabs snap into place (Fig. 5). Position the bag so it hangs below the unit.
- Page 10 ASSEMBLY INSTRUCTIONS INSTALLING THE SHOULDER STRAP Attach Here for Blowing WARNING: To avoid serious personal injury, Attach Here for never attempt to start the unit when Vacuuming standing with the unit clipped to the shoulder strap. Always follow the starting procedures as described in the Starting/ section.
-
Page 11: Oil And Fuel Information
Craftsman 2-cycle oil with this unit. WARNING: Gasoline is If Craftsman 2-cycle oil is unavailable, use a good 2- extremely cycle oil designed for air-cooled engines along with a flammable. Ignited vapors may explode. fuel additive, such as STA-BIL ®... -
Page 12: Starting/Stopping Instructions
STARTING/STOPPING INSTRUCTIONS STOPPING INSTRUCTIONS WARNING: Operate this unit only in a 1. Move the throttle control to the idle position well-ventilated outdoor area. ). Allow the engine to cool down by idling Carbon monoxide exhaust fumes can be lethal in a (Fig. -
Page 13: Operation Pages
OPERATING INSTRUCTIONS • Watch out for children, pets, open windows or freshly HOLDING THE BLOWER/VACUUM washed cars, and blow debris safely away. To avoid serious WARNING: • Clean up after using blowers and other equipment. personal injury, wear goggles or safety glasses at all times Dispose of debris appropriately. - Page 14 OPERATING INSTRUCTIONS OPERATING AS A VACUUM When the upper and WARNING: lower vacuum tubes To prevent serious WARNING: are removed, make sure the vacuum door is personal injury or snapped closed and secured before using damage to the unit, always install vacuum the unit, to avoid injury from the impeller.
-
Page 15: Maintenance And Repair Pages
MAINTENANCE AND REPAIR INSTRUCTIONS MAINTENANCE SCHEDULE NOTE: Maintenance, replacement, or repair of the emission control devices and system may be Perform these required maintenance procedures at the performed by a Sears or other qualified service frequency stated in the table. These procedures should dealer. - Page 16 MAINTENANCE AND REPAIR INSTRUCTIONS 4. Clean the spark arrestor screen with a wire brush. Replace it if it is damaged, or if you are unable to clean it thoroughly. 5. Reinstall the spark arrestor screen by putting the “raised” portion of the screen inside the recessed hole of the muffler.
- Page 17 MAINTENANCE AND REPAIR INSTRUCTIONS CARBURETOR ADJUSTMENT The idle speed of the engine is adjustable through the air filter/muffler cover (Fig. 22). NOTE: Careless adjustments can seriously damage your unit. Contact a Sears or other qualified service dealer to make carburetor adjustments. Call 1-800-4-MY-HOME®...
- Page 18 MAINTENANCE AND REPAIR INSTRUCTIONS TRANSPORTING STORAGE • Never store a fueled unit where fumes may reach an • Allow the engine to cool before transporting. open flame or spark. • Drain fuel from unit. • Allow the engine to cool before storing. •...
-
Page 19: Troubleshooting
TROUBLESHOOTING ENGINE WILL NOT START C A U S E A C T I O N 1. Empty fuel tank 1. Fill fuel tank with properly mixed fuel 2. Primer bulb wasn't pressed enough 2. Press primer bulb fully and slowly 10 times 3. -
Page 20: Specifications
SPECIFICATIONS ENGINE* Engine Type............................Air-Cooled, 2-Cycle Displacement............................31.5 cc (1.95 cu. in) Idle Speed RPM ............................3,200 - 4,400 rpm Vacuum Operating RPM........................... 6,800+ rpm Blower Operating RPM............................. 7,200+ rpm Ignition Type........................Electronic-MAX FIRE IGNITION™ On/Off Stop Control............................Rocker Switch Spark Plug Gap ............................ -
Page 21: Parts List Pages
PARTS LIST ENGINE PARTS - MODEL 794970 2-CYCLE GAS MULCHING BLOWER VACUUM Item Part No. Description Item Part No. Description 753-04810 Muffler Cover Assembly (includes 2 & 30) 753-05011 Pull Handle 791-180350B Air Cleaner Filter 791-613103 Rope 791-180351 Carburetor Mounting Screw 791-181862 Housing Screw 753-04227... - Page 22 PARTS LIST HOUSING PARTS - MODEL 794970 2-CYCLE GAS MULCHING BLOWER VACUUM Item Part No. Description 753-05046 Engine Cover Assm (includes 2) 791-181345 Screw Item Part No. Description 753-05047 Handle Assm (includes 2) 753-04456 Vacuum Door Spring 753-05013 Throttle control Assm (includes 5-9) 753-04455 Vacuum Door Lock 791-182420...
-
Page 23: Notes (Intentionally Blank) Pages
NOTES... - Page 24 NOTES...
- Page 25 NOTES...
- Page 26 NOTES...
- Page 27 NOTES...
- Page 28 NOTES...
- Page 29 NOTES...
-
Page 30: Carb / Epa Warranty Information
EPA Emission Control Warranty Statement California / Your Warranty Rights and Obligations The California Air Resources Board, The Environmental Protection Agency and Sears are pleased to explain the emission control system warranty on your 2000 and later small off-road engine. New small off-road engines must be designed, built and equipped to meet stringent anti-smog standards. -
Page 31: Repair Protection Agreement
Repair Protection Agreements Congratulations on making a smart purchase. ® Your new Craftsman product is designed and manufactured for years of dependable opera- tion. But like all products, it may require repair from time to time. That’s when having a Repair Protection Agreement can save you money and aggravation. - Page 32 Get it fixed, at your home or ours! Your Home For repair – in your home – of all major brand appliances, lawn and garden equipment, or heating and cooling systems, no matter who made it, no matter who sold it! For the replacement parts, accessories and owner’s manuals that you need to do-it-yourself.
Need help?
Do you have a question about the 316.794970 and is the answer not in the manual?
Questions and answers