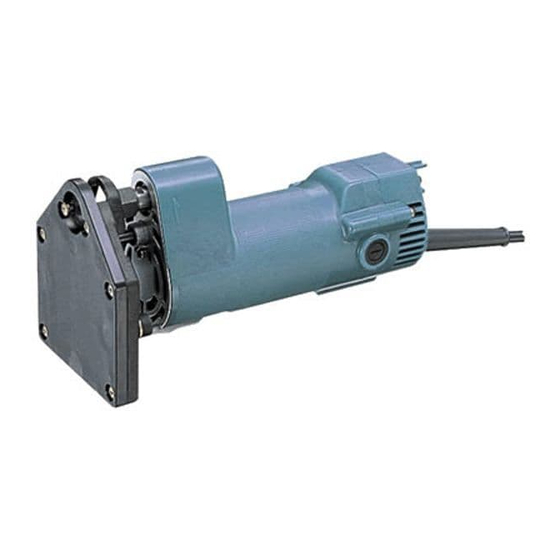
Summary of Contents for Makita 3705
- Page 1 Trimmer 1/4" MODEL 3705 INSTRUCTION MANUAL DOUBLE INSULATION SPEC IF I CAT IONS Collet chuck load speed Overall length Net weight ( R P M ) capacity 1 4 ' 2 3 , 0 0 0 2 1 5 7 / 1 6 " )
-
Page 2: Important Safety Instructions
SAFETY INSTRUCTIONS WARNING: WHEN USING ELECTRIC TOOLS, BASIC SAFE- TY PRECAUTIONS SHOULD ALWAYS BE FOLLOWED TO REDUCE THE RISK OF FIRE, ELECTRIC SHOCK, AND PER- SONAL INJURY, INCLUDING THE FOLLOWING: READ ALL INSTRUCTIONS. KEEP WORK AREA CLEAN. Cluttered areas and benches invite injuries. CONSIDER WORK AREA ENVIRONMENT. -
Page 3: Stay Alert
REMOVE ADJUSTING KEYS AND WRENCHES. Form habit of checking t o see that keys and adjusting wrenches are removed f r o m tool before turning AVOID UNINTENTIONAL STARTING. Don't carry plugged-in tool with finger on switch. Be sure switch is OFF w h e n plugging in. OUTDOOR USE EXTENSION CORDS. -
Page 4: Additional Safety Rules
ADDITIONAL SAFETY RULES Wear hearing protection during extended periods of operation. Handle the bits very carefully. Check the carefully for cracks or damage before operation. Replace cracked or damaged bit immediately. 4. Avoid cutting nails. Inspect for and remove all nails from the workpiece before operation. - Page 5 Installing or removing trimmer bit CAUTION Always be sure that the tool i s switched off and unplugged before installing or removing the bit. Use the hex wrench to loosen the clamp bolt and lower the tool base. lnser the bit...
- Page 6 This will show exactly how the cut will look check dimensions. When using the straight guide or the trimmer guide, be sure to install it on the right side in the feed direction. This will help to keep i t flush with the side of the workpiece.
- Page 7 Straight guide (Optional accessory) The straight guide is effectively used for straight cuts when chamfering or grooving. Install the straight guide on the guide holder with the wing bolt. Then use the hex wrench to loosen the bolts on the tool base and insert the guide holder into the grooves in the tool base.
- Page 8 Trimmer guide (Optional accessory) Trimming, curved cuts in veneers for fur- niture and the like can be done easily with the trimmer guide. The guide roller rides the curve and assures fine cut. Install the trimmer guide on the guide holder with the wing bolt.
- Page 9 Templet guide The templet guide provides a sleeve through which the bit passes, allowing use trimmer with templet patterns. To install the templet guide, loosen the screws on the tool base, insert the templet guide and then tighten the screws.
-
Page 10: Maintenance
Take out the worn carbon brushes, insert the new ones and secure the brush holder caps. To maintain product SAFETY and RELIABILITY, repairs, any other maintenance or adjustment should be performed by Makita Authorized or Factory Service Centers, always using Makita replacement parts. - Page 11 341947-2 Hex wrench 6 Part No. 783204-6 Wrench 10 Part No. 781003-0 Collet cone 1/4" Part No. 763608-8 tool with your Makita Guide holder Part No. 122281-7 Trimmer guide Part 1631 6 2 - 6 Wrench holder Part 410047-0 Wrench 17 Part No.
- Page 12 Bits STRAIGHT Single Flute 2 Flute STRAIGHT i D i - HINGE MORTISING VEINING Single Flute HIGH SPEED STEEL P A R T NO. 5/16 733232-6A CARBIDE TIPPED P A R T NO. 733003-2A 3 / 1 6 7116 C A R B I D E TIPPED P A R T N O .
- Page 13 ROUND NOSE CORE VEE GROOVING - p r 14" DOVETAIL 4 D k - CARBIDE TIPPED P A R T 733008-2A 1 14 15132 733008-4A 9116 HIGH SPEED STEEL P A R T NO. 733238-2A CARBIDE TIPPED P A R T N O 733009-2A 7 3 3 0 0 9 ~ 4 A C A R B I D E TIPPED...
- Page 14 PANEL PILOT CORNER ROUNDING COVE FLUSH TRIMMER Self H I G H SPEED STEEL P A R T 733236 OA 1 14 HIGH SPEED STEEL Pilof Solid P A R T N O 733240 2A 1 1 / 1 6...
- Page 15 2 F L U T E FLUSH TRIMMER COMBINATION FLUSH/22" BEVEL TRIMMER i l J k 3 F L U T E FLUSH TRIMMER ASSEMBLY -Self Piloting - ! l b P A R T N O 7331 28 2A...
- Page 16 FLUTE FLUSH REPLACEMENT CUTTER 114" REPLACEMENT ARBOR BALL BEARING PILOT SOLID CARBIDE PART NO. 733129-6A FOR FLUSH TRIMMER ASSEMBLY NO. 733129-2A P A R T N O 733131-2A FOR FLUSH TRIMMER ASSEMBLY NO 733129-2A P A R T N O 112 O D...
- Page 17 114" TRIMMER Model 3705 Note The switch, noise suppressor and other part configurations may differ from country to country...
- Page 18 3705 MODEL I ; " , " DESCRIPTION M A C E Clirrl Cover Redr Curd Guard Pan Head Srrew M 4 x 1 4 IWifh WazhPrl Strain Relipf M o m Redr t l o w n g FIELD ASSEMBLY...
- Page 19 MAKITA LIMITED ONE YEAR WARRANTY Warranty Policy Every Makita tool is thoroughly inspected and tested before leaving the factory. It is warranted t o be free of defects from workmanship and materials for the period original purchase. Should any trouble develop during this one-year period, return the COMPLETE tool, freight prepaid, t o one of Makita’s Factory or Authorized Service Centers.


Need help?
Do you have a question about the 3705 and is the answer not in the manual?
Questions and answers
What is the horse power and amp for the #.3705 trim router