Table of Contents
Advertisement
Quick Links
Advertisement
Table of Contents

Related Manuals for QView QD700

Summary of Contents for QView QD700
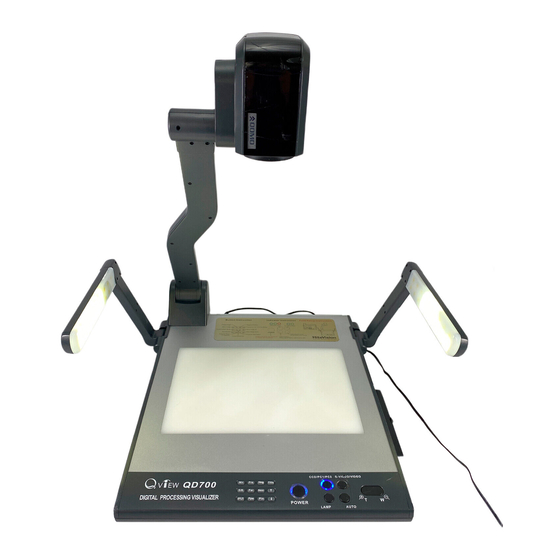
- Page 1 Visual Presenter Quick Start-up Guide Model: QD700...
- Page 2 Turn off all power while setting up and making connections. SETTING UP THE UNIT Use one hand holds the base of the visualizer, use the other hand carefully lift up the camera stand of the unit. 2. Open the arm lights and rotate the camera head until they are in proper positions.
- Page 3 Step 2: Connect to the projector. Rear Panel S-VIDEO AUDIO VIDEO S-VIDEO AUDIO VIDEO AUDIO AUDIO IN PROJECTOR OUT -COMPUTER- IN OUT-12V- IN RGB Input RS232 Cable Screen Projector Side Panel PROJECTOR RGB IN AUDIO IN RS232 Connect visualizer’s PROJECTOR port to the RGB IN port of the projector port with the RGB cable provided together the visualizer.
- Page 4 Rear Panel To the Monitor S-VIDEO AUDIO VIDEO S-VIDEO AUDIO VIDEO AUDIO AUDIO IN PROJECTOR OUT -COMPUTER- IN OUT-12V- IN USB Connector RGB Output RS232 Cable Computer PROJECTOR RGB IN AUDIO IN RS232 Side Panel Note: You can connect a laptop computer to the RGB IN port of side panel with a RGB cable.
- Page 5 Remarks: RGB IN signal can not go to S-VIDEO OUT or VIDEO OUT port to be displayed on the screen. Step 5: Connect to the second video equipment with video input. Video Cable Video out Audio out Video equipment Rear Panel AUDIO VIDEO S-VIDEO...
- Page 6 QOMO HITEVISION, LLC Toll Free: 1-866-990QOMO E-Mail: info@qomo.com Web: www.qomo.com...
Need help?
Do you have a question about the QD700 and is the answer not in the manual?
Questions and answers