Table of Contents
Advertisement
Quick Links
Advertisement
Table of Contents

Related Manuals for Observint NVR4020


Summary of Contents for Observint NVR4020
- Page 1 NVR4020, NVR8040 Embedded Network Video Recorder User Manual Products: NVR4020, NVR8040 NVR4020, NVR8040 PLEASE READ THIS MANUAL BEFORE USING YOUR SYSTEM, and always follow the instructions for safety and proper use. Save this manual for future reference. NVR4020-8040_SM 9/19/2013...
-
Page 2: Legal Notice
Google Permissions. Apple, iPhone, iPod touch, and iPad are registered trademarks of Apple Inc. Other trademarks and trade names may be used in this document to refer to either the entities claiming the marks and names or their products. Observint disclaims any proprietary interest in trademarks and trade names other than its own. -
Page 3: Regulatory Information
Use the appliance at temperatures between 14 °F ~ 131 °F (-10 °C ~ +55 °C) and relative humidity below 90%. The input • power source for this appliance is between 90 ~ 264 Vac, 47 ~ 63 Hz. NVR4020, NVR8040 Embedded NVR User Manual... - Page 4 Install the unit away from heat sources such as radiators, heat registers and stoves. • Installation of the unit near consumer electronics devices, such as stereo receiver/amplifiers and televisions, is permitted as • long as the air surrounding the terminal does not exceed the above mentioned temperature range. Handle hard disk drives with care.
-
Page 5: Table Of Contents
4.2.1 Live View settings ............. .32 NVR4020, NVR8040 Embedded NVR User Manual... - Page 6 TABLE OF CONTENTS SECTION 5 Record, Playback and Video Backup ........... 34 5.1 Configuring record settings .
- Page 7 C.2 Configuring customized protocols ........... .115 NVR4020, NVR8040 Embedded NVR User Manual...
- Page 8 NOTES viii...
-
Page 9: Systems Overview
Congratulations on purchasing your new Embedded NVR security system! Your system includes the following key features: General Each channel supports dual-stream video. • Up to 8 network cameras with the NVR8040, 4 network cameras with the NVR4020. • Independent configuration for each channel including resolution, frame rate, bit rate, image quality, etc. •... -
Page 10: Network Functions
• Forward/reverse multi-channel playback. • Supports pause, skip forward and skip backward during playback. • Up to 8-channel synchronous playback at 4CIF real time (NVR8040) or 4-channel synchronous playback (NVR4020). • Backup Export video data to USB device. • Export video clips during playback. -
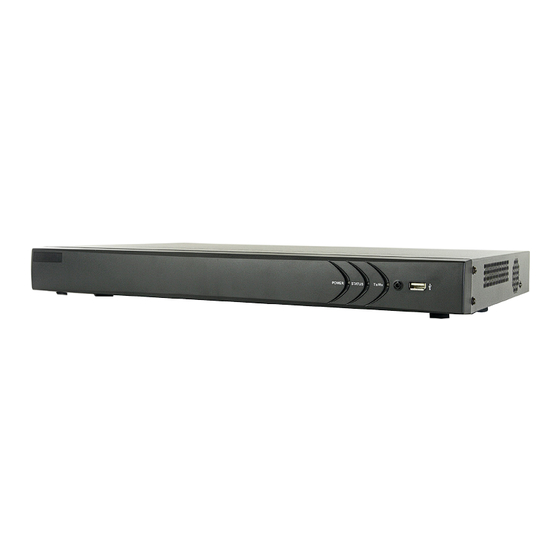
Page 11: Nvr Controls, Connectors And Indicators
This port can be used for a portable mobile HDD, flash drive, DVD burner, or mouse. An additional USB port is located on the USB port back panel. NVR Backpanel Camera (CH1 - CH4) Monitor Out (HDMI, VGA) Audio IN / OUT ON / OFF switch RS-485 Power connector Fan outlet NVR4020 backpanel NVR4020, NVR8040 Embedded NVR User Manual... -
Page 12: Remote Control
Network interface for IP cameras solely dedicated to the NVR. These cameras can only be accessed through the NVR. Each port provides Power over Ethernet (PoE) power to the device connected to it. NOTE: Only the Observint line of 3SVision cameras can be attached to these channels. -
Page 13: Mouse Control
A standard 3-button (left/right/scroll-wheel) USB mouse can also be used with this NVR. To use a USB mouse: 1. Plug USB mouse into the either the front panel or backpanel USB connector of the NVR. NVR4020, NVR8040 Embedded NVR User Manual... -
Page 14: Soft Keyboard
SECTION 1: SYSTEM OVERVIEW 2. The mouse will be automatically detected. If the mouse is not detected, the mouse may not be compatible with the NVR. Please refer to the recommended device list from your provider. The operation of the mouse: Action Effect Live view: Show menu. -
Page 15: Installing The System
Your monitoring and recording equipment is the core device for constant surveillance and the reliable capture of video evidence. Observint Technologies strongly suggest that it be installed in a secure location with access limited to authorized personnel. NVR4020, NVR8040 Embedded NVR User Manual... -
Page 16: Install The Nvr And Monitor
(LAN) through the LAN connector on the back panel, and the other directly to IP cameras plugged into the Camera CH1 - CH4 connectors shown on the NVR4020 below, or Camera CH1 - CH8 connectors on an NVR8040. -
Page 17: Camera Installation
Weatherproof cameras can be mounted in any open area, such as on a telephone pole or on the side of a building. For best results, we recommend you mount your cameras in a sheltered area, such as under the eave or roof of a building. Point the camera in the direction you wish to observe. NVR4020, NVR8040 Embedded NVR User Manual... -
Page 18: Install Cameras
The NVR4020 will monitor at most four IP cameras, including those connected to the RJ45 camera connectors on the back of the NVR and those that connect to the NVR through the local LAN interface. Similarly, the NVR8040 will monitor up to eight cameras. -
Page 19: Connecting It Together - Initial System Setup
When the NVR is powered on, an “Embedded NVR” splash screen appears within 2 minutes. By default, the Setup Wizard opens when the NVR has powered on. The Setup Wizard can assist you in making important configuration settings in NVR. NVR4020, NVR8040 Embedded NVR User Manual... - Page 20 SECTION 2: INSTALLING THE SYSTEM 1. Click Next button on the Wizard window to open the Login window. 2. Enter the admin password in the appropriate field. The default admin password is 12345. To change the admin password, check the New Admin Password checkbox, then enter the new password in the New Password and Confirm fields. 3.
- Page 21 7. To initialize an HDD, click the checkbox for the device you want to initialize, click the Init button, then follow the on-screen instructions to complete the process. NOTE: Initialization removes all the data saved on the HDD. Click Next to continue. NVR4020, NVR8040 Embedded NVR User Manual...
- Page 22 NOTE exceed the channel capacity of your system: 4 channels with the NVR4020 or 8 channels with the NVR8040. See “APPENDIX C Adding Cameras on the LAN to the NVR” on page 112 for procedural guidelines on adding these cameras.
- Page 23 Click OK when the recording mode for each camera is selected. The Wizard will close and the NVR will present the Live View display. For more information about the Live View display, see “SECTION 4 Live View Interface” on page 29. NVR4020, NVR8040 Embedded NVR User Manual...
- Page 24 SECTION 2: INSTALLING THE SYSTEM Live View display 10. While viewing video from each cameras in the Live View display, adjust the direction of each camera to aim it at its surveillance target. Follow the manufacturer’s recommended procedures for aiming the cameras. Live View display after camera adjustments...
-
Page 25: Using The Menu System
The Camera menu lists all cameras configured in the NVR, and shows the channel, IP address, protocol, status, etc. of each. Using this menu, you can assign names to each camera for easy recognition. For cameras attached to the RJ45 ports on the back of the NVR, no other configuration changes are required. NVR4020, NVR8040 Embedded NVR User Manual... -
Page 26: Configuring Hdd Settings
SECTION 2: INSTALLING THE SYSTEM To validate the camera information, open the Camera Management menu. Go to Main menu | Camera | IP Camera. This menu lists the cameras connected to the system. 2.7 Configuring HDD settings 2.7.1 Checking HDD status Check the status of the HDDs installed in the NVR to assure it is (they are) functioning normally. -
Page 27: Managing Network Hdd
4. In the Type drop down list select either NAS or IP SAN. 5. Configure the device type you selected. For a NAS disk: — Enter the NetHDD IP address in the text field. Click Search to discover the available NAS disks on the network. NVR4020, NVR8040 Embedded NVR User Manual... - Page 28 SECTION 2: INSTALLING THE SYSTEM iii. Select the NAS disk from the list shown below, or manually enter the directory in the text field of NetHDD Directory. Click OK to add the NAS disk to your system. For an IP SAN disk: —...
-
Page 29: Configuring The Hdd
Each camera can be configured with an allocated quota for the storage of recorded files. After making configuration changes to the Storage Mode menu (see below) , the NVR must be restarted for new settings to be applied. 1. Open the Storage Mode menu. Go to Menu | HDD | Advanced NVR4020, NVR8040 Embedded NVR User Manual... - Page 30 SECTION 2: INSTALLING THE SYSTEM 2. On the Mode line, open the drop down list and select Quota. 3. On the Camera line, open the drop down list and select the camera channel you want to configure for Quota mode. 4.
-
Page 31: Hdd Detect
Test, Expanded Test or Conveyance Test. c. Click the icon on the S.M.A.R.T. line to execute the test. Allow the test to complete before continuing. The result of the test is shown on the Self-evaluation line. NVR4020, NVR8040 Embedded NVR User Manual... -
Page 32: Bad Sector Detection
SECTION 2: INSTALLING THE SYSTEM 3. Examine the S.M.A.R.T. data provided for the HDD. Check to ensure that the data in the value and Worst column does not exceed the data in the Threshold column. NOTE: S.M.A.R.T. data provided by each HDD manufacturer is usually different. Refer to the manufacturer’s website for S.M.A.R.T. -
Page 33: Configuring Exception Alarms
Click Error info to see the detailed damage information. 2.8 Configuring Exception Alarms The NVR8040 and NVR4020 monitor for and respond to certain system-related alarm conditions (exception alarms). Monitoring for and response to these exceptions are configurable. Exception alarm conditions include: HDD Full: The HDD is full. - Page 34 SECTION 2: INSTALLING THE SYSTEM 4. Click Apply to save your settings. 5. Repeat these steps for other Exception Types you want to configure.
-
Page 35: Startup, Shutdown, Reboot
1. Right click anywhere on the desktop to open the pop-up window, then select Menu. 2. If a Login window opens, select a User Name with administrative privileges, enter the appropriate Password, then click OK. NVR4020, NVR8040 Embedded NVR User Manual... -
Page 36: Rebooting The Nvr
SECTION 3: STARTUP, SHUTDOWN, REBOOT admin NOTE The default User Name with administrative privileges and its associated Password are and 12345. 3. In the Menu window, click the Shutdown icon, then click Shutdown in the pop-up window. 4. Click Yes in the Attention window. 5. -
Page 37: Live View Interface
Each camera channel displayed on the Live View screen may contain one or both status icons in the upper-right corner of the viewing frame. Live View Status icons Icon Type Reason Alarm Video loss, tampering, motion detection or sensor alarm Record Manual record, schedule record, motion detection or alarm triggered record NVR4020, NVR8040 Embedded NVR User Manual... -
Page 38: Quick Setting Toolbar
SECTION 4: LIVE VIEW INTERFACE Icon Type Reason Record and Alarm Both alarm and record status 4.1 Quick Setting Toolbar Left-clicking the mouse on a viewing frame opens a Quick Setting Toolbar at the top or bottom of the frame. Enable/disable Digital manual record... -
Page 39: Live View Pop-Up Menu
Menu: Opens the configuration menu window. See “SECTION 5 — Record, Playback and Video Backup” on page 34. Single Screen: showing only one camera channel on the monitor. Open the drop-down list to select the camera — channel you want to view. NVR4020, NVR8040 Embedded NVR User Manual... -
Page 40: Live View Settings
SECTION 4: LIVE VIEW INTERFACE Multi-screen: opens a submenu where you can choose from several multi-channel screen configurations, including — 2 *2, 1+5, 1+7, 3*3, in multi-screen mode, you can view video from multiple camera channels simultaneously. Previous screen: Move to the screen displayed previously. —... - Page 41 5. Click a viewing screens, then double-click the camera in the list on the right that you what to show there. When the selection is made, label in the viewing screen changes to the camera channel number. In the example above, only the top two screens are assigned. 6. Click the Apply button to save your setting. NVR4020, NVR8040 Embedded NVR User Manual...
-
Page 42: Record, Playback And Video Backup
SECTION 5: RECORD, PLAYBACK AND VIDEO BACKUP SECTION 5 Record, Playback and Video Backup After the initial setup of your NVR using the Wizard, the Menus interface enables you to refine your configuration settings and expand the functionality of the system. To use most menus, the user must log into the NVR system, either locally or remotely, with administrative privileges. -
Page 43: Configuring Record Settings
Record Audio: Check the checkbox to enable audio recording. — 3. Click Apply to save your new configuration settings. 4. Open the Sub-stream tab page. a. Configure the parameters of the camera. b. Click Apply to save the settings. NVR4020, NVR8040 Embedded NVR User Manual... -
Page 44: Configuring Record Schedule
The record schedule can be used to automatically start and stops recording at preset times. NOTE: Alarm triggered recording is not enabled in the NVR8040 or NVR4020. 1. Open the Record Schedule menu. Go to Menu | Record | Schedule 2. - Page 45 Copy (see the window below), select the days you want to copy the schedule to, then click OK. To use the graphical method to draw the schedule: Click the color icons for either Normal or Motion in the right panel. — NVR4020, NVR8040 Embedded NVR User Manual...
- Page 46 SECTION 5: RECORD, PLAYBACK AND VIDEO BACKUP Drag the mouse pointer across the area of the chart (day of the week, hours of the day) where you want to — use that type of recording. Blocks on the chart, each representing 1 hour of one day, will be colored for the recording mode you selected.
-
Page 47: Configuring Motion Detection Recording
Follow the steps below to schedule a recording triggered by a motion detection. 1. Open the Motion Detection menu. Go to Menu | Camera | Motion NVR4020, NVR8040 Embedded NVR User Manual... - Page 48 SECTION 5: RECORD, PLAYBACK AND VIDEO BACKUP 2. To configure Motion Detection: a. Choose camera you want to configure. b. Check the Enable Motion Detection box. c. Use the mouse to drag a rectangle across the area where you want to detect motion. If you want to sense for motion detection in all areas of the video, drag a rectangle across the entire video screen.
- Page 49 Apply to save your settings. Click the Arming Schedule tab. With the Arming Schedule, you can define up to eight time periods during each day of the week when motion detection is monitored. Time periods cannot overlap. NVR4020, NVR8040 Embedded NVR User Manual...
- Page 50 Select the actions you want to occur, then click Apply to save your settings, and OK to return to the Motion Detection menu. NOTES: The Trigger Alarm Output option is not functional in the NVR8040 and NVR4020. The Notify Surveillance Center and Send Email options require additional network settings. See “SECTION 7 Network Settings” on page 80 for more information.
-
Page 51: Manual Record
Select Record on the left menu frame. b. Click the status button before camera number to change the label from ON to OFF. c. Click the icon after Norman or Motion Detection. d. When the Attention window opens, click No. NVR4020, NVR8040 Embedded NVR User Manual... -
Page 52: Configuring Holiday Recording
SECTION 5: RECORD, PLAYBACK AND VIDEO BACKUP Green “ON” icon means that the channel is configured with a record schedule. NOTE If the NVR is rebooted, manual record operations are canceled. 5.1.5 Configuring Holiday recording Follow the steps below to configure the record schedule on holiday for that year. You may want to have different plan for recording on holidays. -
Page 53: Configuring Hdd Group For Recording
You can group the HDDs and save the record files in a specific HDD group. You must have multiple HDDs installed in the system to perform this configuration. 1. Open the HDD menu. Go to Menu | HDD 2. Click Advanced in the left frame to open the Storage Mode menu. NVR4020, NVR8040 Embedded NVR User Manual... -
Page 54: Files Protection
SECTION 5: RECORD, PLAYBACK AND VIDEO BACKUP 3. Verify that the HDD mode is Group. If not, set it to Group, then click Apply and follow the on-screen instructions to reboot the NVR. See Return to the HDD menu. 4. Click General in the left frame. 5. -
Page 55: Playback
File of recording in progress cannot be locked. 5.2 Playback 5.2.1 Playing back video by channel Playback the recorded video files of a specific channel in the live view mode. Channel switch is supported. NVR4020, NVR8040 Embedded NVR User Manual... -
Page 56: Instant Playback By Channel
SECTION 5: RECORD, PLAYBACK AND VIDEO BACKUP Instant playback by channel In Live View mode, click the channel you want to playback, then click the playback icon on the quick setting toolbar. In the instant playback mode, only recordings made during the previous five minutes on the channel are played. Playback by channel 1. - Page 57 5. In the window that opens, click the entry of the video segment you want to play, then click the icon in the Play column. 6. In the screen that opens, select the camera or cameras you want playback, then click OK to continue. By default, only the camera of the video you selected will play. NVR4020, NVR8040 Embedded NVR User Manual...
- Page 58 SECTION 5: RECORD, PLAYBACK AND VIDEO BACKUP To open the Results list ( the right frame - see above), move the mouse pointer to the right edge of the screen. You can play a different video segments by clicking the segment to highlight it, then clicking the Play icon associated with it. Move the mouse pointer away from the right side to close the frame.
-
Page 59: Playing Back A Motion Event
Exit. 5.2.2 Playing back a motion event The NVR4020 and NVR8040 can search for and playback recordings triggered by motion events. 1. Open the Playback menu. Go to Menu | Playback 2. - Page 60 SECTION 5: RECORD, PLAYBACK AND VIDEO BACKUP 3. In the drop Event Type down-down list, select, for example, Motion. 4. Open the calendar and time pop-up windows to select the Start Time and End Time of the timespan you want to search. 5.
- Page 61 SECTION 5: RECORD, PLAYBACK AND VIDEO BACKUP 6. Click Search to generate a list of motion detected events. 7. Select the video clip from the list, then click the Play icon associated with it. NVR4020, NVR8040 Embedded NVR User Manual...
-
Page 62: Playback By Tag
SECTION 5: RECORD, PLAYBACK AND VIDEO BACKUP The control panel at the bottom of the screen is described earlier in this section. See “5.2.1 Playing back video by channel” on page 47. 8. To open the search result list during video playback, move the mouse cursor to the right edge of the screen. 9. - Page 63 SECTION 5: RECORD, PLAYBACK AND VIDEO BACKUP 5. Click Search to generate a list of tagged video files. NVR4020, NVR8040 Embedded NVR User Manual...
- Page 64 SECTION 5: RECORD, PLAYBACK AND VIDEO BACKUP 6. Select the video clip from the list, then click the Play icon associated with it. The control panel at the bottom of the screen is described earlier in this section. See “5.2.1 Playing back video by channel” on page 47.
- Page 65 Tag management. The tag management feature allows you to check, edit, and delete tags. 1. Click the Tag management icon in the lower left corner of the screen to open the Tag management window. NVR4020, NVR8040 Embedded NVR User Manual...
-
Page 66: Playback From System Logs
SECTION 5: RECORD, PLAYBACK AND VIDEO BACKUP To change the name of a tag, select (highlight) a tag in the list, then click the icon in the Edit column. — Click the tag name, use the pop-up keyboard to change the name, click Enter, then click OK. To delete a tag, select (highlight) a tag in the list, then click the icon in the Delete column. - Page 67 SECTION 5: RECORD, PLAYBACK AND VIDEO BACKUP 3. Select a Start Time, End Time, Major Type and Minor Type. NVR4020, NVR8040 Embedded NVR User Manual...
- Page 68 SECTION 5: RECORD, PLAYBACK AND VIDEO BACKUP 4. Click Search. If the search didn’t find a file matching your search criteria, the message No matched log file. will appear. 5. Choose a log with record file and click the playback button to play the file, or click the icon in the Details column to see more information about the entry.
-
Page 69: Auxiliary Functions - Playback Frame By Frame
4-ch (with 1920*1080p resolution) simultaneous reverse playback is supported and up to 1-ch (with 2560*1920 resolution) reverse playback is supported. 1. Open the Playback menu. Go to Menu | Playback 2. On the IP Camera line, select multiple IP cameras by checking the boxes associated with them. NVR4020, NVR8040 Embedded NVR User Manual... -
Page 70: Digital Zoom
SECTION 5: RECORD, PLAYBACK AND VIDEO BACKUP 3. Click Playback to play back the record files reversely. 5.2.7 Digital Zoom 1. Click the magnifier button on the playback control bar to enter Digital Zoom screen. 2. Use the mouse to draw a rectangle over the area you want to zoom in on. The area can be enlarged up to 16 times the original size on the screen. -
Page 71: Backing Up Record Files - Export
5. Click the Quick Export button. A pop-up window will open showing the file structure of your external storage device. f your USB device is not shown in the Device Name field, click the Refresh button. NVR4020, NVR8040 Embedded NVR User Manual... - Page 72 SECTION 5: RECORD, PLAYBACK AND VIDEO BACKUP 6. If the device you are exporting to is a rewritable device such as a USB flash drive, select the directory where you want to copy the files, or create a New Folder. NOTE: Some USB devices types do not include the New Folder and Format options, but may include an Erase option.
-
Page 73: Export By Video Search
5. Click Search to list the video clips recorded during the selected time span. In the Search Result list, you can play the video clip by clicking the icon in the Play column associated with the file. NVR4020, NVR8040 Embedded NVR User Manual... - Page 74 SECTION 5: RECORD, PLAYBACK AND VIDEO BACKUP 6. Select the video clips you want to export by clicking the checkbox associated with the file. By default, all files are selected. You can deselect all files by clicking the checkbox in the table header, then click the checkboxes for only those files you want to export.
-
Page 75: Export By Event Search
Video recordings triggered my Events, such as motion detection, can be searched for and exported to a USB storage device such as a USB flash drive or USB disk drive, or USB optical drive. 1. Attach an USB storage device, such as a USB flash drive or USB disk drive, to the NVR USB port. NVR4020, NVR8040 Embedded NVR User Manual... - Page 76 SECTION 5: RECORD, PLAYBACK AND VIDEO BACKUP 2. Open the Export menu. Go to: Menu | Export | Event 3. On the Event Type line, select open the drop down list and select, for example, Motion. 4. Select the Start Time and End Time of the period when the video clips of interest were recorded. To change the time, click on the field, then select the target date or time from the pop-up menu.
- Page 77 6. To watch a video clip in the Motion (search result) list, click (highlight) the clip you want to watch, click Details, then in the Event Details window, click the icon in the Play column of the file. NVR4020, NVR8040 Embedded NVR User Manual...
- Page 78 SECTION 5: RECORD, PLAYBACK AND VIDEO BACKUP 7. In the Events Detail window, click Export to open the Export window, or in the Motion (search result) list, check the boxes for the video clips you want to export, then click Quick Export. A pop-up window will open showing the file structure of your external storage device.
-
Page 79: Exporting Video Clips During Playback
USB flash drive or USB disk drive, or USB optical drive. 1. Attach an USB storage device, such as a USB flash drive or USB disk drive or USB optical drive, to the NVR USB port. 2. Playback a video file. NVR4020, NVR8040 Embedded NVR User Manual... - Page 80 SECTION 5: RECORD, PLAYBACK AND VIDEO BACKUP Clip icon 3. Advance the file playback to the start of the segment you want to export, then click the Clip icon (scissors) at the bottom of the screen to mark the start of the clip you want to save. 4.
- Page 81 10. Check the Export result by playing a file that was exported. In the Export window, click the file you want to play, then click the associated icon in the Play column. NVR4020, NVR8040 Embedded NVR User Manual...
- Page 82 SECTION 5: RECORD, PLAYBACK AND VIDEO BACKUP Note: The Player utility player.exe will be exported automatically during video file export.
-
Page 83: Managing User Accounts
The NVR supports up to 32 user accounts. 6.1 Adding a user account 1. Enter the User Management interface. Go to Menu | Configuration | User 2. Click Add to open the Add User menu. NVR4020, NVR8040 Embedded NVR User Manual... - Page 84 SECTION 6: MANAGING USER ACCOUNTS 3. Enter the information for new user, including User Name, Password, Level and User’s MAC Address. Set the user Level to Operator or Guest. Different Levels have different operating permission. — Operator: The Operator user level has permission of Two-way Audio in Remote Configuration and all operating permission in Camera Configuration by default.
- Page 85 Local Video Export: Locally exporting recorded files of the selected camera(s). — 7. Click OK to save your settings and exit the User menus. NOTE Only the admin user account has permission to restore the DVR to factory default settings. NVR4020, NVR8040 Embedded NVR User Manual...
-
Page 86: Deleting A User Account
SECTION 6: MANAGING USER ACCOUNTS 6.2 Deleting a user account 1. Enter the User Management interface. Go to Menu | Configuration | User 2. Click the entry for the user to be deleted from the list. When the item is selected, it is highlighted. 3. - Page 87 — check the Change Password box, enter the old (current) admin password, then enter the new password in the Password and Confirm fields. 5. Click OK to save the settings and exit the menu. NVR4020, NVR8040 Embedded NVR User Manual...
-
Page 88: Network Settings
SECTION 7: NETWORK SETTINGS SECTION 7 Network Settings 7.1 Configuring General Settings Network settings must be properly configured before you connect the NVR to cameras on network, or access it remotely. 1. Open the Network Settings menu. Go to Menu | Configuration | Network 2. -
Page 89: Configuring Ddns
3. Check the Enable DDNS box to enable this feature. 4. Open the DDNS Type drop down list and select one of five options: IPServer, DynDNS, PeanutHull, NO-IP, hkDDNS. IPServer: Enter Server Address for IPServer. — NVR4020, NVR8040 Embedded NVR User Manual... - Page 90 SECTION 7: NETWORK SETTINGS DynDNS: — Enter Server Address for DynDNS (i.e. members.dyndns.org). In the NVR Domain Name text field, enter the domain obtained from the DynDNS website. iii. Enter the User Name and Password registered in the DynDNS website. PeanutHull: Enter the User Name and Password obtained from the PeanutHull website.
-
Page 91: Configuring Ntp Server
You can use SNMP protocol to get device status and parameters related information. 1. Open the Network Settings menu. Go to Menu | Configuration | Network 2. Click the SNMP tab to open the SNMP settings menu. 3. Check the Enable SNMP box. NVR4020, NVR8040 Embedded NVR User Manual... -
Page 92: Configuring Remote Alarm Host
SECTION 7: NETWORK SETTINGS 4. Configure the following SNMP settings: Trap Address: IP Address of SNMP host — Trap Port: Port of SNMP host — 5. Click Apply to save your settings and close the menu. Before setting up SNMP, download the SNMP software and configure it to receive the device information via the SNMP port. By NOTE setting the Trap Address, the NVR is allowed to send the alarm event and exception messages to the surveillance center. -
Page 93: Configuring Rtsp
2. Click the More Settings tab to open the More Settings menu. 3. In the menu shown above, enter the RTSP port number. The default RTSP port is 554. 4. Click Apply to save your settings and close the menu. NVR4020, NVR8040 Embedded NVR User Manual... -
Page 94: Configuring Server And Http Ports
SECTION 7: NETWORK SETTINGS 7.2.8 Configuring Server and HTTP Ports You can change the server and HTTP ports in the Network Settings menu. The default server port is 8000 and the default HTTP port is 80. 1. Open the Network Settings menu. Go to Menu | Configuration | Network 2. - Page 95 — Select Receivers: Select the receiver. Up to 3 receivers can be configured. — Receiver: The name of user to be notified. — Receiver’s Address: The Email address of user to be notified. — NVR4020, NVR8040 Embedded NVR User Manual...
-
Page 96: Configuring Upnp
SECTION 7: NETWORK SETTINGS Enable Attached Pictures: Check the Enable Attached Picture box if you want to send email with attached alarm — images. The interval is the time of two adjacent alarm images. You can also set SMTP port and enable SSL here. Interval: The interval refers to the time between two actions of sending attached pictures. -
Page 97: System Maintenance
Exception conditions - Video loss, illegal login, HDD full/error, IP camera disconnected, network disconnected, etc. • Information events - Start/stop recording, local/network HDD information, HDD S.M.A.R.T., etc. • Operation events - power on, login, local operation logout, etc. • NVR4020, NVR8040 Embedded NVR User Manual... -
Page 98: Log Search
SECTION 8: SYSTEM MAINTENANCE System logs can be searched and sorted for specific entries, and archived for use later. You can also search for video clips through system logs. 8.2.1 Log Search 1. Open the Log Information screen. Go to Menu | Maintenance | Log Information 2. - Page 99 4. You can Export the result of the log search (click Export), choose a log entry with record file and click the playback button to play the file, or click the icon in the Details column to see more information about the entry. The Log Information Details screen is shown below. NVR4020, NVR8040 Embedded NVR User Manual...
-
Page 100: Log Export
SECTION 8: SYSTEM MAINTENANCE 8.2.2 Log Export Log information can be exported to a backup device such as a USB storage device. The exported log file is in .txt format and readable with an ASCII text viewer such as Microsoft® Windows® Notepad or Wordpad. The filename, prefixed with the date and timestamp, in the format YYYYMMDDHHMMSSlogBack.txt. - Page 101 7. Select the directory where you want to copy the files, or create a New Folder. 8. Click the Export button to start the Export. Allow the operation to finish before continuing. 9. Check the Export result on a computer by opening a file that was saved. NVR4020, NVR8040 Embedded NVR User Manual...
-
Page 102: Import / Export System Configuration
SECTION 8: SYSTEM MAINTENANCE 8.3 Import / Export system configuration You can export the NVR configuration, then import the file later to restore the earlier configuration. 1. Attach an USB storage device, such as a USB flash drive or USB disk drive, to the NVR USB port. 2. - Page 103 6. Click OK to close the pop-up window. NOTE: The configuration backup file a binary file with a timestamp in the format devCfg_<code>_YYYYMMDDHHMMSS.bin 7. Record the name of the exported file for future reference. NVR4020, NVR8040 Embedded NVR User Manual...
-
Page 104: Upgrade Firmware
SECTION 8: SYSTEM MAINTENANCE Import configuration file 1. On the Device Name line, open the drop down list and select the destination of the exported configuration file. The configuration backup file is a binary file with a timestamp in the format devCfg_<code>_YYYYMMDDHHMMSS.bin 2. - Page 105 Click the Upgrade button, the follow the on-screen instructions for completing the upgrade. 4. If installing firmware from a FTP server: a. Click the FTP upgrade tab at the top of the menu. NVR4020, NVR8040 Embedded NVR User Manual...
-
Page 106: Default
SECTION 8: SYSTEM MAINTENANCE b. Click the firmware file you want to load. c. Click the Upgrade button, the follow the on-screen instructions for completing the upgrade. 5. Open the System Information screen and verify that the new firmware version is installed. 8.5 Default The default option will reset the NVR to its factory settings. -
Page 107: Testing Network Delay And Packet Loss
8.6.3 Exporting Network Packet By connecting the NVR to network, the captured network data packet can be exported to a USB device such as a flash drive, HDD, DVD-R/W and other local USB backup devices. NVR4020, NVR8040 Embedded NVR User Manual... -
Page 108: Checking The Network Status
SECTION 8: SYSTEM MAINTENANCE 1. Open the Network Traffic menu. Go to Menu | Maintenance | Net Detect 2. Click the Network Detection tab to open the Network Detection menu. 3. Select the backup device from the Device Name drop down list. Note: Click the Refresh button if the connected local backup device cannot be displayed. -
Page 109: Checking Network Statistics
Use this display to check the bandwidth of the IP Camera, bandwidth of Remote Live View, bandwidth of Remote Playback, bandwidth of Net Receive Idle and bandwidth of Net Send Idle. 3. Click the Refresh button to show the current status. NVR4020, NVR8040 Embedded NVR User Manual... -
Page 110: Remote Access
SECTION 9: REMOTE ACCESS SECTION 9 Remote Access If you NVR is connected to a local network (LAN), you can access it from another computer on the LAN through an internet browser. The users and permissions setup in the NVR apply remotely. Note that some user permissions disallow remote access. 9.1 Remote login To access the NVR from a computer on the LAN: 1. - Page 111 When the Opening WebComponents.exe window opens, close the internet browser window, then click Save File in the window. c. Follow the on-screen instructions to Run WebComponents.exe and install the software. d. When the software setup is complete, click Finish. NVR4020, NVR8040 Embedded NVR User Manual...
-
Page 112: Remote Live View Screen
SECTION 9: REMOTE ACCESS e. Open your Internet browser again, then login to the NVR again as you did in Step 1 and 2 above. 9.2 Remote Live View screen The Live View screen initially appears in a 3 x 3 channel viewing frame configuration with no live view images shown. You can: Change the viewing screen layout by clicking the multi-screen select button and selecting the icon for a 1 screen or a 2 x 2 •... -
Page 113: Remote Playback Screen
Open the Playback screen by clicking Playback in the screen header. The Playback screen allows you to review video recorded from one camera or several cameras concurrently. Also, video can be downloaded to your local computer. NVR4020, NVR8040 Embedded NVR User Manual... - Page 114 SECTION 9: REMOTE ACCESS Capture Audio play / mute Download Multi-screen Stop mode select Play motion controls Zoom playback Snip Set playback time Timeline (drag to reposition) Playback timestamp Record legend Expand / contract timeline To playback recorded video: Click the multi-screen mode button to select the number of viewing frames you need to display. You can select either a 1, 2 x •...
-
Page 115: Remote Log Screen
Open the Configuration screen by clicking Configuration in the screen header. The Configuration menu enables you to view the NVR configuration and make configuration changes. The User Name you use to login to the NVR must have administrative privileges to change the NVR configuration. NVR4020, NVR8040 Embedded NVR User Manual... - Page 116 SECTION 9: REMOTE ACCESS Options in the configuration menu are identical to those in the embedded NVR Menu system. For more information on how to use these options, refer to the NVR Menu descriptions in previous sections of this manual. After making configuration changes click Save to apply your changes.
-
Page 117: Cleaning
Do not use benzene, thinner or other chemical products on the camera assembly; these may dissolve the paint and promote damage of the surfaces. Before using any chemical product, read the instructions carefully. CAUTION NVR4020, NVR8040 Embedded NVR User Manual... -
Page 118: Appendix A Glossary
APPENDIX A: GLOSSARY Glossary APPENDIX A Dual Stream: Dual stream is a technology used to record high resolution video locally while transmitting a lower resolution stream over the network. The two streams are generated by the NVR, with the main stream having a maximum resolution of 4CIF and the sub-stream having a maximum resolution of CIF. -
Page 119: Appendix Bfaq
There’s a chance that the NVR and your USB device is not compatible. Please refer to our company’s website to view a list of compatible devices. Q Why doesn’t audio work? Audio is not supported on this NVR. NVR4020, NVR8040 Embedded NVR User Manual... -
Page 120: Appendix C Adding Cameras On The Lan To The Nvr
APPENDIX C: ADDING CAMERAS ON THE LAN TO THE NVR Adding Cameras on the LAN to the NVR APPENDIX C IP cameras can connect to the NVR either through the IP ports on the back panel of the NVR, or through the LAN the NVR is connected to. - Page 121 In the list of cameras below, select a CAMER NO. (D1 .. D8 or D1 .. D4 ) IP port on the back of the NVR) that is that has no camera connected to it. For that port entry, click the icon in the edit column. The Edit IP Camera window will open. NVR4020, NVR8040 Embedded NVR User Manual...
-
Page 122: Editing Camera Options
APPENDIX C: ADDING CAMERAS ON THE LAN TO THE NVR d. On the Adding Method line, open the drop down list and select Manual. e. On the IP Camera Address line, click the entry field and use the pop-up keyboard to enter the IP address of the camera you want to add. -
Page 123: Configuring Customized Protocols
C.2 Configuring customized protocols To use cameras not configured with the standard protocols, you can customize protocols for them. There are 16 customized protocols provided in the system; you can select one and configure its corresponding parameters. NVR4020, NVR8040 Embedded NVR User Manual... - Page 124 APPENDIX C: ADDING CAMERAS ON THE LAN TO THE NVR 7. In the IP Camera screen, click the Protocol button to open the Protocol Management menu. Before customizing the protocol for the network camera, contact the manufacturer for specific information regarding main stream NOTE and sub-stream setup requirements.
- Page 125 APPENDIX C: ADDING CAMERAS ON THE LAN TO THE NVR 9. Select the custom protocol you configured, and then enter the IP address, user name and password of the camera. 10. Click Add to add the camera. NVR4020, NVR8040 Embedded NVR User Manual...
Need help?
Do you have a question about the NVR4020 and is the answer not in the manual?
Questions and answers