Advertisement
ALI-NVR3404P Embedded Network Video Recorders Quick Setup Guide
This quick setup guide provides instructions to initially setup and use the ALI-NVR3404P network video recorder (NVR). For information
about using your NVR and its extensive capabilities, refer to the Alibi Embedded Network Video Recorder Firmware User Manual
provided at www.alibisecurity.com/resources.
For more information, refer to these documents - available from your equipment vendor:
ALIBI Power Tools Installation and User Manual
•
ALIBI™ Witness 2.0 v3 Smartphone App for Android (or Apple iOS) Mobile Devices User Guide
•
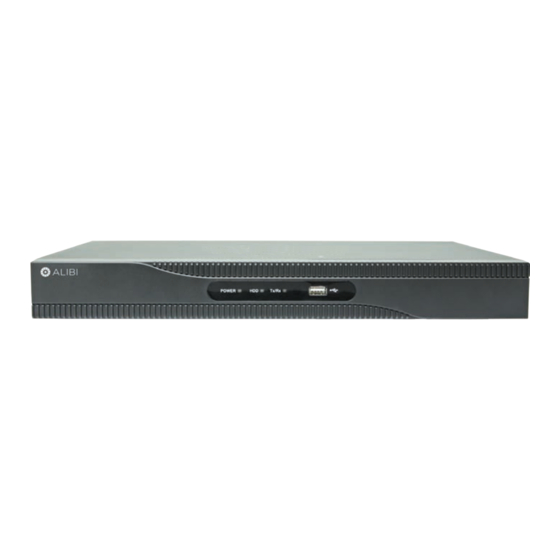
Controls and Indicators
Front panel
Status indicators USB port
Item
Function / Description
POWER
Indicator is green when the unit is powered on. When the unit is off, the LED is red if power is available.
Status Indicators
HDD
HDD indicator blinks red when data is being read from or written to an HDD.
TX/RX
Blinks green when the network connection is functioning normally.
USB Interfaces
Universal Serial Bus (USB) 2.0 port for additional USB devices such as a mouse or Hard Disk Drive (HDD).
Backpanel
Audio IN/OUT
Internal Ethernet switch
ports with PoE (4)
Item
Description
1 channel (HDMI/VGA), resolution: 1920 × 1080P / 60 Hz, 1600 × 1200 / 60 Hz, 1280 × 1024 / 60 Hz, 1280 × 720 / 60 Hz,
VIDEO OUT (VGA, HDMI)
1024 × 768 / 60 Hz. HDMI also supports 4K video output resolution.
Audio IN / OUT
RCA connectors for audio line input and line output
Connect the 48 Vdc power adapter provided with the recorder to this port, and to a standard 100 ~ 240 Vac power source using the
Power connector
power cord provided.
ON / OFF Switch
Switch for powering the recorder on or off.
GROUND
Terminal for ground. Connect to earth ground before powering on the NVR.
LAN
10/100/1000BASE-T Ethernet network interface
USB interface
Universal Serial Bus (USB 2.0) port for additional devices such as USB mouse and USB Hard Disk Drive (HDD).
Internal Ethernet switch ports
4 10/100 Mbps ports for IP cameras. These ports provide Power over Ethernet (PoE).
1
LAN
Power switch
Video Out
Power Adapter
Ground
USB
(VGA, HDMI)
connector
terminal
Mouse control
A standard 3-button (left / right / scroll-wheel) USB mouse can also be used with this NVR. To use a USB mouse:
1.
Plug the USB mouse into the either the front panel or back panel USB connector of the NVR.
2.
The mouse will be automatically detected. If the mouse is not detected, the mouse may not be compatible with the NVR. Please refer
to the recommended device list from your provider.
Using the mouse
Action
Effect
Single click: Live view: Select channel and show the quick set menu
Menu: Select and enter
Double click: Live view: Switch between single-screen and multi-screen
Left click
Click and drag: PTZ control: pan, tilt and zoom
Tamper-proof, privacy mask and motion detection: Select target area
Digital zoom-in: Drag and select target area
Live view: Drag channel / time bar
Live view: Show menu
Right click
Menu: Exit current menu to upper level menu
Scroll up: Live view: Previous screen
Menu: Previous item
Scroll wheel
Scroll down: Live view: Next screen
Menu: Next item.
Step 1. Getting Started: Unpacking the Equipment
What's in the box
Your system includes:
NVR
•
6 foot Ethernet cable
•
6 foot HDMI cable
•
48 Vdc power adapter and cable
•
HDD SATA and power interface cables for internal hard disk drive
•
Remove the equipment from its packaging and place it on a flat, clean surface. Inspect each item. If any visible damage is present, contact
your supplier for a replacement. Verify that your order is complete.
What you need
Although each security system installation is different, most require the following items not included with your system components:
VGA or HDMI compatible computer monitor
•
IP cameras and cables compatible with the NVR
•
ALI-NVR3404P_SQ
180503
Advertisement
Table of Contents

Related Manuals for Observint ALIBI ALI-NVR3404P


Summary of Contents for Observint ALIBI ALI-NVR3404P
- Page 1 ALI-NVR3404P Embedded Network Video Recorders Quick Setup Guide Mouse control This quick setup guide provides instructions to initially setup and use the ALI-NVR3404P network video recorder (NVR). For information about using your NVR and its extensive capabilities, refer to the Alibi Embedded Network Video Recorder Firmware User Manual A standard 3-button (left / right / scroll-wheel) USB mouse can also be used with this NVR.
-
Page 2: Step 4. Install A Monitor, Mouse, Power
Install your security cameras. Always follow the installation instructions provided with the camera. NOTE: If the cameras feature Power over the configuration of the network, these settings may change. To improve remote access to the recorder, Observint recommends that Ethernet (PoE), the cameras that plug into the ports on the back of the NVR can be powered through those ports. - Page 3 VGA Video Output Formats 1920 × 1080/60 Hz, 1600 × 1200/60 Hz, 1280 × 1024/60 Hz, 1280 × 720/60 Hz, 1024 × 768/60 Hz Two Way Audio Input 1-ch, RCA (Linear, 1kΩ) www.Observint.com © 2018 Observint Technologies. All rights reserved.
-
Page 4: Hdd Installation
The HDD should be above the front panel ribbon cable, and under the front panel black cable. See the photo above for the location of The photo below shows the inside of the recorder without an HDD. Become familiar with the items identified in the photo. these cables. www.Observint.com © 2018 Observint Technologies. All rights reserved. - Page 5 Menu | HDD feature. For more information, refer to the ALIBI Embedded Network Video Recorder Firmware User Manual available at www.alibisecurity.com/resources. Initialize (Init) the HDD when you setup the NVR using Wizard. www.Observint.com © 2018 Observint Technologies. All rights reserved.
Need help?
Do you have a question about the ALIBI ALI-NVR3404P and is the answer not in the manual?
Questions and answers