Table of Contents
Advertisement
Quick Links
Owner's Manual
(this document)
Read this first. It explains the basic things you need to know in
order to use the XS-82H/XS-83H/XS-84H.
PDF Manual
(download from the Web)
. Reference Manual
This describes all parameters of the XS-82H/XS-83H/XS-84H.
It also describes the settings to make when operating the unit by
remote control.
Copyright © 2014 ROLAND CORPORATION
All rights reserved. No part of this publication may be reproduced in any form without the written permission of ROLAND CORPORATION.
Before using the XS-82H/XS-83H/XS-84H, ensure that its system program is at the most recent version. For information on available upgrades
for the system program, see the Roland website (http://proav.roland.com).
You can check the version of the system program by selecting the [MENU] button
To obtain the PDF manual
1.
Enter the following URL in your computer.
http://proav.roland.com
I
2.
Go to the XS-82H, XS-83H, or XS-84H
product page and click the "Support" tab.
g
g
"SYSTEM"
"VERSION."
Advertisement
Table of Contents

Related Manuals for Roland VS-82H


Summary of Contents for Roland VS-82H
- Page 1 Copyright © 2014 ROLAND CORPORATION All rights reserved. No part of this publication may be reproduced in any form without the written permission of ROLAND CORPORATION. Before using the XS-82H/XS-83H/XS-84H, ensure that its system program is at the most recent version. For information on available upgrades for the system program, see the Roland website (http://proav.roland.com).
- Page 2 IMPORTANT SAFETY INSTRUCTIONS WARNING: To reduce the risk of fire or electric shock, do not expose this apparatus to rain or moisture. The lightning flash with arrowhead symbol, within an CAUTION equilateral triangle, is intended to alert the user to the RISK OF ELECTRIC SHOCK presence of uninsulated “dangerous voltage”...
- Page 3 AVERTISSEMENT: Pour éviter les risques d’incendie ou de choc électrique, ne pas exposer cet appareil à la pluie ou à l’humidité. L’éclair éché dans un triangle équilatéral est destiné à ATTENTION avertir l’utilisateur de la présence, dans l’appareil, d’une RISQUE DE CHOC ÉLECTRIQUE zone non-isolée soumise à...
-
Page 4: Table Of Contents
Contents USING THE UNIT SAFELY Audio Operations Adjusting Microphone Gain CONSIGNES DE SÉCURITÉ Adjusting the Volume Balance of Input Audio Adjusting the Volume Level of Output Audio IMPORTANT NOTES Other Features Panel Descriptions Saving/Recalling Settings (Presets) Front Panel/Top Panel/Side Panel Saving Settings on a USB Flash Drive Rear Panel Formatting USB Flash Drives... -
Page 5: Using The Unit Safely
Roland Service Center, or an authorized Secure a sufficient amount of space at the setup Otherwise, you risk injury as the result of Roland distributor, as listed on the “Information” when: the unit toppling over or dropping down. location • The power cord has been damaged; or Since this unit normally emits a slight • If smoke or unusual odor occurs;... - Page 6 USING THE UNIT SAFELY CAUTION Place in a well ventilated location The unit should be located so that its location or position does not interfere with its proper ventilation. When disconnecting the power cord, grasp it by the plug To prevent conductor damage, always grasp the power cord by its plug when disconnecting it from this unit or from a power outlet.
-
Page 7: Consignes De Sécurité
Confiez toute réparation à votre revendeur, entraîner une perte auditive. Si jamais Avant d’utiliser l’appareil à l’étranger, le centre Roland le plus proche ou un vous ressentez une perte auditive ou des consultez votre revendeur, un centre distributeur Roland agréé, comme indiqué... - Page 8 USING THE UNIT SAFELY ATTENTION ATTENTION Placer dans un endroit bien ventilé Précautions concernant l’utilisation de l’alimentation fantôme L’appareil doit être placé en veillant à ce que son emplacement ou sa position ne Toujours éteindre l’alimentation fantôme gêne pas sa propre ventilation. avant de brancher tout autre appareil qu’un microphone à...
-
Page 9: Important Notes
• Any data stored within the unit can be lost as the equipment containing large power transformers) result of equipment failure, incorrect operation, • Roland is an either registered trademark or may induce hum. To alleviate the problem, change etc. To protect yourself against the irretrievable trademark of Roland Corporation in the United the orientation of this unit;... -
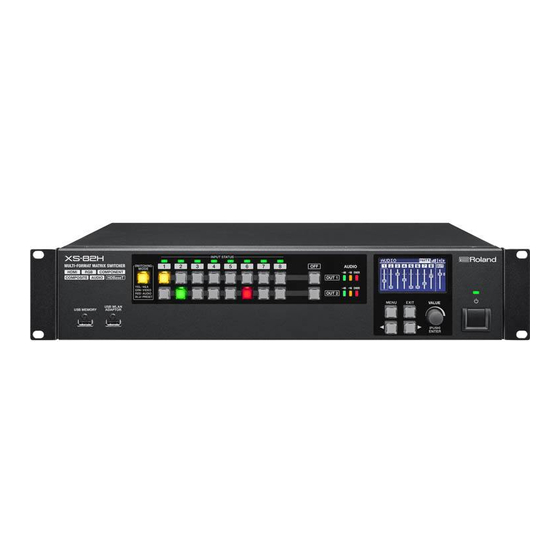
Page 10: Panel Descriptions
You use this when operating the unit remotely using the XS-80H Remote iPad application. p. 28 * For the wireless USB adaptor, use the ONKYO UWF-1 or Roland WNA1100-RL. This switches the operation mode of the cross-point selection buttons ( ). - Page 11 Panel Descriptions Name Explanation Page [MENU] button This displays the menu. p. 17 5 During menu display, these move the cursor. Also, depending on the menu item, they move to the setting p. 17 screen for a different channel or the like. ] (cursor) buttons p.
-
Page 12: Rear Panel
Panel Descriptions Rear Panel XS-84H Name Explanation Page This turns the main power on and off. [POWER] (main power) switch p. 17 When the main power has been turned on, the power button on the front panel can be used to switch the power to on or standby. -
Page 13: Placement And Setup
Placement and Setup Important Notes on Rack Mounting Connecting Cables to the Euroblock Plugs Attach cables to the included Euroblock plug and connect them to the * When mounting the unit in a rack, to ensure efficient cooling, give AUDIO INPUT and OUTPUT connectors. attention to the following points. -
Page 14: Connecting External Equipment
Connecting External Equipment * To prevent malfunction and equipment failure, always turn down the volume, and turn off all the units before making any connections. * Provide cable and adapter plugs to match the connector configuration on the equipment you’re using. Connecting Video Source/Output Equipment After making the connections, make the settings for the type of incoming video signals on video channels 1 through 8 (p. -
Page 15: Connecting Audio Source/Output Equipment
Connecting External Equipment Connecting Audio Source/Output Equipment Audio output Audio source Ampliers, speakers, recording units, etc. Video decks, CD players Microphones, audio mixers, etc. equipment equipment Audio input connectors Audio output connectors XS-84H Using Phantom Power * Connect microphones to the R channel of AUDIO INPUT connector 1 or 2. -
Page 16: Connecting The Power Cord
Connecting External Equipment Connecting the Power Cord NOTE Be sure to use the included power cord for connecting the power supply. Connect the included power cord to the AC IN connector on the rear panel. AC IN connector Power code * The shape of the power cord’s plug varies depending on the country. -
Page 17: Basic Operation
* Before turning the unit on/off, always be sure to turn the volume to the Reference Manual (PDF) for the unit from the following down. Even with the volume turned down, you might hear some Roland website. sound when switching the unit on/off. However, this is normal http://proav.roland.com and does not indicate a malfunction. -
Page 18: Changing The View On The Display
Basic Operation Changing the View on the Display The unit’s top screen has five types of view modes. Changing Audio Fader Assignments You use the cursor buttons to change the view mode. At the audio volume control screen, you can display audio faders for eight audio input channels and one audio output channel. -
Page 19: Video Operations
Video Operations Setting the Video Signal for Each Video Changing Cross Points Input Channel This changes the cross points for video or audio. This sets the type of incoming video signal for each individual video * This unit provides a variety of output modes for video output. input channel. -
Page 20: Inputting/Outputting Copyright-Protected (Hdcp) Video
Video Operations Inputting/Outputting Copyright-protected (HDCP) Video This unit lets you enable and disable HDCP (digital content protection) individually for copyright-protected (HDCP) video that is input and output. By default, input and output of HDCP-protected video are enabled. To enable or disable HDCP input and output, use the procedure described below to described below to change the setting. -
Page 21: Switching Between Hdmi Output And Hdbaset Output
Video Operations Switching Between HDMI Output and Outputting an Imported Still Image HDBaseT Output This assigns a still image imported from a USB flash drive to a video input channel and outputs it in the same way as video. By factory default, the selection of HDMI output and HDBaseT output is set at “AUTO”... -
Page 22: Switching The Video Output Mode
Video Operations Switching the Video Output Mode This unit provides a variety of output modes for video output. Selecting an output mode recalls preset values for video output. * You can change “VIDEO OUTPUT” settings after recalling the preset values for video output. Note, however, that depending on the “MODE” setting, some individual menu items might be unchangeable. - Page 23 Video Operations Output image Interlinked buttons OUTPUT 1 OUTPUT 2 OUTPUT 3 OUTPUT 4 OUTPUT Setting value Description Button illumination XS-83H and XS-84H only pattern XS-84H only This outputs the picture rotated 90 degrees clockwise. ROTATION-R1 ü ü ü ü ROTATION-R2 ü...
-
Page 24: Applying A Fade To Output Video
Video Operations Applying a Fade to Output Video This applies a fade to output video. Use the [MENU] button g “TRANSITION” g “TIME” to set the fade time (0.0 to 10.0 sec). If you want to change to a monochrome picture instantly, set “0.0 sec”... -
Page 25: Audio Operations
Audio Operations Adjusting Microphone Gain Adjusting the Volume Balance of Input Audio This adjusts the input sensitivity of microphones connected to the R channels of AUDIO INPUT connectors 1 and 2. This adjusts the volume balance of the audio input to the unit. MEMO NOTE 5 Input sensitivity can be adjusted for only the R channel of... -
Page 26: Adjusting The Volume Level Of Output Audio
Audio Operations Adjusting the Volume Level of Output Audio This adjusts the volume level of output audio. Checking the Volume Level See the level meter to check the volume level of output audio. Insucient Excessive Suitable If “OVER” lights up, the volume level is too high. A level where the “-18”... -
Page 27: Other Features
Other Features Saving/Recalling Settings (Presets) You can internally save current cross points, audio/video settings, and other values as presets and recall them for use when needed. The unit can save 32 presets. Saving Settings Recalling Settings This calls up a saved preset. Select the [MENU] button g “PRESET MEMORY”... -
Page 28: Formatting Usb Flash Drives
XS-80H Remote application for the iPad. the drive. * For the wireless USB adaptor, use the ONKYO UWF-1 or Roland WNA1100-RL. Making the Connection Carefully insert the USB flash drives all the way in—until it is firmly in place. -
Page 29: Appendices
Was the USB flash drive formatted on the unit? p. 28 on the unit. Operation of non-Roland USB flash drives cannot be assured. A USB flash drive cannot be read. Operation has been tested for commonly available USB flash drives, but Was a non-Roland USB flash drive used? operation with all USB flash drives is not assured. -
Page 30: Block Diagram
Appendices Block Diagram Video Block HDMI/DVI Inputs x 8 Analog Video Inputs x 8 SCALER SETTING EDID Emu HDMI CH 1 D-sub SCALER SETTING EDID Emu COLOR FLIP SCALER SCALER SETTING HDMI EDID Emu CORRECTOR VERTICAL CH 2 SCALER SETTING D-sub EDID Emu EDID Emu... - Page 31 Appendices HDMI/DVI OUTPUTS HDBaseT OUTPUTS PROCESSOR OUTPUT Memory SELECT HDMI STILL TEST FLIP COLOR CH 1 SCALER PATTERN HORIZONTAL CORRECTOR MEMORY 1–4 HDBaseT HDMI [MODE] STILL TEST FLIP COLOR CH 2 SCALER PATTERN HORIZONTAL CORRECTOR MEMORY 1–4 SPAN HDBaseT MULTI ROTATION MATRIX HDMI...
-
Page 32: Connector Specifications
Appendices Connector Specifications Analog video INPUT connectors RS-232C connector Pin No. Signal 1 2 3 4 5 6 7 8 9 D-Sub 15-pin (female) D-Sub 9-pin (male) Input video signal type Pin No. Component Composite Communication method Synchronous (asynchronous), full-duplex Pr/Cr Communication speed 9600 bps/38400 bps... -
Page 33: Audio Input/Output Connectors
Appendices AUDIO INPUT/OUTPUT connectors RCA pin plug The AUDIO INPUT and OUTPUT connectors are wired as shown in the figure below. Wire the cables correctly, according to whether you’re using balanced Unbalanced connection or unbalanced connections. COLD HOT COLD TIP: HOT SLEEVE: GND COLD COLD... -
Page 34: Main Specifications
Appendices Main Specifications Video Video processing 4:4:4 (Y/Pb/Pr), 10-bit HDMI Type A (19 pins) x 8 (INPUT 1–8) * HDCP Supported RGB/ Input Connectors Component/ HD DB-15 type x 8 (INPUT 1–8) Composite/S- Video HDMI Type A (19 pins) x 2 (OUTPUT1–2) XS-82H * HDCP Supported HDBaseT... - Page 35 Appendices Audio Audio processing Sampling rate 24 bits/48 kHz, 8ch Digital HDMI Type A (19 pins) x 8 Input Connectors Analog 5-pin euroblock type x 8 Digital HDMI Type A (19 pins) x 2 XS-82H Analog 5-pin euroblock type x 2 Digital HDMI Type A (19 pins) x 3 Output...
-
Page 36: Dimensions
Appendices Dimensions Unit... - Page 37 MEMO...
-
Page 38: Federal Communications Commission
Compliance Information Statement Model Name : XS-82H/XS-83H/XS-84H Type of Equipment : Video Switcher Responsible Party : Roland Corporation U.S. Address : 5100 S. Eastern Avenue Los Angeles, CA 90040-2938 Telephone : (323) 890-3700 For EU Countries This product is intended for use in the following Electromagnetic environments: E1: residential, E2: commercial and light industrial, E3: urban outdoors, E4: controlled EMC environment, ex. - Page 39 For EU Countries For China...
Need help?
Do you have a question about the VS-82H and is the answer not in the manual?
Questions and answers