
Subscribe to Our Youtube Channel
Related Manuals for CFS RT1


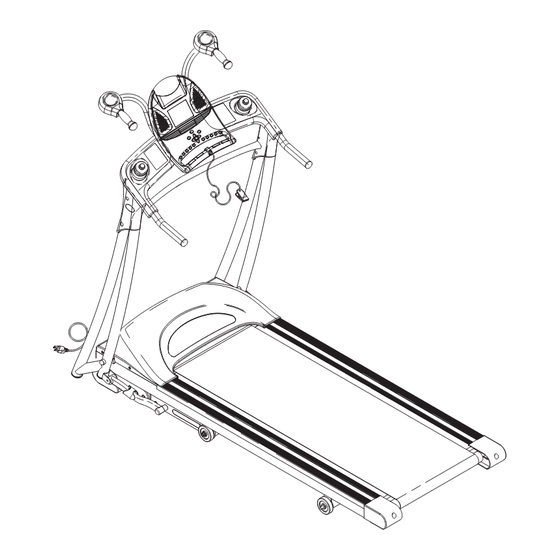
Summary of Contents for CFS RT1
-
Page 1: Service Manual
Core Fitness Systems 2003-2004 Treadmill Service Manual CFS Series If you have any questions, please call the Sears Parts and Repair Center at 1-800-488-1222... -
Page 2: Table Of Contents
Safety Instructions Recommended Tools Maintenance Tensioning or Aligning the Running Belt Tensioning the Drive Belt Lubricating Procedures CFS “5-Step” Diagnostic Process Upper Board Troubleshooting Console Cable Voltage Chart Auto-Calibration Instructions Lower board troubleshooting Wiring Diagrams Lower Control Board Diagnostic LED Chart... -
Page 4: Safety Instructions
Important Safety Instructions Warning statements indicate a particularly dangerous activity. You should be extremely cautious when doing the following: x Removing power from the treadmill, the power cord being disconnected from the wall outlet. Always ensure that the treadmill is unplugged from the wall outlet when you inspect or adjust the treadmill, or when you isolate, remove, or replace a treadmill component. - Page 5 Safety guidelines you should know and follow include: x Read the owner’s manual and follow all operation instructions. x Operate the treadmill on a solid, level surface. Locate the rear of the treadmill at least four feet from walls or furniture. Keep the area behind the treadmill clear. x Visually check the treadmill before beginning service or maintenance operations.
- Page 6 WARNING: Connect this appliance to a properly grounded, dedicated 20 amp outlet only. See grounding Instructions. GROUNDING INSTRUCTIONS This product must be grounded. If a treadmill should malfunction or breakdown, grounding provides a path of least resistance for electrical current to reduce the risk of electrical shock. This product is equipped with a cord having an equipment-grounding conductor and a grounding plug.
-
Page 7: Recommended Tools
Required Tools and Equipment The following list is a summary of the tools and equipment required by the procedures in this manual. Phillips screwdrivers anti-static wrist strap (when handling electronic parts) flat-head screwdrivers digital multi-meter drive belt tension gauge Allen wrench set (Metric) open-end wrenches of assorted sizes (Metric) clamp-on AC amp meter ½”... -
Page 8: Maintenance
PREVENTATIVE MAINTENANCE PROCEDURES Cleanliness of your CFS treadmill and its operating environment will keep maintenance problems and service calls to a minimum. For this reason, Sears recommends that the following preventive maintenance schedule be followed. After Each Use x Turn off the treadmill with the on/off switch, and unplug the power cord from the wall outlet. -
Page 9: Tensioning Or Aligning The Running Belt
Tensioning or Aligning the Running Belt Tensioning the Running Belt: If you can feel a slipping sensation when running on the treadmill, the running belt must be tightened. In most cases, the belt has stretched from use, causing the belt to slip. This is a normal and common adjustment. -
Page 10: Aligning The Running Belt
Aligning the Running Belt: If the running belt moves rapidly to one side when performing the next step, press the Stop button immediately. x Turn on the treadmill. With the treadmill speed between 6-8 mph, stand behind the treadmill and watch the movement of the running belt. As you watch the running belt, make sure that the belt runs without moving from one side to the other and that the belt is centered between the side rails. -
Page 11: Tensioning The Drive Belt
Tensioning the Drive Belt Procedure: Turn off the power to the treadmill and remove the power cord from the wall outlet. With a Philips head screwdriver, remove the motor cover. Unplug the motor wires from the lower board. Before continuing, it is a good idea to weight down the treadmill deck to prevent the treadmill from springing up. -
Page 12: Lubricating Procedures
Treadmill Deck Lubrication Procedures There are three different applications in which you would be required to add lubrication to a CFS treadmill. 1. MAINTENANCE A CFS treadmill does not need to be waxed regularly. However, Sears recommends that lubrication be applied once a year. This is not always necessary, but it will ensure long-life of the treadmill. - Page 13 Lubricating the Air Shock Procedure: 1. Fold the treadmill to the upright position, making sure the treadmill is locked securely. 2. Add lubricating oil on the shaft of the air shock. 3. Lift the frame up and down, repeating this several times to allow the lubricating oil blend into air shock...
-
Page 14: Cfs "5-Step" Diagnostic Process
FIVE-STEP DIAGNOSIS PROCESS The following steps are provided as routine checkpoints when diagnosing problems on a CFS treadmill. If followed correctly, these checkpoints should help diagnosis the majority of problems that may be encountered. 1. Proper supplying power to treadmill. - Page 15 FIVE-STEP DIAGNOSIS PROCESS - Continued 2. Proper Wiring - Verify that all wires are secure and attached in the correct position (reference wiring diagrams in table of contents). - Verify that there aren’t any pinches or cuts in any of the wires, especially the console cable connecting from the lower board to the upper board.
- Page 16 FIVE-STEP DIAGNOSIS PROCESS – Sensor Wire Function - Verify that the lower control board is outputting the proper voltage (5 volts DC). See Voltage checkpoints in table of contents for voltage measurement instructions. - Verify that the sensor wire is functioning properly in Diagnostics Mode. To enter Diagnostics Mode, follow the directions below: Diagnostic Mode Instructions - With the treadmill power on and the safety key in position on the console,...
- Page 17 - The start speed of the treadmill can also be determined by counting the revolutions/minute of the running belt. At 0.5 mph, the treadmill belt should make 4.5 revs/minute for the RT1. If the belt revolutions are incorrect, adjust the speed dial located on the lower control board (see speed calibration in...
- Page 18 FIVE-STEP DIAGNOSIS PROCESS – Continued 5. Voltage Checkpoints/Diagnostic LED’s. Verify that the lower board is functioning properly by referencing the Diagnostic LED’s located on the lower control board. A complete description for each Diagnostic LED can be found by referencing the lower control board Diagnostic LED chart in the table of contents.
-
Page 19: Upper Board Troubleshooting
CONSOLE TROUBLESHOOTING CONTENTS Console Cable Voltage Chart Auto-Calibration procedures No display on console All or some of the keys on console will not work Error-message "E1 or E2" on console Diagnostics Mode Heart-rate-control function does not work Static shocks from upper board/heart rate grips……………………………….30 Console exploded diagram ………………………………………………………31... -
Page 20: Console Cable Voltage Chart
Console Cable Voltage Chart (DC volts) - Elevation - Elevation - Speed control - Ground - Ground - RPM (pulse) - Power to console - Power to console - 0 volts - PWM - Motor SW - Elevation Down - Elevation Up CORRECT VOLTAGE FOR WIRE HARNESS: Brown 5 volts Blue 12 - 16 volts... -
Page 21: Auto-Calibration Instructions
Auto-Calibration Procedures The RT1 model have a built-in auto-calibration sequence into the software programming. This will allow the rpm sensor reading to be detected and stored in the upper board. This process is performed at the factory and will not need to be repeated unless replacing the upper board or lower board in your Horizon Series treadmill. - Page 22 Step 2. Auto Calibration While in the Engineering Mode Menu, press the Select button until Auto Set appears in the display. Press “Start” to select. Press “Start” to begin. The treadmill running belt will begin moving and will automatically begin the auto- calibration sequence to properly set and store the speed values.
-
Page 23: No Display On Console
No Display on Console If the console only displays dashes in the display window, follow the possible causes below: Possible causes: x Adjust the position of the safety key. x Safety key polarity strength is not adequate. Replace the safety key. x Reed Switch inside console is defective. - Page 24 x Breaker is damaged. Inspect the circuit breaker to see if it has tripped off. (If it is tripped off--like diagram A, reset the breaker.) x ON/OFF switch is damaged. Make sure the ON/OFF switch is turned to the "ON" position and that the switch is lit. If the switch is not lit, check the power cord connection and function.
-
Page 25: All Or Some Of The Keys On Console Will Not Work
All or Some of the Keys on Console Will not Work Possible causes: x Keypad electrodes (N74) are not coming into proper contact with upper control board (N17). Remove keypad and reposition. x The upper control board (N17) is defect. Replace entire console. -
Page 26: Error-Message "E1 Or E2" On Console
E-1 Error-message on the Upper Board If there is belt movement upon start up of the treadmill, and an E-1 message occurs, follow the possible causes below: Possible cause: x Check all wire connections. x Verify that the sensor magnet is positioned in the front roller pulley. x Verify the distance between the RPM sensor wire and the front roller pulley (2-4 mm). - Page 27 E-2 Error-message on the Upper Board If there is belt movement upon start up of the treadmill, and an E-2 message occurs, follow the possible causes below: Possible cause: x Check voltage of wall outlet. Warning! Hazardous voltages will be tested in the following procedure. Exercise extreme caution when performing these procedures.
-
Page 28: Diagnostics Mode
Diagnostics Mode With the treadmill power on and the safety key in position on the console, press and hold the 1 & 10 quick speed keys for about 5 seconds to enter the Engineering Mode Menu. The console should beep three times and Auto Set should be displayed once in the Engineering Mode Menu. -
Page 29: Heart-Rate-Control Function Does Not Work
Heart-Rate-Control Function Does Not Work When holding the heart rate handlebars, the display in the Pulse display window should register HR. If this does not register, follow the possible causes below. Possible causes: x Defective heart rate receiver/heart rate grips. Replace entire console. x Defective upper board. -
Page 30: Static Shocks From Upper Board/Heart Rate Grips
Static Shocks from Upper Board/Heart Rate Grips Possible causes: x Lubrication on running deck and running belt inadequate. Contact Sears for lubrication application. x Defective grounding fibers in running belt. Replace running belt. Note: Improper grounding of the upper board or running belt may also cause other symptoms like erratic speed, scrambled reading of the upper board, resetting of the treadmill, or erratic or non-responsive heart rate function. -
Page 31: Console Exploded Diagram
Console Exploded Diagram... -
Page 32: Lower Board Troubleshooting
LOWER BOARD TROUBLESHOOTING CONTENTS Treadmill will not start Treadmill will reset Running speed is not stable Wiring diagram Lower board LED diagnosis Speed Calibration... -
Page 33: Treadmill Will Not Start
Treadmill Motor Will Not Start Possible causes: x Verify that all wire connections are properly connected. x Follow the auto-calibration instructions (reference auto-calibration in table of contents). x Verify the diagnostic LED’s on the lower board. Reference diagnostic LED chart for possible causes. -
Page 34: Treadmill Will Reset
Treadmill Will Stop and Reset x Check voltage of wall outlet. Warning! Hazardous voltages will be tested in the following procedure. Exercise extreme caution when performing these procedures. Do not connect or disconnect any wiring, connectors, or other components with the power applied to the treadmill. x Disconnect the treadmill power cord from the wall outlet. -
Page 35: Running Speed Is Not Stable
Running Speed Is Not Stable (erratic speeds) x Verify that the running belt and drive belt tensions are adequate, preventing belts from slipping. x Check voltage of wall outlet. Warning! Hazardous voltages will be tested in the following procedure. Exercise extreme caution when performing these procedures. -
Page 36: Wiring Diagrams
Lower Control Board Wiring Diagram Console cable Elevation motor Transformer (green) sensor wire Elevation motor (black) Elevation motor (red) Elevation motor (white) Motor (from on/off switch) (Red) Motor (from on/off (black) switch) Transformer Transformer (red) (red) - Page 37 Wiring Diagram A – SOCKET WIRE TO ON/OFF SWITCH E – ON/OFF SWITCH TO LOWER BOARD (AC1) B – GROUND F – ON/OFF SWITCH TO BREAKER C – SOCKET WIRE TO BREAKER D – ON/OFF SWITCH TO LOWER BOARD (AC2)
-
Page 38: Lower Control Board Diagnostic Led Chart
Lower Board LED Diagnosis Top layer of lower control board LED 5 & 6 LED 1 LED 2 LED 4 LED 3 Bottom layer of lower control board LED 7 LED 8... - Page 39 Lower Board LED Diagnosis LED 1 & 2: Transfer indicators. When the power switch is turned on, LED 1 & 2 light up, meaning that power is supplied to the lower board. These LED’s should remain on while operating the drive motor and elevation motor. If the LED’s are not lit, check the AC service from the wall outlet.
-
Page 40: Speed Calibration
At 0.5 mph, the treadmill belt should make 4.5 revolutions per minute for the RT1 treadmill. If the belt revolutions are incorrect, adjust the speed dial located on the lower control board. -
Page 41: Manual Speed Calibration
Manual Speed Calibration To adjust the speed setting of the treadmill, turn the speed dial clockwise (to increase speed) or counterclockwise (to decrease speed). IR Comp Speed Adjustment Calibration The IR comp dial should only need to be adjusted if the treadmill belt is running in a jerky or choppy motion. -
Page 42: Incline Motor Troubleshooting
INCLINE MOTOR TROUBLESHOOTING CONTENTS Incline function does not work Treadmill will incline up or down without command Incline does not reach minimum or maximum settings... - Page 43 No Incline Function Possible Causes: x Verify that all wire connections are properly attached. x Inspect console cable for damage. x Check voltage of console cable. Determine defective part by using console cable chart. x Verify diagnostic LED’s on lower board. Reference Diagnostic LED chart for possible causes.
- Page 44 Treadmill Will Incline Up or Down Without Command Possible causes: x Verify that all wire connections are properly attached. x Inspect console cable for damage. x Check voltage of console cable. Determine defective part by using console cable chart. x Verify diagnostic LED’s on lower board. Reference Diagnostic LED chart for possible causes.
- Page 45 Incline Does Not Reach Minimum or Maximum Settings Possible causes: x Incline motor is not installed properly x Verify elevation motor shaft position. The elevation motor shaft should be flush with the bottom of the motor housing. If the position of the shaft is to close to the bottom motor housing, the shaft may have become jammed.
-
Page 46: Drive Motor And Roller Troubleshooting
DRIVE MOTOR AND ROLLER TROUBLESHOOTING CONTENTS Thumping noises generating from under motor cover Cleaning the motor Thumping noises generating from rear of treadmill... - Page 47 Noises Generating From Under Motor Cover Possible causes: x Verify proper tension of the running belt. Excessive noise may be created by an over-tightened running belt. x Remove motor cover and verify alignment of drive belt. x Inspect for debris on drive motor pulley, front roller pulley, or on drive belt x If this problem is being experienced on a new treadmill, let the treadmill run for about 30 minutes without load to break the treadmill in.
- Page 48 Stoning the Motor Commutator x Unplug the power cord from the wall outlet. x Remove the brush covers on the drive motor and inspect the brushes and the motor commutator for any uneven wear. x If the surface of the motor brush is pitted, rough, or has burn marks, replace the motor brush.
- Page 49 Noises Generating From the Rear of the Treadmill Possible causes: x If this problem is being experienced on a new treadmill, let the treadmill run for about 30 minutes without load to break the treadmill in. x Verify proper tension of the running belt. Excessive noise may be created by an over-tightened running belt.
-
Page 50: Parts Replacement
TREADMILL PARTS REPLACEMENT CONTENTS Running Belt / Deck Roller Motor Motor Brush Lower Board Console Cable Incline Motor Upper Board Keypad (Membrane Key) Air Shock... -
Page 51: Running Belt / Deck
Running Belt/Deck Replacement Procedure Tools required: z Philips screwdriver z T-handle Allen wrench (5mm, 6mm) Procedure: 1. With a Philips head screwdriver, remove the motor cover, rear roller end caps, and left and right side rails. 2. With the appropriate size Allen wrench remove the rear roller. It is a good idea to note the position of the rear roller before removing. - Page 52 Running Belt/Deck Replacement Procedure - Continued 6. Tighten the deck bolts. Assemble the front roller first, but do not tighten completely. Then assemble the rear roller and drive belt idler. 7. Finish tightening the front roller. 8. Start the treadmill, and run it to ensure proper belt tension and side-to-side belt tracking.
-
Page 53: Roller
Roller Replacement Tools required: z Philips screwdriver z T-handle Allen wrench (6mm, 8mm) Procedure: Front roller 1. With a Philips head screwdriver, remove the motor cover. 2. With the Philips head screwdriver, remove the speed sensor. Press your finger against the drive belt and guide it towards the left until it is released from the front roller. -
Page 54: Motor Replacement
Motor Replacement Tools required: z Philips screwdriver z Socket wrench (13mm) z Box wrench (8mm) z Allen wrench (6mm) Procedure: Turn off the power to the treadmill and remove the power cord from the wall outlet. With a Philips head screwdriver, remove the motor cover. Unplug the motor wires from the lower board. - Page 55 M46). With a 6mm Allen wrench, remove the bolts (M06) and washers (M30, M25) holding the motor to the motor bracket, and replace it with a new motor. Put the new motor in place on the frame, taking caution to properly align the motor flywheel pulley and the front roller pulley.
-
Page 56: Motor Brush
Motor Brush Replacement Tools required: z Flat blade screwdriver Procedure: 1. Turn off the power to the treadmill and unplug the power cord from the wall outlet. 2. Remove the motor brush cover and the carbon brushes with a flat blade screwdriver. -
Page 57: Lower Board
Lower Board Replacement Tools required: z Philips head screwdriver Procedure: 1. Turn off the power to the treadmill and unplug the power cord from the wall outlet. 2. With a Philips head screwdriver, remove the motor cover. 3. Verify that LED MTR is not lit on the lower board. If this LED is lit, please wait approximately 1 minute until the light is out. -
Page 58: Console Cable Replacement
Console Cable Replacement Tools required: z Philips screwdriver z Allen wrench (5mm) z 13 mm wrench z Needle nose pliers Procedure: 1. Turn off the power to the treadmill and unplug the power cord from the wall outlet. 2. With a Philip head screwdriver, remove the motor cover and disconnect the console cable from the lower control board. - Page 59 5. Remove the console assembly from the console mast (AC02) by removing the console mast covers on both the left and right side. 6. Remove the rear (closet to the back of the treadmill) 45 mm bolt and 13 mm nut that attaches the console assembly to the console mast (AC01).
-
Page 60: Incline Motor
Incline Motor Replacement Tools required: z Philips screwdriver z Qty 2 wrenches (17mm) Procedure: 1. Turn off the power to the treadmill and unplug the power cord from the wall outlet. 2. With a Philips head screwdriver, remove the motor cover. Disconnect the incline motor wires from the lower control board. -
Page 61: Upper Board
Upper Board Replacement Tools required: Philips screwdriver. Note: Diagram on following page. Procedure: 1. Turn off the power to the treadmill and unplug the power cord from the wall outlet. 2. With a Philips head screwdriver, remove the console from the console mast. 3. - Page 62 Upper Board Replacement...
-
Page 63: Keypad (Membrane Key)
Keypad Replacement Tools required: Philips screwdriver. Note: Diagram on following page. Procedure: 1. Turn off the power to the treadmill and unplug the power cord from the wall outlet. 2. With a Philips head screwdriver, remove the console from the console mast. 3. - Page 64 Keypad Replacement...
-
Page 65: Air Shock
Air Shock Replacement Tools required: Wrench (13mm) Procedure: 1. Fold treadmill to locking position. 2. Use a 13mm wrench to loosen the nut that secures the top screws of the air shock to the frame. 3. Unscrew the entire air shock counterclockwise to remove it from the bottom screw attachment screw.
Need help?
Do you have a question about the RT1 and is the answer not in the manual?
Questions and answers