
Subscribe to Our Youtube Channel
Related Manuals for Cli-mate CLI-DH20-E


Summary of Contents for Cli-mate CLI-DH20-E
- Page 1 Dehumidification System CLI-DH20-E | Installation & Operating Instructions...
- Page 2 Congratulations on your purchase of a Cli~Mate Air Dehumidification System. This air dehumidifier is compact and stylish in design, quiet, portable and easy to operate. Unit effectively removes moisture from the air creating a drier, healthier room environment. Note: Please read through the instructions carefully before using or installing the product and ensure that the manual is kept in a safe place for future reference.
-
Page 3: Product Specifications
This appliance is designed for household use only. Do not use this unit outdoors, in wet environments or on wet surfaces. System Specifications CLI-DH20-E To achieve best performance; make sure all doors and windows Air Dehumidification System are closed before turning on the unit. - Page 4 OPERATION CONDITIONS AND SAFETY PRECAUTIONS • If the supply cord is damaged, it must be replaced by the manufacturer, its service agent or similarly qualified persons Read all instructions carefully. in order to avoid a hazard. • All components need to be installed in accordance with the user •...
- Page 5 • If unit ever tips or falls over when water reservoir is full, immediately unplug the power cord. Ensure unit is dried thoroughly before operation of the unit. • Do not put fingers or other objects in any openings of the unit. During the set up of this product if you have any questions / comments / issues DO NOT RETURN TO STORE FOR SERVICE AND TECHNICAL ADVICE ON THIS PRODUCT FREE...
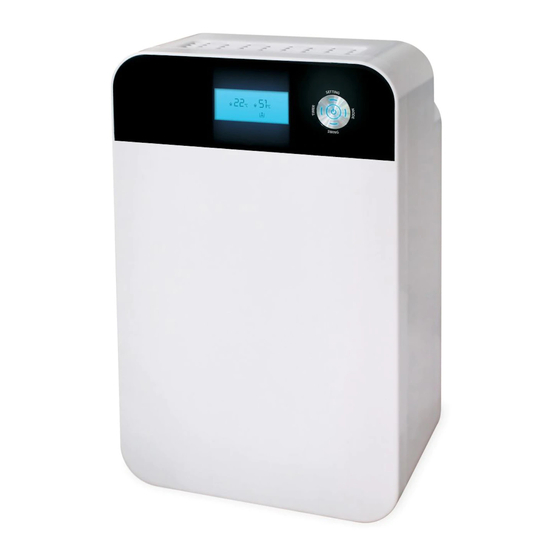
- Page 6 A. COMPONENT IDENTIFICATION AND CHECK LIST A. Dry Air Outlet B. Control Panel C. LCD Display D. Handle E. Humid Air inlet F. Air Filter G. Continuous Drainage Hose* H. Continuous Drainage Outlet (For hose connection) Water Reservoir * Continuous drainage hose is an extra drainage option; hose does not need to be connected if using the water reservoir to catch condensed water.
- Page 7 B. CONTROL PANEL & KEY PADS C. LCD DISPLAY ICONS POWER Turns unit ON/OFF. MODE Allows selection of desired working mode, the corresponding indicator light will illuminate. SETTING Allows selection of the desired running mode (High (H), Low (L)) 1. Automatic Dehumidifying 7.
- Page 8 D. OPERATION INSTRUCTIONS Note: When the ambient relative humidity is 1% lower than the selected relative humidity ratio percentage (RH%), the unit 1. Plug unit into power socket, unit will beep twice. compressor will switch off and fan speed will operate at a Low (L). 2.
- Page 9 8. To select ON/OFF timer. 10. As unit operates, condensed water will drain into water reservoir. When water reservoir is full unit will beep 10 times To set automatic OFF timer, press TIMER button when unit is and WATER FULL indicator light will illuminate and all other powered ON;...
-
Page 10: Product Safety Features
E. PRODUCT SAFETY FEATURES 3. Failure of Humidity & Temperature Sensor When the connection wire between the humidity and temperature 1. Automatic Defrosting sensor is disconnected, the humidity icon will blink and To ensure the unit operates and performs as stated, the unit has 0°C and 0% RH will display on LCD screen. -
Page 11: Maintenance And Repair
Note: If the ON/OFF timer has been set and activated, the unit will G. MAINTENANCE AND REPAIR restart at default operating mode, not at previous set mode. Before carrying out any maintenance or cleaning of the unit, make Note: If power supply is cut off due to one of the safety features sure that the power to the unit is turned off and power cord is being activated, the unit will not restart at previous set mode but removed from the power socket. - Page 12 H. UNIT NOT USED FOR PROLONGED PERIODS If not using the unit for a prolonged period, switch off and unplug the unit, empty the water reservoir, and allow minimum of two days for unit to dry before packing away. Keep unit in a dry and ventilated place.
-
Page 13: Troubleshooting
I. TROUBLE SHOOTING BEFORE YOU CALL FOR SERVICE PLEASE REVIEW THE TROUBLE SHOOTING TIPS FIRST. Problem Possible Causes What To Do 1. Check connection to wall socket 1. Unit is not plugged into wall socket 2. Check indicator lights to determine which safety feature has No Power 2. - Page 14 Problem Possible Causes What To Do 1. Unit not on a level flat surface 1. Reposition or relocate unit onto a flat surface. Loud Noise 2. Faulty internals 2. Call customer care. 1. Water reservoir not installed correctly 1. Reinstall water reservoir 2.
- Page 15 Your Aquaport 12 Month Repair or Replacement Warranty Conditions Of This Warranty: Aquaport warrants this appliance to the first purchaser and subject to 1. This product has been fully installed in accordance with the the stated conditions: user manual installation instructions. Warranty covers any defects in material or workmanship in the 2.
- Page 16 CUSTOMER HOTLINE: 1300 764 325 Aquaport Corporation Pty Ltd PO Box 81 Findon SA 5023 Australia Telephone: 1300 764 325 Facsimile: 08 8354 0722 Email: aquaport@aquaport.com.au Web: www.aquaport.com.au...
Need help?
Do you have a question about the CLI-DH20-E and is the answer not in the manual?
Questions and answers