Magnavox 9MDPF20 Owner's Manual
Color tv with built-in dvd player
Hide thumbs
Also See for 9MDPF20:
- Specifications (1 page) ,
- Quick use manual (2 pages) ,
- Owner's manual (52 pages)
Table of Contents
Advertisement
Quick Links
Download this manual
See also:
Quick User Manual
TD007.QX33
03.3.14 1:50 PM
O
'
WNER
9MDPF20
C
OLOR
Page 1
M
S
ANUAL
TV
WITH BUILT-IN
N
EED
M
AGNAVOX REPRESENTATIVES ARE READY TO HELP YOU WITH ANY
QUESTIONS ABOUT YOUR NEW PRODUCT
C
, F
-
ONNECTIONS
IRST
TIME
W
E WANT YOU TO START ENJOYING YOUR NEW PRODUCT RIGHT AWAY
C
ALL US BEFORE YOU CONSIDER RETURNING THE PRODUCT
1-800-705-2000
O
R VISIT US ON THE WEB AT WWW
DVD PLAYER
H
? C
!
ELP
ALL US
. W
E CAN GUIDE YOU THROUGH
S
,
F
ETUP
AND ANY OF THE
EATURES
.
MAGNAVOX
I
MPORTANT
R
W
R
ETURN YOUR
ARRANTY
EGISTRATION
S
EE WHY INSIDE
.
.
.
.
COM
!
C
10
ARD WITHIN
DAYS
.
.
Advertisement
Table of Contents

Related Manuals for Magnavox 9MDPF20


Summary of Contents for Magnavox 9MDPF20
-
Page 1: Dvd Player
TD007.QX33 03.3.14 1:50 PM Page 1 ’ WNER ANUAL 9MDPF20 OLOR WITH BUILT-IN AGNAVOX REPRESENTATIVES ARE READY TO HELP YOU WITH ANY QUESTIONS ABOUT YOUR NEW PRODUCT ONNECTIONS E WANT YOU TO START ENJOYING YOUR NEW PRODUCT RIGHT AWAY ALL US BEFORE YOU CONSIDER RETURNING THE PRODUCT... -
Page 2: Warranty
Return your Warranty Registration card today to ensure you receive all the benefits you’re entitled to. Once your MAGNAVOX purchase is registered, you’re eligible to receive all the privileges of own- ing a MAGNAVOX product. So complete and return the Warranty Registration Card enclosed with your purchase at once. -
Page 3: Safety And General Information 3
Philips Consumer Electronics P.O. Box 14810 Knoxville, TN 37914-1810 (865) 521-4316 As an E ® Partner, Magnavox has determined that this product meets the E NERGY gy efficiency. E ® is a U.S. registered mark. Using products with the E NERGY Saving energy reduces air pollution and lowers utility bills. -
Page 4: Table Of Contents
TD007.QX33 03.3.14 1:50 PM Page 4 4 Table of Contents General Information Safety and General Information ....3 Table of Contents ......4 Introduction . -
Page 5: Introduction 5
TD007.QX33 03.3.14 1:50 PM Page 5 Welcome to your TV/DVD owner’s manual. This manual describes the 9MDPF20 and explains how to use all its features. Features - TV • Setup menus in English, French, or Spanish • Auto Power Off •... -
Page 6: Playable Discs
TD007.QX33 03.3.14 1:50 PM Page 6 6 Playable Discs Playable Discs The DVD Player of this TV/DVD will play many types of Discs, including Digital Video Discs (DVDs) and Audio Compact Discs (CDs). It will play MP3 and JPEG files as well. To play a DVD, make sure it meets the requirements for Region Codes and Color Systems as described below. -
Page 7: Putting Batteries In The Remote Control
TD007.QX33 03.3.14 3:00 PM Page 7 Putting Batteries in the Remote Control Remove the battery compartment lid on the bottom of the remote control by sliding the lid down and off, following the direction of the arrow on the lid. Place two AA batteries inside the battery compartment with their + and –... -
Page 8: Hooking Up The Tv/Dvd
TD007.QX33 03.3.14 1:50 PM Page 8 8 Hooking Up the TV/DVD Hook up your TV/DVD using one of the connections shown. Hooking Up Your TV/DVD with a Cable TV Signal or Outdoor Antenna Hooking Up Your TV/DVD with a Cable Box/Satellite Receiver To view any channel, set the TV/DVD to the output channel (channel 03 or 04) of the Cable Box/Satellite Receiver. - Page 9 TD007.QX33 03.3.14 1:50 PM Page 9 Hooking Up Your TV/DVD with the supplied Rod Antenna To install the supplied rod antenna, push the stem of the antenna into the antenna hole at the top on the rear of the TV/DVD. Connect the antenna wire to the ANT(enna) Jack on the rear of the TV/DVD as shown.
-
Page 10: Fuse Replacement
TD007.QX33 03.3.17 3:49 PM Page 10 10 Hooking Up the TV/DVD (cont’d) Mobile Connections Usually, the supplied rod antenna provides adequate recep- tion. When you want to watch TV outdoors or in a vehicle, try a mobile antenna (not supplied); or, try an indoor dipole antenna (not supplied) for better reception. -
Page 11: Optional Connections 11
TD007.QX33 03.3.14 1:50 PM Page 11 Analog Stereo Hookups If you want to hear the TV/DVD sound through a stereo instead, make this connection. Complete the antenna/Cable TV signal connections. Details are on pages eight - nine. Connect red and white audio cables to the red and white AUDIO OUT jacks on the back of the TV/DVD and to the AUDIO IN... -
Page 12: First-Time Setup,Watching Tv
TD007.QX33 03.3.14 1:50 PM Page 12 12 First-Time Setup,Watching TV The TV/DVD can memorize available TV channels. If you are using a Cable Box or Satellite Receiver, you do not need to set channels at the TV/DVD. Set the TV/DVD to the output channel of the Cable Box or Satellite Receiver (channel 03 or 04) or AUX. -
Page 13: Playing A Disc 13
TD007.QX33 03.3.14 1:50 PM Page 13 Before you begin, turn on the power of any equipment connected to the TV/DVD. Make sure other equipment is set to the correct channel. Details are on page 11. Press STANDBY-ON to turn on the TV/DVD. Press EJECT A to open the Disc tray. -
Page 14: Remote Control Buttons
TD007.QX33 03.3.14 1:50 PM Page 14 14 Remote Control Buttons PICTURE Button Press to access the picture controls. Details are on page 21. STANDBY-ON Button (POWER) Press to turn on or off the TV/DVD. Number Buttons TV Mode: Press two digits to access a specific channel. - Page 15 TD007.QX33 03.3.14 1:50 PM Page 15 EJECT A Button Press to open or close the Disc tray. ZOOM Button Press to enlarge the picture during DVD playback. Details are on page 31. SKIP H and G Buttons Press to go to other Tracks or Chapters.
-
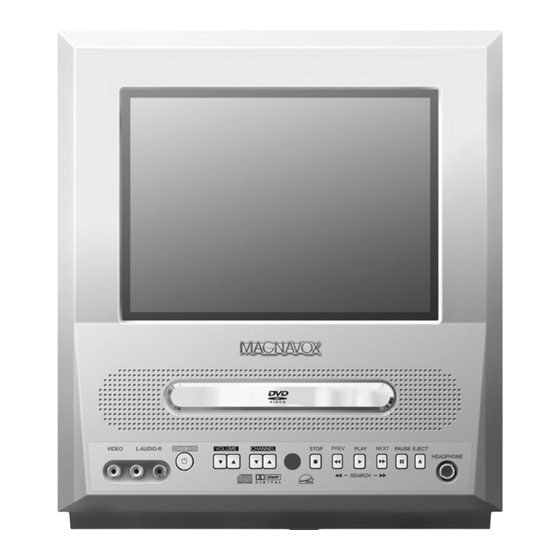
Page 16: Front Panel
TD007.QX33 03.3.14 1:50 PM Page 16 16 Front Panel Disc tray Insert a Disc here. PLAY B Button Press to start Disc playback. Details are on page 13. STOP C Button Press to stop Disc playback. Details are on page 13. CHANNEL K/L Buttons Press to select TV channels. -
Page 17: Rear Panel 17
TD007.QX33 03.3.14 1:50 PM Page 17 Antenna Hole Connect the stem or base of the supplied rod antenna here. Details are on page nine. Power Cord Connect to a standard AC outlet (120V/60Hz). AUDIO OUT L/R jacks (Audio Out, left and right, white and red) Connect these jacks to an analog Stereo. -
Page 18: Menu Language
TD007.QX33 03.3.14 1:50 PM Page 18 18 Menu Language This affects the language of the TV/DVD’s setup menus and on-screen display terms. It does not alter the language of TV programming or Discs. Before you begin, press SELECT to put the TV/DVD in TV mode. -
Page 19: Resetting Tv Channels 19
TD007.QX33 03.3.14 1:50 PM Page 19 The TV/DVD may memorize channels when you turn it on the first time. You may reset channels with these steps. Before you begin, press SELECT to put the TV/DVD in TV mode. Press SETUP. Press L or M to select CHAN- NEL SET UP. -
Page 20: Adding/Deleting Channels
TD007.QX33 03.3.14 1:50 PM Page 20 20 Adding/Deleting Channels You can delete TV channels you no longer receive or seldom watch. Or, you can add more channels if the TV/DVD did not memorize all your favorite channels. Before you begin, press SELECT to put the TV/DVD in TV mode. -
Page 21: Picture Control 21
TD007.QX33 03.3.14 1:50 PM Page 21 The TV/DVD’s picture controls – BRIGHT, SHARPNESS, TINT, COLOR, and CONTRAST – are preset to factory specifications. Although the factory settings are usually the best, you may need to make some adjustments for a natural looking image. -
Page 22: Sleep Timer
TD007.QX33 03.3.14 1:50 PM Page 22 22 Sleep Timer Use the Sleep Timer to program the TV/DVD to shut off in a certain amount of time. Press SLEEP until your desired amount of time appears on the screen with SLEEP. Each press of SLEEP will increase the time by 30 min- utes. -
Page 23: Disc Menus,Title Menus 23
TD007.QX33 03.3.14 1:50 PM Page 23 Disc Menus Some DVDs contain menus that describe the contents of the Disc or allow you to customize Disc playback. For example, the menu may offer choices for subtitle languages, special features, or scene selection. To use the DVD Disc menu and select features, follow these steps. -
Page 24: Fast Forward/Reverse Search
TD007.QX33 03.3.14 1:50 PM Page 24 24 Fast Forward/Reverse Search Before you begin, press SELECT to put the TV/DVD in DVD mode. During play, press g or h on the remote control. During DVD play, pressing g or h will forward or reverse the picture at two, eight, 50, or 100 times the normal playback speed. -
Page 25: Title/Chapter Playback,Time Playback 25
TD007.QX33 03.3.14 1:50 PM Page 25 Title/Chapter Playback,Time Playback 25 Title/Chapter Playback During DVD play, press SEARCH MODE until CH (for Chapter) or TT (for Title) appears on the TV screen. The number of available Titles or Chapters will appear at the right ( /4, for example). Enter the Title or Chapter number using the Number buttons. -
Page 26: Track Playback
TD007.QX33 03.3.14 1:50 PM Page 26 26 Track Playback There are three ways to play an Audio CD at a specific Track. Use the Number buttons, the SEARCH MODE but- ton, or SKIP j and i. Before you begin, press SELECT to put the TV/DVD in DVD mode. -
Page 27: Paused And Step-By-Step Play, Resume On 27
TD007.QX33 03.3.14 1:50 PM Page 27 Paused and Step-by-Step Play, Resume On 27 Paused and Step-by-Step Play During play, press PAUSE F. Play will pause and the sound will be mute. When playing a DVD, press PAUSE F repeat- edly to see the picture advance one frame (or step) at a time. -
Page 28: Repeat Play, A-B Repeat Play
TD007.QX33 03.3.14 1:50 PM Page 28 28 Repeat Play, A-B Repeat Play Repeat Play During DVD or Audio CD play, press REPEAT until the repeat mode you want appears on the On a DVD, select CHAPTER, TITLE, or OFF. On an Audio CD, select TRACK, ALL (all Tracks on the Disc), or OFF. -
Page 29: Marker 29
TD007.QX33 03.3.14 1:50 PM Page 29 Use Markers to remember your favorite places on an Audio CD or DVD. To set the Markers, follow these steps. Before you begin, press SELECT to put the TV/DVD in DVD mode. Play the Disc to within 30 seconds prior to the point at which you want to set the Marker. -
Page 30: Subtitle Language, Camera Angles
TD007.QX33 03.3.14 1:50 PM Page 30 30 Subtitle Language, Camera Angles Subtitle Language The DVD Player allows you to select a language for subtitles during play. You may select only the subtitles that are avail- able on the Disc. During play, press SUBTITLE to select a subti- tle language. -
Page 31: Slow Motion, Zoom 31
TD007.QX33 03.3.14 1:50 PM Page 31 Slow Motion Press PAUSE F during DVD playback. Press D or h. Slow motion play will begin. Press D or h repeatedly during slow motion play to play the DVD forward or backward at 1/16, 1/8, or 1/2 the normal speed. -
Page 32: Parental Password
TD007.QX33 03.3.14 1:50 PM Page 32 32 Parental Password The Parental feature prevents viewing of DVDs that exceed your rating limits. This feature will not limit viewing if the DVD is not rated or coded. Check your DVDs and settings before letting children access the TV/DVD. - Page 33 TD007.QX33 03.3.14 1:50 PM Page 33 Press p to select CHANGE, then press ENTER. PARENTAL PARENTAL LEVEL ALL CHANGE Press the Number buttons to enter a four-digit password. The password numbers will appear on the screen. Write down the password so you will not for- get it.
-
Page 34: Parental Levels
TD007.QX33 03.3.14 1:50 PM Page 34 34 Parental Levels Follow these steps to set the rating level for your DVDs. DVDs whose ratings exceed the level you set will not play. Before you begin, press SELECT to put the TV/DVD in DVD mode. Press SETUP twice while play is stopped. - Page 35 TD007.QX33 03.3.14 1:50 PM Page 35 Press o or p to select a level, then press ENTER. The rating levels continue on two menu screens. Press o or p repeatedly to move to the next or previous screen to find the rating level you want.
-
Page 36: Audio Language, Stereo Sound Mode
TD007.QX33 03.3.14 1:50 PM Page 36 36 Audio Language, Stereo Sound Mode Audio Language You can select a language for DVDs during playback if multi- ple languages are available. During DVD play, press AUDIO repeatedly to choose one of the available languages. The new audio will be heard. -
Page 37: Random Play, Programmed Play 37
TD007.QX33 03.3.14 1:50 PM Page 37 Random Play You may play the Tracks of an Audio CD in Random order instead of the order in which they are recorded (1,2,3...). You can also use this feature for JPEG and MP3 files. Before you begin, press SELECT to put the TV/DVD in DVD mode. -
Page 38: Mp3/Jpeg Playback
TD007.QX33 03.3.14 1:50 PM Page 38 38 MP3/JPEG Playback The DVD Player will play MP3 or JPEG files that you record and finalize on a CD-RW (Compact Disc-Rewritable) or CD-R (Compact Disc-Recordable). These Discs may contain pictures in a JPEG format or audio Tracks in an MP3 format. -
Page 39: Mp3/Jpeg Displays 39
TD007.QX33 03.3.14 1:50 PM Page 39 You can review MP3 and JPEG Track (File) information dur- ing playback. Press DISPLAY until the current Track/File number, total Tracks/Files available, and elapsed playing time of the current Track (MP3 only) appear. 2 / 25 0:01:15 The following may appear to indicate Repeat play. -
Page 40: Audio Settings
TD007.QX33 03.3.14 1:50 PM Page 40 40 Audio Settings Change Audio settings based on other equipment you con- nected to the TV/DVD or according to your Disc sound fea- tures. Before you begin, press SELECT to put the TV/DVD in DVD mode. While play is stopped, press SETUP twice. -
Page 41: Dvd Display
TD007.QX33 03.3.14 1:50 PM Page 41 DVD Display Press DISPLAY repeatedly to see the following displays during DVD playback. CH 7/49 0:01:46 - 0:03:27 CH (Chapter): Current Chapter number / total Chapters TT (Title): Current Title number / Total Titles Press DISPLAY repeatedly or press RETURN to remove the display. -
Page 42: Language Settings
TD007.QX33 03.3.14 1:50 PM Page 42 42 Language Settings You can use the LANGUAGE settings to select different lan- guages for the Audio or Subtitles of DVDs, as well as lan- guages for DVD Disc menus. Before you begin, press SELECT to put the TV/DVD in DVD mode. -
Page 43: Helpful Hints
TD007.QX33 03.3.14 1:50 PM Page 43 Press o o or p p to select AUDIO, SUBTITLE, or DISC MENU. Then, press ENTER. The language options for the selected item will appear. AUDIO: The DVD’s audio plays LANGUAGE in the selected language. AUDIO ORIGINAL ENGLISH... -
Page 44: Language Settings
TD007.QX33 03.3.14 1:50 PM Page 44 44 Language Settings (cont’d) Language Codes English Abkhazian 4748 Esperanto Afar 4747 Estonian Afrikaans 4752 Albanian 6563 Faroese Amharic 4759 Fiji Arabic 4764 Finnish Armenian 5471 French Assamese 4765 Frisian Aymara 4771 Gaelic (Scots) 5350 Azerbaijani 4772 Galician... -
Page 45: Black Level,Virtual Surround 45
TD007.QX33 03.3.14 1:50 PM Page 45 Black Level Adjust Black Level to brighten the DVD picture during play- back. During DVD play, press MODE so the Black Level icon shows in the top left corner of the TV screen. Within 10 seconds, press ENTER repeatedly to choose ON or OFF. -
Page 46: Display Settings
TD007.QX33 03.3.14 1:50 PM Page 46 46 Display Settings You can adjust TV Mode, Angle Icon, and Automatic Power Off in the Display menu. When play is stopped, press SETUP twice. The QUICK SETUP screen will appear. QUICK SETUP TV MODE 4:3 LETTER BOX DOLBY DIGITAL Press B to select CUSTOM at the top of the... - Page 47 TD007.QX33 03.3.14 1:50 PM Page 47 Press o or p to select an item, then press ENTER. If you selected TV MODE, press o or p to select a setting, then press ENTER. Choose 4:3 LETTER BOX if you want to see the entire, widened picture with black bars at the top and bottom of the screen.
-
Page 48: Helpful Hints
TD007.QX33 03.3.14 1:50 PM Page 48 48 Helpful Hints If you are having problems with your product, check this list of problems and possible solutions before requesting service. You may be able to solve the problem yourself. Location For safe operation and satisfactory performance of your TV/DVD, remember the following: •... -
Page 49: Glossary / Specifications 49
TD007.QX33 03.3.14 1:50 PM Page 49 Glossary AUDIO In/Out Jacks: jacks that send (OUT) or receive (IN) sound to or from other equipment that is connected to the TV/DVD. Automatic Channel Setup: process in which the TV/DVD memorizes all available TV channels. -
Page 50: Limited Warranty
TO GET WARRANTY SERVICE IN U.S.A., PUERTO RICO, OR U.S. VIRGIN ISLANDS... Take the product to a Magnavox factory service cen- ter (see enclosed list) or authorized service center for repair. When the product has been repaired, you must pick up the unit at the center. - Page 51 TD007.QX33 03.3.14 1:50 PM Page 51...
-
Page 52: Index
TD007.QX33 03.3.14 1:50 PM Page 52 52 Index a-b repeat ....28 angle button ....15, 30 ant(enna) jack .
Need help?
Do you have a question about the 9MDPF20 and is the answer not in the manual?
Questions and answers