Table of Contents
Advertisement
Quick Links
ASSEMBLY & OPERATING INSTRUCTIONS
Model: 720-0536
FOR OUTDOOR USE ONLY
FOR PROPANE GAS USE ONLY
This instructions manual contains important information necessary for the proper assembly and safe use of the appliance.
Read and follow all warnings and instructions before assembling and using the appliance
1 1
Follow all warnings and instructions when using the appliance
Keep this manual for future reference
Advertisement
Table of Contents

Related Manuals for Nexgrill 720-0536


Summary of Contents for Nexgrill 720-0536
- Page 1 ASSEMBLY & OPERATING INSTRUCTIONS Model: 720-0536 FOR OUTDOOR USE ONLY FOR PROPANE GAS USE ONLY This instructions manual contains important information necessary for the proper assembly and safe use of the appliance. Read and follow all warnings and instructions before assembling and using the appliance...
-
Page 2: Table Of Contents
Table of Contents Safety Instruction ..... Gas Conversion ..... . 29-32 Assembly Instruction . -
Page 3: Safety Instruction
Safety Instruction WARNING ELECTRICAL GROUNDING INSTRUCTIONS This appliance (rotisserie motor) is equipped with a plug and should be plugged directly into a properly grounded receptacle. When installed, must be electrically grounded in accordance with local codes or in the absence of local codes, with the National Electrical Code, ANSI/NFPA 70 or the Canadian Electrical Code, CSA C22.1 DO NOT cut or remove the grounding prong from this plug. - Page 4 Safety Instruction WARNING CAUTION: Beware of Flashback Do not try lighting this appliance without reading the CAUTION: Spiders and small insects occasionally “LIGHTING INSTRUCTIONS” section of this manual. spin webs or make nest in the grill burner tubes during transit and warehousing.
- Page 5 Safety Instruction LP-Gas Supply System PROPER PLACEMENT AND CLEARANCE OF §A 20lb tank of approximately 1/4 inches in diameter by 18-1/4 GRILL inches high is the maximum size LP gas tank to use. §This safety feature prevents the tank from being overfilled, which •Never use your gas grill in a garage, porch, shed, can cause malfunction of the LP gas tank, regulator and/or grill.
- Page 6 Safety Instruction SAFETY PRACTICES TO AVOID PERSONAL WARNING INJURY Your grill will get very hot. Never lean over the cooking area while using your grill. Do not touch When properly cared for, your grill will provide safe, cooking surfaces, grill housing, lid or any other grill reliable service for many years.
- Page 7 Safety Instruction Do not heat unopened food containers. A build-up of Do not use the grill to cook excessively fatty meats or pressure may cause the containers to burst. other products which promote flare – ups. Use a covered hand when opening the grill lid. Do not operate the grill under unprotected combustible constructions.
-
Page 8: Assembly Instruction
Assembly Instruction PLEASE READ THESE INSTRUCTIONS CAREFULLY AND FOLLOW STEP BY STEP ► Propane Tank sold separately ► Tools required, Phillips head screwdriver and 10 wrench. (not included) ► All screws packed in the hardware pack, totally 20 screws in it. STEP 1: Remove screws from hardware packet, attach the side shelf to the side shelf control panel with 4 screws for each side as shown below. - Page 9 Assembly Instruction Continued STEP 2: Remove screws from hardware packet, attach the side shelf push bar to the right side shelf from inside to outside as shown below. There are 2 screws for push bar.
- Page 10 Assembly Instruction Continued STEP 3. Assemble the side shelf and side control panel into the firebox with eight screws as shown below. Attention: the upper 2 screws to the firebox should be screwed from inside to outside for right side shelf , but the other screws should be firmed from outside into inside.
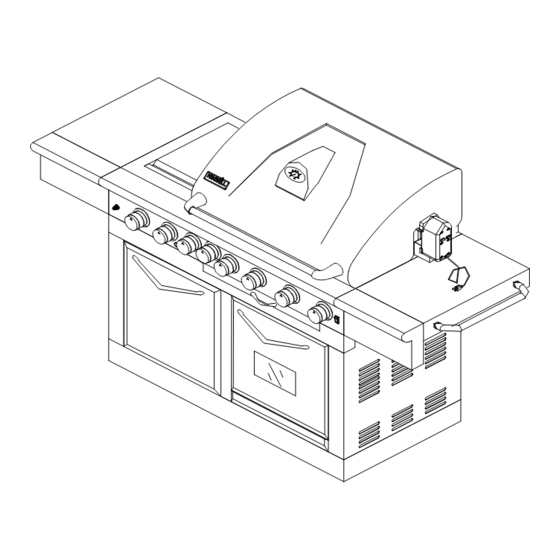
- Page 11 Assembly Instruction Continued STEP 4: Battery is inserted for the Rotisserie burner and searing burner. To install the battery, turn the ignition button cap counterclockwise and remove it. Replace the ignition button cap after the battery is installed. Instruct to remove batteries if consumed or if product is to be left unused for a long time.
- Page 12 Assembly Instruction Continued STEP 5: Attach propane gas tank to regulator inlet fitting by turning the regulator clockwise as shown in figure below. LP gas cylinder must be fitted with a listed overfill prevention device (OPD). Open the door and pull out the tray, place the gas tank cylinder in the tank tray , then use retention kit that showed as below diagram to secure the tank cylinder .
-
Page 13: Assembly Instruction
Assembly Instruction Continued STEP 6: The screws for rotisserie drive motor bracket are screwed into the right side of the grill housing. Remove the screws and install the rotisserie motor bracket as shown in the figure below. Assemble the rotisserie skewer as shown in the figure below. -
Page 14: To Match Light The Grill
To Match Light the Grill If the burner will not light after several attempts then the burner can be match lit. If you have attempted to light the main burners with the igniter, allow 5 minutes for any accumulated gas to dissipate. Insert a match into the lighting rod. -
Page 15: L.p. Gas Hook-Up
Gas Hook - Up NEVER CONNECT AN UNREGULATED GAS QCC1 in the standard for compressed gas SUPPLY LINE TO THE APPLIANCE. USE cylinder valve outlet and inlet connection THE REGULATOR/HOSE ASSEMBLY ANSI/CGA-V-1. SUPPLIED. Manifold pressure: 11”(27.94cm) water This is a liquid propane configured grill. Do not column (W.C.). -
Page 16: Installer Final Check List
Gas Hook - Up 5. When connecting regulator assembly to the 7. If you have a gas connection leak you valve, hand tighten the quick coupling nut cannot repair, turn gas OFF at supply tank, clockwise to a complete stop. Do not use a disconnect fuel line from your grill and call wrench to tighten. -
Page 17: Leak Testing
Leak Testing GENERAL Only those parts recommended by the manufacturer should be used on the grill. Although all gas connections on the grill are leak tested at the factory prior to shipment, a complete Substitution will void the warranty. Do not use gas tightness check must be performed at the the grill until all connections have been checked installation site due to possible mishandling in... - Page 18 CAUTIONS Place dust cap on cylinder valve outlet when the cylinder is not in use. Only install the type of dust cap on the cylinder valve outlet that is provided with the cylinder valve. Other types of caps or plugs may result in leakage of propane. The gas must be turned off at the supply cylinder when the unit is not in use.
-
Page 19: Operating Instruction
Operating Instructions GENERAL USE OF THE GRILL AND WARNING: IMPORTANT! ROTISSERIE USING THE SIDE BURNER: Each main burner is rated at 10,000 Btu/hr. Inspect the gas supply hose prior to turning The main grill burners encompass the entire the gas “ON”. If there is evidence of cuts, cooking area and are side ported to wear or abrasion, it must be replaced prior minimize blockage from falling grease and... - Page 20 Operating Instructions Continued USING THE OVEN OVEN VENT: Do not block the ducts at the rear of the range when cooking in the oven. It is important that the flow of hot air from the oven and fresh air into the oven burner never be interrupted. Avoid touching the vent openings or nearby surfaces during oven or broiler operation –...
-
Page 21: Grill Lighting Instruction
Operating Instructions Continued CAUTION: PLEASE TAKE OFF THE WARMING RACK WHEN USING THE ROTISSERIE BURNER. THE HIGH HEAT COMING FROM THE ROTISSERIE BURNER MAY CAUSE THE WARMING RACK TO BEND. Grill Lighting Instructions WARNING: IMPORTANT! Never substitute regulators and hose assembly for those supplied with the grill. - Page 22 Grill Lighting Instructions continued TO LIGHT THE GRILL BURNER: If you’ve just attempted to light the burner with the igniter, allow 5 minutes for any Make sure all knobs are “OFF” then turn on accumulated gas to dissipate. Keep your face the gas supply from the LP tank.
- Page 23 Grill Lighting Instructions continued FLAME CHARACTERISTICS Check for proper burner flame characteristics. Each burner is adjusted prior to shipment; however, variations in the Burner flames should be blue and stable with local gas supply may take minor no yellow tips, excessive noise, or lifting. If adjustments necessary.
-
Page 24: Motor Instruction
Motor Instruction • TO USE MOTOR SAFELY, PLEASE READ WARNING PRIOR TO USE ROTISSERIE DRIVE MOTOR USE ONLY FOR OUTDOORS. DO NOT EXPOSE TO RAIN. CAUTION: TO ENSURE CONTINUED PROTECTION AGAINST RISK OF ELECTRIC SHOCK, CONNECT TO PROPERLY GROUNDED OUTLETS ONLY, TO REDUCE THE RISK OF ELECTRIC SHOCK, KEEP EXTENSION CORD CONNECTION DRY AND OFF THE GROUND. -
Page 25: Lighting Illustration
Lighting Illustration Main & Side Burner Lighting Illustration Rotisserie Burner or Searing Burner Lighting Illustration Step 1. Step to light the Rotisserie Burner : Make sure the Lid is open push electronic ignition button then push and turn the rotisserie knob to “ON”... -
Page 26: Converting To Natural Gas
This grill is certified for use with either Liquid Propane (LP Gas) or Natural Gas and comes complete with the necessary parts to convert it for use with Natural Gas. The Nexgrill patented Conversion Valves allows the use of Natural Gas without replacing the burners or entire valve system. - Page 27 Instruction for Converting to Natural Gas Continued TOOLS NEEDED: A- 6mm & 7mm LONG SOCKET & DRIVER B-PHILLIPS C-FLAT-HEAD SCREWDRIVER D-ADJUSTABLE WRENCH E-10mm OPEN END WRENCH F-VICE GRIPS Step 1: Replace Main Burner Orifice a. Remove cooking-grids & flame tamers b.
-
Page 28: Instruction For Converting To Natural Gas
Step 1. Remove the side burner lid, and side burner base Use a screwdriver to disassemble the two screws on either side. Remove the screws on the base, all together 4 screws, 2 on each side Step 2. remove the LP orifice and reattach the NG orifice Turn back and keep the side burner base as figure Use the wrench that attached in the hardware package, the small 6.1mm wrench hold to the orifice and the bigger 18mm wrench used to hold the orifice connector, remove the LP... -
Page 29: Gas Conversion
Gas Conversion Step 3: Replace Rear Burner Orifice a. Remove rear baffle from bowl Assembly b. Grasp brass elbow with vice grip c. With 10 mm wrench remove LP orifices and replace with NG orifice(1.78mm) d. Replace rear baffle... - Page 30 Gas Conversion continued Step 4: Replace Searing Burner Orifice a. Remove the COTTER-PIN 2 screws on Searing burner and remove the burner b. Remove the 2 screws on the fire baffle in the front of Searing burner and remove the fire baffle panel.
- Page 31 Gas Conversion continued Step 4: Replace Oven Burner Orifice a. Remove Back Access Panel from the rear panel (Fig 1) b. Grasp brass elbow with vice grip or pliers (Fig 2) c. With 10 mm wrench, remove LP orifice and replace with NG orifice(1.98mm) (Fig 3 & 4) d.
- Page 32 Gas Conversion Continued Step 5: Remove Regulator a. Use adjustable wrench to remove existing LP Gas regulator and Hose assembly. b. If you are replacing an existing Natural Gas Grill, the supply hose that supplied Natural Gas to the old Grill will work with your new Grill. c.
-
Page 33: Care And Maintenance
Care and Maintenance MAIN GRILL BURNER CLEANING STAINLESS STEEL Ensure the gas supply is off and the knobs are The grill is made from non-rusting and 430 in the “OFF” position. Make sure the grill is cool. stainless steel. There are many different Clean the exterior of the burner with a wire stainless steel cleaners available. - Page 34 Care and Maintenance Continued STAINLESS STEEL : HOW TO REPLACE MAIN BURNER Step 1. Insert the burner onto the orifice. There are many different stainless steel cleaners available. Always use the mildest cleaning procedure first, scrubbing in the direction of the grain. Do not use steel wool as it will scratch the surface.
-
Page 35: Oven Maintenance And Cleaning
Oven Maintenance and Cleaning CLEANING INSIDE THE OVEN: Bottom of the oven is partially covered by the Oven Bottom Cover and flame tamer. This cover may be removed for cleaning by lifting it up and out of the oven. The interior parts of the oven are porcelain coated. They are all easily cleaned. Care should taken so as not to drip water into the small holes (ports) on the burner. -
Page 36: Remove The Oven Door
Remove the oven door The oven door can be removed for cleaning. Please see the following illustrations. Oven Door Disassembling as shown in the figure: 2.Keeping the door at 30-45 degrees angle, lift 1,Open the oven door entirely, lock the iron piece to the door, pull it up &... -
Page 37: Trouble Shooting
Trouble Shooting SPIDER AND INSECT WARNING!!! WHEN TO LOOK FOR SPIDERS You should inspect the burners at least once a year or immediately after any of the Checking and cleaning burner/ venturi tubes following conditions occur: for insects and insect nests. A clogged tube can lead to a fire beneath the grill. - Page 38 Trouble Shooting continued PREHEATING: The grill lid should be in a closed position during the preheat time period. It is necessary to preheat the grill for a short time before cooking certain foods, depending on the type of food and the cooking temperature. Food that requires a high cooking temperature needs a pre-heat period of five minutes;...
- Page 39 Trouble Shooting continued PROBLEM SOLUTION • Make sure you have a spark while you are trying to light When attempting to light my grill, it will not light immediately. the burner (if no spark) • Ensure that the wire is connected to the electrode assembly.
- Page 40 Trouble Shooting continued • Ensure the motor is connected to a properly grounded Rotisserie motor will not turn power supply. • Ensure the on / off switch is in the on position. • Ensure that the spit is fully inserted into the rotisserie motor •...
-
Page 41: Exploded View
LP Explode View... -
Page 42: Part List
Part List PART (DESCRIPTION) PART (DESCRIPTION) Main Lid Control knob Main lid screw cover Main manifold Main lid screw Main Gas Valve Temperature gauge housing Grease Tray handle Heat indicator Grease Tray Logo side panel, left Main Lid Handle Heat Insulating Spacer Cart Frame, Front Main Lid Handle seat, left... - Page 43 Part List Continued PART (DESCRIPTION) PART (DESCRIPTION) back access panel Oven Plate, Rear Oven Lamp Rubber Grommet Oven Flue back panel Oven Grill Inside Liner Rotisserie motor bracket Front Door, left Rotisserie motor Door magnet Spit Fork Lighting Rod Cover Spit Rod U-shape Burner Orifice Shaft Collar...
-
Page 44: Electrical Wiring Diagram
Electrical Wiring Diagram LIGHT SWITCH WARNING! ELECTRICAL GROUNDING INSTRUCTIONS: this outdoor cooking gas appliance is equipped with a three-prong (grounding) plug for your protection against shock hazard and should be plugged directly into a properly grounded three- pronged receptacle. DO NOT cut or remove the grounding prong from the plug. Caution: Label all wires prior to disconnection when servicing controls. -
Page 45: Ordering Parts & Grill Hints
Different orifices must be installed when If dealer service is not available, contact: converting from one type of gas to another. Nexgrill Industries, Inc. customer service You will also need a data plate indicating what type of gas is used by the grill. -
Page 46: Grill Cooking Chart
Grill Cooking Chart WEIGHT OR APPROXIMATE SPECIAL INSTRUCTIONS AND FOOD THICKNESS HEAT SETTING TIME TIPS VEGETABLES Slice.Dot with butter or margarine Wrap in heavy-duty foil.Grill,turning occasionally Fresh Beets 12 to 20 minutes Carrots Grill,turning once.Brush Occasionally Turnips With melted butter or margarine Onion 1/2 inch slices 8 to 20 minutes... - Page 47 Grill Cooking Chart continues WEIGHT OR APPROXIMATE SPECIAL INSTRUCTIONS HEAT FOOD THICKNESS FLAME SIZE SETTING TIME AND TIPS Tenderloin, Porterhouse, Remove excess fat from edge. Slash T-Bone, Sirloin remaining fat at 2-inch intervals. Rare 1 inch High 8 to 14 minutes Grill, turning once.
- Page 48 Grill Cooking Chart continues WEIGHT OR APPROXIMATE HEAT SPECIAL INSTRUCTIONS FOOD THICKNESS SETTING TIME AND TIPS FISH AND SEAFOOD Grill,turning once.Brush with melted butter,margarine or oil To keep moist. Steaks Halibut 3/4 to 1 inch Medium to 8 to 15 minutes Salmon High Swordfish...
-
Page 49: Grill Recipe Suggestion
Grill Recipe Suggestions continued BBQ SALMON TANGY SEAFOOD KABOBS BBQ the chops brushing with the marinade occasionally. Serve with 1 lb. Large shrimp, shelled & 2 large salmon steaks deveined mixed salad, dressed with 2 tbs. Oil ¾ lbs. sea scallops vinaigrette flavored with fresh dill. - Page 50 Grill Recipe Suggestions continued Pound flank steak to ¼ inch Preheat grill. Combine cheese, In blender, process 1/3 c. water, condensed soup, milk, BBQ sauce, thickness or flatten chicken breasts. onion, soy sauce, 2 tsp. oil and the oregano, salt and pepper in a large Mix oil, lime juice and seasonings next 8 ingredients until smooth.
- Page 51 Grill Recipe Suggestions continues CHICKEN TANDOORI STYLE Marinade ribs for 3 hours. Use TURKEY marinade for basting by adding 8 large chicken thighs or 12 lb. turkey drumsticks beer to it. Place pan under the ribs Beer basting sauce: and baste frequently. To cook ribs 1 c.
-
Page 52: Limited Warranty
The warranty period is not extended by such repair or replacement. Nexgrill Industries, Inc. shall not be liable for any incidental or consequential damages for breach of any express or implied warranty on its products. Except to the extent prohibited by applicable law, any implied warranty of merchantability or fitness for a particular purpose on this product is limited to the duration of the above warranty.
Need help?
Do you have a question about the 720-0536 and is the answer not in the manual?
Questions and answers