
Summary of Contents for JLab SUPRA FIT Eclipse
- Page 1 Need Help? Visit us at: eclipsemp3.com/ mp3support/ SUPRA FIT VIDEO PLAYER USER MANUAL...
-
Page 2: Table Of Contents
CONTENTS FOREWORD SAFETY & USAGE FEATURES APPEARANCE BASIC OPERATION CONNECTING TO PC MAIN MENU MUSIC VIDEO PICTURES eBOOK PHOTO CAMERA VIDEO CAMERA PC CAMERA CALENDAR CALCULATOR RECORDER APPLICATION SETTINGS VIDEO CONVERSION CONTACT US FCC INFORMATION LIMITED MANUFACTURER’S WARRANTY... -
Page 3: Foreword
FOREWORD If any problems occur during while using your Eclipse by JLab product, please feel free to contact JLab Audio technical support at 1-866-358-6640, or send an email to SERVICE@JLABAUDIO.COM. Thank you for your support... - Page 4 NOTES 1. The playback times listed refer to the maximum playback times possible, using the best power savings. The actual playback time may differ as adjustments to screen brightness, power savings modes, volume, etc. are made. 2. There are many brands of microSD cards on the market using different quality and speed standards.
-
Page 5: Safety & Usage
SAFETY & USAGE • Do not use the player in exceptionally cold or hot, dusty, damp or dry environments. • Do not drop, strike, or throw your player. Physical damage to your player will void ALL warranties. • Please charge your battery when: >... -
Page 6: Features
FEATURES • Touch screen operating system for ease of use • 240x320, 26K color high speed TFT screen • Built-in 1.3MP digital camera • Music player: compatible with MP3 and WAV formats • Picture browser: compatible with JPEG, BMP, GIF, PNG and TIF formats •... -
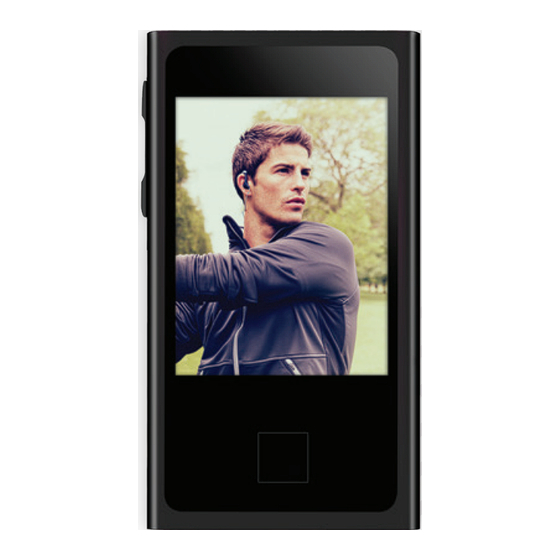
Page 7: Appearance
APPEARANCE... -
Page 8: Basic Operation
BASIC OPERATION Power On/Off To power the player on/off, press and hold the Power button until the device powers on or off. Volume Adjustment In Music or FM Radio mode, touch the dot above and if using your finger, keep touching to the right of the dot to increase volume. - Page 9 Inserting & Removing the microSD Card Inserting Ensure that the player is powered off, and disconnected from the computer. Hold the microSD card face up (side with words aligned in the opposite direction of the display screen), and slide the card into the socket on the player, slightly past flush. When you hear the card click into place, you can access it.
-
Page 10: Connecting To Pc
CONNECTING TO PC Loading Files: Copy & Paste Note: This alternate method is used to load videos, pictures, and eBook files as well as audio files. 1. Connect the MP3 player to a working USB port. 2. When the unit is connected to your computer, it will create a gray and green icon in the system tray (lower right hand corner of your desktop) called Safely Remove Hardware. - Page 11 5. Open the drive by either double left clicking on the drive itself, or by right clicking to open the option menu then left clicking on the desired drive. 6. Locate the music stored on your computer. Generally this is stored in the My Music folder of your computer.
- Page 12 7. Once you have located the song files, you can right click on the song itself, and select Copy. Open the removable disk drive, right click on in the empty space, and select Paste. This will transfer the song on to your player. 8.
-
Page 13: Main Menu
MAIN MENU This player provides a touch screen Operating System for direct operation. The main menu interface is shown in the picture below: 1. The battery is shown on the upper right corner of the main menu interface 2. Under the main menu interface, choose and touch an icon on the screen, and the player will enter the selected mode. -
Page 14: Music
MUSIC Plug the earphones into headphone jack. In the main interface, touch the Music icon to enter Music mode. Compatible with MP3 and WAV formats. Main Interface Music Setting Interface Touch one of the 4 buttons at the bottom of the interface to enable an appropriate function. -
Page 15: Icon Description
Icon Description Display mode. Playing mode. Playing rating mode. Playing EQ style. Song playing progress bar: Drag the bar to adjust playing progress. Volume bar: Drag the bar to adjust volume. Previous: Skip to previous song or long touch for fast rewind. Play: Touch the play icon, and it will change to the pause icon. -
Page 16: Video
VIDEO Video mode will allow you to watch your movie and video files loaded on the player. Compatible with AVI (XVID), WMV (non encrypted), and FLV formats. Note: If you are having a hard time viewing your video files, please convert them using the AVI conversion tool included with the player. - Page 17 Icon Description Play: Touch and it will change to pause button, and touch again to continue playing. Volume: Touch it and the Volume bar will pop out at the bottom. Drag the bar to adjust volume. Previous: Touch and it will change to the previ- ous video.
-
Page 18: Pictures
PICTURES Photo mode will allow you to view your image files, whether they are photos, computer generated images, album art, etc. Compatible with JPEG, BMP, GIF, PNG, and TIFF. Note: We recommend converting your files to 320x240 or 240x320 dimensions before loading them to the player for optimum quality. -
Page 19: Browse Pictures
Browse Pictures 1. Touch 2. Touch the thumbnail twice to browse pictures. Touch the picture, and the icons will appear automatically at the bottom of the screen. Delete Picture If you want to delete the photo, touch the Delete option. A box will open. - Page 20 Icon Description Settings: Set Up Rotate, Zoom, Slide Interval, Set as Desktop, and Delete. Previous: Previous picture. Next: Next picture. Return to the previous interface. Return to the main menu.
-
Page 21: Ebook
eBOOK This player will display only eBook and text files which are in TXT format. You can create these files using your Windows Notepad or WordPad programs. Main Interface View Text File Select a TXT file to enter eBook browser interface. - Page 22 Delete Text File If you want to delete the TXT file, touch the Delete option. A box will open. Click on the word Yes and the file will be removed from your device. Icon Description Settings: Skip to, Auto Reading Speed, Add Tag, Font Size, Font Color, and Delete File.
-
Page 23: Photo Camera
PHOTO CAMERA The player comes with a 1.3MP digital camera built in which will allow you to snap pictures, record video and even act as a webcam! Camera Interface Icon Description Space: Shows the remaining number of pictures you can take in your current settings, until the memory is full. - Page 24 Resolution: Allows you to adjust the resolution of pictures you take. Options are 1280x960, 1024x768, 640x480, 320x240. Default is 1280x960. Snap: Briefly touch the Camera icon to take pictures. Return to the previous interface.
-
Page 25: Video Camera
VIDEO CAMERA Video Interface Icon Description Lighting: Allows you to adjust for lighting. Choose from Auto, Daylight, Cloudy or Inside. Swap: Swap between Video Recorder and Camera mode. Video Mode: Takes you to Video mode, and allows you to browse videos you have taken. Resolution: Allows you to change the size of video files you record. -
Page 26: Pc Camera
Record: Touch the Video Record icon to start recording. Return to the previous interface. PC CAMERA When the player is powered on, select PC camera, and connects the device to your computer’s USB port. Your computer will run a setup and install the device as a PC camera, which will allow you to use the device as a webcam. -
Page 27: Recorder
RECORDER Icon Description Stop: Touch it and it will change to play icon to enter Recording mode. Settings: Record Format, Record Quality, Record Gain, Record Mode, and Save Path. Return to the previous interface. Return to the main menu. -
Page 28: Application
APPLICATION The Applications item on the main menu allows you to access one of several extra applications on the player. Please note that applications may be added or removed as firmware changes on the player, so not all items shown in this section may be available for use, or some applications not described in this manual may be available on your player. -
Page 29: Settings
SETTINGS Player Information Touch the Player icon for relevant product information. Set Time This will allow you to adjust the date and time, which is displayed on most screens of the player. Setting the 24 hour time to on or off will change the way time is displayed, for example, 3PM will display as 15:00 if set to on, and 3:00 if set to off. - Page 30 Note: Brightness setting 1 will make your screen exceedingly hard to view, and may make readjusting your settings neccessary! Please exercise extreme caution when adjusting your brightness. Calibrate This setting will allow you to calibrate the screen of your player to increase the accuracy of the touch screen.
-
Page 31: Power Off
Power Off This option allows you to set a timer to automatically power the player off. This setting is great if you plan on dozing off to some music, but don’t want to drain the battery of your device. Tap the icons to adjust this item. -
Page 32: Video Conversion
VIDEO CONVERSION If your video files will not play on your Eclipse by JLab player, you can convert them using the conversion tool which is included with the device. To do so, you will need to first install the software. - Page 33 Once the conversion tool is open, the first step in actually converting and loading the file is to select the file you wish to convert. Locate the Input File line towards the top of the window, and select the Add file button and use the file selection window to select the file you want to convert and load.
-
Page 34: Contact Us
If you receive an error when attempting to convert a video file, then you likely lack the proper video codecs on your computer. There are several large codec packs which will contain the majority of the common video codecs, such as the K-Lite Mega codec pack, and the Storm codec pack. -
Page 35: Limited Manufacturer'swarranty
• Consult the dealer or an experienced radio/TV technician for help. LIMITED MANUFACTURER’S WARRANTY Eclipse by JLab products carry a one year from date of purchase warranty. This warranty is nontransferable. JLab Audio warrants to the original registered end-user purchaser that Eclipse by JLab products will be free from defects in materials and workmanship for one year from the date of new purchase. - Page 36 1. Customers will be charged additional for testing and repackaging when returned “bad” items are found to have no problems or defects. 2. Items found to be out-of-warranty or not belonging to JLab Audio will not be replaced. Instead, they will be returned back to the customer freight-collect.
- Page 37 3. Customer is responsible for paying any freight charge caused by refused shipment or unclaimed goods. 4. JLab Audio will make every reasonable effort to deliver on time however; JLab Audio will not be liable for late or lost shipments.
- Page 38 Consequential Damages & Limitations 1. JLab Audio shall not be liable for any failure to perform or delay in performing any of its obligations when such failure or delay is due to circumstances beyond its reasonable control, including, without limitation, any act of God, war, strike,...
Need help?
Do you have a question about the SUPRA FIT Eclipse and is the answer not in the manual?
Questions and answers