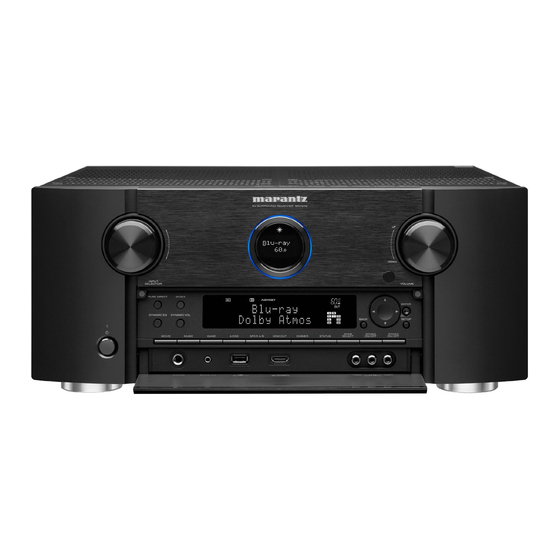
Marantz SR7010 Quick Start Manual
Av surround receiver
Hide thumbs
Also See for SR7010:
- Owner's manual (377 pages) ,
- Service manual (237 pages) ,
- User manual (32 pages)
Table of Contents
Advertisement
Quick Links
Quick Start Guide
Kurzanleitung / Guide de démarrage rapide / Guida di Avvio Rapido /
Guía de inicio rápido / Snelhandleiding / Snabbstartsguide /
Краткое руководство пользователя / Skrócona instrukcja obsługi
Read Me First....
Bitte zuerst lesen... / Lisez-moi en premier.... / Nota preliminare.... /
Lea esto primero.... / Lees mij eerst... / Läs detta först... /
Прочитайте в первую очередь... / Przeczytaj to najpierw....
AV Surround Receiver
SR7010
ENGLISH
DEUTSCH
FRANÇAIS
ITALIANO
ESPAÑOL
NEDERLANDS
SVENSKA
РУССКИЙ
POLSKI
Advertisement
Table of Contents

Summary of Contents for Marantz SR7010
-
Page 1: Quick Start Guide
ENGLISH DEUTSCH FRANÇAIS AV Surround Receiver SR7010 ITALIANO ESPAÑOL NEDERLANDS Quick Start Guide SVENSKA Kurzanleitung / Guide de démarrage rapide / Guida di Avvio Rapido / Guía de inicio rápido / Snelhandleiding / Snabbstartsguide / Краткое руководство пользователя / Skrócona instrukcja obsługi РУССКИЙ... -
Page 2: Before You Begin
Welcome Before You Begin Required for Setup Thank you for choosing a Marantz AV receiver. This guide provides step-by- step instructions for setting up your AV receiver. Speaker cables Please do not return this unit to the store – call for assistance. -
Page 3: What's In The Box
What’s In the Box Quick Start Guide FM indoor antenna Owner’s Manual AM loop antenna Safety Instructions Sound calibration microphone Notes on radio Sound calibration microphone stand Cable labels Remote control unit Receiver R03/AAA batteries Power cord External antennas for Bluetooth/ wireless connectivity The supplied Sound calibration microphone stand is convenient for use when performing Speaker Calibration. - Page 4 For each of the two antennas: Bluetooth or Wi-Fi features of the SR7010. q Place the antenna evenly over the antenna terminal located at the upper left or right corner of the rear panel.
-
Page 5: Installing Batteries In The Remote Control Unit
Setup Installing batteries in the remote control unit There are three steps to the setup process. Installing batteries in the remote control unit Connecting the receiver Following the On-Screen Setup Assistant R03/AAA batteries... -
Page 6: Connecting The Receiver
Connecting the receiver 2.1) Place the receiver near your TV and connect the power cord. Receiver Power cord (supplied) Connect to household power outlet (AC 230 V, 50/60 Hz) -
Page 7: Connect To The Network
2.2) Connect to the network. Wired LAN Wireless LAN When connecting cables (wired connection), connect a LAN When connecting to wireless LAN (Wi-Fi), follow the cable between your receiver and your network router. instructions in “Connecting the external antennas for Bluetooth/Wireless connectivity”... -
Page 8: Turn On The Tv
2.3) Connect the receiver to your TV 2.4) Turn on the TV. with an HDMI cable. HDMI IN (ARC) HDMI cable TV remote control unit 2.5) Select the appropriate HDMI input HDMI OUT N I T MONITOR1 on your TV. (ARC) HDMI INPUT... -
Page 9: Verify The Connection
2.6) Turn on the receiver. 2.7) Verify the connection. • Press X to turn on the receiver. • Verify that you can see this screen on your TV. AV Reciever Setup Assistant Pleas e s elect a la nguage. .. English Deutsch Français... -
Page 10: Following The On-Screen Setup Assistant
Following the On-Screen Setup Assistant The Setup Assistant will walk you through connecting and configuring your speakers and components to your Marantz AV Reciever Setup Assistant receiver. Please use the remote control and follow the Pl e a s e s el e ct a l a ng uage. . . -
Page 11: Online Version
Online Version n Printable Version Enter the following URL into your web browser: Access the print version of the owner’s manual from the manuals.marantz.com/SR7010/EU/EN/ included CD-ROM or select the “PDF Download” link from the Online Version. Insert the disc into your PC. - Page 12 Printed in China 5410 11321 01AM Copyright © 2015 D&M Holdings Inc. All Rights Reserved.


Need help?
Do you have a question about the SR7010 and is the answer not in the manual?
Questions and answers