Table of Contents
Advertisement
Advertisement
Table of Contents

Related Manuals for Pfaff select 2.0


Summary of Contents for Pfaff select 2.0
- Page 1 Simply select & sew! O w n e r ´ s m a n u a l...
-
Page 2: Important Safety Instructions
This household sewing machine is designed to comply with IEC/EN 60335-2-28 and UL1594. IMPORTANT SAFETY INSTRUCTIONS When using an electrical appliance, basic safety precautions should always be followed, including the following: Read all instructions before using this household sewing machine. DANGER - To reduce the risk of electric shock: •... -
Page 3: Table Of Contents
Stitch table - Non-elastic ......6-7 Utility stitches ........26 Stitch table - Stretch stitches ....8-9 Stretch stitches........26 Operate your Pfaff Select Utility and stretch stitch combinations ..26 Lid ..............10 Utility stitches and practical sewing Connecting the foot control ......10 Explanation of the sewing chart ....27... -
Page 4: Parts Of Your Select Sewing Machine
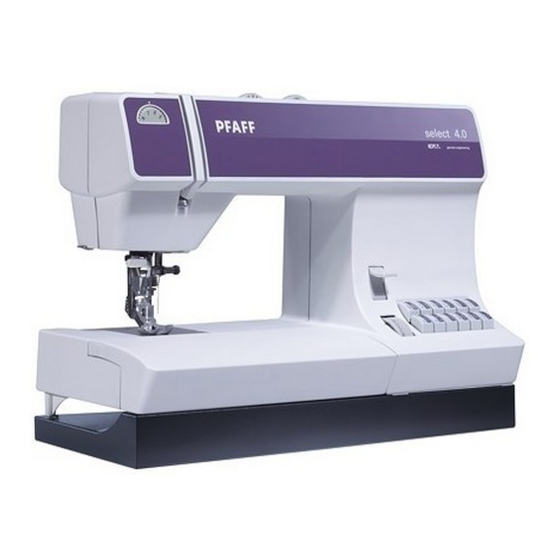
Parts of your select™ sewing machine Main switch 16 Removable accessory tray Connection socket “foot control with 17 Base plate main cord” 18 Needle plate Handwheel release disk 19 Stitch length dial Handwheel 20 Button for “reverse sewing” Carrying handle 21 Stitch selection Bobbin winder 22 Needle threader (4.0) -
Page 5: Standard Accessories
Standard accessories For more information about accessories, please contact your PFAFF® dealer. 0 Standard Presser Foot 5 Buttonhole Foot With IDT (pictured) 6 Darning Foot select 4.0 and 3.0 select 4.0 Without IDT 7 Rolled Hem Foot, 3 mm select 2.0... -
Page 6: Stitch Overview
Stitch overview Stitch table - Non-elastic stitches Stitch Presser Application Foot 3.0/2.0 A/B/C A/B/C Standard buttonhole for blouses or bed linen . For invisible hemming with simultaneous seam/ overcasting. Especially for stretch material. A traditional decorative stitch e.g. for towel borders. A traditional decorative stitch e.g. - Page 7 Stitch Presser Application Foot 3.0/2.0 For all straight stitching and topstitching work up to 6 mm For serging and appliqué. Also suitable for tapering, eyelet embroidery and cording work. Straight stitch: For all sewing and top-stitching operations which require a left needle position. Zigzag stitch: For serging, appliqué...
-
Page 8: Stitch Table - Stretch Stitches
Stitch table - Stretch stitches Stitch Presser Application Foot 3.0/2.0 Elastic closing and serging seam. The material must be turned by 180 degrees. For top-stitching and overstitching stretch materials, e.g. cuffs, hems and panels. A decorative stitch for top-stitching or whip stitching hems, e.g. - Page 9 Stitch Presser Application Foot 3.0/2.0 A decorative stitch, e.g. for household textiles. A decorative stitch, e.g. for household textiles. A decorative stitch, e.g. for traditional embroidery. An ornamental stitch, e.g. for bath accessories. A decorative stitch, e.g. for household textiles. For top-stitching and overstitching stretch materials, i.e.
-
Page 10: Lid
Open the folding lid (7) upwards. The stitches of the sewing machine are illustrated on the inside of the lid. Connecting the foot control Connect the plug of the foot control to the connecting socket (2) of the sewing machine and to the wall socket. The sewing speed is regulated by pressing the foot control. -
Page 11: Accessory Tray
Accessory tray Your Pfaff select sewing machine has a removable accessory tray (16) which is also used as an extended work support. Model 4.0, has a special removable accessory organizer. The enclosed accessories are numbered. Sort the enclosed accessories into the corresponding sections of the accessory organizer. -
Page 12: Bobbin Winding
Switch off the main switch (1) Place the empty bobbin so that the small pin (A) of the bobbin winder (6) snaps into the slot of the bobbin. The Pfaff logo is facing up. Push the bobbin to the right Note: The bobbin can only be wound when it is moved fully to the right. -
Page 13: Spool Pin
Winding the bobbin from the spool pin Place the sewing thread on the spool pin (9). To guarantee free movement of the thread and to give additional hold to the thread spool, t a spool cap corresponding to the size of the thread spool. - Page 14 Winding the bobbin from the second spool pin Push the second spool pin (8) into its hole. Slide on a spool cap and place the thread spool on the spool pin. Threading Place the thread into guide A and pull it through opening B to the right under hook C.
- Page 15 Winding through the needle Even if the machine has been completely threaded, you can still wind the bobbin. First make sure to stop the needle from moving while winding the bobbin (see page 12). Threading Raise the presser foot lifter (15). Pass the needle thread through the presser foot and then upwards through the right threading slot (12).
-
Page 16: Changing The Bobbin
Changing the bobbin Switch off the main switch (1) Removing the bobbin case and bobbin Open the bobbin door at the left side swinging it open towards the front. Lift the latch (E) of the bobbin case and pull the bobbin case out of the machine. Release the latch and take the empty bobbin out of the bobbin case. -
Page 17: Inserting The Bobbin
Inserting the bobbin Insert the full bobbin (with the Pfaff logo facing towards the bobbin case) into the bobbin case. In doing so, pull the thread sideways through slot A, then under the tension plate B until it rests in the opening (see arrow). -
Page 18: Threading
Threading Threading the needle thread Switch off the main switch Raise the presser foot lifter (15) and turn the handwheel until the take-up lever (10) has moved to the top. Place the thread on the spool pin (9) and t the corresponding spool cap. -
Page 19: Needle Threader (Model 4.0)
Needle threader (Model 4.0) To make threading the needle easier and quicker, use the PFAFF needle threader (22). Lower the presser foot. Turn the handwheel until the needle is at its highest position. Place the needle thread under hook A and hold it taut. Move the... -
Page 20: Bringing Up The Bobbin Thread
Bringing up the bobbin thread Switch off the main switch (1) Raise the presser foot. Hold the needle thread and turn the handwheel towards you until the needle is in the highest position and the bobbin thread has formed a loop. Pull the needle thread to bring up the bobbin thread. -
Page 21: Presser Foot Lifter
Presser foot lifter The presser foot is raised or lowered with the presser foot lifter (15). Changing the presser foot Removing the presser foot Switch off the main switch (1) Position the needle at its highest point. Press the presser foot upwards at the front and down at the back at the same time so that it disengages from the presser foot holder (26). -
Page 22: The Idt(Integrated Dual Feed)
The IDT (Integrated Dual Feed) For sewing any fabric precisely Pfaff provides the ideal solution: the Integrated Dual Feed, IDT system. As on industrial machines, the IDT feeds the fabric from the top and bottom at the same time at the same stitch length. The fabric is fed precisely. -
Page 23: Setting The Needle Thread Tension
Changing the needle Switch off the main switch. To remove: Lower the presser foot and move the needle to its highest point. Now loosen the needle screw (25) and pull the needle down. To insert: The at side A of the needle must face to the rear. -
Page 24: Stitch Width Dial
Stitch width dial The stitch width can be adjusted with this dial (27). When selecting the width, the needle must not be in the material. Basic setting: Turn the stitch width knob (27) to the symbol (maximum stitch width). Exception: Straight stitch is sewn with stitch width 0. -
Page 25: Reverse Sewing
Reverse sewing The machine sews in reverse only as long as the reverse sewing button (20) is pressed. Stitch length adjustment dial Adjust stitch length With the stitch length adjustment dial (19) you can adjust the stitch length between 0 and 6 mm by turning the point marking on the button to the required length. -
Page 26: Stitch Selection Easy Select System
Stitch selection Easy Select System Utility stitches Each stitch has been given a letter that you can nd on the push button controls. By pressing the correct button, the stitch is selected and the machine is ready to sew. Button B releases the buttons that have been activated. -
Page 27: Explanation Of The Sewing Chart
Explanation of the sewing Stitch chart The following charts show the recommended settings for each stitch or technique. – These charts also provide you with instructions that are necessary when Stitch Stitch number sewing the selected stitches. The choice of the sewing foot, the setting of the needle thread tension and whether Stitch width in mm to use IDT or not. -
Page 28: Needle Thread Tension
Needle thread tension To get perfect sewing results, the needle and bobbin thread tensions must be Perfect tension perfectly tuned to each other. The normal setting for utility stitches is in the range of 4-5. Check the tension with a wide zigzag Too high tension stitch. -
Page 29: Straight Stitch
Straight stitch Stitch G is the basic straight stitch. The stitch length can be increased up to 6 mm. It is easier to do some sewing jobs by changing the needle position, e.g. top- stitching a collar or sewing in a zipper. You can select up to 15 different needle positions. -
Page 30: Blindhem Stitch
Blindhem stitch The blindhem stitch is best suited for invisible hems; sewing by hand is no longer necessary. Use Blindhem stitch H for wool fabrics and Blindhem stitch D for stretch fabrics. For Blindhem stitch D the hem is sewn and overcast at the same time. -
Page 31: Overlock Stitch
Overlock stitch What is an overlock stitch? For stretch fabrics, the select models offer overlock stitches which sew two fabric layers together and overcast simultaneously. They are more elastic than normal seams, very durable and quickly sewn. Tip: We recommend using blindhem stitch foot No. -
Page 32: Elastic Stitch
Elastic stitch Because of its high elasticity, this stitch can be used for sewing elastic on swimwear, skirts or lingerie. • Mark elastic and fabric in quarters. • Pin elastic to fabric at quarter markings. • Place fabric and elastic under sewing foot. -
Page 33: Hemming With The Twin Needle
Hemming with the twin needle Use the twin needle to make beatiful topstitch seams. Using the twin needle you can add a professional touch to hems on stretch fabrics such as T-shirts, knitted articles or cycling shorts both quickly and easily. Twin needles are available in different widths. -
Page 34: Buttonholes
Buttonholes Stitch Sewing buttonholes is very easy with all the models with push button controls since the fabric does not have to be turned. Buttonholes are generally sewn onto – a piece of doubled fabric. However, for some fabrics, e.g. silk, organza and viscose, it is necessary to use stabilizer to prevent the fabric from contracting while sewing. -
Page 35: Buttonholes
• Carefully cut open your buttonhole. Tip: For ne buttonholes, you can reduce the buttonhole width with the stitch width dial (27) down to approx. 3 mm. Use the center needle position Carfully cut open your buttonhole with scissors or a seam ripper. -
Page 36: Free Motion Sewing
Free Motion Sewing Insert the darning foot: Loosen screw D. Set the needle at its highest point and push the pin of the darning foot fully into the hole C of the sewing foot holder. When doing this, the guide fork G should position itself around the presser bar. -
Page 37: Sewing On Zippers
• Sew on the button. Take care to ensure that the needle also enters the right- hand hole in the button. Securing • Select straight stitch by turning the width dial (27) to 0. • Change the needle position with the needle position dial (28) so that the needle enters one of the two holes. -
Page 38: Changing The Needle Plate
Changing the needle plate Switch off the main switch (1) It is very important to clean your sewing machine, because it will reward you with a longer service life. The more often you use the machine, the more care it needs. Removal: •... -
Page 39: Changing The Sewing Bulb
Changing the sewing bulb Switch off the main switch (1) • Disconnect the main plug and the foot control plug from the machine. • Take off the removable accessory tray (16). The sewing bulb is located inside the left side of the sewing machine. Removal: •... -
Page 40: Trouble-Shooting
Trouble-shooting The machine skips stitches The needle is not properly inserted. Push needle fully upwards, at side facing the back. The wrong needle is inserted. Use a needle system 130/705 H. Needle is bent or blunt. Insert a new needle. Machine is not properly threaded. - Page 41 Machine does not feed or feeds irregularly Sewing lint has collected between the feed Remove needle plate, remove lint with dog teeth rows. brush. Feed dog is lowered, slide A (see page 23) Push slide B (see page 23) to left. at right.
-
Page 43: Intellectual Property
Such modi cations, however, will always be to the bene t of the user and the product. Intellectual property PFAFF, SELECT and IDT (image) are trademarks of KSIN Luxembourg II, S.ar.l. Please note that on disposal, this product must be safely recycled in accordance with relevant National legislation relating to electrical/electronic products. - Page 44 www.pfaff.com...
Need help?
Do you have a question about the select 2.0 and is the answer not in the manual?
Questions and answers