
Related Manuals for Onkyo TX-8160


Summary of Contents for Onkyo TX-8160
-
Page 1: Remote Control (Rc-903S) K
Network Stereo Receiver TX-8160 Instruction Manual Thank you for purchasing an Onkyo product. Please retain this manual for future reference. -
Page 2: Table Of Contents
Contents Supplied accessories Names and functions of parts Before use, check the packaging for the main unit and the accessories below. 0 Front 0 Display ∫ Remote control (RC-903S) 0 Remote control ∫ Batteries for remote control (AAA/R03) 0 Rear ∫... -
Page 3: Important Safety Instructions
WARNING: WARNING AVIS TO REDUCE THE RISK OF FIRE OR ELECTRIC RISK OF ELECTRIC SHOCK RISQUE DE CHOC ELECTRIQUE SHOCK, DO NOT EXPOSE THIS APPARATUS TO DO NOT OPEN NE PAS OUVRIR RAIN OR MOISTURE. The lightning flash with arrowhead symbol, within an equilateral triangle, is intended to alert the user to the CAUTION: presence of uninsulated “dangerous voltage”... - Page 4 If water or any other liquid gets inside and receiver. – Connect the equipment into an outlet on a circuit this unit, have it checked by your Onkyo dealer. different from that to which the receiver is connected.
- Page 5 Precautions DISCLAIMER For Canadian Models NOTE: Through this device you are able to link to other services CAN ICES-3 B/NMB-3 B or websites which are not under the control of any For models having a power cord with a polarized plug: company which has designed, manufactured or CAUTION: distributed/have distributed this device, and its affiliates...
-
Page 6: Other Functions
MP3, WAV, FLAC, DSD, WMA, MPEG4 AAC (with the Home Network feature and connection of a USB storage device) Onkyo Remote (smartphone app) You can play high-res sources in formats such as WAV, FLAC, or DSD files (*) distributed over the Internet by using the Home Network feature or connecting a USB storage device. -
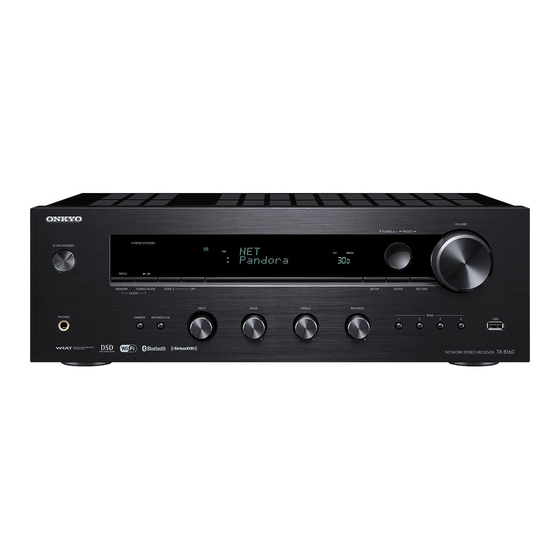
Page 7: Names And Functions Of Parts
Names and functions of parts Front Í ON/STANDBY button: Press this button to turn the PHONES terminal: Connect headphones with a unit on or put it in standby mode. standard plug. MENU/MEMORY button: Press this button to display DIMMER button: Use this button to switch the the menu or register a AM/FM station. -
Page 8: Display
Names and functions of parts Display DIRECT indicator: This indicator appears when Direct Message display area: Track information and menus of the audio quality setup is on. appear here. -
Page 9: Remote Control
Names and functions of parts Remote control Í button: Press this button to turn the unit on or put it in standby mode. INPUT SELECTOR buttons: Use these buttons to select the source. Skip (:/9) buttons (*) Search (6/5) buttons (*) REPEAT button: Turns repeat play on and off and selects the mode. -
Page 10: Rear
Names and functions of parts Rear REMOTE CONTROL jack: An Onkyo product with Power cord: Connect the power cord to an AC outlet. RI jack can be connected and synchronized with this Disconnect the power cord only after putting the unit unit. -
Page 11: Connections
Connections ¥ The power cord must be connected only after all other cable connections are completed. 12 - 15 mm (1/2” - 5/8”) Connecting speakers Twist the wires of the speaker cable tightly before inserting into the terminals. After inserting the cables, tighten the terminals firmly by turning to the right. -
Page 12: Connecting A Player
Connections Connecting a player When connecting a subwoofer: You can enjoy the audio from players such as televisions, Blu-ray disc players, and game consoles. DIGITAL IN connection If the player has an optical or coaxial digital output terminal, connect using either a digital optical cable or digital coaxial cable to one of the DIGITAL IN terminals. -
Page 13: Am/Fm Antenna Connections
Connections LINE IN connection AM/FM antenna connections Use an RCA cable to connect to the LINE OUT terminal Connect the antennas to listen to AM/FM broadcast. on the player to one of the LINE IN terminal on this unit. 0 You may be unable to receive radio transmissions in To play, select the terminal name with the INPUT some areas even if you connect an antenna. -
Page 14: Network Connection
Connections ® Network connection Wi-Fi connection Set up the Wi-Fi connection with the access point (a This enables you to enjoy Internet radio services (*), wireless LAN router, for example). Set with the remote AirPlay, Spotify, and the home network features. Connect control while watching the display on the main unit. - Page 15 Connections 5. Use the direction ( ) buttons to select “Wi-Fi Setup”, and then press the ENTER button when “Start” When the access point is not displayed is displayed. Use the direction ( ) button to select the “Other...” on the display and press the ENTER button.
-
Page 16: Listening To Internet Radio
Listening to Internet radio TuneIn Radio With the radio stations and the on-demand programs Router registered, TuneIn Radio is a service where you can enjoy music, sports and news from all over the world. MENU This unit , , , , ENTER Some Internet radio services are registered to the unit by RETURN... -
Page 17: Pandora
Pandora stations. You can create your stations by entering your favorite tracks and artists when prompted. After you have created your account and stations you can return to your Onkyo receiver and press the ENTER button to begin listening to your personalized Pandora. -
Page 18: Siriusxm Internet Radio
Listening to Internet radio Create a New Station SiriusXM Internet Radio Enter the name of a track, artist, or genre and Pandora If you want to listen to the service, you must subscribe. To will create a unique radio station for you based on the subscribe go to www.siriusxm.com/internetradio with your musical qualities of that track, artist, or genre. - Page 19 Listening to Internet radio direction ( ) buttons to select “Sign out” and then press the ENTER button. SiriusXM Internet Radio Menu 7. Use the direction ( ) buttons to select a station If you press the MENU button or ENTER button while and then press the ENTER button or the playback (1) playing SiriusXM Internet Radio, the following menu button to start playback from the station.
- Page 20 Listening to Internet radio One touch play with the BGM button Registering your favorite radio stations (My Favorites) You can listen to your favorite radio stations by registering them to “My Favorites”, which appears when you press the NET button. “My Favorites” allows you to register up to 40 stations.
- Page 21 Listening to Internet radio 3. Use the direction ( ) buttons to display “IP 3. Press the direction ( ) buttons to select a Address”. number to which a radio station is not registered, and press the MENU button. Make a note of the IP address. 4.
-
Page 22: Playing Music With Bluetooth ® Functions
® Playing music with Bluetooth functions Playback You can wirelessly enjoy music files stored in a smartphone or other Bluetooth enabled device. The coverage area is 48 feet (15 meters). Pairing If the unit is on and the Bluetooth enabled device is connected, the input will be automatically switched to BLUETOOTH “BLUETOOTH”. -
Page 23: Playing Music Files From Iphone/Ipod/Ipad
® Playing music with AirPlay center, swipe from the bottom of the screen of the iOS device. 0 If the AirPlay icon is not displayed, confirm that this Router unit and the iOS device are both connected to the router correctly. 3. -
Page 24: Playing Music With Spotify
Playing music with Spotify Notes for using the multi-zone feature 0 To enjoy Spotify music in a separate room, select Router Zone 2, and manually select “NET” as the input of the separate room. Also select this unit in the Spotify application. -
Page 25: Playing Tracks Stored On A Usb Storage Device
Playing tracks stored on a USB storage device You can connect a USB storage device to the USB port 5. Use the direction ( ) buttons to select a track and on the front panel and play music files on it. press the playback (1) button. -
Page 26: Home Network Functions
Home network functions Playing music stored on DLNA-compatible ∫ Playing music files by operating the unit devices Router ENTER RETURN PC/NAS You can play music files stored on a server by operating the unit. This unit ® 1. Start the server (Windows Media Player 11, Windows The unit allows you to use DLNA (*) to play music files ®... -
Page 27: Music Streaming From A Shared Folder (Home Media)
Home network functions ∫ Using the Play To feature Music streaming from a shared folder (Home Media) Using a controller device or PC that complies with the DLNA standard, you can play music files stored on a server. In this section, we explain the steps to perform remote ®... - Page 28 Home network functions Creating a shared folder 1. Select and right-click the folder to share. 2. Select “Properties”. 3. Select “Advanced Sharing” on the “Sharing” tab. 4. Select the “Share this folder” check box and click “OK”. 5. Click “Share” for “Network File and Folder Sharing”. 6.
-
Page 29: Listening To The Sound From A Connected Player
Listening to the sound from a connected player By connecting an Onkyo component with RI jack to the unit by using an RI cable and an RCA cable, you can link the unit’s power and input selection and enable operation with this unit’s remote control. For details, refer to the instruction manual of the component with the RI jack. -
Page 30: Listening To Am/Fm Radio
Listening to AM/FM radio Tuning into a radio station monaural. This can minimise the noise and audio interruptions. TUNING ∫ Tuning into stations manually If you tune into an FM radio station manually, it will be received in monaural sound. 1. - Page 31 Listening to AM/FM radio One touch reception with the BGM button Presetting a radio station PRESET MEMORY TUNING MODE TUNER By registering your favorite radio stations to BGM buttons, you can receive it with one press of a button. ENTER 1.
- Page 32 Listening to AM/FM radio ∫ Selecting preset stations 1. Press the TUNER button of the remote control repeatedly to select either “AM” or “FM” on the display. 2. Press CH (i/j) buttons to select a preset number. 0 You can also select by directly entering the preset number with the number buttons.
-
Page 33: Multi-Zone Playback
Multi-zone playback Performing Multi-zone Playback You can listen to audio in a room (called Zone 2) other than the one where this unit is located (called the main room). 0 DSD format files cannot be output to Zone 2. ZONE 2 VOLUME 0 With “NET”... - Page 34 Multi-zone playback on the main unit, and while the display is flashing, use the controls to make the adjustments. Alternatively, you can use the VOLUME 3/4 or MUTING buttons on the remote control after pressing the REMOTE MODE ZONE 2 button. To control only in the separate room: If you turn the unit to standby during multi-zone playback, the “Z2”...
-
Page 35: Various Settings
Various settings Adjusting sound quality, etc. Sleep timer , , , AUDIO SLEEP 1. Press the AUDIO button. With the sleep timer, you can set the unit so that it 2. Press the direction ( ) buttons to select the setting automatically turns off after a specified period. -
Page 36: Inputting Characters
Various settings Inputting characters Setup menu , , , , , , , , ENTER ENTER RETURN SETUP While performing network settings or in the Internet radio The unit allows you to configure advanced settings to menu, etc., when the following appears on the display, provide you with an even better experience. - Page 37 To set, select each input source or select the preset Network Standby: you can turn on the power of the unit number of the registered station. via network using an application such as Onkyo Remote. 0 For information on how to input characters, see “Inputting characters” ( 36).
- Page 38 Various settings Wi-Fi: Connect the unit to network via wireless LAN 0 If the input is not switched automatically, set to “Off” router. and change the input manually. On: Wireless LAN connection Auto Reconnect: This function automatically reconnects Off (Wired) (default setting): Wired LAN connection to the Bluetooth enabled device connected last when you Wi-Fi Setup: You can configure wireless LAN settings by change the input selector to “BLUETOOTH”.
-
Page 39: Firmware Update
Refer to the descriptions below to check documentation are furnished to you for use at your the meaning. own risk. Onkyo will not be liable and you will have no remedy for damages for any claim of any kind Error code... - Page 40 Various settings ∫ Updating the firmware via USB connection 10. Press the ENTER button with “Update” selected to start update. You need a 64 MB or larger capacity USB storage for “Completed!” is displayed when the update is updating. complete. 11.
-
Page 41: Troubleshooting
Troubleshooting 0 If your record player uses an MC cartridge, you must connect an audio equalizer and either an MC head Before starting the procedure Problems may be solved by simply turning the power amp or an MC transformer. on/off or disconnecting/connecting the power cord, which is easier than working on the connection, setting and operating procedure. - Page 42 0 If there is a metallic object near the unit, Bluetooth connection may not be possible as the metal can effect Onkyo is not responsible for damages (such as CD rental on the radio wave. fees) due to unsuccessful recordings caused by the unit’s 0 Depending on the Bluetooth enabled device, Send/ malfunction.
-
Page 43: Compatible Devices/Media/File Formats
Compatible devices/media/file formats Compatible devices/media Extension .mp3, .MP3 Standard MPEG-1/MPEG-2 Audio Layer-3 ∫ USB storage device Sampling Frequency 8 k/11.025 k/12 k/16 k/22.05 k/24 k/32 k/ The unit supports USB storage devices that support the USB Mass 44.1 k/48 kHz Storage Class. -
Page 44: Amplifier Section
Specifications ∫ Amplifier section ∫ Bluetooth section Rated Output Power (FTC): Communication system: With 8 ohm loads, both channels driven, from 20- Bluetooth Specification version 2.1 +EDR (Enhanced Data Rate) 20,000 Hz; rated 80 watts per channel minimum RMS Frequency band: 2.4 GHz (2.402 GHz - 2.480 GHz) power, with no more than 0.1 % total harmonic Modulation method:... - Page 45 Bluetooth SIG, Inc. and any use of such marks by Onkyo Corporation is under license. Other trademarks and trade names are those of their respective owners. Onkyo Corporation does not guarantee Bluetooth compatibility between the receiver and all Bluetooth enabled devices.
- Page 46 5. A program that contains no derivative of any portion of the Library, but is designed to work with the Library by being Onkyo notifies you that, according to the attached GPL/LGPL, you have right to obtain, modify, and redistribute software compiled or linked with it, is called a "work that uses the Library".
-
Page 47: Gnu General Public License
The source code for a work means the preferred form of the work for making modifications to it. For an executable work, In response to requests from the copyright owners of each piece of software, Onkyo notifies you of the following:... - Page 48 The above copyright notice and this permission notice shall be included in all copies or substantial portions of the Software. There is no warranty against interference with your enjoyment of the library or against infringement. There is no warranty THE SOFTWARE IS PROVIDED "AS IS", WITHOUT WARRANTY OF ANY KIND, EXPRESS OR IMPLIED, INCLUDING that our efforts or the library will fulfill any of your particular purposes or needs.
- Page 49 5. mailto: michael.barone@lmco.com (12) RSA Data Security, Inc. MD5 Message-Digest Algorithm 6. mailto: Jean-Francois.Boudreault@viagenie.qc.ca Copyright (C) 1991-2, RSA Data Security, Inc. Created 1991. All rights reserved. 7. mailto: karl@owl.HQ.ileaf.com License to copy and use this software is granted provided that it is identified as the "RSA Data Security, Inc. MD5 Message- 8.
- Page 50 9. Accepting Warranty or Additional Liability. their licenses terminated provided such individuals or entities remain in full compliance with those licenses. Sections 1, 2, While redistributing the Work or Derivative Works thereof, You may choose to offer, and charge a fee for, acceptance of 6, 7, 8, 9, 10 and 11 will survive any termination of this License.
- Page 52 Tel: 86-21-52131366 Fax: 86-21-52130396 http://www.cn.onkyo.com/ Asia, Oceania, Middle East, Africa Please contact an Onkyo distributor referring to Onkyo SUPPORT site. http://www.intl.onkyo.com/support/ The above-mentioned information is subject to change without prior notice. Visit the Onkyo web site for the latest update.
Need help?
Do you have a question about the TX-8160 and is the answer not in the manual?
Questions and answers