Table of Contents
Advertisement
C O M M U N I C A T I N G
Communicating Wall Control
With Wi- -Fir Capability
Owner's Manual
TSTAT0201CW
U.S. Patent No. 7,243,004
U.S. Patent No. 7,775,452
All trademarks are the property of the respective owners.
®
Wi-Fi
is a registered trademark of the Wi-Fi Alliance Corporation.
R
S Y S T E M
616 02 1019 00
10/17/14
Advertisement
Table of Contents

Subscribe to Our Youtube Channel
Related Manuals for Observer TSTAT0201CW


Summary of Contents for Observer TSTAT0201CW
- Page 1 C O M M U N I C A T I N G S Y S T E M Communicating Wall Control With Wi- -Fir Capability Owner’s Manual TSTAT0201CW U.S. Patent No. 7,243,004 U.S. Patent No. 7,775,452 All trademarks are the property of the respective owners. ®...
-
Page 2: Table Of Contents
........® Setting Up Remote Access and Wi-Fi Connection ..® Registering Your Observer Wall Control on the Internet 616 02 1019 00... -
Page 3: Introduction
Your new Observer Control offers high quality comfort technology. Please take a few moments to review this manual. Set up a comfort schedule that makes sense for your lifestyle;... -
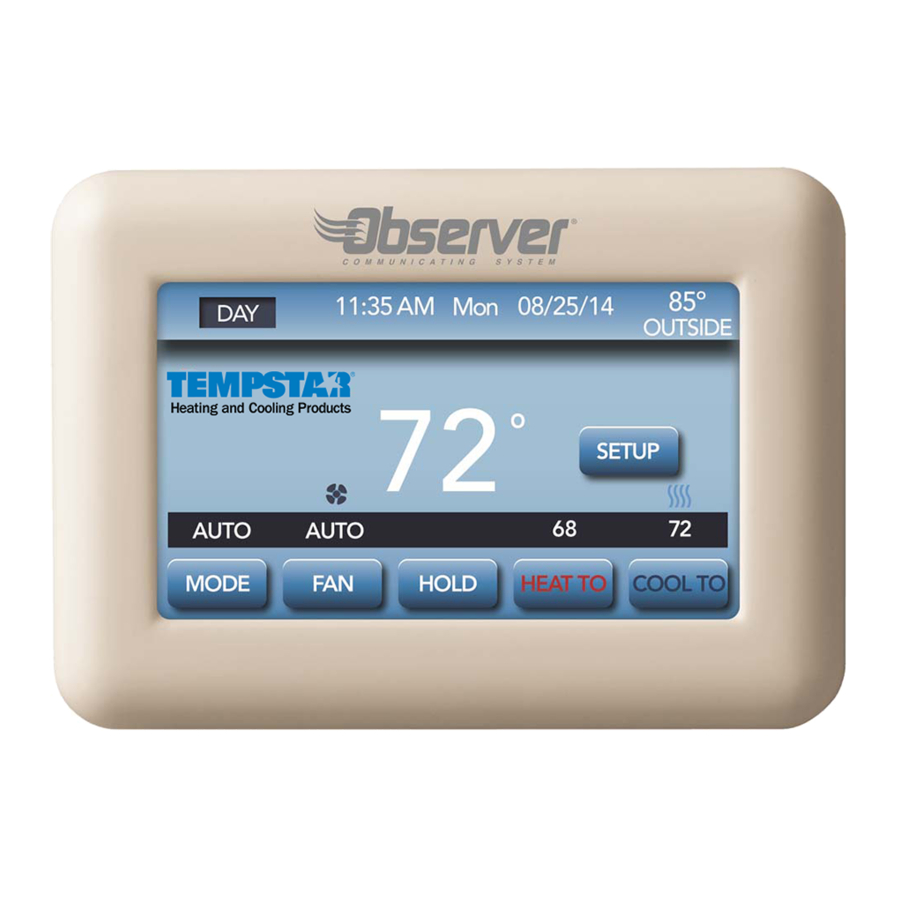
Page 4: Set Day And Time
Actual Outdoor temperature (if applicable) System mode: OFF, HEAT, COOL, AUTO or EMHT (if applicable) Fan mode: AUTO, LOW, MED or HIGH (is applicable) Heat To setting (Zone specific if applicable) Cool To settings (Zone specific if applicable) Set Day and Time A14558 To set the current time and date, press SETUP from the HOME Screen;... - Page 5 Under date, you can select the month, day, or year buttons; then use the ▲ and ▼ to select the appropriate date. Under time, you can select the hour, minute, and am/pm; then use the ▲ and ▼ to select the appropriate time. You also have the option of selecting between a 12 HR or 24 HR clock format.
-
Page 6: System Mode
System Mode Press MODE to select the desired system mode. Off: Heating and cooling systems are off ® Auto: Observer Control automatically selects heating or cooling to maintain your comfort during transitional heating and cooling seasons ® Heat: Observer Control operates only the heating system... -
Page 7: Fan Setting
® Cool: Observer Control operates only the cooling system Emergency Heat: Only electric heat will be used for heating (only for heat pump with auxiliary heat) NOTE: The fan may operate even though the system Mode is set to OFF, if the Fan Mode is set to a condition other than AUTO. -
Page 8: Hold Current Temperature
Fan Airflow is not selectable by zone. When continuous fan is used, all zones will be open. Hold Current Temperature ® The Observer Control allows you to maintain your current temperature by overriding the program schedule. Press the HOLD button to override the program and maintain your current indoor temperate setting indefinitely. - Page 9 To go back to your programmed schedule, simply press the RESUME button. NOTE: For Zoning, overriding the program schedule can be done for each individual zone by pressing the Zone name button. The HOLD / RESUME override program schedule can be independently selected for each zone.
-
Page 10: Adjusting Temperature
Adjusting Temperature (Temporary Hold) ® The Observer Control allows you to adjust the indoor temperature at any time, overriding the programmed schedule. Heating To change the heating set point, press HEAT TO; then use the ▲ and ▼ buttons to set the desired temperature. - Page 11 An override time will be displayed on the right side of the screen. You can change the override time in 15-minute increments by pressing the arrows below the time. When you have completed your changes, press DONE. NOTE: If the schedule is already set to HOLD or HOLD UNTIL, the Until option will not be shown on this screen.
-
Page 12: Setup
An override time will be displayed on the right side of the screen. You can change the override time in 15-minute increments by pressing the arrows below the time. When you have completed your changes, press DONE. NOTE: For Zoning, temporarily overriding the program schedule can be done for each individual zone by pressing the Zone name button. - Page 13 A14558 616 02 1019 00...
- Page 14 Screen/Zones From the BASIC SETUP screen; press SCREEN/ZONES. From this screen, you will have the option to adjust the screen brightness by pressing the ADJUST BRIGHTNESS button. Use the ▲ and ▼ buttons to select your desired screen brightness. Press DONE to return to normal operation. To clean your screen, press the CLEAN SCREEN button.
-
Page 15: Zone Status
the display without changing settings. After 30 seconds, the screen will return to the main screen and become active. Zone Status To view the status of each zone, press Zone Status to see the current Temperature and Damper Position for each of your installed zones. -
Page 16: Zone Names
NOTE: Please see the Zoning section for more information regarding the features available with Observer® Zoning System. Zone Names Press Zone Names to customize the descriptions for each of your installed zones. NOTE: In order to activate the Key Board, press each individual Zone name. -
Page 17: Schedule
Press Done to save your changes. Schedule Determine Your Comfort Schedule ® Before you program your Observer Control, take a moment to plan your comfort schedule. Each day is divided into four time periods: WAKE, DAY, EVE, and SLEEP. You can select a different heating and cooling temperature for each time period, based on your daily or weekly schedule. - Page 18 A14558 2. Press ▲ under “All Days”, then press EDIT. 616 02 1019 00...
- Page 19 3. Press PERIOD; then use the ▲ or ▼ to select the period to change. 616 02 1019 00...
- Page 20 4. Press START; then use the ▲ or ▼ to change the time the corresponding period starts. 5. Press HEAT TO; then use the ▲ or ▼ to change the desired heating temperature for that period. 6. Press COOL TO; then use the ▲ or ▼ to change the desired heating temperature for that period.
- Page 21 Follow Steps 1 – 7 for each individual Zone using the ▲ / ▼ arrows to select the desired zone. Weekday/Weekend You can create a schedule for your work week and a separate schedule for the weekend. 616 02 1019 00...
- Page 22 1. Press SETUP, then SCHEDULE 2. Press ▲ under “Weekday/Weekend”; then press EDIT to modify the weekday schedule. To modify the weekend schedule, press the WEEKEND button. 616 02 1019 00...
- Page 23 3. Press PERIOD; then use the ▲ or ▼ to select the period to change. 4. Press START; then use the ▲ or ▼ to change the time the corresponding period starts. 5. Press HEAT TO; then use the ▲ or ▼ to change the desired heating temperature for that period.
- Page 24 NOTE: For Zoning Follow Steps 1 – 7 for each individual Zone using the ▲ / ▼ arrows to select the desired zone. 616 02 1019 00...
- Page 25 Each Day You can create a different schedule for each day of the week. 1. Press SETUP, then SCHEDULE 2. Press ▲ under “Each Day”; then press EDIT to modify the schedule for that day. To modify a different day, press one of the day buttons on the bottom to scroll through the week to find the day you wish to change.
- Page 26 3. Press PERIOD; then use the ▲ or ▼ to select the period to change. 4. Press START; then use the ▲ or ▼ to change the time the corresponding period starts. 5. Press HEAT TO; then use the ▲ or ▼ to change the desired heating temperature for that period.
- Page 27 616 02 1019 00...
-
Page 28: Humidity Settings
Humidity Settings ® The Observer Control allows you to manually set your humidity set points to me your comfort levels. If you have a humidifier installed, press SETUP; then press HUMIDITY. Under HUMIDIFICATION, use the ▲ and ▼ buttons to select your desired humidity level during heating mode. -
Page 29: Dealer Info
Notifications, directly from the ® Observer wall control to your dealer. See the Quick Start guide provided with your Observer wall control for more information on registering your Observer wall control for remote access. 616 02 1019 00... - Page 30 A14558 To access the Lockout, Sounds and Reminders options, click in the MORE arrow and go to the second screen of Basic Setup options. A14561 616 02 1019 00...
-
Page 31: Keypad Lock
Keypad Lock ® You can lock the Observer Control to help avoid inadvertent changes to your settings. A14558 A14561 Press SETUP; press MORE, then press LOCKOUT. To enable the lockout feature, press the ON button. 616 02 1019 00... - Page 32 After you have enabled the lockout feature, please select a ® 4-digit code to be used to unlock the Observer Control. Press DONE to return to normal operation. Once the lockout feature is active, to unlock the screen press anywhere on the screen to be prompted to enter your 4-digit code.
-
Page 33: Sounds
Sounds Press Sounds from the Basic Setup screen to adjust the ® Volume and Sound Type heard from your Observer control. Volume options include: OFF, LOW, MED or HIGH Sound Types include: Beep, Click and Click 2 (Double Click) NOTE: When OFF is selected, the sound features of the ®... -
Page 34: Reminders
Reminders Reminder messages alert you to when it is time to replace your filter. The reminders will be sent after the number of hours of system operation shown on this screen. For example, if you have your fan set for continuous operation (Fan Mode = On, Low, Med, or High) the fan will operate for approximately 720 hours per month. -
Page 35: Zoning Features
Zoning Features ® When installed as a complete Observer Zoning System, the Observer Control can be installed as a Master Control with up to five additional sensors. Sensor options can include any combination of the following: Room Sensor Zone Sensor... - Page 36 From the Setup menu, you can program a comfort schedule for each individual zone by using the ▲/ ▼ button to select the corresponding zone. 616 02 1019 00...
- Page 37 NOTE: See the Schedule section for complete details. ® When the Observer Control is installed as a Zone Sensor, the overall functionality of the control and screens available will be different from those found on the Master Zone Control. From each individual Zone Sensor, you can override the...
- Page 38 NOTE: See Adjusting Temperature (Temporary Hold) and Hold Current Temperature sections for complete details. The basic information displayed on the Home Screen of the Zone Sensor consists of the following: Current schedule period: WAKE, DAY, EVE, or SLEEP NOTE: Use the Master Control to setup Schedules for each individual Zone Date and time NOTE: Date and Time information is supplied to...
- Page 39 Fan mode: AUTO, LOW, MED or HIGH NOTE: Any changes to the System Mode from the Zone Sensor are global in nature and will impact the entire system. Hold (Zone specific) Heat To setting (Zone specific) Cool To settings (Zone specific) Setup options available for the Zone Sensor consist of the following: A14558...
- Page 40 Screen/Zones: Under this Basic Setup Screen, you will have the option to Adjust Brightness, Clean Screen or change the Zone Name. Sounds: Under this menu selection, you will have the option to adjust the Volume and Sound Type heard from the individual Zone Sensor.
- Page 41 Humidity: From this menu selection, you will have the option to adjust the Humidity settings for the entire system. NOTE: Any changes to the Humidity settings from the Zone Sensor are system specific and will be applied to all zones. NOTE: The main wall control has the only humidity sensor in the system.
-
Page 42: Version
Version Selecting this menu option will display the Model Number, Serial Number, and Software version for the individual Zone Sensor. A14558 A14517 616 02 1019 00... -
Page 43: Software Updates
Software Updates ® We will periodically issue software updates for the Observer Communicating Wall Control. Updates are usually made to support new HVAC equipment that are added to our product line; so you will likely not need them, unless you upgrade your comfort system. -
Page 44: Setting Up Remote Access And Wi-Fi ® Connection
TSTAT0201CW, can connect through an in-home Wi-Fi network to connect to the Internet. If the in-home Wi-Fi network or router is found to be incompatible with the Observer wall control, an Observer Wireless Access Point (NAXA00101WA) or any other compatible wireless router can be installed to establish Wi-Fi connectivity. - Page 45 Observer wall control will not be negatively affected by the network-related modifications, upgrades, or similar activity of the user’s Internet service provider or mobile device carrier service.
- Page 46 A14560 A14520 Select the WIRELESS button from the Basic Setup screen 616 02 1019 00...
- Page 47 A14521 ® Make sure the Wi-Fi connection is enabled, by touching ENABLED. Select Setup Wireless Connec- tion to scan for a wireless network. You do not need to select the Manually Enter Ac- cess Point, or Advanced Settings, unless you have ®...
- Page 48 A14522 Next, touch Scan for available access points. A14523 On the next screen look for the desired SSID of the router/access point. Press the arrow at the bottom right to see three more SSIDs. Press the Select button for the desired SSID. Then press the arrow in the bottom right.
- Page 49 A14524 The security settings, if any, for the selected network will be displayed. Usually auto-detect will correctly identify the mode of security used. A secured net- ® work will prompt for the Wi-Fi security key. If the incorrect security mode appears on the Auto Detect button, press the Auto-Detect button and the Select Security selection screen will appear.
- Page 50 Pressing the Back button will return to the previous screen, with the updated security mode. A14524 ® If a Wi-Fi security key is shown as on the Security Settings screen, then select the Wireless Security Key bar and enter the security key. Touch in the security key area, and the keyboard will appear.
- Page 51 A14526 A14527 The control will inform you if the connection is suc- cessful. If so, touch DONE. 616 02 1019 00...
- Page 52 A14528 If the connection is unsuccessful, verify that the proper information has been entered before you touch RETRY. The control will attempt to connect with the information previously entered. To start the process from the beginning, press Done. A14529 616 02 1019 00...
-
Page 53: Registering Your Observer ® Wall Control On The Internet
® Observer communicating wall control online. This requires the MAC address and serial number of the Observer wall control. To find the serial number and MAC address of the Observer wall control, click on Menu, choose Wireless, and then choose Register. - Page 54 A14530 This screen will provide the information needed on the MyObserverComfort website (www.MyObserverComfort.com) during registration. Many people take a picture of this screen with their smartphone for easy reference when registering. A14531 Click Done once you have copied this information. 616 02 1019 00...
- Page 55 Instructions for registering your wall control may be found on the Quick Start guide shipped with the product, or on the www.MyObserverComfort.com website. If you have any issues with connection or registration, please contact your servicing dealer or contact the help desk (available M-F, 8am - 5pm ET) at 877-591-8908.
- Page 56 All trademarks are the property of the respective owners. ® Wi-Fi is a registered trademark of the Wi-Fi Alliance Corporation. Copyright 2014, International Comfort Products Lewisburg, TN 37091 USA 616 02 1019 00...
Need help?
Do you have a question about the TSTAT0201CW and is the answer not in the manual?
Questions and answers
How to reset thermostat from system fault, comm error outdoor unit
To reset the Observer TSTAT0201CW thermostat from a system fault or communication error with the outdoor unit, go to the Thermostat Setup menu and select "Reset Factory Defaults." This will clear the event history and reset the system.
This answer is automatically generated