Table of Contents
Advertisement
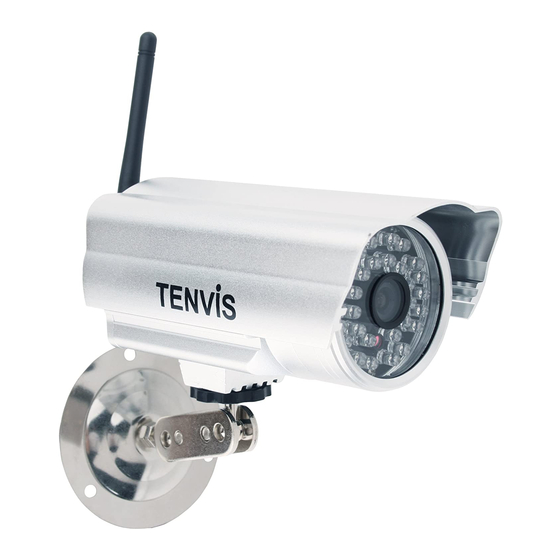
MJPEG SERIES OUTDOOR
WiFi outdoor IP Camera
B EF O RE Y OU BE G IN
Please unpack the box carefully and identify that all the parts are present.
The Camera is suitable for indoor or outdoor use.
Check the voltage of the power supply. Make sure you use the recommended power
input (12V DC, 1.0A). Use of incorrect voltage is not covered by the warranty.
Do not attempt to open the casing to access the Camera. Damage caused to the
product by tampering with the casing is not covered by the warranty.
Do not aim the camera at the sun or similar intense light.
The interval time of powering the camera on and off must be more than 10 seconds
otherwise it will cause serious damage to the CPU.
When you update the cameras, please ensure you:
- connect the camera directly to a computer using a network cable
- close other programs and windows on the computer
- keep the power connected when updating the firmware
Advertisement
Table of Contents

Related Manuals for Tenvis Mini319w


Summary of Contents for Tenvis Mini319w
- Page 1 MJPEG SERIES OUTDOOR WiFi outdoor IP Camera B EF O RE Y OU BE G IN Please unpack the box carefully and identify that all the parts are present. The Camera is suitable for indoor or outdoor use. Check the voltage of the power supply. Make sure you use the recommended power input (12V DC, 1.0A).
-
Page 2: Product Description
PR OD U C T D E S CRI PTION WiFi outdoor IP Camera can be set up in minutes for instant monitoring and live viewing on your Mac or Windows computer and 3G Smartphone - all via your wireless network router or switch For optional recording, simply install the Smart Witness recording software to you r Windows PC and configure it to your particular requirements. -
Page 3: Package Contents
P A C KA GE C O N T E N TS Power Adaptor Software Installation CD WiFi Camera with Allen Key Screws and Wall Plugs Bracket & Antenna CA M E RA IN S TA L LAT I ON Begin by screwing the antenna and bracket to the camera and power the camera using the power supply provided. - Page 4 C AME RA SE TUP conti nued Please note that if you are using the camera on a wireless network you will need to first configure the camera for wired use, before you programme your wireless settings in to it. Insert the Installation CD into your PC CD drive and the installation screen should appear automatically.
-
Page 5: Basic Properties
C A M E R A S ET U P c o nti nu e d After searching, the software will give one of 3 results: Connected IP cameras are located on the LAN - All the IP cameras will be listed and will be displayed in the result field as shown below. -
Page 6: Network Configuration
C A M E R A S ET U P c o nti nu e d Network Configuration Configure the Network parameters from this page. • DHCP checkbox: If checked, the device will obtain an IP from the DHCP server (ensure the Router, with which the device connects, has a DHCP function). - Page 7 C A M E R A S ET U P c o nti nu e d Flush ARP Buffer ARP stands for Address Resolution Protocol. It is used to associate a layer 3 (Network layer) address (such as an IP address) with a layer 2 (Data Link layer) address (MAC address). When a wired network and a wireless network of the camera both use the same fixed IP address, a problem may occur where connections to web pages will time out and fail.
-
Page 8: Audio Buffer
CA ME RA SET UP c o n ti nue d Main User Interface (as seen in Internet Explorer) Device Status Indicates the number of cameras connected on the network. For Viewer Allows you to view Full Screen or in Split Screen. Select the icons according to the view preferred. For example: Select for Full Screen, for Quad view or... -
Page 9: For Operator
C A M E R A S ET U P c o nti nu e d Click the icon to take a snapshot image. Snapshot: Note Recorded video file names will be saved in the format: CameraName_ Current time. For example: IPCAM_20081211134442. This recording is from the camera called IPCAM and the recording ‘end’... - Page 10 C A M E R A S ET U P c o nti nu e d User Settings - You can configure up to 8 user names and passwords and the level of users as Administrator, Operator or Visitor. Administrators can: Set Record Path - Click ‘Browse’...
-
Page 11: Multi-Device Settings
C AME RA SE TUP conti nued Multi-Device Settings In the Multi Device Settings page, you can see all devices searched in the LAN. The ‘1st Device’ is the default IP camera. You can add more cameras to the list in the network for monitoring. -
Page 12: Wireless Lan Settings
C A M E R A S ET U P c o nti nu e d Wireless LAN Settings Enter the wireless settings page of the Wireless Router to find out the SSID, Channel, Encryption and Authentication details. This product supports WEP and WAP security encryption. ADSL Settings When connected to the Internet through ADSL, you can enter the ADSL username and password obtained from your ISP. -
Page 13: Mail Service Settings
CAME RA SE TU P co nt inue d Mail Service Settings Configure the Email addresses that will receive and send mails after an alarm is raised. Sender - This device uses the sender mailbox to send mails. Receiver - To receive the mail from the Sender.You can set up to 4 receiver mailbox. SMTP Server - The SMTP server for the sender mailbox. - Page 14 C A M E R A S ET U P c o nti nu e d Report Internet IP by Mail - Check the box so when the IP camera is powered on or the Internet IP address changes, an email will be sent. (For example: IPCAM ‘s url is http://119.123.207.96:9002). Make sure the port is mapped to the router correctly by UPnP or Virtual Map function.
- Page 15 C A M E R A S ET U P c o nti nu e d Alarm Service Settings (Motion Detection) Enter the Alarm Service Settings page to configure the Motion Detection function. When you enable motion detection, the camera can be triggered to send email alerts and upload images. In the camera monitoring page, the green icons will turn to red and you will hear an alert sound if motion is detected.
-
Page 16: Using The Wifi Function
A CC E S SI NG T H E WI F I C AME R A Using the WiFi Function To use the wireless functions of the IP Camera a wireless router is required. Follow the instructions below to get started after the camera has been mounted properly. Use the Network cable to connect IP Camera to the LAN. - Page 17 A CC ES SI NG T H E W I F I C AM E R A con ti n u ed Connect to the Internet using a router to access the Internet Follow the steps to use a router to access the Internet by shared ADSL. If a router is set for dial-up Internet access, setting an ADSL dial-up account and password on the IP Camera is not required.
-
Page 18: How To Use Ddns
A CC ES SI NG T H E W I F I C AM E R A con ti n u ed Access the IP Camera from the Internet User can access the IP Camera from the Internet by entering the WAN IP address + port number into the browse. - Page 19 A CC ES SI NG T H E W I F I C AM E R A con ti n u ed IP Camera will access the Internet automatically. Another way the user can access the IP camera from a WAN is by using the DDNS domain name. If the gateway settings and DDNS settings have been completed, enter the DDNS dynamic domain name (for example,http://ipcam.vicp.net, do not add www.) in the address bar of IE to access the IP Camera.
- Page 20 ACC E S S ING T H E WI F I CA M E R A co nti nued Login as “admin” and enter your password. Camera recording image displays as shown in the picture below.
-
Page 21: Before You Begin
A CC ES SI NG T H E W I F I C AM E R A con ti n u ed Accessing the IP Camera from an Android Phone Before you begin: Make sure you allow install unsigned sources: Press “Menu”... - Page 22 ACC E SS IN G T H E W I FI C A M E R A co n ti n ued Download the Android software from CD. Unzip the software and copy “IPCamera.apk” to the phone using a usb cable.
- Page 23 A CC ES SI NG T H E W I F I C AM E R A con ti n u ed Use “File explorer” on your handset to navigate to the SD memory card. (You may need to download File explorer if you don’t have one). Click to install application. Once installed, open application.
-
Page 24: Frequently Asked Questions
A P PE N D I X Frequently Asked Questions Note: Please check Network connections first to troubleshoot any problems. Check the working status revealed by the indicators on the network server, hub, exchange the network card. If abnormal, check the network connections. Browse to the list of problems you may encounter while setting up the camera: What do I do if I have forgotten the administrator User Name and/or password? To reset the administrator User Name and password, Press and hold down the RESET BUTTON for... -
Page 25: Problems With Network Bandwidth
A P PE N D I X c o nt i n u ed Install the ‘IP Camera Tool’, ActiveX controller will be installed simultaneously (recommended). Download ActiveX controller and set the Security Properties of IE on the PC when you view it for first time: Go to Tools >... - Page 26 A P PE N D I X c o nt i n u ed Can’t access the IP camera on the internet? There could be a number of reasons: ActiveX controller is not installed correctly. The port IP camera being used is blocked by Firewall or Anti-virus software. Change the port number and try again.
- Page 27 A P PE N D I X c o nt i n u ed Wait for the download to complete. A dialog box will pop-up as shown as in the chart below. Click the ‘Install Now’ button to start installation. After installation, click ‘Restart Firefox’...
- Page 28 A P PE N D I X c o nt i n u ed Register procedure from a DDNS web Step 1: Enter http://www.dyndns.com/ and Create Account. Step 2: Enter your information. Step 3: After a minute, you will receive an E-mail from DynDNS Support and it will give you a confirmation address (e.g.
- Page 29 A P PE N D I X c o nt i n u ed Step 5: On the Add New Hostname page. Input your Hostname. Choose Host with IP address. Click “Use Auto Detect IP Address” xxx.xx.xx.xxx. Then click Create Host. Step 6: Now you have obtained a Dynamic Domain Name, and can use it in the DDNS Service Settings.
-
Page 30: Default Parameters
A P PE N D I X c o nt i n u ed Default Parameters Default network Parameters IP address: Automatically obtained Subnet mask: 255.255.255.0 Gateway: Automatically obtained DHCP: Disabled DDNS: Disabled Username and password Default Administrator User Name: admin Default Administrator Password: No password... -
Page 31: Warranty
WAR R ANT Y TECHNICAL SUPPORT For Technical Support please contact your local distributor. LIMITED WARRANTY This product is supplied with a 1 Year warranty. The Warranty excludes products that have been misused (including accidental damage) and damage caused by normal wear and tear. In the unlikely event that you encounter a problem with this product, it should be returned to the place of purchase.
Need help?
Do you have a question about the Mini319w and is the answer not in the manual?
Questions and answers