Table of Contents
Advertisement
Quick Links
Advertisement
Table of Contents

Related Manuals for Brigade CVDSC548T6GAR

Summary of Contents for Brigade CVDSC548T6GAR
- Page 1 Use & Care Manual BRIGADE Viking Range Corporation 111 Front Street Greenwood, Mississippi 38930 USA (662) 455-1200 For product information, call 1-888-845-4641 or visit our web site at www.brigade.ca Professional Custom Freestanding Electronic Control Dual Fuel Ranges F21088 EN (030113)
-
Page 2: Table Of Contents
Lighting Burners___________________________________________18 at 1-888-845-4641. Surface Burners/Automatic Re-Ignition _______________________18 VariSimmer™ _____________________________________________18 We appreciate your choice of a Brigade range and hope that you will TruPower Plus™ Burner ____________________________________18 again select our products for your other major appliance needs. Surface Heat Settings ______________________________________19... -
Page 3: Warnings & Safety
Warnings & Safety Warnings & Safety Warning and Important Safety Instructions appearing in this manual WARNING are not meant to cover all possible conditions and situations that may occur. Common sense, caution, and care must be exercised when If the information in this manual is not followed exactly, a installing, maintaining, or operating the appliance. - Page 4 Warnings & Safety Warnings & Safety To Prevent Fire or Smoke Damage Cooking Safety • Be sure all packing materials are removed from the appliance before • To eliminate the hazard of reaching over hot surface burners, cabinet operating it. storage should not be provided directly above a unit.
- Page 5 Warnings & Safety Warnings & Safety Cooking Safety Utensil Safety (cont.) (cont.) • NEVER use aluminum foil to cover oven racks or oven bottom. This could • This appliance has been tested for safe performance using conventional cookware. DO NOT use any devices or accessories that are not specifically result in risk of electric shock, fire, or damage to the appliance.
- Page 6 Warnings & Safety Warnings & Safety WARNING Important Safety Notice and Warning (State of California Proposition 65) WARNING: This product contains one or more chemicals known to the ELECTRICAL SHOCK HAZARD State of California to cause cancer. DO NOT touch a hot oven light bulb with a damp cloth as WARNING: This product contains one or more chemicals known to the the bulb could break.
-
Page 7: Before Using Range
Warnings & Safety Before Using Range All products are wiped clean with solvents at the factory to remove any WARNING visible signs of dirt, oil, and grease which may have remained from the manufacturing process. Before starting to cook, clean the range thoroughly with hot, soapy water. -
Page 8: Range Features
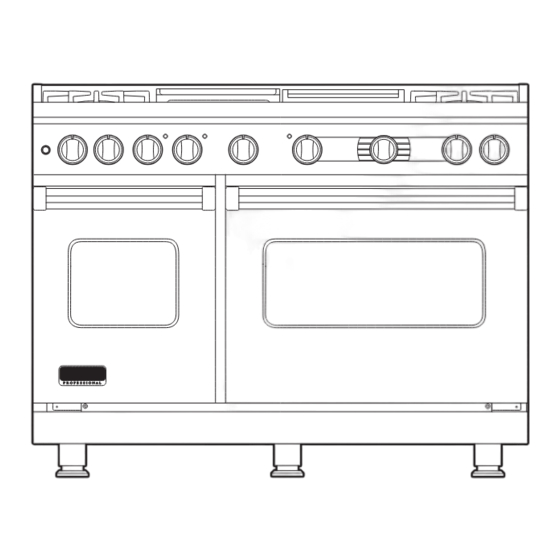
Range Features Range Features Interior Oven Left Rear Burner Left Front Burner Left Oven Left Oven Griddle Control Left Display Right Display Right Rear Burner Right Front Burner Light Switch Control Knob Control Knob Selector Control Temperature Knob (Clock & Time) (Function &... -
Page 9: Burner Configurations
Range Features Oven Features Burner Configurations Broil element TruConvec™ element (behind baffle) Denotes models which have a TruPower Plus™ 18,500 BTU Burner Two TruGlide Oven light 30” Four-Burner 36” Six-Burner racks Oven light One standard 48” Six-Burner/Griddle rack Concealed bake element Rack Positions Each 30”... -
Page 10: Surface Operation
Surface Operation Surface Operation Lighting Burners Surface Cooking Tips All burners are ignited by electric ignition using the exclusive • Use low or medium flame heights when cooking in vessels that are SureSpark™ Ignition system, offering consistent and reliable poor conductors of heat, such as glass, ceramic, and cast-iron. ignition every time. -
Page 11: Cooking Vessels
Surface Operation Surface Operation Cooking Vessels Griddle/Simmer Plate Operation Each cook has his or her own preference for the particular cooking • Turn the griddle control knob counterclockwise to the desired vessels that are most appropriate for the type of cooking temperature setting. -
Page 12: Oven Functions And Settings
Surface Operation Oven Functions and Settings Griddle/Simmer Plate Clean Up & Care (cont.) • After using the griddle, always remove the grease trough located in CLOCK/ OVEN PROBE FUNC the front. Simply pull the trough towards you and lift out. Be sure to 00000000 allow all surfaces to cool before removing the grease trough. -
Page 13: Programming Clock
Oven Functions and Settings Oven Functions and Settings Clock Display BROIL HI HI BROIL Clock Display (General) Use this setting for broiling dark meats at 1” thickness When AC power is applied (including after a 12:00 or less where rare or medium doneness is desired. power loss), CLOCK display shows a flashing Temperature is pre-set at 550ºF (290ºC). -
Page 14: Using The Oven
Oven Functions and Settings Using the Oven Temp Display (General) Set Oven Function and CLOCK/ OVEN PROBE FUNC Temperature Temperature Setting: 5ºF (2ºC) increments MIN/SEC OVEN TEMP TIMER Temperature Display: COOK TIME Actual Temp (PREHEAT ONLY) 1ºF (1ºC) increments Set Oven Function: STOP CLEAN/ Meat Probe Actual Temp... - Page 15 Using the Oven Using the Oven Set Oven Function and Temperature Preheat (cont.) For best results, it is extremely important that you preheat your oven Note: OVEN TEMPERATURE button does not need to be pushed as to the desired cooking temperature before placing food items in the the program automatically moves to setting OVEN TEMPERATURE oven to begin cooking.
-
Page 16: Set Oven Function And Temperature
Using the Oven Using the Oven Normal Operation Cook Time and Stop Time CLOCK/ OVEN PROBE FUNC (Delay Cook) Once the FUNCTION and TEMPERATURE are set, and PREHEAT MIN/SEC OVEN TIMER TEMP completes, oven will beep indicating set temperature has been With the Viking oven, you can choose COOK reached and normal operation begins. -
Page 17: Hold Mode
Using the Oven Using the Oven Cook Time and Stop Time (Delay Cook) Timer Operation (cont.) CLOCK/ OVEN PROBE FUNC will be illuminated. Pressing ”CLOCK/PROBE” button shows time (Used to operate timer independently MIN/SEC OVEN TIMER TEMP while maintaining DELAY programming. There will be an audible beep from oven) COOK at 1 minute and 3 long beeps when time expires (0:00). -
Page 18: Conventional And Convection Cooking
Using the Oven Using the Oven Control Lock Conventional and Convection Cooking CLOCK/ OVEN PROBE FUNC This feature allows user to lock out Because of variations in food density, surface texture and consistency, MIN/SEC OVEN control panel to prevent adjustments to TEMP some foods may be prepared more successfully using the conventional TIMER... -
Page 19: Baking
Baking Using the Oven Conventional and Convection Cooking BAKE (Two-Element Bake) (cont.) • Some recipes, especially those that are homemade, may require Full power heat is radiated from adjustment and testing when converting from standard to the bake element in the bottom convection modes. - Page 20 Baking Baking TRU CONV (TruConvec™) Baking Chart The rear element only operates Single Rack Time at full power. There is no direct Food Pan Size Position Temp (min) heat from the bottom or top BREADS elements. The motorized fan in Biscuits Cookie sheet 3 or 4...
- Page 21 Solving Baking Problems Baking Convection Baking Chart Baking problems can occur for many reasons. Check the chart below for the causes and remedies for the most common problems. It is Single Rack Time important to remember that the temperature setting and cooking Food Pan Size Position...
-
Page 22: Roasting
Roasting Roasting CONV ROAST* Roasting Tips (cont.) (Convection Roast) • When using a meat thermometer, insert the probe halfway into the The convection element runs in center of the thickest portion of the meat. (For poultry, insert the conjunction with the inner and thermometer probe between the body and leg into the thickest part outer broil elements. - Page 23 Roasting Roasting Conventional Roasting Chart Convection Roasting Chart (when using the Bake or Convection Bake setting) Internal Time Internal Food Weight Temp (min/lb) Temp Time Food Weight Temp (min/lb) Temp BEEF BEEF Rib roast Rib roast Rare 4 - 6 lbs 325˚...
-
Page 24: Broiling
Broiling Broiling CONV BROIL* LOW BROIL (Convection Broil) This mode uses only a fraction The top element operates of the available power to the at full power. This function is inner broil element for delicate exactly the same as regular top-browning. - Page 25 Broiling Broiling Broiling Tips Broiling Chart • ALWAYS use a broiler pan and grid for broiling. They are designed Type and Time to provide drainage of excess liquid and fat away from the cooking Cut of Meat Weight Setting Rack (min) surface to help prevent splatter, smoke, and fire.
-
Page 26: Convection Dehydrate/Defrost
Convection Dehydrate/Defrost User Settings Convection Dehydrate To adjust settings: This oven is designed not only to cook, but also to dehydrate fruits 1. Press “CLEAR” and hold 2 seconds to activate. and vegetables by removing water through evaporation. 1. Prepare the food as recommended. 2. -
Page 27: Meat Probe
Meat Probe Meat Probe To Insert the Meat Probe The meat probe takes the (cont.) Probe Cable guesswork out of roasting by 5. Toggle ”SELECTOR” right to increase or left to decrease to desired cooking foods to the ideal internal temperature in 1ºF increments. -
Page 28: Cleaning And Maintenance
Cleaning and Maintenance Cleaning and Maintenance Burner Head Any piece of equipment works better and lasts longer when maintained properly and kept clean. Cooking equipment is no If ports on burner head are clogged, clean with a straight pin. exception. Your range must be kept clean and maintained properly. DO NOT enlarge or distort the ports. -
Page 29: Self-Clean Cycle
Cleaning and Maintenance Cleaning and Maintenance WARNING Control Knobs MAKE SURE ALL THE CONTROL KNOBS POINT TO THE OFF POWER FAILURE WARNING POSITION BEFORE REMOVING. Pull the knobs straight off. Wash in Due to safety considerations and the possibility of personal injury in detergent and warm water. -
Page 30: Replacing Oven Lights
Self-Clean Cycle Replacing Oven Lights If Self-Clean is selected: WARNING Note: A fan noise will be heard during the self-clean cycle and will continue to run for the 3-1/2 hour duration of the self-clean cycle. ELECTRICAL SHOCK HAZARD 1. The control initiates the door lock. During this period, the display Disconnect the electric power at the main fuse or circuit shows “LOCKING”. -
Page 31: Troubleshooting
Troubleshooting Service Information If service is required, call your dealer or authorized service agency. Problem Possible Cause and/or Remedy The name of the authorized service agency can be obtained from the Range will not function. Range is not connected to electrical power. dealer or distributor in your area. -
Page 32: Warranty
Warranty Warranty (cont.) PROFESSIONAL SERIES LIMITATION OF REMEDIES AND DURATION OF IMPLIED WARRANTY CUSTOM FREESTANDING ELECTRONIC CONTROL DUAL FUEL RANGES WARRANTY OWNER’S SOLE AND EXCLUSIVE REMEDY FOR A CLAIM OF ANY KIND WITH RESPECT TO THIS PRODUCT SHALL BE THE REMEDIES SET FORTH ABOVE. VIKING RANGE CORP IS NOT THREE YEAR FULL WARRANTY RESPONSIBLE FOR CONSEQUENTIAL OR INCIDENTAL DAMAGE, INCLUDING BUT NOT LIMITED TO Freestanding electronic control dual fuel ranges and all of their component parts, except as detailed...
Need help?
Do you have a question about the CVDSC548T6GAR and is the answer not in the manual?
Questions and answers