Table of Contents
Advertisement
Quick Links
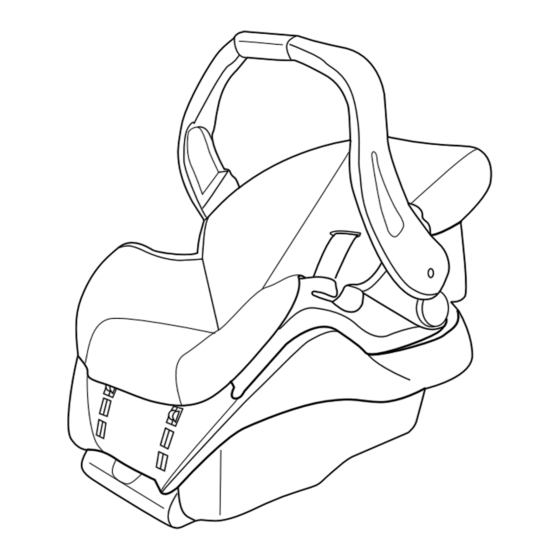
Infant Restraint
/Carrier
Owner's Manual
READ THIS MANUAL
KEEP INSTRUCTIONS FOR FUTURE USE.
Do not install or use this infant restraint until you
read and understand the instructions in this manual.
FAILURE TO PROPERLY USE THIS INFANT RESTRAINT
INCREASES THE RISK OF SERIOUS INJURY OR DEATH IN
A SUDDEN STOP OR CRASH.
© 2002 Graco ISPC015BA
09/02
1
Advertisement
Table of Contents

Related Manuals for Graco ISPC015BA


Summary of Contents for Graco ISPC015BA
- Page 1 Do not install or use this infant restraint until you read and understand the instructions in this manual. FAILURE TO PROPERLY USE THIS INFANT RESTRAINT INCREASES THE RISK OF SERIOUS INJURY OR DEATH IN A SUDDEN STOP OR CRASH. © 2002 Graco ISPC015BA 09/02...
-
Page 2: Table Of Contents
1.0 Warnings to Parents and Other Users ....4-5 2.0 Registration Information ......6-7 2.1 Register Your Infant Restraint . - Page 3 6.0 Using Infant Restraint .......27-40 6.1 Positioning Harness Straps ..... . .27 6.1.1 3-Point Harness .
-
Page 4: Warnings To Parents And Other Users
1.0 Warnings to Parents and Other Users Failure to properly use this infant restraint increases the risk of serious injury or death in a sharp turn, sudden stop or crash. Your child’s safety depends on you installing and using this infant restraint correctly. - Page 5 6. Properly reclining the infant restraint. 7. Properly securing the infant restraint in the vehicle using a seat belt designed to restrain an infant restraint or by using LATCH. Many seat belts are NOT safe to use with infant restraints, even though they can easily be threaded through the infant restraint!
-
Page 6: Registration Information
Graco Children’s Products Inc. 150 Oaklands Blvd. Exton, PA 19341 or call 1-888-224-6549 2.2 Recall Information • Call the U.S. Government’s Auto Safety Hotline at 1-800-424-9393 (202-366-0123 in D.C. area) • www.nhtsa.dot.gov • Graco: 1-888-224-6549 or www.gracobaby.com... -
Page 7: If You Need Help
2.3 If You Need Help In the U.S.A. or Canada, please contact our Customer Service Department with any questions you may have concerning parts, use, or maintenance. When you contact us, please have your product’s model and serial numbers ready so that we may help you efficiently. -
Page 8: Features And Components
3.0 Features and Components Each model of the infant restraint comes with different harness options. To adjust your infant restraint properly, it is very important to follow the instructions that are appropriate for the model you have purchased. 3-Point Harness 5-Point Harness Vehicle belt/LATCH* path LATCH... -
Page 9: 3-Point Harness Model
3.1 3-Point Harness Model FRONT VIEW: 3-POINT HARNESS Harness Handle slots Handle adjustment Harness button clip Vehicle belt hook Harness Harness straps buckle... - Page 10 REAR VIEW: 3-POINT HARNESS Canopy (on certain models) Harness tightener Release handle Level Harness indicator* anchor buckle Harness slot Attachment Owner’s latch manual pocket Locking clip** *Level The level indicator is attached to the side of Indicator the infant restraint, and indicates whether or not the infant restraint is properly reclined.
-
Page 11: 5-Point Harness Model
3.2 5-Point Harness Model FRONT VIEW: 5-POINT HARNESS Handle Harness slots Harness Handle clip adjustment button Harness buckle Vehicle Harness belt adjustment hook button Harness buckle tongues Harness adjustment strap... - Page 12 REAR VIEW: 5-POINT HARNESS Canopy (on certain models) Release handle Level indicator* Harness slot Owner’s manual pocket Attachment latch Metal Waist strap junction anchor buckle plate Harness adjustment strap Locking clip** *Level The level indicator is attached to the side of Indicator the infant restraint, and indicates whether or not the infant restraint is properly reclined.
-
Page 13: Removing And Attaching Base
3.3 Removing and Attaching Base – To remove infant restraint, squeeze handle at back of seat and lift infant restraint from base – as shown To put infant restraint in base, push infant restraint down until it clicks into base. Pull up on infant restraint to be sure it is latched firmly into base. -
Page 14: Attaching Canopy (Certain Models)
3.5 Attaching Canopy (on certain models) – 1. Infant restraint comes with four (two on certain models) identical canopy support parts. Thread one canopy support completely through one sewn – tunnel — 2. Slide straight end of a second support into the straight end of the —... -
Page 15: Head Support (Certain Models)
3.6 Head Support (on certain models) š Some infants may need extra support to keep their head and body in a comfortable position. Unsnap the sides and resnap them with the harness straps threaded through the slots in š the cushion ›... -
Page 16: Important Information
4.0 Important Information 4.1 Warnings for Use as Infant Restraint • DO NOT INSTALL OR USE THIS INFANT RESTRAINT AND BASE UNTIL YOU READ AND UNDERSTAND THE INSTRUCTIONS IN THIS MANUAL AND IN YOUR VEHICLE OWNER’S MANUAL. DO NOT let others install or use the infant restraint unless they understand how to use it. - Page 17 • SOME SPECIAL NEEDS CHILDREN, such as pre-term babies or those who have tested positive for positional apnea, may be at increased risk of suffering breathing or other difficulties in an infant restraint. If your child has special needs, we recommend that you have your physician or hospital staff evaluate your child and recommend the proper infant restraint or car bed before using this product.
-
Page 18: Warning For Use With A Stroller
4.2 Warning for Use With a Stroller • USE ONLY WITH STROLLERS THAT ARE PART OF THE GRACO TRAVEL SYSTEM. Refer to stroller instruction sheet for details about how to attach the infant restraint to your stroller. If you do not have an instruction sheet, please call toll-free, 1-888-224-6549 to obtain one, or visit our website, www.gracobaby.com. -
Page 19: Additional Warnings For Use As Carrier
4.3 Additional Warnings for Use as Carrier • FALL HAZARD: Child’s movements can slide carrier. NEVER place carrier near edges of countertops, tables or other high surfaces. Always stay within arms reach whenever carrier is not on floor/ground. BE SURE handle locks into position before lifting carrier. NEVER place carrier in the top of a shopping cart. -
Page 20: Height And Weight Limits
4.4 Height and Weight Limits FAILURE TO USE INFANT RESTRAINT IN A MANNER APPROPRIATE FOR YOUR CHILD’S SIZE MAY INCREASE THE RISK OF SERIOUS INJURY OR DEATH. Your child MUST meet all requirements: • WEIGHT: 20 lbs (9 kg) or less •... -
Page 21: Infant Restraint Location
Some vehicles do not have any seating positions that can be used safely with the infant restraint. If you are not sure where to place the infant restraint in your vehicle, consult your vehicle owner’s manual or Graco at 1-888-224-6549. – • Whenever possible, secure the infant restraint in the center position of the –... -
Page 22: Vehicle Seat Belt Requirements
Pay careful attention to these systems; some of the seat belts that are not safe to use look very much like seat belts that are safe to use. If you are unsure, consult your vehicle owner’s manual or Graco at 1-888-224-6549. -
Page 23: Unsafe Vehicle Belt Systems
5.2.1 UNSAFE Vehicle Belt Systems DO NOT use any of the following systems to secure the infant restraint. LATCH can be used IN PLACE OF the vehicle belt system. Please refer to vehicle owners manual for LATCH locations. • Lap Belts with Emergency Locking Retractor (ELR) This lap belt stays loose and can move until it locks in a crash or sudden stop. -
Page 24: Safe Vehicle Belt Systems
5.2.2 SAFE Vehicle Belt Systems THE FOLLOWING BELT SYSTEMS CAN BE USED WITH YOUR INFANT RESTRAINT, IF the seat location meets all other requirements of these instructions and those in your vehicle owner's manual. LATCH can be used in place of the vehicle belt system. Please refer to vehicle owners manual for LATCH locations. - Page 25 • Combination Lap/Shoulder Belt with Sliding Latch Plate This belt has a latchplate that slides freely along the belt. This belt MUST be converted to prevent movement of the lap portion of the belt. You must use the locking clip provided with the infant restraint, unless your vehicle's seat belt Locking clip can be converted in another way as described...
-
Page 26: Latch Locations
5.3 LATCH locations Newer vehicles may have one or more seating positions with LATCH anchorage systems. If vehicle is equipped with LATCH, the vehicle lower anchor points may be visible at the vehicle seat crease. If not visible, they may be marked with the symbol See your vehicle owner’s manual for exact locations, anchor identification, and requirements for use with an infant restraint. -
Page 27: Using Infant Restraint
6.0 Using Infant Restraint 6.1 Positioning Harness Straps FAILURE TO PROPERLY ADJUST THE HARNESS STRAPS FOR YOUR CHILD INCREASES THE RISK OF SERIOUS INJURY OR DEATH IN THE EVENT OF A SHARP TURN, SUDDEN STOP OR CRASH. The harness straps must be properly adjusted to fit your child according to the following instructions. -
Page 28: 3-Point Harness
6.1.1 3-Point Harness – 1. From back, push harness anchor buckle back through harness slot. If necessary, from front, use harness – strap to pull buckle from slot Harness tightener Harness anchor buckle — 2. Reinsert harness anchor buckle in the —... -
Page 29: 5-Point Harness
6.1.2 5-Point Harness š 1. Depress the harness adjustment button š under the seat flap . Pull the shoulder straps out to loosen the harness. 2. Behind seat, remove the ends of the two shoulder straps from the metal junction ›... - Page 30 FOR SMALLER BABY: – Use the lower harness slots (if they are even with or just — below your child’s shoulders) and the upper strap loops . The ends of the straps must hang in front of the metal plate as shown —...
-
Page 31: Securing Child In Infant Restraint
6.2 Securing Child in Infant Restraint Failure to properly secure your child in the infant restraint/carrier increases the risk of serious injury or death from suffocation or falls, or in the event of a sudden stop or crash. Even when used only as a carrier, make sure the harness straps are properly secured. -
Page 32: 3-Point Harness
5. Buckle harness to the latch between child’s legs. Make sure that you hear a “click.” – DO NOT use the infant restraint if the harness does not latch in place. Call Graco at 1-888-224-6549. 6. From the back, pull strap through harness tightener to tighten the straps – as shown . -
Page 33: 5-Point Harness
Make sure that you hear each tongue click into the buckle. ™ DO NOT use the infant restraint if the harness does not latch in place. Call Graco at 1-888-224-6549. ™ 6. Snap harness clip pieces together 7. Pull on harness adjustment strap to tighten š... -
Page 34: Installing Infant Restraint/Base Using Vehicle Belt
6.3 Installing the Infant Restraint/Base Using Vehicle Belt You must carefully follow the instructions provided by your vehicle manufacturer, in addition to the information in this manual. Be sure you have read and understood section 5, “Infant Restraint Location” on p.21-26. –... - Page 35 3. Thread the seat belt: Belt MUST go Base with seat belt under tongue Infant restraint with seat belt 4. Buckle the seat belt. Make sure the buckle tongue goes into the ™ ™ correct buckle . The seat belt should not be twisted or turned.
- Page 36 5. Tighten the vehicle seat belt. Refer to your vehicle owners manual and the instructions in “5.2.2 SAFE Vehicle Belt Systems”, p. 24-25, on tightening your vehicle belt. To create a very tight installation, push down hard with your knee –...
-
Page 37: Using Latch To Install Base
Using LATCH to install Base ˜ Tongue For ease of installation, extend LATCH to its maximum length. Position base in vehicle seat as shown. 3. Thread LATCH through base belt path normally used for vehicle seat belt. Make sure that LATCH is UNDER ˜... -
Page 38: Reclining Infant Restraint/Base
6.5 Reclining Infant Restraint/Base For your child’s safety, it is important that your infant restraint/base be properly reclined. Attached to the side of your infant restraint is a level indicator to help properly recline the infant restraint/base on the vehicle seat. Failure to properly recline the infant restraint on the vehicle seat increases the risk of serious injury or death. - Page 39 – When using the base: To lower the foot; pull down on the bottom of the foot to the desired setting to adjust the recline –. To raise the foot; set the base on a flat surface, push in on the fingers on the base —...
- Page 40 Final Safety Check: Every time you drive with your child, – PUSH DOWN on the top of the infant restraint slowly but firmly to make sure the vehicle belt does not lengthen at all and that the vehicle belt or LATCH is fastened very tightly around the –...
-
Page 41: Additional Information
7.0 Additional Information 7.1 Airplane Use Install in an airplane the same way as in an automobile. Notify the airline ahead of time that you intend to bring the seat on board. Use only in forward-facing aircraft seat. Follow the flight attendant’s instructions about infant restraint placement. - Page 42 Repeat step 3 for LATCH with adjustment belt. After fastening onto storage bar, pull on adjustment belt to make sure LATCH is securely fastened. – LATCH storage should look like this – when complete Underside of base...
-
Page 43: Cleaning And Maintenance
7.3 Cleaning and Maintenance TO REMOVE AND WASH INFANT RESTRAINT PAD, follow — instructions in “6.1 Positioning Harness Straps”, p. 27-30. On 5-point harness models, push aside the small tab that holds the anchor buckles in — place and pull the anchor buckles out of their indentations. -
Page 44: Replacement Parts
MUST be included on the form to ensure proper replacement parts. Your model number can be found on a sticker on the underside of your infant restraint. Payment must accompany your order. Parts may also be ordered from Graco’s web site at www.gracobaby.com. Parts List: Price:** Seat pad ......... - Page 45 **CA 7.25%, IL 6.25%, IN 5%, NY 8.25%, OH 5.75%, PA 6%, SC 5% Telephone (including Area Code) Seat pad Check or money order enclosed (payable to Graco Children’s Products Inc.) Canopy Canopy bow Charge to credit card 3-point harness...
Need help?
Do you have a question about the ISPC015BA and is the answer not in the manual?
Questions and answers