Download Print this page

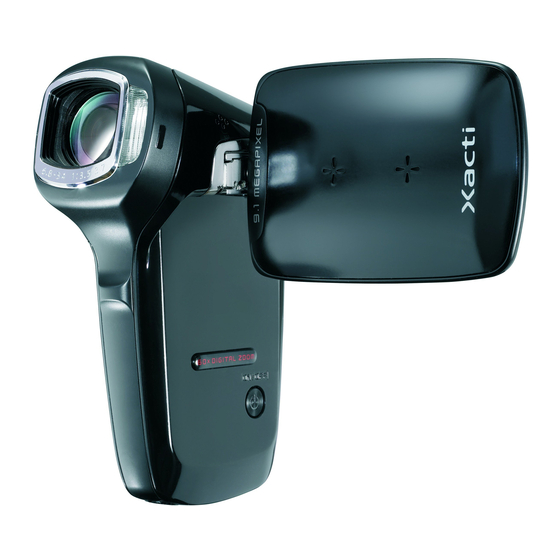
Sanyo VPC-CG9BK Service Manual

Digital movie camera
Hide thumbs Also See for VPC-CG9BK:

Advertisement

SERVICE MANUAL
Digital Movie Camera
Contents
1. OUTLINE OF CIRCUIT DESCRIPTION ............................... 3
2. DISASSEMBLY ................................................................... 12
3. ELECTRICAL ADJUSTMENT ............................................. 17
5. TROUBLESHOOTING GUIDE ............................................ 23
6. PARTS LIST ........................................................................ 24
CIRCUIT DIAGRAMS & PRINTED WIRING BOARDS ........... C1
RoHS
•This product does not contain any hazardous substances prohibited by the RoHS
Directive.
WARNING
•You are requested to use RoHS compliant parts for maintenance or repair.
•You are requested to use lead-free solder.
(This product has been manufactured using lead-free solder. Be sure to follow the
warning given on page 2 when carrying out repair work.)
CAUTION : Danger of explosion if battery is incorrectly replaced.
Replace only with the same or equivalent type recommended by the
manufacturer.
Discard used batteries according to the manufacturer's instructions.
NOTE : 1. Parts order must contain model number, part number, and description.
2. Substitute parts may be supplied as the service parts.
3. N. S. P. : Not available as service parts.
Design and specification are subject to change without notice.
SG214/U, EX, GX, EX2, GX2, EX4, GX5, U4, EX5 (R)
FILE NO.
VPC-CG9BK
(Product Code : 168 137 02)
(U.S.A.) (Canada)
VPC-CG9EXBK
(Product Code : 168 137 03)
(Europe) (U.K.) (South America)
(China) (Australia) (Hong Kong)
(Russia) (Middle East) (Africa)
(General) (Korea) (Taiwan)
VPC-CG9GXBK
(Product Code : 168 137 04)
(South America) (China)
(Australia) (Hong Kong)
(General) (Korea) (Taiwan)
VPC-CG9EXW
(Product Code : 168 137 07)
(Europe) (U.K.) (South America)
(China) (Australia) (Hong Kong)
(Russia) (Middle East) (Africa)
(General) (Korea) (Taiwan)
VPC-CG9GXW
(Product Code : 168 137 09)
(South America) (China)
(Australia) (Hong Kong)
(General) (Korea) (Taiwan)
VPC-CG9EX
(Product Code : 168 137 11)
(Europe) (U.K.) (South America)
(China) (Australia) (Hong Kong)
(Russia) (Middle East) (Africa)
(General) (Korea) (Taiwan)
VPC-CG9GXP
(Product Code : 168 137 12)
(South America) (China)
(Australia) (Hong Kong)
(General) (Korea) (Taiwan)
VPC-CG9
(Product Code : 168 137 18)
(U.S.A.) (Canada)
VPC-CG9EXP
(Product Code : 168 137 19)
(Europe) (U.K.) (South America)
(China) (Australia) (Hong Kong)
(Russia) (Middle East) (Africa)
(General) (Korea) (Taiwan)
REFERENCE No. SM5310742

Advertisement

loading

Summary of Contents for Sanyo VPC-CG9BK

  • Page 1: Table Of Contents

    FILE NO. SERVICE MANUAL VPC-CG9BK (Product Code : 168 137 02) (U.S.A.) (Canada) VPC-CG9EXBK Digital Movie Camera (Product Code : 168 137 03) (Europe) (U.K.) (South America) (China) (Australia) (Hong Kong) (Russia) (Middle East) (Africa) (General) (Korea) (Taiwan) VPC-CG9GXBK (Product Code : 168 137 04)
  • Page 2 PRODUCT SAFETY NOTICE The components designated by a symbol ( ! ) in this schematic diagram designates components whose value are of special significance to product safety. Should any component designated by a symbol need to be replaced, use only the part designated in the Parts List.
  • Page 3: Outline Of Circuit Description

    1. OUTLINE OF CIRCUIT DESCRIPTION 1-1. CMOS CIRCUIT DESCRIPTION 1. IC Configuration The CMOS peripheral circuit block basically consists of the following ICs. IC911 (MT9N001I125TC) CMOS imager CDS, AGC, ADC built-in H driver, V driver, serial communication circuit built-in 2. IC911 (CMOS) [Structure] The electric charges which are generated when each pixel is optically converted are in turn converted into signal voltages...
  • Page 4 1-2. CP1 and VF1 CIRCUIT DESCRIPTION 1. Circuit Description 2. Outline of Operation 1-1. Digital clamp When the shutter opens, the reset signals (ASIC and CPU) The optical black section of the extracts averaged values from and the serial signals (“take a picture” commands) from the the subsequent data to make the black level of the output 8-bit microprocessor are input and operation starts.
  • Page 5 4. Lens drive block 5. Video Clip Recording and Playback 4-1. Focus drive 5-1. Recording The 16-bit serial data signals (LENS_SD) and (LENS_SCLK The signal from the camera block is input to IC101 (ASIC). The and LENS_EN) which are output from the ASIC (IC101) are data that is input to the ASIC is input to SDRAM, and converts used to drive (FOCUS A +, FOCUS A -, FOCUS B + and FO- this data to encoded MPEG4 data, after which it is written in...
  • Page 6 1-3. PWA POWER CIRCUIT DESCRIPTION 1. Outline 3. Motor System Power Output This is the main power circuit, and is comprised of the follow- BOOST 5 V is output. Feedback for the 5.0 V output is pro- ing blocks. vided to the switching controller (Pin (B7) of IC501) so that Switching controller (IC501) PWM control can be carried out.
  • Page 7 1-4. ST1 STROBE CIRCUIT DESCRIPTION 1. Charging Circuit 2. Light Emission Circuit When UNREG power is supplied to the charge circuit and the When FLCLT signal is input from the ASIC, the stroboscope CHG signal from microprocessor becomes High (3.3 V), the emits light.
  • Page 8 1-5. SYA CIRCUIT DESCRIPTION 1. Configuration and Functions For the overall configuration of the SYA block, refer to the block diagram. The SYA block centers around a 8-bit microprocessor (IC301), and controls camera system condition (mode). The 8-bit microprocessor handles the following functions. 1.
  • Page 9 KEY_LEFT Key input LEFT (L= input) LCD panel rotation detection (L= panel inversion) HINJI NOT USED NOT USED NOT USED NOT USED BAT_OFF Battery OFF detection (L= battery OFF) Serial communication request signal SREQ FRAME_VALID CMOS_V signal KEY_2ND Key input 2nd SHUTTER (L= input) RESET Microprocessor reset input (L= reset) XCIN...
  • Page 10 3. Power Supply Control The 8-bit microprocessor controls the power supply for the overall system. The following is a description of how the power supply is turned on and off. When the battery is attached, a regulated 3.2 V (power off: 2.4 V) voltage is normally input to the 8-bit microprocessor (IC301) by IC302, so that clock counting and key scanning is carried out even when the power switch is turned off, so that the camera can start up again.
  • Page 11 MEMO – 11 –...
  • Page 12: Disassembly

    2. DISASSEMBLY 2-1. REMOVAL OF ST1 BOARD, LENS AND CP1 BOARD When assembling, tighten the screws order. A → B → C → D NOTE: Discharge a strobe capacitor with the discharge jig (VJ8-0188) for electric shock prevention. – 12 –...
  • Page 13 1. Screw 1.7 x 6 7. Compl, cabi mid 2. Open the cover battery. 3. Screw 1.7 x 4.5 4. Three screws 1.7 x 6 5. Two screws 1.7 x 4.5 6. Cabinet top 7. Compl, cabi mid 8. Screw 1.7 x 3 9.
  • Page 14 2-2. REMOVAL OF UNIT CONTROL 1. Heat sink tape joint 8. Holder joint 2. Screw 1.7 x 3.5 9. Earth spring right 3. Unit, control 10. Spacer wire 4. Spacer unit 11. Speaker, 8 5. Heat sink right 12. Spacer speaker 6.
  • Page 15 2-3. REMOVAL OF TB1 BOARD AND VF1 BOARD 14. Spacer LCD A VF1 board side LCD side 5. Spacer LCD C When assembling, tighten the screws order. A → B → C → D Microphone dressing method 1. Screw 1.7 x 2 11.
  • Page 16 2-4. BOARD LOCATION VF1 board TB1 board ST1 board CP1 board – 16 –...
  • Page 17: Electrical Adjustment

    Download the calibration software and the firmware Install the USB driver with camera or connection kit for PC. from the following URL. http://www.digital-sanyo.com/overseas/service/ 3. Pattern box Place the DscCalDi.exe file, camapi32.dll file and Turn on the switch and wait for 30 minutes for aging to take QrCodeInfo.dll file together into a folder of your...
  • Page 18 3-6. The adjustment item which in necessary in part exchange CCD Black CCD White Lens Lens Point And Point Factory Adjust- Adjust- White Point Language storage Reset Defect Adjust- Cord Defect Detect Setting ment ment information Setting Detect Setting ment Adjustment registration (Infinity)
  • Page 19 Note: Adjustment value determination is effectuated using below val- Do not vibrate during the adjustment. ues. The temperature of the camera should be allowed to reach The adjustment values fulfill the conditions below, they are de- termined as within specifications. room temperature before adjusting the focus.
  • Page 20 3. AWB Adjustment Adjustment value determination is effectuated using the “CHECK", “CHECK_ND”, "MS", “MS_M”, “MS_C”, “MS_C2”, “IRIS_PWM1”, “IRIS_PWM2”, “IRIS_PWM3”, “IRIS_PWM4” and “IRIS_PWM5” values. If CHECK= wc0, wc1, wc2 CHECK_ND= wnc0, wnc1, wnc2 MS= ms1, ms2, MS_M= ms3, ms4, MS_C= ms5, ms6, MS_C2= ms7, ms8, IRIS_PWM1= s1, s2 IRIS_PWM2= s3, s4...
  • Page 21 Preparation: 3-13. Firmware uploading procedure POWER switch: ON 1. Uploading the firmware should be carried out if the version Setting of pattern box: number (COMPL PWB XX-X) on the replacement circuit Color temperature: 3100 ± 20 (K) board is lower than the version of the distributed firmware. Luminance: 900 ±...
  • Page 22: Usb Storage Information Registration

    17.) 2. Double-click on the DscCalDi.exe. 3. Click on the Get button in the USB storage window and check the USB storage data. VID: SANYO PID: CG9 Serial: Rev. : 1.00 4.
  • Page 23: Troubleshooting Guide

    5. TROUBLESHOOTING GUIDE POWER LOSS INOPERTIVE TAKING INOPERATIVE PUSH SHUTTER PUSH THE POWER BUTTON SW FOR A WHILE HIGH IC301-24, 52 IC301-14 CHECK UNIT SW CHECK POWER SW KEY INPUT KEY_POWER INPUT IC501-D5, F6 (PON) IC301-9, 36, 59 CHECK IC101, IC301, Q5005-2 (PON2) CHECK IC302 (VDD)
  • Page 24: Parts List

    LOCATION PARTS NO. DESCRIPTION LOCATION PARTS NO. DESCRIPTION Note: Please refer to the table of next page for the accessories. 7001 636 115 5564 CARTON INNER-SG214/U,VPC-CG9BK,VPC-CG9 636 103 1783 STRAP CAP LENS-SG112/J 7001 636 115 5571 CARTON INNER-SG214/EX,VPC-CG9EXBK, 636 113 1100...
  • Page 25 Table of accessories...
  • Page 26 CABINET AND CHASSIS PARTS 1 LOCATION PARTS NO. DESCRIPTION LOCATION PARTS NO. DESCRIPTION 636 114 1574 COMPL,COVER BATT-SG214 636 114 0461 SPACER LENS RIGHT-SG214 VPC-CG9BK,VPC-CG9EXBK,VPC-CG9GXBK 636 113 0462 CABINET TOP-SG214/J 636 114 1598 COMPL,COVER BATT-SG214 VPC-CG9BK,VPC-CG9EXBK,VPC-CG9GXBK, VPC-CG9EXW,VPC-CG9GXW VPC-CG9EX,VPC-CG9 636 114 4902...
  • Page 27 CABINET AND CHASSIS PARTS 1 Cabinet 1 SG214/J PARTS LIST 1...
  • Page 28 HEAT SINK TAPE RIGHT-214 645 096 8129 MAGNET-SG214/J 636 116 7574 ASSY,CABI RIGHT SV-214/J 636 115 4789 SPACER LCD A-SG214/J VPC-CG9BK,VPC-CG9EXBK,VPC-CG9GXBK 636 114 6715 SPACER LCD C-SG214/J 636 116 7581 ASSY,CABI RIGHT SV-214/J2 636 113 0653 COVER LCD BACK-SG214/J VPC-CG9EXW,VPC-CG9GXW...
  • Page 29 CABINET AND CHASSIS PARTS 2 109 113 Cabinet 2 SG214/J PARTS LIST 2...
  • Page 30 ELECTRICAL PARTS Note: 1. Materials of Capacitors and Resistors are abbreviated as follows ; Resistors Capacitors MT-FILM Metallized Film Resistor MT-POLYEST Metallized Polyester Capacitor MT-GLAZE Metallized Glaze Resistor MT-COMPO Metallized Composite Capacitor OXIDE-MT Oxide Metallized Film Resistor TA-SOLID Tantalum Solid Capacitor AL-SOLID Aluminum Solid Capacitor NP-ELECT...
  • Page 31 LOCATION PARTS NO. DESCRIPTION LOCATION PARTS NO. DESCRIPTION C1066 303 338 0309 CERAMIC 0.1U K 10V C9011 303 294 6100 CERAMIC 100P J 50V C1067 303 338 0309 CERAMIC 0.1U K 10V C9012 303 338 0309 CERAMIC 0.1U K 10V C1068 303 338 0309 CERAMIC...
  • Page 32 LOCATION PARTS NO. DESCRIPTION LOCATION PARTS NO. DESCRIPTION R1122 301 224 9405 MT-GLAZE 1.0M JA 1/16W R9012 301 226 1506 MT-GLAZE 0.000 ZA 1/16W R1256 301 224 8804 MT-GLAZE 100 JA 1/16W R9014 301 226 1506 MT-GLAZE 0.000 ZA 1/16W R1301 301 261 1707 MT-GLAZE...
  • Page 33 LOCATION PARTS NO. DESCRIPTION (RESISTORS) R1701 301 226 1506 MT-GLAZE 0.000 ZA 1/16W R1867 301 301 3500 MT-GLAZE 200 JA 1/16W R1868 301 263 6908 MT-GLAZE 2K JA 1/16W R1869 301 263 6908 MT-GLAZE 2K JA 1/16W R1870 301 301 3500 MT-GLAZE 200 JA 1/16W R1871...
  • Page 34 SANYO Electric Co., Ltd. Osaka, Japan Mar./’08 Printed in Japan...