
Summary of Contents for Bad Boy Xtreme N
- Page 1 treme Installation and Operation Guide treme Hi-Power B/G/N Wi-Fi Antennas Revision: 1.3 Getting YOU on the web...
- Page 2 Declaration of Conformity Bitstorm declares that this Bitstorm BAD BOY device is in compliance with the essential require- ments and other relevant provisions of Directive 1999/5/EC. This device complies with Part 15 of the FCC rules. Operation is subject to the following two con-...
-
Page 3: Package Contents
1 75’ (23m) Outdoor Rated, PVC Jacket, UV Protected Black Cable 1 10’ (3m) Indoor Ethernet Gray Cable 1 Grommet - for Xtreme N only (located under end cover) 1 Packet of Connector Corrosion Inhibitor (located under end cover) ... -
Page 4: Chapter 1 - Bench Test
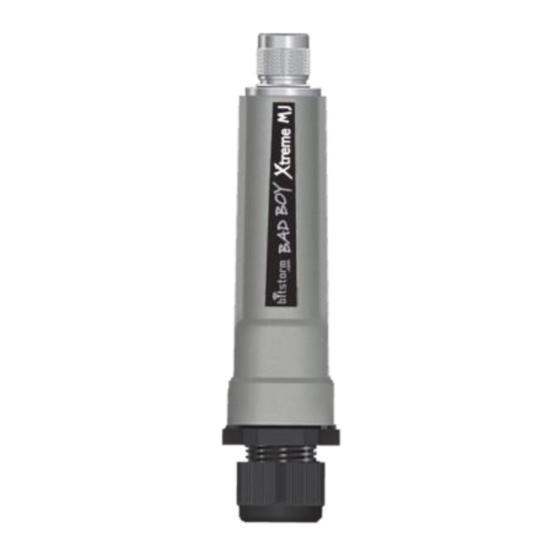
Bitstorm Inc. Bad Boy Xtreme N & MJ Chapter 1 - Bench Test Check off items as completed. Step 1 Remove the protective cap from Antenna connector and attach to Xtreme. Finger tight is adequate. Do not over tighten. - Page 5 POE Adapter Port 1. See illustration on Page 3 for location. Note: Xtreme requires power to operate and should be connected to Port 1 which always supplies power. Caution: Do not connect anything other than Bitstorm BAD BOY devices to Port 1. Step 5 ...
-
Page 6: Chapter 2 - Installation
Bitstorm Inc. Bad Boy Xtreme N & MJ Proceed with remainder of installation only after correct operation has been determined. Chapter 2 - Installation Disconnect power. Determine the best location for the unit. It can be any place con-... - Page 7 Xtreme N: Put the cable end through bot- tom cover and plug into Xtreme N. If conven- ient, verify that Power LED lights. Investigate if it does not. Xtreme MJ: Separate gland parts. Fit cable...
-
Page 8: Chapter 3 - Operation
Congratulations - you should now be surfing the web. Chapter 3 - Operation Step 1 Power up the BAD BOY system. It will take about 30 seconds after power is applied for the system to become fully operational. If you DO NOT have the Unleashed option installed: Turn off Wi-Fi devices in your computer to prevent multiple simultane- ous Wi-Fi connections. - Page 9 Bitstorm Inc. Bad Boy Xtreme N & MJ Step 3 Refer to Fig 2. On the Link Setup tab, select the country that you are in as required [1]. Select a hotspot from the list [2] or enter an access point name into the Hotspot Name field [3].
- Page 10 Bitstorm Inc. Bad Boy Xtreme N & MJ Step 4 When Apply has completed, the Status tab will be displayed. Connec- tion progress will be reported. You may see status of ’Connecting’, ‘Authenticating’, ‘Obtaining IP Address’, etc. See Fig 3.
-
Page 11: Appendix A - Specifications
Upgradeable: Yes - Firmware Operating System: All - Windows / Mac / Linux / etc. PCB Conformal Coating: Xtreme N - Acrylic, Xtreme MJ - None Wireless Modes: Wireless Modes B / G / N Appendix B - Xtreme N LED Indicators... -
Page 12: Appendix C - Power Injector Duo Specifications
Bitstorm Inc. Bad Boy Xtreme N & MJ Appendix C - Power Injector DUO Specifications M-POE-DUO-S15.5 Injector Power Input: 5-30 Vdc Injector Power Output: 15.5 Vdc, 1A max Output Ripple: < 80 mV Output Short Circuit Protected: Yes – protection circuit limited to 5A max Power Reverse Polarity Protection: Yes –... -
Page 13: Appendix E - Computer Ethernet Port Settings
Bitstorm Inc. Bad Boy Xtreme N & MJ Appendix E - Computer Ethernet Port Settings Accessing the settings for your computer’s Ethernet port are described here for various operating systems. Please keep in mind that as revisions to operating systems are re- leased, exact naming of buttons and fields may change. - Page 14 Bitstorm Inc. Bad Boy Xtreme N & MJ into the browser’s address bar. Refer to Chapter 3 - Operation. Multiple Wi-Fi devices. If system does not include optional Unleashed, ensure the computer’s built-in Wi-Fi is turned off. Refer to your computer’s manual.
-
Page 15: Warranty
Bitstorm Inc. Bad Boy Xtreme N & MJ required to return your Xtreme to Bitstorm for repair. The results of improper use or damage to the reset button and PCB is not covered under warranty. Warranty All Bitstorm products are warranted against defects in material and workmanship for a period of one year from date of purchase under normal use. - Page 16 Mount Xtreme onto a backstay. The angle of backstays does not vary significantly, so Xtreme N and MJ can be added on any rig. Can be used with sloops, ketches, yawls, cutters, schooners, cat- amarans, trimarans, etc. Polished stainless steel finish with stainless steel screws, flat washers and stainless steel nylon inserted locking nuts.
Need help?
Do you have a question about the Xtreme N and is the answer not in the manual?
Questions and answers